
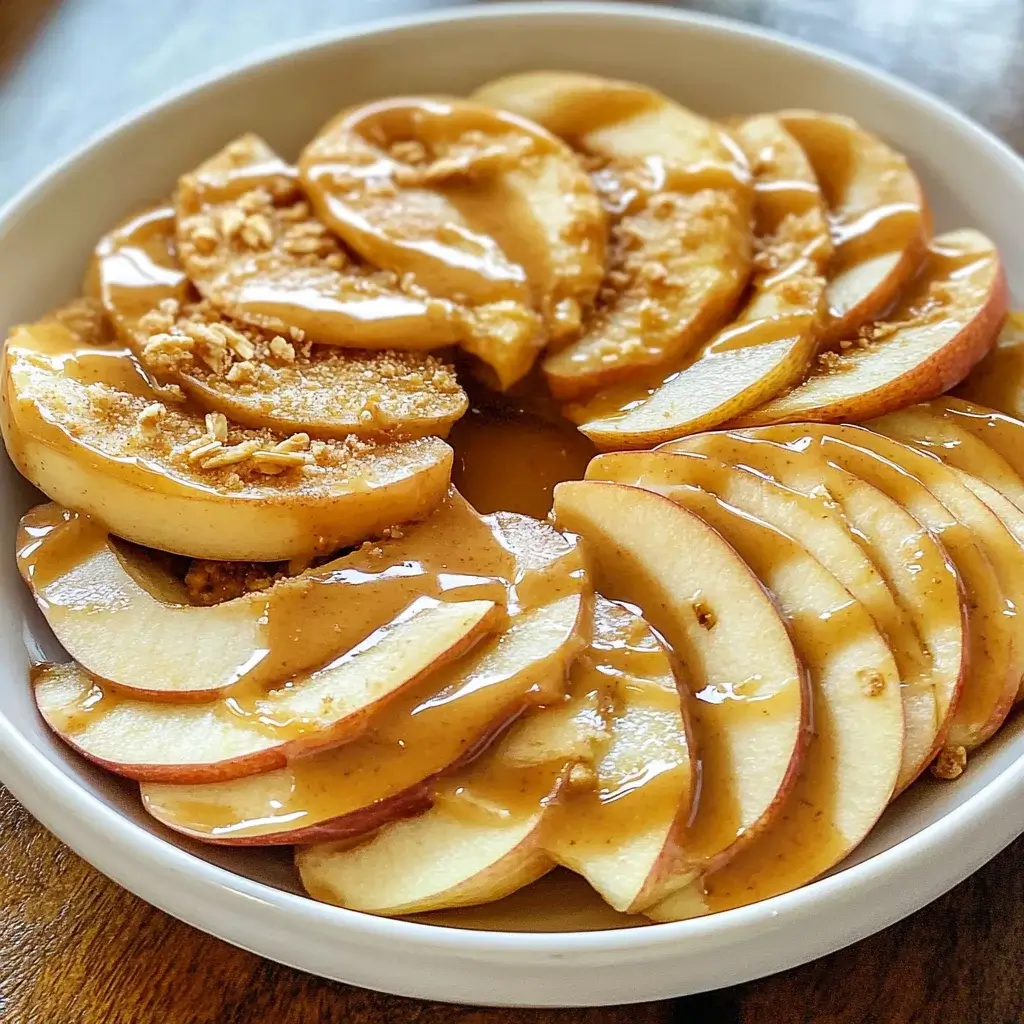

There are some recipes that just feel like a warm hug, and Peanut Butter Apple Slices are exactly that for my family. I remember the first time I whipped these up; it was a frantic weekday afternoon, the kids were “starving” (as they always dramatically declare post-school), and I needed something quick, healthy, and, most importantly, something they’d actually eat without a fuss. Sliced apples, a generous schmear of peanut butter, and a sprinkle of whatever fun toppings we had on hand – it was an instant hit! The crunch of the apple, the creamy, salty-sweetness of the peanut butter, and the little bursts of flavor from chocolate chips or cinnamon… it was magic. Since then, it’s become our go-to snack, perfect for after-school fuel, a light pre-dinner bite, or even a surprisingly satisfying healthy dessert. It’s so simple, yet so incredibly versatile and delicious, proving that sometimes the best things in life truly are the easiest.
Ingredients
- 2 medium-sized Apples (e.g., Fuji, Honeycrisp, Gala, or Granny Smith for a tarter taste – choose crisp, firm varieties for the best texture)
- 1/2 cup Peanut Butter (creamy or crunchy, natural or regular – choose your favorite! Almond butter, cashew butter, or sunflower seed butter can also be used as alternatives)
- Optional Toppings (choose 1-3):
- 1-2 tablespoons Mini Chocolate Chips (semi-sweet, milk, or dark, for a touch of indulgence)
- 1-2 tablespoons Granola (for added crunch and fiber)
- 1 teaspoon Chia Seeds or Flax Seeds (for an omega-3 and fiber boost)
- 1/2 teaspoon Ground Cinnamon (for a warm, comforting spice)
- 1-2 tablespoons Shredded Coconut (unsweetened or sweetened, for a tropical twist)
- 1-2 tablespoons Chopped Nuts (like walnuts, pecans, or almonds, for extra crunch and protein)
- A drizzle of Honey or Maple Syrup (for extra sweetness, if desired)
Instructions
- Prepare the Apples: Wash the apples thoroughly under cool running water. Pat them dry with a clean kitchen towel or paper towel. This helps the peanut butter adhere better.
- Core the Apples (Optional but Recommended): If you have an apple corer, stand the apple upright and press the corer down through the center. Remove the core. If you don’t have a corer, you can slice the apples first and then use a small knife or melon baller to remove the core and seeds from each slice. Coring first makes for neater, round “cookie” slices.
- Slice the Apples: Place the cored apple on its side on a cutting board. Carefully slice the apple horizontally into rounds, about 1/4 to 1/2 inch thick. Aim for consistent thickness so they are easy to handle and eat. You should get about 4-5 good slices per apple, depending on its size. If you didn’t core the apple first, slice it vertically around the core, then lay the large pieces flat and slice them.
- Prevent Browning (Optional): If you’re not serving them immediately, you can lightly brush the cut surfaces of the apple slices with a little lemon juice or soak them in a bowl of water with a splash of lemon juice for a few minutes, then pat dry. This helps prevent oxidation and browning.
- Spread the Peanut Butter: Take an apple slice and, using a butter knife or a small spatula, spread a layer of peanut butter evenly over one side of the slice. The amount is up to your preference – some like a thin layer, others prefer a more generous spread.
- Add Toppings: Sprinkle your chosen toppings over the peanut butter layer. Get creative! This is where you can customize the slices to your liking.
- Arrange and Serve: Place the finished peanut butter apple slices on a plate or platter. Serve immediately for the best taste and texture.
- Repeat: Continue with the remaining apple slices until all are prepared.
Nutrition Facts
- Servings: Approximately 2-4 (depending on apple size and appetite)
- Calories per serving (approximate, for 1/2 recipe with 1 apple & 1/4 cup PB, minimal toppings): 250-350 calories
- Protein (approx. 8-10g per serving): Essential for muscle repair, growth, and keeping you feeling full and satisfied. Peanut butter is a great plant-based source.
- Fiber (approx. 5-7g per serving): Apples are rich in dietary fiber, which aids in digestion, helps regulate blood sugar levels, and contributes to satiety.
- Healthy Fats (approx. 16-20g per serving): Primarily from peanut butter, these are monounsaturated and polyunsaturated fats, which are beneficial for heart health and brain function.
- Carbohydrates (approx. 25-35g per serving): Provide energy, with natural sugars from the apple and complex carbohydrates that offer sustained fuel.
- Vitamins & Minerals (Varies): Apples provide Vitamin C and potassium, while peanut butter offers Vitamin E, magnesium, and niacin. The exact amounts depend on the specific ingredients and toppings used.
Disclaimer: Nutritional information is an estimate and can vary based on specific ingredients, brands, and portion sizes used.
Preparation Time
- Total Preparation Time: 5-10 minutes
- Short Description: This snack comes together incredibly quickly. The majority of the time is spent washing, coring, and slicing the apples. Spreading the peanut butter and adding toppings takes just a couple of minutes, making it an ideal choice for a speedy and satisfying treat. No cooking required!
How to Serve
Peanut Butter Apple Slices are wonderfully versatile. Here are some fantastic ways to serve them:
- As a Quick After-School Snack:
- Arrange a few slices on a small plate for an individual serving.
- Perfect for refueling kids after a busy day at school.
- For a Healthy Breakfast Boost:
- Serve alongside a bowl of yogurt or a small omelet.
- The combination of fruit, protein, and healthy fats makes for a balanced start to the day.
- As a Pre-Workout or Post-Workout Fuel:
- The natural sugars from the apple provide quick energy, while the protein from peanut butter aids in muscle recovery.
- Eat them about 30-60 minutes before a workout or shortly after.
- On a Snack Platter for Gatherings:
- Arrange a variety of apple slices with different toppings on a larger platter.
- They add color and a healthy option to any party spread.
- Consider offering small bowls of different toppings so guests can customize their own.
- As a Light and Healthy Dessert:
- Satisfy your sweet tooth without the guilt.
- A drizzle of honey or a few dark chocolate chips can make them feel extra decadent.
- Packed in a Lunchbox:
- If packing for lunch, treat apple slices with lemon juice to prevent browning.
- You can pack the peanut butter and toppings separately and assemble them at lunchtime to maintain freshness and prevent sogginess. Or, assemble them and place another apple slice on top to make a “sandwich” to protect the peanut butter.
- With a Glass of Milk or a Cup of Tea/Coffee:
- The classic pairing of apples and peanut butter goes beautifully with a comforting beverage.
Additional Tips
- Choose the Right Apples: Crisp apples like Honeycrisp, Fuji, Gala, or Pink Lady work best as they hold their shape and provide a satisfying crunch. Granny Smith apples offer a tart contrast to the sweet peanut butter. Avoid softer varieties like McIntosh, which can become mushy.
- Prevent Browning Effectively: While lemon juice is common, you can also soak apple slices in a saltwater solution (1/2 teaspoon salt per cup of water) for a few minutes, then rinse and pat dry. This method is surprisingly effective and doesn’t leave a lemony taste. For lunchboxes, pineapple juice or a product like “Fruit Fresh” also works well.
- Peanut Butter Perfection: For easier spreading, ensure your peanut butter is at room temperature. If using natural peanut butter that has separated, stir it thoroughly before use. If it’s too thick, you can microwave it for a few seconds (5-10 seconds) to soften it slightly.
- Get Creative with Nut Butters: Don’t limit yourself to just peanut butter! Almond butter, cashew butter, sunflower seed butter (for a nut-free option), or even tahini can offer exciting new flavor profiles. Each brings its own unique nutritional benefits too.
- Make it a “DIY Apple Nacho” Bar: For kids or parties, slice the apples and arrange them on a platter. Then, set out small bowls of peanut butter (or other nut butters) and various toppings (chocolate chips, granola, shredded coconut, seeds, etc.). Let everyone customize their own apple “nachos.” This is a fun and interactive way to enjoy the snack.
- Storage Savvy: Peanut Butter Apple Slices are best enjoyed immediately after preparation. If you need to make them slightly ahead (an hour or two), treat the apples to prevent browning and store them in an airtight container in the refrigerator. The peanut butter may cause the apples to release a bit more moisture over time.
- Dietary Adjustments:
- Nut-Free: Use sunflower seed butter, tahini, or a flavored cream cheese. Ensure toppings are also nut-free.
- Vegan: Ensure your peanut butter and chocolate chips (if using) are vegan-certified. Use maple syrup instead of honey if adding extra sweetener.
- Lower Sugar: Opt for natural, unsweetened peanut butter and skip sugary toppings like chocolate chips or sweetened coconut. Focus on nuts, seeds, and cinnamon.
- Slice Thickness Matters: Thicker slices (around 1/2 inch) are sturdier and can hold more toppings without breaking. Thinner slices (around 1/4 inch) offer a more delicate bite. Experiment to find your preferred thickness. Using a mandoline slicer (with extreme caution and a hand guard) can help achieve perfectly uniform slices.
FAQ Section
Q1: How do I keep the apple slices from turning brown?
A1: The best way to prevent browning (oxidation) is to treat the cut surfaces of the apple slices with an acidic substance. You can brush them lightly with lemon juice, soak them for a few minutes in a bowl of water with a splash of lemon juice, or use a saltwater solution (1/2 teaspoon salt per 1 cup of water for a few minutes, then rinse). Pat them dry before adding peanut butter.
Q2: What are the best types of apples to use for this recipe?
A2: Crisp, firm apples are ideal as they provide the best texture and hold up well to the peanut butter and toppings. Popular choices include Honeycrisp, Fuji, Gala, Pink Lady, and Granny Smith (for a tarter flavor). Softer apples like McIntosh are not recommended as they can become mushy.
Q3: Can I make Peanut Butter Apple Slices ahead of time?
A3: They are best enjoyed fresh. However, if you need to make them a little ahead (e.g., an hour or two for a party, or for a lunchbox), treat the apple slices to prevent browning (see Q1) and store them in an airtight container in the refrigerator. For lunchboxes, consider packing peanut butter and toppings separately to assemble just before eating, or make “sandwiches” with two apple slices to protect the toppings.
Q4: Are Peanut Butter Apple Slices a healthy snack?
A4: Yes, generally they are a very healthy snack! Apples provide fiber, vitamins, and antioxidants. Peanut butter offers protein and healthy fats. The key is portion control and choosing healthy toppings. Opt for natural, unsweetened peanut butter and limit sugary additions like excessive chocolate chips or sweetened coconut if you’re aiming for maximum health benefits.
Q5: What are some good nut-free alternatives to peanut butter?
A5: For a nut-free version, sunflower seed butter (often called SunButter) is an excellent alternative with a similar creamy texture. Tahini (sesame seed paste) can also be used for a more savory-leaning flavor. Flavored cream cheese or even a thick Greek yogurt mixed with a little honey and cinnamon could also work. Always ensure your toppings are nut-free as well.
Q6: My kids are picky eaters. Any tips to get them to try this?
A6: Involve them in the making process! Let them choose the apple, help spread the peanut butter (with supervision), and pick their own toppings from a selection you provide. Making it a “DIY” activity or calling them “apple cookies” or “apple pizzas” can make it more appealing. Start with familiar toppings they already like, such as mini chocolate chips or sprinkles (in moderation).
Q7: How long do leftover Peanut Butter Apple Slices last?
A7: Leftovers, if any, should be stored in an airtight container in the refrigerator and are best consumed within 24 hours. The apples may soften slightly and release some moisture over time, even if treated to prevent browning. The texture is optimal when fresh.
Q8: Can I use other fruits besides apples for this snack concept?
A8: Absolutely! While apples are classic, this concept works well with other firm fruits. Pear slices are a great option (though they also brown quickly and benefit from lemon juice). Banana “coins” topped with peanut butter and toppings are also delicious, though they are best eaten immediately as bananas soften and brown very rapidly. Firm peaches or nectarines in season could also be an interesting variation.
Peanut Butter Apple Slices
Ingredients
- 2 medium-sized Apples (e.g., Fuji, Honeycrisp, Gala, or Granny Smith for a tarter taste – choose crisp, firm varieties for the best texture)
- 1/2 cup Peanut Butter (creamy or crunchy, natural or regular – choose your favorite! Almond butter, cashew butter, or sunflower seed butter can also be used as alternatives)
- Optional Toppings (choose 1-3):
- 1–2 tablespoons Mini Chocolate Chips (semi-sweet, milk, or dark, for a touch of indulgence)
- 1–2 tablespoons Granola (for added crunch and fiber)
- 1 teaspoon Chia Seeds or Flax Seeds (for an omega-3 and fiber boost)
- 1/2 teaspoon Ground Cinnamon (for a warm, comforting spice)
- 1–2 tablespoons Shredded Coconut (unsweetened or sweetened, for a tropical twist)
- 1–2 tablespoons Chopped Nuts (like walnuts, pecans, or almonds, for extra crunch and protein)
- A drizzle of Honey or Maple Syrup (for extra sweetness, if desired)
Instructions
- Prepare the Apples: Wash the apples thoroughly under cool running water. Pat them dry with a clean kitchen towel or paper towel. This helps the peanut butter adhere better.
- Core the Apples (Optional but Recommended): If you have an apple corer, stand the apple upright and press the corer down through the center. Remove the core. If you don’t have a corer, you can slice the apples first and then use a small knife or melon baller to remove the core and seeds from each slice. Coring first makes for neater, round “cookie” slices.
- Slice the Apples: Place the cored apple on its side on a cutting board. Carefully slice the apple horizontally into rounds, about 1/4 to 1/2 inch thick. Aim for consistent thickness so they are easy to handle and eat. You should get about 4-5 good slices per apple, depending on its size. If you didn’t core the apple first, slice it vertically around the core, then lay the large pieces flat and slice them.
- Prevent Browning (Optional): If you’re not serving them immediately, you can lightly brush the cut surfaces of the apple slices with a little lemon juice or soak them in a bowl of water with a splash of lemon juice for a few minutes, then pat dry. This helps prevent oxidation and browning.
- Spread the Peanut Butter: Take an apple slice and, using a butter knife or a small spatula, spread a layer of peanut butter evenly over one side of the slice. The amount is up to your preference – some like a thin layer, others prefer a more generous spread.
- Add Toppings: Sprinkle your chosen toppings over the peanut butter layer. Get creative! This is where you can customize the slices to your liking.
- Arrange and Serve: Place the finished peanut butter apple slices on a plate or platter. Serve immediately for the best taste and texture.
- Repeat: Continue with the remaining apple slices until all are prepared.
Nutrition
- Serving Size: one normal portion
- Calories: 350
- Fat: 20g
- Carbohydrates: 35g
- Fiber: 7g
- Protein: 10g


