
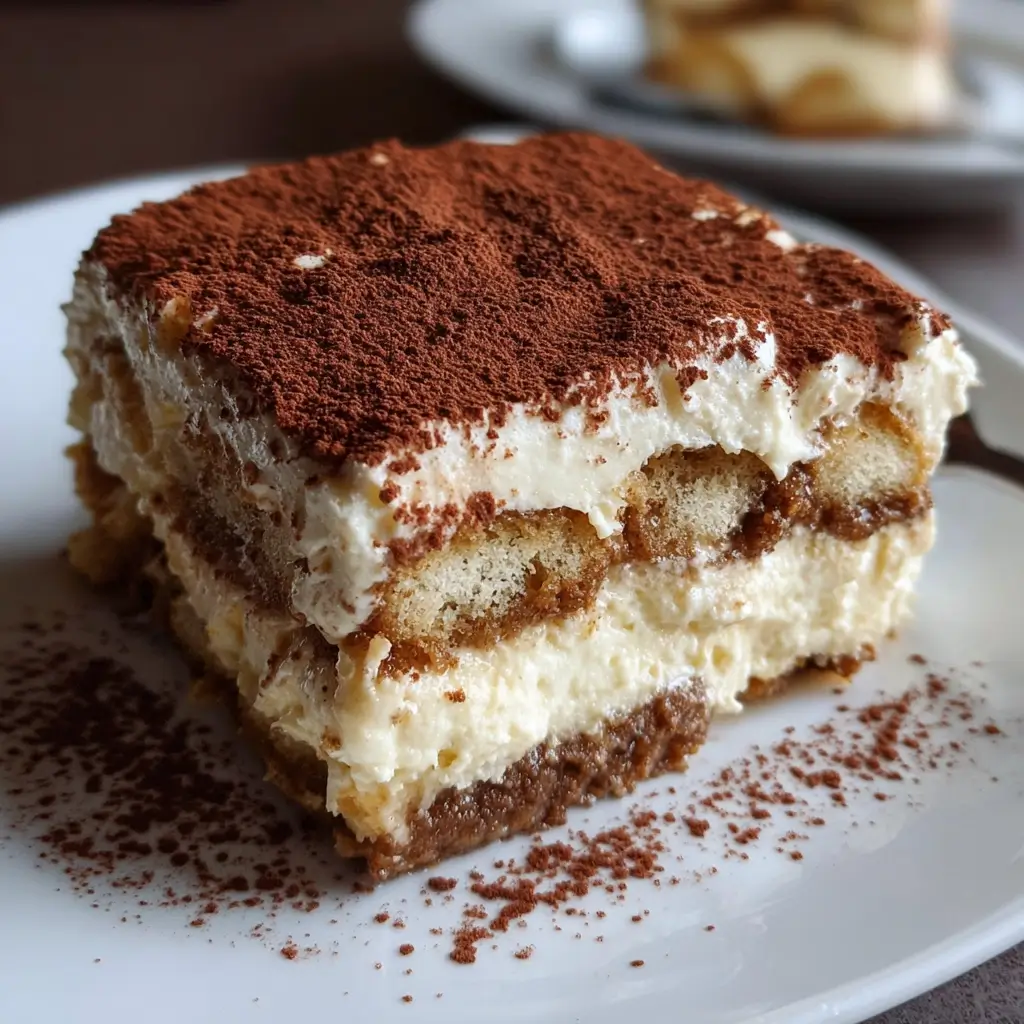

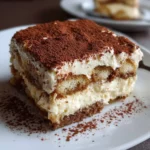
There are certain desserts that feel less like a simple sweet treat and more like an event. They carry an air of sophistication, a whisper of far-off places, and a promise of pure indulgence. For the longest time, Tiramisu was that dessert for me—something I would only ever order at a fine Italian restaurant, assuming its creation was a complex art form reserved for seasoned pastry chefs. The idea of layers, tempering, and achieving that perfect balance of coffee, cream, and cocoa seemed impossibly daunting. Then, I discovered the secret: a classic Tiramisu doesn’t have to be fussy. This recipe is the culmination of that discovery, a gateway to creating an authentic, show-stopping dessert with surprising ease. The first time I made this for a family dinner, the usual lively chatter faded to a reverent silence, punctuated only by the clinking of spoons against the dish. My son, a notoriously picky eater, looked up with wide, chocolate-dusted eyes and declared it “the best cloud cake ever.” That’s the magic of this No-Fuss Classic Tiramisu. It transforms simple, high-quality ingredients into something ethereal—a velvety, coffee-infused dream that is both elegant and deeply comforting. It’s the recipe that demystified the legend for me, and I am absolutely certain it will do the same for you, bringing a piece of Italian elegance right into your kitchen.
Ingredients for the Perfect No-Fuss Classic Tiramisu
Achieving the authentic taste of Tiramisu relies on using the right ingredients. There are no shortcuts to perfection, but sourcing these quality components is the most crucial step.
- 6 large egg yolks: These are the foundation of your creamy zabaglione-style base, providing richness, color, and a velvety texture that is simply irreplaceable. Use fresh, high-quality eggs for the best flavor.
- ¾ cup (150g) granulated sugar: This dissolves into the egg yolks to create a sweet, stable, and glossy cream base.
- 1 cup (240ml) heavy whipping cream: Chilled and whipped to stiff peaks, this adds lightness and airy volume to the dense mascarpone, creating that signature cloud-like consistency.
- 1 pound (450g or 2 cups) mascarpone cheese, at room temperature: This is the heart and soul of Tiramisu. Mascarpone is a soft, slightly sweet Italian cream cheese. Bringing it to room temperature is essential to prevent it from curdling when mixed.
- 1 ¾ cups (420ml) strong brewed coffee or espresso, cooled: The flavor of your Tiramisu is heavily influenced by your coffee. Use a high-quality, strong brew and ensure it’s completely cooled to prevent the ladyfingers from becoming mush.
- 2 tablespoons Marsala wine, dark rum, or brandy (optional): This adds a traditional, complex layer of flavor that complements the coffee and cream. While optional, a touch of Marsala wine is highly recommended for an authentic taste.
- 2 packages (about 48) Italian ladyfingers (Savoiardi): These are not the soft, cake-like ladyfingers. You need the crisp, dry, and highly absorbent Italian “Savoiardi” biscuits that soak up the coffee mixture without turning to mush.
- ¼ cup (30g) unsweetened cocoa powder: For dusting. This provides a slightly bitter, chocolatey finish that perfectly balances the sweetness of the cream and the richness of the dessert.
Step-by-Step Instructions for Effortless Elegance
Follow these steps carefully to assemble your dessert. The process is divided into preparing the components and then layering them together for the final, beautiful result.
Part 1: Preparing the Creamy Mascarpone Filling
- Create the Zabaglione Base: Find a heatproof bowl (glass or stainless steel works best) that can sit comfortably over a saucepan of simmering water without touching the water. This creates a double boiler. In this bowl, add the 6 egg yolks and ¾ cup of granulated sugar. Whisk them together vigorously by hand or with an electric mixer on low speed for about a minute until combined.
- Cook the Base: Place the bowl over your saucepan of simmering water. Continue to whisk constantly and consistently for about 8-10 minutes. The mixture will slowly transform. You’re looking for it to become pale yellow, thicken significantly, and grow in volume. A key sign it’s ready is when you can lift the whisk and the mixture falls back in a thick “ribbon” that sits on the surface for a moment before dissolving. This process not only thickens the base but also gently cooks the egg yolks. Once it reaches this stage, remove the bowl from the heat and set it aside to cool down to room temperature.
- Whip the Heavy Cream: In a separate, chilled bowl, pour in the 1 cup of cold heavy whipping cream. Using an electric mixer with the whisk attachment, beat the cream starting on low and gradually increasing the speed to high. Continue whipping until stiff peaks form. This means when you lift the beaters out of the cream, the peak that forms holds its shape and doesn’t slump over. Be careful not to over-whip, or it will turn grainy.
- Combine the Mascarpone and Zabaglione: In a large third bowl, add your room-temperature mascarpone cheese. Use a spatula to briefly stir it and loosen it up. Pour the cooled egg yolk and sugar mixture (the zabaglione) over the mascarpone. Gently fold the two together with the spatula until they are just combined and no streaks remain. It’s crucial to be gentle here; over-mixing can cause the mascarpone to break and become watery.
- Fold in the Whipped Cream: Add about one-third of your whipped cream to the mascarpone mixture and gently fold it in to lighten the base. Then, add the remaining whipped cream and continue to fold gently until the mixture is smooth, airy, and uniform in color. Your Tiramisu cream is now ready.
Part 2: Assembling the Tiramisu
- Prepare the Coffee Soak: In a shallow dish or pie plate, pour your 1 ¾ cups of cooled strong coffee or espresso. If you are using alcohol, stir in the 2 tablespoons of Marsala wine, rum, or brandy now.
- The First Layer of Ladyfingers: Take one ladyfinger at a time and dip it into the coffee mixture for just 1-2 seconds per side. This is a quick dip-and-roll motion. The goal is for the exterior to be moistened, but the interior to remain slightly crisp. They will continue to soften as the dessert chills. Arrange the dipped ladyfingers in a single, snug layer at the bottom of a 9×13 inch baking dish or a similar-sized serving dish. Break some ladyfingers in half if needed to fill in any gaps.
- The First Layer of Cream: Spoon half of the prepared mascarpone cream mixture over the layer of ladyfingers. Use an offset spatula or the back of a spoon to gently spread it into an even, smooth layer, ensuring it covers all the ladyfingers to the edges of the dish.
- The Second Layer: Repeat the process. Dip the remaining ladyfingers into the coffee mixture one by one and arrange them in a second tight layer on top of the cream.
- The Final Cream Layer: Spread the remaining half of the mascarpone cream over the second layer of ladyfingers, creating another smooth, even surface. This will be the beautiful top of your dessert.
- Chill for Perfection: Cover the dish tightly with plastic wrap, making sure the wrap doesn’t touch the surface of the cream. Place the Tiramisu in the refrigerator to chill for at least 6 hours, but preferably overnight (12-24 hours). This chilling period is not optional; it is essential for the dessert to set properly and for the flavors to meld together into the classic Tiramisu taste.
- The Final Touch: Just before you are ready to serve, remove the Tiramisu from the refrigerator. Unwrap it and dust the top generously with the ¼ cup of unsweetened cocoa powder using a fine-mesh sieve for an even, professional-looking coating.
Nutrition Facts: A Guilt-Free Glimpse
This is an indulgent dessert meant for special occasions. Here’s a brief look at its nutritional profile.
- Servings: This recipe yields approximately 10-12 generous servings.
- Calories per serving: Approximately 450-550 calories. This is a rich dessert, powered by mascarpone, eggs, and sugar, designed for pure enjoyment.
- Fat: High in fat, primarily from the mascarpone cheese and heavy cream, which gives Tiramisu its signature creamy, melt-in-your-mouth texture.
- Carbohydrates: The primary source of energy here, coming from the sugar and the ladyfinger biscuits.
- Protein: Contains a moderate amount of protein, mainly contributed by the egg yolks and dairy components.
Preparation and Chill Time: The Secret to Success
Patience is a key ingredient in this recipe. While the active time is minimal, the resting time is where the magic happens.
- Active Preparation Time: Approximately 25-30 minutes. This includes preparing the cream and assembling the layers.
- Chill Time: A minimum of 6 hours, but 12-24 hours is highly recommended.
- Total Time: Approximately 6.5 to 24.5 hours. The extended chill time allows the ladyfingers to soften to a perfect cake-like consistency and lets the coffee, cream, and (if used) alcohol flavors meld beautifully.
How to Serve Your Masterpiece Tiramisu
Presentation enhances the experience of this elegant dessert. Here are a few ways to serve your Tiramisu:
- Classic Family Style:
- Serve it directly from the 9×13 inch dish it was made in.
- After dusting with cocoa powder, use a sharp knife to cut clean squares.
- Use a small spatula to lift each piece carefully onto a dessert plate.
- Elegant Individual Portions:
- For a more refined presentation, assemble the Tiramisu in individual glass tumblers, wine glasses, or small ramekins.
- Simply break the ladyfingers to fit the shape of the glass and create smaller, distinct layers.
- This method is perfect for dinner parties as it simplifies serving and looks stunning.
- Accompaniments:
- Tiramisu is wonderful on its own, but a small cup of strong espresso or a sweet dessert wine like a Moscato or Vin Santo makes for a perfect pairing.
- For a little extra texture, you can add a few high-quality dark chocolate shavings on top of the cocoa powder.
Additional Tips for Tiramisu Triumph
These eight tips will help you navigate the nuances of the recipe and ensure a flawless result every time.
- The Coffee Conundrum: The quality of your coffee directly impacts the final flavor. Use freshly brewed, high-quality espresso if possible. If you don’t have an espresso machine, a very strong drip coffee or French press coffee will work well. Instant espresso powder dissolved in hot water is a better alternative than weak, watery coffee. Always let it cool completely.
- Ladyfinger Finesse: The most common mistake is over-soaking the ladyfingers. They are like sponges. A quick, one-to-two-second dip is all that’s needed. The biscuits should be moist on the outside but still have a firm center. They will absorb more moisture from the mascarpone cream as the dessert chills, resulting in a perfect, soft, cake-like texture.
- The Mascarpone Must-Do: Using cold mascarpone straight from the fridge is a recipe for disaster. It will seize up and curdle when you try to mix it with the zabaglione, resulting in a lumpy, grainy cream. Let it sit on the counter for about 30-45 minutes to bring it to a cool room temperature. It should be soft and easily spreadable.
- Embrace Room Temperature Eggs: Just as the mascarpone needs to be at room temperature, so do your egg yolks. They will whip up with the sugar more easily, creating a lighter and more voluminous base for your cream. Simply place your eggs in a bowl of warm water for 5-10 minutes to quickly bring them to room temperature.
- The Power of Gentle Folding: When combining the zabaglione with the mascarpone, and especially when adding the whipped cream, use a large spatula and a gentle folding motion. Cut down through the middle of the mixture, scrape along the bottom, and bring it up and over. This technique incorporates the ingredients without deflating the air you worked so hard to whip into the cream.
- Alcohol is Optional but Authentic: Classic Tiramisu often includes a sweet fortified wine like Marsala. Dark rum, brandy, or a coffee liqueur like Kahlúa are also fantastic options. If you prefer to make it alcohol-free, you can simply omit it or add ½ teaspoon of rum extract to the coffee for a hint of flavor without the alcohol.
- The Art of the Final Dusting: Don’t be tempted to dust the cocoa powder on top before chilling. As the dessert sits in the fridge, the cocoa will absorb moisture from the cream and can become damp and clumpy. For that beautiful, dry, velvet finish, always dust with cocoa powder immediately before you slice and serve.
- Clean Slices Every Time: For picture-perfect servings from a large dish, have a tall glass of hot water and a paper towel handy. Dip a sharp knife into the hot water, wipe it clean with the paper towel, and make a cut. Repeat this process for every single cut you make. The hot, clean blade will glide through the cream without smearing it.
Frequently Asked Questions about Classic Tiramisu
Here are answers to some of the most common questions about making this iconic Italian dessert.
1. Why did my Tiramisu turn out watery or runny?
This is the most common issue and usually has one of three culprits. First, you may have over-soaked the ladyfingers, releasing too much liquid into the cream. Second, your mascarpone cream might have been over-mixed, causing the fat to separate from the liquid. Third, you may not have chilled it for long enough. The minimum 6-hour chill time is critical for the dessert to set and firm up properly.
2. Can I make Tiramisu without raw eggs?
Absolutely. The method described in this recipe, where the egg yolks and sugar are cooked over a double boiler (creating a zabaglione), already heats the yolks enough to be considered safe by many food safety standards. For those who are still concerned, you can use pasteurized eggs, which are available in cartons at most grocery stores and can be used as a direct 1:1 substitute.
3. What is the best substitute for Marsala wine?
If you don’t have Marsala, the best substitutes are other spirits that complement coffee and cream. Dark rum is the most popular and effective alternative. Brandy, cognac, or a coffee liqueur like Kahlúa or Tia Maria also work beautifully. For a non-alcoholic version, simply leave it out.
4. Can I make Tiramisu ahead of time?
Yes, and you should! Tiramisu is the perfect make-ahead dessert because its flavor and texture actually improve with time. It’s best made one day in advance, allowing all the flavors to meld together perfectly. It can be made up to two days ahead of time and stored tightly covered in the refrigerator.
5. How should I store leftover Tiramisu?
Store any leftovers in an airtight container or keep the original dish tightly covered with plastic wrap in the refrigerator. It will keep well for up to 4 days. The texture may soften slightly more each day, but the flavor will remain delicious.
6. What are Savoiardi, and can I use soft ladyfingers instead?
Savoiardi are crisp, firm, and very porous Italian biscuits, specifically designed for desserts like Tiramisu. They are sturdy enough to handle a quick soak without disintegrating. You should avoid using the soft, spongy, cake-like ladyfingers, as they will turn to complete mush when dipped in the coffee mixture and will not provide the proper structure for the dessert.
7. Can I freeze Tiramisu?
Yes, you can freeze Tiramisu, though the texture of the cream may change slightly upon thawing. To freeze, assemble the dessert in a freezer-safe dish, but do not dust it with cocoa powder. Cover it with plastic wrap and then a layer of aluminum foil. It can be frozen for up to 3 months. To serve, thaw it overnight in the refrigerator, and then dust with cocoa powder just before serving.
8. What can I use if I absolutely cannot find mascarpone cheese?
For a truly authentic Tiramisu, there is no perfect substitute for mascarpone. Its unique creamy texture and slightly sweet flavor are essential. However, in a pinch, you can create a substitute by beating 8 ounces of full-fat, block-style cream cheese (softened) with ¼ cup of heavy whipping cream and 2 tablespoons of sour cream or full-fat Greek yogurt until smooth. Be aware that this will alter the final flavor and texture, making it tangier and denser than a classic Tiramisu.
No-Fuss Classic Tiramisu
Ingredients
Achieving the authentic taste of Tiramisu relies on using the right ingredients. There are no shortcuts to perfection, but sourcing these quality components is the most crucial step.
- 6 large egg yolks: These are the foundation of your creamy zabaglione-style base, providing richness, color, and a velvety texture that is simply irreplaceable. Use fresh, high-quality eggs for the best flavor.
- ¾ cup (150g) granulated sugar: This dissolves into the egg yolks to create a sweet, stable, and glossy cream base.
- 1 cup (240ml) heavy whipping cream: Chilled and whipped to stiff peaks, this adds lightness and airy volume to the dense mascarpone, creating that signature cloud-like consistency.
- 1 pound (450g or 2 cups) mascarpone cheese, at room temperature: This is the heart and soul of Tiramisu. Mascarpone is a soft, slightly sweet Italian cream cheese. Bringing it to room temperature is essential to prevent it from curdling when mixed.
- 1 ¾ cups (420ml) strong brewed coffee or espresso, cooled: The flavor of your Tiramisu is heavily influenced by your coffee. Use a high-quality, strong brew and ensure it’s completely cooled to prevent the ladyfingers from becoming mush.
- 2 tablespoons Marsala wine, dark rum, or brandy (optional): This adds a traditional, complex layer of flavor that complements the coffee and cream. While optional, a touch of Marsala wine is highly recommended for an authentic taste.
- 2 packages (about 48) Italian ladyfingers (Savoiardi): These are not the soft, cake-like ladyfingers. You need the crisp, dry, and highly absorbent Italian “Savoiardi” biscuits that soak up the coffee mixture without turning to mush.
- ¼ cup (30g) unsweetened cocoa powder: For dusting. This provides a slightly bitter, chocolatey finish that perfectly balances the sweetness of the cream and the richness of the dessert.
Instructions
Follow these steps carefully to assemble your dessert. The process is divided into preparing the components and then layering them together for the final, beautiful result.
Part 1: Preparing the Creamy Mascarpone Filling
- Create the Zabaglione Base: Find a heatproof bowl (glass or stainless steel works best) that can sit comfortably over a saucepan of simmering water without touching the water. This creates a double boiler. In this bowl, add the 6 egg yolks and ¾ cup of granulated sugar. Whisk them together vigorously by hand or with an electric mixer on low speed for about a minute until combined.
- Cook the Base: Place the bowl over your saucepan of simmering water. Continue to whisk constantly and consistently for about 8-10 minutes. The mixture will slowly transform. You’re looking for it to become pale yellow, thicken significantly, and grow in volume. A key sign it’s ready is when you can lift the whisk and the mixture falls back in a thick “ribbon” that sits on the surface for a moment before dissolving. This process not only thickens the base but also gently cooks the egg yolks. Once it reaches this stage, remove the bowl from the heat and set it aside to cool down to room temperature.
- Whip the Heavy Cream: In a separate, chilled bowl, pour in the 1 cup of cold heavy whipping cream. Using an electric mixer with the whisk attachment, beat the cream starting on low and gradually increasing the speed to high. Continue whipping until stiff peaks form. This means when you lift the beaters out of the cream, the peak that forms holds its shape and doesn’t slump over. Be careful not to over-whip, or it will turn grainy.
- Combine the Mascarpone and Zabaglione: In a large third bowl, add your room-temperature mascarpone cheese. Use a spatula to briefly stir it and loosen it up. Pour the cooled egg yolk and sugar mixture (the zabaglione) over the mascarpone. Gently fold the two together with the spatula until they are just combined and no streaks remain. It’s crucial to be gentle here; over-mixing can cause the mascarpone to break and become watery.
- Fold in the Whipped Cream: Add about one-third of your whipped cream to the mascarpone mixture and gently fold it in to lighten the base. Then, add the remaining whipped cream and continue to fold gently until the mixture is smooth, airy, and uniform in color. Your Tiramisu cream is now ready.
Part 2: Assembling the Tiramisu
- Prepare the Coffee Soak: In a shallow dish or pie plate, pour your 1 ¾ cups of cooled strong coffee or espresso. If you are using alcohol, stir in the 2 tablespoons of Marsala wine, rum, or brandy now.
- The First Layer of Ladyfingers: Take one ladyfinger at a time and dip it into the coffee mixture for just 1-2 seconds per side. This is a quick dip-and-roll motion. The goal is for the exterior to be moistened, but the interior to remain slightly crisp. They will continue to soften as the dessert chills. Arrange the dipped ladyfingers in a single, snug layer at the bottom of a 9×13 inch baking dish or a similar-sized serving dish. Break some ladyfingers in half if needed to fill in any gaps.
- The First Layer of Cream: Spoon half of the prepared mascarpone cream mixture over the layer of ladyfingers. Use an offset spatula or the back of a spoon to gently spread it into an even, smooth layer, ensuring it covers all the ladyfingers to the edges of the dish.
- The Second Layer: Repeat the process. Dip the remaining ladyfingers into the coffee mixture one by one and arrange them in a second tight layer on top of the cream.
- The Final Cream Layer: Spread the remaining half of the mascarpone cream over the second layer of ladyfingers, creating another smooth, even surface. This will be the beautiful top of your dessert.
- Chill for Perfection: Cover the dish tightly with plastic wrap, making sure the wrap doesn’t touch the surface of the cream. Place the Tiramisu in the refrigerator to chill for at least 6 hours, but preferably overnight (12-24 hours). This chilling period is not optional; it is essential for the dessert to set properly and for the flavors to meld together into the classic Tiramisu taste.
- The Final Touch: Just before you are ready to serve, remove the Tiramisu from the refrigerator. Unwrap it and dust the top generously with the ¼ cup of unsweetened cocoa powder using a fine-mesh sieve for an even, professional-looking coating.
Nutrition
- Serving Size: one normal portion
- Calories: 550


