
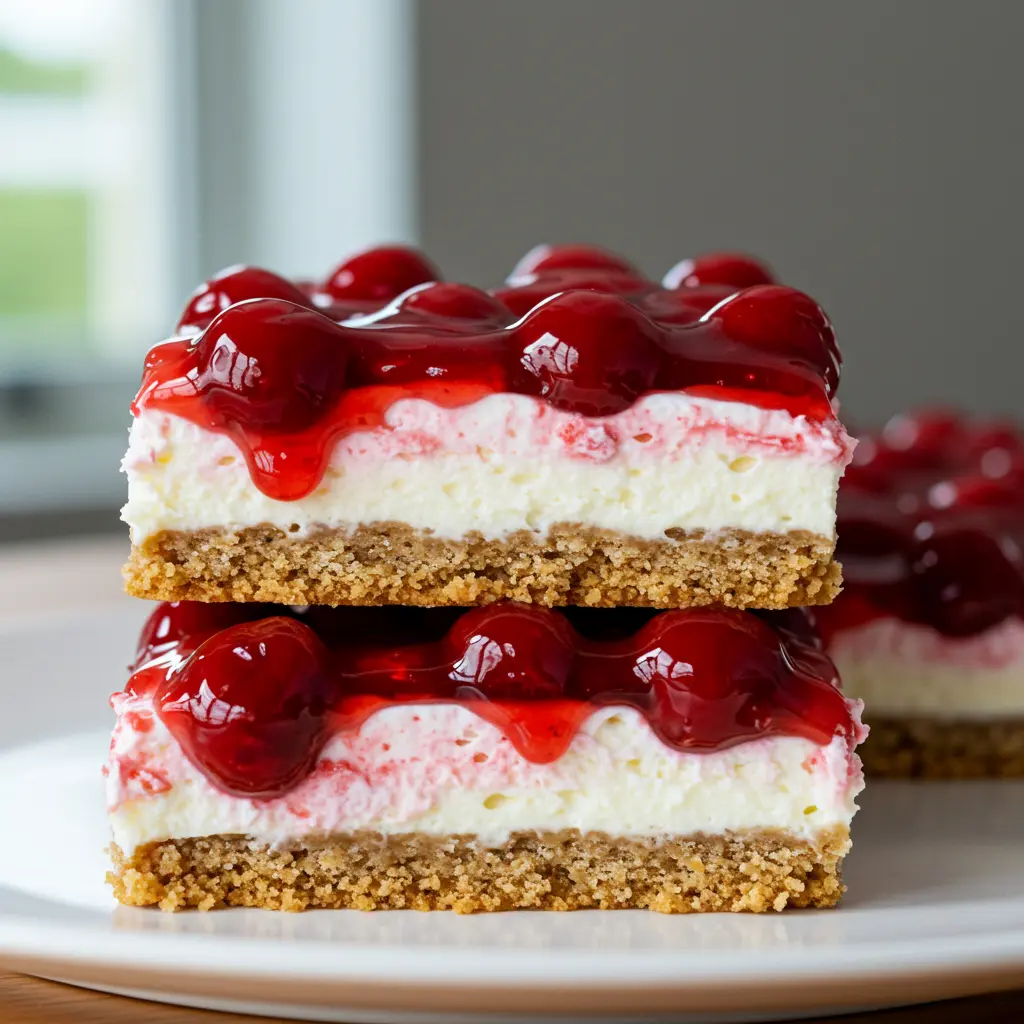

In the world of desserts, few treats bring as much joy and satisfaction as a cheesecake. With its rich texture and delightful flavors, cheesecake is a favorite for many. But what if you could enjoy all the deliciousness of a cheesecake without the hassle of baking? Enter No-Bake Cherry Cheesecake Bars. These bars are not only easy to make but also perfect for any occasion. Whether you’re hosting a dinner party or simply craving a sweet treat, these cheesecake bars are sure to impress. Let’s dive into the recipe and discover how to create these delectable bars.
Ingredients
To make these mouthwatering No-Bake Cherry Cheesecake Bars, you’ll need the following ingredients:
- 1 ½ cups graham cracker crumbs: Provides a crunchy base that complements the creamy filling.
- ½ cup melted butter: Helps bind the graham cracker crumbs together to form a solid crust.
- 1 8 oz cream cheese, softened: The star of the show, offering a rich and creamy texture.
- ½ cup powdered sugar: Adds sweetness to the cream cheese mixture.
- 1 tsp vanilla extract: Enhances the flavor with a hint of vanilla.
- 1 cup whipped cream or cool whip: Adds lightness and volume to the cheesecake filling.
- 1 can cherry pie filling: Offers a sweet and tangy topping that perfectly pairs with the creamy cheesecake.
Instructions
Creating these No-Bake Cherry Cheesecake Bars is a straightforward process. Follow these steps to achieve the perfect dessert:
- Prepare the Crust
- In a bowl, combine the graham cracker crumbs and melted butter.
- Mix until the crumbs are evenly coated with butter.
- Line an 8×8 inch pan with parchment paper.
- Press the crumb mixture into the bottom of the pan to form a firm crust.
- Make the Cheesecake Filling
- In another bowl, beat the softened cream cheese, powdered sugar, and vanilla extract until smooth and creamy.
- Gently fold in the whipped cream or cool whip until well combined.
- Spread the cream cheese mixture evenly over the prepared crust.
- Add the Cherry Topping
- Carefully spread the cherry pie filling over the cream cheese layer, ensuring an even distribution.
- Chill the Bars
- Place the pan in the refrigerator and allow the bars to chill for at least 4 hours. This step is crucial for setting the cheesecake properly.
- Serve
- Once chilled, remove the bars from the pan and cut them into 12 equal servings. Enjoy the creamy, fruity goodness!
Nutrition Facts
Understanding the nutritional content of your dessert can help you make informed choices. Here’s a breakdown of the nutrition facts per serving (makes 12 servings):
- Calories: 200
- Fat: 10g
- Carbohydrates: 25g
- Protein: 2g
- Sugars: 9g
These cheesecake bars offer a delightful treat that is both satisfying and reasonably portioned.
How to Serve
Presentation is key when serving these No-Bake Cherry Cheesecake Bars. A beautifully presented dessert not only enhances the overall dining experience but also makes the treat more appealing to the eye. Here are some detailed ideas for serving them beautifully:
Chilled with Fresh Mint
Serving the bars straight from the refrigerator is essential for maintaining their creamy texture and refreshing flavor. To elevate the presentation, garnish each bar with a few fresh mint leaves. The vibrant green color of the mint adds a stunning contrast against the creamy cheesecake and the rich cherry topping, creating a visually striking dessert. Additionally, the mint’s aromatic qualities complement the sweetness of the cherries, enhancing the overall flavor profile. For an added touch, consider using mint sprigs that are freshly washed and dried, placing them artfully on the bars just before serving to ensure they retain their vibrant appearance.
With Whipped Cream
To amp up the indulgence factor, consider adding a dollop of freshly whipped cream on top of each bar. Not only does this addition provide a delightful creaminess that pairs wonderfully with the cheesecake, but it also adds an element of luxury to the dish. For an elegant presentation, use a piping bag fitted with a star tip to create beautiful swirls or rosettes of whipped cream atop each bar. You can also sprinkle a little bit of finely grated chocolate or cocoa powder over the whipped cream to introduce an additional layer of flavor and a touch of sophistication. Alternatively, if you prefer a more rustic look, simply spoon the whipped cream on top for a homey feel.
Drizzled with Chocolate
For those who crave a bit more decadence, consider drizzling melted chocolate over the bars before serving. To achieve the perfect drizzle, melt high-quality chocolate (dark, milk, or white, depending on your preference) and let it cool slightly to a pourable consistency. Using a fork or a piping bag, create an artistic drizzle over the bars, allowing the chocolate to cascade down the sides for an eye-catching effect. This not only adds visual charm but also a rich flavor contrast that enhances the overall dessert. For an interesting twist, consider using flavored chocolate melts, like raspberry or mint, to tie in with the cherry theme or to introduce a surprising flavor element.
Additional Serving Suggestions
- Plate Presentation: Instead of serving the bars directly from the dish, consider transferring them to individual dessert plates. This allows for an opportunity to create a beautiful plate presentation. You can add a swirl of cherry sauce or a sprinkle of graham cracker crumbs around the bars for a decorative touch.
- Accompanied by Fresh Fruit: Enhance the visual appeal and flavor by serving the cheesecake bars alongside an assortment of fresh fruits, such as slices of strawberries, blueberries, or even a medley of seasonal fruits. This not only adds color but also provides a fresh, fruity counterpoint to the rich cheesecake.
- Serve with a Beverage Pairing: Consider pairing your cheesecake bars with a complementary beverage. A chilled glass of sweet Riesling or a refreshing iced tea can enhance the flavors of the dessert. For a non-alcoholic option, a sparkling lemonade or cherry soda can provide a fun and festive touch.
- Personalized Touches: If you’re serving these bars at a gathering or party, consider adding personalized touches such as custom place cards or themed decorations that reflect the occasion. This creates a more inviting atmosphere and makes your dessert stand out even more.
By incorporating these serving suggestions, you’ll not only enhance the visual appeal of your No-Bake Cherry Cheesecake Bars but also create a memorable experience for your guests, making each bite feel like a special occasion.
Additional Tips
To ensure your No-Bake Cherry Cheesecake Bars turn out perfectly every time, consider the following comprehensive tips:
Room Temperature Cream Cheese
One of the most crucial steps in achieving a smooth and creamy cheesecake filling is to use room temperature cream cheese. Here’s why it matters:
- Smooth Consistency: Cold cream cheese straight from the fridge can lead to a lumpy filling because it doesn’t blend well with other ingredients. By allowing the cream cheese to sit at room temperature for about 30 to 60 minutes before use, you enable it to soften completely. This is key for achieving a velvety texture that’s essential for cheesecake.
- Easier Mixing: When cream cheese is softened, it incorporates more easily with sugar and other ingredients, reducing the risk of overmixing. Overmixing can incorporate excess air into the filling, which might cause your cheesecake to crack as it sets.
- Flavor Development: Room temperature cream cheese also allows for better flavor melding with other ingredients, ensuring that the sweetness and tanginess of the cheesecake filling are perfectly balanced.
Firm Crust
A well-prepared graham cracker crust is fundamental to the overall structure and enjoyment of your cheesecake bars. Here’s how to ensure it’s firm and ready:
- Proper Pressing: When you combine the graham cracker crumbs with melted butter and sugar, be sure to press the mixture firmly into the bottom of the pan. Use the flat bottom of a measuring cup or the back of a spoon to compact the crust evenly. Make sure there are no gaps or air pockets, as these can lead to a crumbly crust when cutting the bars.
- Chill Before Filling: For an even firmer crust, consider chilling the crust in the refrigerator for about 30 minutes before adding the cheesecake filling. This helps the butter solidify and bind the crumbs together more tightly, resulting in a crust that holds up beautifully when sliced.
- Baking Option: While no-bake cheesecake bars are loved for their simplicity, you can also choose to bake the crust for an additional layer of flavor and stability. Bake the crust at 350°F (175°C) for about 8-10 minutes before cooling it down and adding the filling. This will create a firmer base and enhance the graham cracker flavor.
Chill Time
Patience is key when it comes to chilling your No-Bake Cherry Cheesecake Bars. Here’s why you shouldn’t rush this step:
- Proper Setting: The chilling process allows the cheesecake filling to firm up, ensuring that it holds its shape when cut. If you cut into the bars too soon, they may ooze or collapse, ruining the presentation and texture.
- Flavor Development: Chilling the bars for a longer period not only helps them set but also allows the flavors to meld together more harmoniously. The sweet and tangy notes of the cheesecake filling will deepen and become more pronounced after a good chill.
- Overnight Chill: If time permits, consider preparing your cheesecake bars a day in advance. Allowing them to chill overnight in the refrigerator will yield the best results, providing a firmer texture and richer flavor. Just be sure to cover the bars with plastic wrap or aluminum foil to prevent them from absorbing any odors from the fridge.
- Serving Tip: Once your cheesecake bars have chilled sufficiently, use a sharp knife to cut them into squares or rectangles. For cleaner cuts, dip the knife in hot water and wipe it dry between cuts. This technique prevents the filling from sticking to the blade and ensures that each piece looks pristine.
By following these detailed tips, you can elevate your No-Bake Cherry Cheesecake Bars to new heights of deliciousness, ensuring that they are not only visually appealing but also rich in flavor and perfectly textured. Enjoy the process of creating this delightful dessert and savor every bite!
FAQs
1. Can I use a different type of crust?
Absolutely! If you’re not a fan of graham crackers, you can substitute with crushed digestive biscuits, gingersnaps, or even Oreos for a chocolate twist.
2. Can I make these bars ahead of time?
Yes, these bars are perfect for making ahead. They can be stored in the refrigerator for up to 3 days. Just cover them with plastic wrap or store them in an airtight container to maintain freshness.
3. Is there a way to make these bars lighter?
For a lighter version, you can use reduced-fat cream cheese and light whipped topping. Keep in mind that this may slightly alter the taste and texture.
4. Can I use fresh cherries instead of canned pie filling?
Certainly! Fresh cherries can be used to make a homemade topping. Simply cook pitted cherries with a bit of sugar and cornstarch until thickened, then let it cool before using.
Conclusion
No-Bake Cherry Cheesecake Bars are not just a dessert; they are a celebration of flavors and textures that come together to create an unforgettable experience for your taste buds. The combination of a luscious, creamy filling, a perfectly crunchy crust, and a tangy cherry topping makes these bars an ideal choice for any occasion, whether it’s a casual family gathering, a festive holiday celebration, or a potluck with friends.
One of the most appealing aspects of these cheesecake bars is their simplicity. The no-bake aspect means that you can whip them up in a fraction of the time it would take to bake a traditional cheesecake, allowing you to spend more time enjoying the company of your loved ones rather than fretting over the oven. This makes them a perfect solution for last-minute dessert preparations or when you simply want to indulge without the fuss.
Moreover, the versatility of the recipe means that you can easily customize it to suit your preferences. If cherries aren’t your favorite fruit, feel free to experiment with other toppings such as strawberries, blueberries, or even a rich chocolate ganache. This adaptability makes the recipe not just a one-time affair but a staple that you can tweak and modify throughout the seasons, ensuring you have a delightful dessert option at your fingertips year-round.
The harmonious blend of flavors in these bars is another reason they are sure to please. The creamy cheesecake filling, which is typically made with cream cheese and whipped topping, offers a rich and decadent mouthfeel that beautifully contrasts with the light and airy texture of the whipped cream. The crust, usually made from crushed graham crackers, provides a satisfying crunch that balances the creaminess of the filling, while the cherry topping brings a refreshing tartness that cuts through the sweetness and adds a burst of color to the dish.
For those who love to entertain, these cheesecake bars are an impressive yet easy dessert that can be prepared ahead of time. They can be stored in the refrigerator, allowing the flavors to meld and develop even further, making them an excellent make-ahead option for parties or gatherings. When it’s time to serve, simply slice them into bars and present them on a platter for a visually appealing treat that is sure to impress your guests.
As you gather your ingredients and prepare to create these delectable bars, remember to savor the process. Cooking can be a joyous occasion, and the anticipation of enjoying your homemade dessert can enhance the experience. Once you take that first bite of your No-Bake Cherry Cheesecake Bars, you will understand why they are destined to become a favorite in your dessert repertoire.
So, don’t hesitate any longer—dive into this delightful recipe and experience the sweet satisfaction of a no-bake dessert that is as impressive as it is delicious. Your taste buds will thank you, and your friends and family will be clamoring for seconds!
Print
No-Bake Cherry Cheesecake Bars Recipe
Ingredients
To make these mouthwatering No-Bake Cherry Cheesecake Bars, you’ll need the following ingredients:
- 1 ½ cups graham cracker crumbs: Provides a crunchy base that complements the creamy filling.
- ½ cup melted butter: Helps bind the graham cracker crumbs together to form a solid crust.
- 1 8 oz cream cheese, softened: The star of the show, offering a rich and creamy texture.
- ½ cup powdered sugar: Adds sweetness to the cream cheese mixture.
- 1 tsp vanilla extract: Enhances the flavor with a hint of vanilla.
- 1 cup whipped cream or cool whip: Adds lightness and volume to the cheesecake filling.
- 1 can cherry pie filling: Offers a sweet and tangy topping that perfectly pairs with the creamy cheesecake.
Instructions
Creating these No-Bake Cherry Cheesecake Bars is a straightforward process. Follow these steps to achieve the perfect dessert:
- Prepare the Crust
- In a bowl, combine the graham cracker crumbs and melted butter.
- Mix until the crumbs are evenly coated with butter.
- Line an 8×8 inch pan with parchment paper.
- Press the crumb mixture into the bottom of the pan to form a firm crust.
- Make the Cheesecake Filling
- In another bowl, beat the softened cream cheese, powdered sugar, and vanilla extract until smooth and creamy.
- Gently fold in the whipped cream or cool whip until well combined.
- Spread the cream cheese mixture evenly over the prepared crust.
- Add the Cherry Topping
- Carefully spread the cherry pie filling over the cream cheese layer, ensuring an even distribution.
- Chill the Bars
- Place the pan in the refrigerator and allow the bars to chill for at least 4 hours. This step is crucial for setting the cheesecake properly.
- Serve
- Once chilled, remove the bars from the pan and cut them into 12 equal servings. Enjoy the creamy, fruity goodness!
Nutrition
- Serving Size: one normal portion
- Calories: 200
- Sugar: 9g
- Fat: 10g
- Carbohydrates: 25g
- Protein: 2g


