
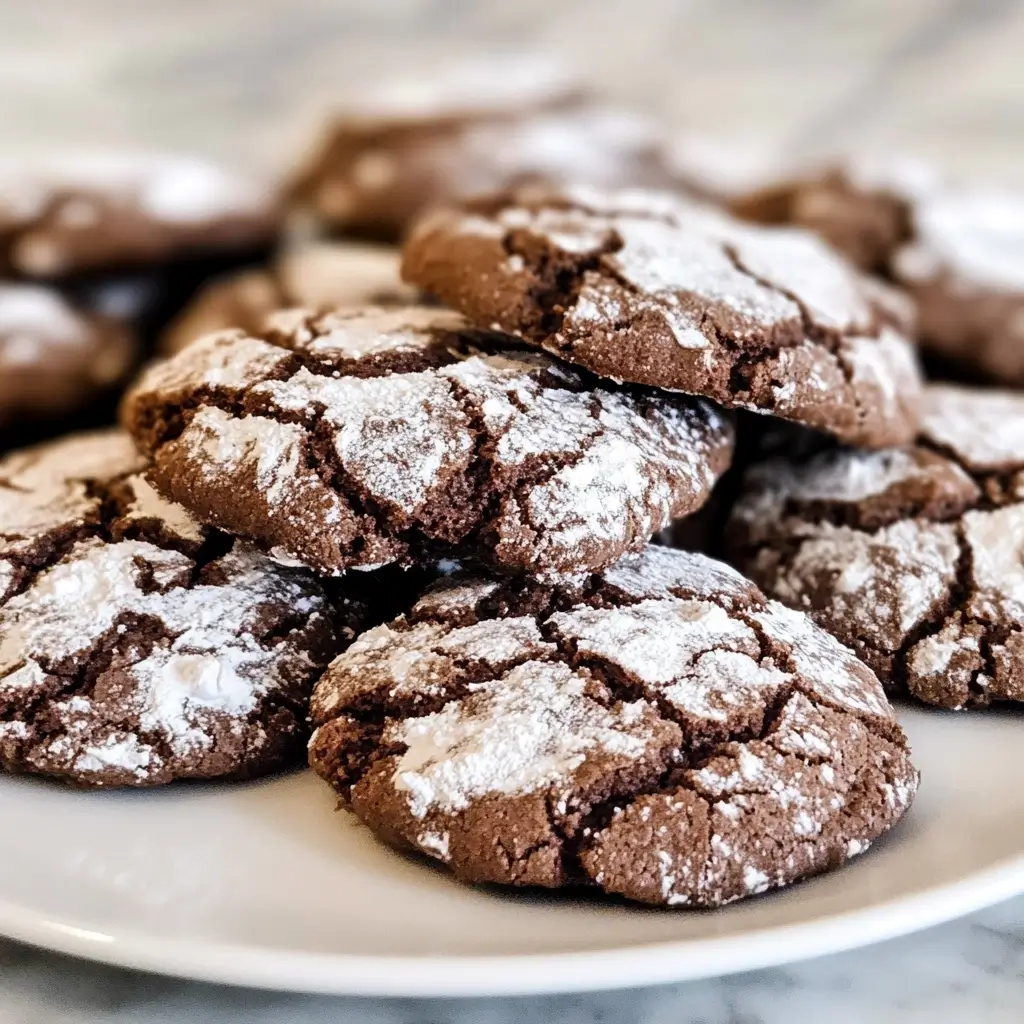

Of all the cookies that grace our holiday platters and fill our kitchen with warmth, there’s one that holds a truly special place in my heart: the Easy Chocolate Crinkle Cookie. There’s something magical about them. It starts with a rich, brownie-like dough, so dark and promising. Then comes the satisfying process of rolling the sticky, chilled balls of dough in a mountain of powdered sugar, completely enrobing them in a snowy white coat. The real magic, however, happens in the oven. As they bake, they puff up and spread, creating a dramatic landscape of deep, dark cracks and crevices across the white surface. The first time I made these for a family gathering, they vanished from the dessert table in minutes. My nephew, usually a staunch chocolate chip purist, declared them “little brownie bites covered in snow.” My mother-in-law, a baker of incredible skill, asked for the recipe—the highest compliment of all. They are now a non-negotiable tradition in our home. Their beauty is matched only by their taste: a slightly crisp exterior gives way to an incredibly soft, fudgy, and intensely chocolatey center. This recipe isn’t just easy; it’s a guaranteed showstopper that brings joy and a touch of winter wonderland to any occasion.
Ingredients
This recipe relies on simple, common pantry staples to create its signature fudgy texture and deep chocolate flavor. Each component plays a crucial role in achieving the perfect crinkle.
- 1 cup (125g) All-Purpose Flour: The structural foundation of our cookies. Standard all-purpose flour provides the perfect balance of protein to give the cookies shape without making them tough.
- 1 cup (200g) Granulated Sugar: This is our primary sweetener. It not only adds sweetness but also contributes to the cookies’ spread and the crispy edges that contrast so beautifully with the soft center.
- ½ cup (45g) Unsweetened Cocoa Powder: The heart and soul of the cookie’s flavor. A good quality, unsweetened cocoa powder (natural or Dutch-processed will work) provides the deep, rich, and intense chocolate taste that makes these cookies so irresistible.
- ½ cup (120ml) Vegetable Oil: Oil is the secret to the ultra-fudgy, brownie-like texture. Unlike butter, which contains water and milk solids, oil is pure fat, which coats the flour proteins and inhibits gluten development, resulting in a moister, denser, and chewier cookie.
- 2 Large Eggs: Acting as a binder, eggs hold the dough together. They also add richness, moisture, and help with the leavening, contributing to the cookie’s puff and subsequent “crinkle.”
- 1 teaspoon Baking Powder: This is our primary leavening agent. It creates the carbon dioxide gas bubbles that cause the cookies to rise rapidly in the oven. This lift is essential for creating the cracks as the surface sets and breaks apart.
- 1 teaspoon Vanilla Extract: A crucial flavor enhancer. Vanilla doesn’t make the cookies taste like vanilla; instead, it deepens, rounds out, and elevates the chocolate flavor, making it more complex and aromatic.
- Pinch of Salt: A small amount of salt is a baker’s best friend. It balances the sweetness of the sugar and intensifies the chocolate notes, preventing the cookies from tasting flat.
- ½ cup (65g) Powdered Sugar (for rolling): This is the magic ingredient for the signature crinkle look. It serves two purposes: it creates the beautiful white, snowy coating, and as the cookie spreads, it absorbs a tiny bit of surface moisture, which helps the top dry out and crack dramatically.
Instructions
Following these steps carefully, particularly the chilling time, is the key to achieving perfectly fudgy cookies with dramatic, beautiful crinkles. The process is straightforward and rewarding.
Step 1: Combine the Dry Ingredients
In a medium-sized mixing bowl, add the all-purpose flour, unsweetened cocoa powder, baking powder, and the pinch of salt. Use a whisk to thoroughly combine these ingredients for at least 30 seconds. Whisking is more effective than stirring with a spoon because it not only breaks up any clumps (especially in the cocoa powder) but also aerates the mixture, ensuring the leavening agent and salt are evenly distributed throughout the flour. This simple step is crucial for a uniform texture and rise in your finished cookies. Set the bowl aside.
Step 2: Mix the Wet Ingredients
In a separate, larger bowl (or the bowl of a stand mixer fitted with the paddle attachment), add the granulated sugar and vegetable oil. Mix on medium speed with an electric hand mixer or your stand mixer for about 1-2 minutes. The mixture should look thick, glossy, and well-combined. Next, add the large eggs, one at a time, beating well after each addition until fully incorporated. Beat in the vanilla extract. The mixture will become lighter in color and slightly fluffy. This process emulsifies the ingredients, creating a stable base for the dough.
Step 3: Form the Dough
Pour the combined dry ingredients from the first bowl into the bowl of wet ingredients. Start mixing on a low speed to prevent a cloud of cocoa and flour from dusting your kitchen. Mix only until the flour streaks have just disappeared. It is vital not to overmix at this stage. Overmixing develops the gluten in the flour, which would result in a tough, cakey cookie rather than the desired soft, fudgy texture. The final dough will be very soft, sticky, and look more like a thick brownie batter than a typical cookie dough. Do not be alarmed by the stickiness; this is exactly what it should look like.
Step 4: Chill the Dough (The Most Important Step)
Cover the bowl of dough tightly with plastic wrap, pressing the wrap directly onto the surface of the dough to prevent a skin from forming. Place the bowl in the refrigerator to chill for a minimum of 4 hours, though overnight is even better. This chilling period is non-negotiable. It allows the oil to solidify, transforming the sticky, unmanageable dough into a firm, scoopable consistency. Chilling also allows the flavors to meld and deepen, and most importantly, it prevents the cookies from spreading too quickly in the oven, which is essential for achieving the signature crinkle effect.
Step 5: Preheat and Prepare for Baking
When you are ready to bake, preheat your oven to 350°F (175°C). Line two large baking sheets with parchment paper. This prevents the cookies from sticking, ensures even browning on the bottom, and makes for incredibly easy cleanup. Place the powdered sugar in a small, shallow bowl.
Step 6: Scoop and Roll the Cookies
Remove the chilled dough from the refrigerator. It should be firm to the touch. Using a small cookie scoop (about 1 tablespoon in size) or a regular tablespoon, scoop out portions of the dough. Roll each portion between your palms to form a smooth, uniform ball, about 1 inch in diameter.
Step 7: Coat in Powdered Sugar
Drop each dough ball directly into the bowl of powdered sugar. Roll it around generously until it is completely and thickly coated on all sides. Don’t be shy with the powdered sugar; a thick coating is necessary for a dramatic, white finish. The thicker the coat, the more pronounced the final crinkle will be.
Step 8: Bake the Cookies
Place the sugar-coated dough balls onto your prepared baking sheets, ensuring you leave at least 2 inches of space between each one to allow for spreading. Bake in the preheated oven for 10-12 minutes. The cookies will puff up, spread out, and the beautiful cracks will form across the surface. The edges should look set, but the center will still appear slightly soft. Be careful not to overbake, as this will dry out the fudgy center.
Step 9: Cool the Cookies
Remove the baking sheets from the oven and let the cookies cool on the sheets for 5 minutes. They will be very delicate at first, and this brief cooling period allows them to set up. After 5 minutes, use a thin spatula to carefully transfer the cookies to a wire cooling rack to cool completely. The cookies will firm up as they cool, developing their classic crisp-on-the-outside, chewy-on-the-inside texture.
Nutrition Facts
This recipe yields approximately 24 cookies. The nutritional information is an estimate and can vary based on the specific ingredients used.
- Servings: 24 cookies
- Calories per serving: Approximately 110 kcal per cookie
- Fat: Around 6g per cookie. The fat content, primarily from the vegetable oil, is responsible for the cookie’s rich, moist, and fudgy texture.
- Carbohydrates: Roughly 15g per cookie. This is the main source of energy, coming from the flour and sugars, giving the cookies their satisfying sweetness and structure.
- Protein: Approximately 1g per cookie. The protein, from the flour and eggs, provides the essential structure that holds the cookie together as it bakes.
- Sugar: About 10g per cookie. The combination of granulated and powdered sugar creates the perfect level of sweetness and is key to the cookie’s signature crackled appearance.
Preparation Time
The hands-on time for this recipe is minimal, but the chilling time is essential for success.
- Active Preparation Time: 15-20 minutes (for mixing the dough and rolling the cookies).
- Chilling Time: Minimum of 4 hours, or ideally overnight (8-12 hours).
- Baking Time: 10-12 minutes per batch.
- Total Time: Approximately 4 hours 30 minutes (with minimum chilling).
How to Serve
These Easy Chocolate Crinkle Cookies are delightful on their own, but they can also be the star of a beautiful dessert presentation. Here are some wonderful ways to serve them:
- Classic and Simple:
- Serve them piled high on a festive platter or cake stand as part of a holiday dessert spread.
- Pair a couple of warm cookies with a tall, cold glass of milk for the ultimate comfort snack.
- Enjoy with a hot cup of coffee or a rich espresso; the bitterness of the coffee beautifully complements the deep chocolate flavor.
- For Gifting and Parties:
- Package them in clear cellophane bags tied with a festive ribbon for a beautiful and delicious homemade gift.
- Arrange them on a cookie tray alongside other holiday favorites like shortbread and gingerbread for a variety of textures and flavors.
- Use them as a feature at a cookie exchange party; their striking appearance always makes them a popular choice.
- Elevated Dessert Ideas:
- Create a simple ice cream sandwich by placing a scoop of high-quality vanilla bean or peppermint ice cream between two cookies.
- Serve one or two cookies alongside a scoop of raspberry sorbet. The tartness of the raspberry cuts through the richness of the chocolate for a perfect pairing.
- Crumble a cookie over a bowl of chocolate mousse or pudding to add a delightful textural contrast.
Additional Tips
To ensure your chocolate crinkle cookies are perfect every single time, keep these expert tips in mind.
- Do Not Compromise on Chilling: This is the most critical tip. A sticky, warm dough will spread into a flat, greasy puddle in the oven, and the crinkles will fail to form. Chilling solidifies the fat, which means the cookie holds its shape longer in the oven, allowing the top to set and crack as the cookie bakes and spreads. 4 hours is the absolute minimum.
- The Double Sugar Roll Technique: For an extra-bold, snowy white finish that doesn’t melt away, try a double roll. First, roll the chilled dough ball lightly in a bowl of granulated sugar, then roll it generously in the powdered sugar. The granulated sugar acts as a primer, creating a slight barrier that helps the powdered sugar adhere better and stay brighter during baking.
- Use High-Quality Cocoa Powder: The cookies are all about the chocolate flavor, so the quality of your cocoa powder matters. Whether you choose a Dutch-processed cocoa for a darker color and smoother flavor or a natural cocoa for a sharper, more intense chocolate hit, using a brand you trust will make a noticeable difference in the final taste.
- Ensure Eggs are at Room Temperature: Room temperature eggs emulsify much more easily and efficiently into the batter than cold eggs. This creates a smoother, more uniform dough and helps trap air, which contributes to a lighter texture and better rise. To quickly bring eggs to room temperature, place them in a bowl of warm (not hot) water for 5-10 minutes.
- Avoid Overmixing the Flour: Once you add the dry ingredients to the wet, mix only until they are just combined. A few faint streaks of flour are acceptable. Overmixing develops gluten, the protein network in flour, which will change the texture from soft and fudgy to tough and cakey.
- Use a Cookie Scoop for Uniformity: Using a small cookie scoop is the best way to ensure all your cookies are the same size and shape. This isn’t just for aesthetics; uniform cookies will bake evenly, meaning you won’t have some that are overdone while others are still raw in the center.
- Don’t Overcrowd Your Baking Sheets: Give your cookies plenty of room to spread out. Placing them at least 2 inches apart ensures that hot air can circulate freely around each cookie, promoting even baking and preventing them from merging into one giant cookie-blob. Bake in batches if necessary.
- Proper Storage is Key: To maintain that perfect texture, store the completely cooled cookies in an airtight container at room temperature. They will stay soft and fudgy for up to 5 days. Placing a slice of bread in the container can also help them retain moisture.
FAQ Section
Here are answers to some of the most frequently asked questions about making Easy Chocolate Crinkle Cookies.
1. Why didn’t my cookies crinkle?
This is the most common issue. The lack of crinkles is usually due to one of three things: 1) The dough was not chilled long enough, causing it to spread too fast. 2) Your baking powder might be old or expired, so it didn’t provide enough lift. 3) You didn’t use a thick enough coat of powdered sugar to create the cracking effect.
2. Can I make the cookie dough ahead of time?
Absolutely! This dough is perfect for making ahead. You can prepare the dough and store it, tightly covered, in the refrigerator for up to 3 days. When you’re ready to bake, just scoop, roll, and bake as directed. The extended chilling time will only improve the flavor.
3. The dough is so sticky! Is that normal?
Yes, it is completely normal. This recipe uses oil instead of butter and has a high ratio of wet ingredients, which results in a very soft, sticky dough similar to a thick batter. The essential chilling step is what firms up the dough, making it solid and easy to handle and roll into balls.
4. Can I use butter instead of oil in this recipe?
You can, but it will change the final texture. If you substitute melted butter for the oil, the cookies will have a delicious buttery flavor but will be less fudgy and slightly more cake-like. Oil (a pure liquid fat) is the secret to that classic, dense, brownie-like chewiness.
5. How do I know for sure when the cookies are done baking?
The visual cues are more reliable than the timer. The cookies are done when they have puffed up, spread out, and are covered in cracks. The edges will look dry and set, but the center will still look a little soft and underdone. They will continue to bake and set on the hot pan after you remove them from the oven. Overbaking is the enemy of a fudgy center.
6. Can I freeze these chocolate crinkle cookies?
Yes, they freeze beautifully in two ways. You can freeze the baked and cooled cookies in an airtight, freezer-safe container or bag for up to 3 months. Or, for fresh-baked cookies anytime, you can freeze the unbaked dough balls. Scoop and roll the dough (before coating in powdered sugar), place them on a baking sheet, and freeze until solid. Then, transfer the frozen balls to a freezer bag. When ready to bake, you can bake from frozen (adding 1-2 minutes to the bake time) after rolling them in powdered sugar.
7. My powdered sugar just melted and disappeared. What went wrong?
This usually happens when the dough balls are too warm when they go into the oven, causing the sugar to melt before the surface can set. Ensure your dough is thoroughly chilled and work quickly when rolling. Also, be very generous with the powdered sugar coating—a thin layer is more likely to be absorbed. The “double sugar roll” tip mentioned above is the best defense against this.
8. Can I make this recipe gluten-free?
Yes, you should be able to adapt this recipe for a gluten-free diet. For the best results, substitute the all-purpose flour with a high-quality, 1-to-1 gluten-free baking flour blend that contains xanthan gum. The texture might be slightly different, but they will still be delicious and fudgy. Follow all other instructions as written.
Easy Chocolate Crinkle Cookies
Ingredients
This recipe relies on simple, common pantry staples to create its signature fudgy texture and deep chocolate flavor. Each component plays a crucial role in achieving the perfect crinkle.
- 1 cup (125g) All-Purpose Flour: The structural foundation of our cookies. Standard all-purpose flour provides the perfect balance of protein to give the cookies shape without making them tough.
- 1 cup (200g) Granulated Sugar: This is our primary sweetener. It not only adds sweetness but also contributes to the cookies’ spread and the crispy edges that contrast so beautifully with the soft center.
- ½ cup (45g) Unsweetened Cocoa Powder: The heart and soul of the cookie’s flavor. A good quality, unsweetened cocoa powder (natural or Dutch-processed will work) provides the deep, rich, and intense chocolate taste that makes these cookies so irresistible.
- ½ cup (120ml) Vegetable Oil: Oil is the secret to the ultra-fudgy, brownie-like texture. Unlike butter, which contains water and milk solids, oil is pure fat, which coats the flour proteins and inhibits gluten development, resulting in a moister, denser, and chewier cookie.
- 2 Large Eggs: Acting as a binder, eggs hold the dough together. They also add richness, moisture, and help with the leavening, contributing to the cookie’s puff and subsequent “crinkle.”
- 1 teaspoon Baking Powder: This is our primary leavening agent. It creates the carbon dioxide gas bubbles that cause the cookies to rise rapidly in the oven. This lift is essential for creating the cracks as the surface sets and breaks apart.
- 1 teaspoon Vanilla Extract: A crucial flavor enhancer. Vanilla doesn’t make the cookies taste like vanilla; instead, it deepens, rounds out, and elevates the chocolate flavor, making it more complex and aromatic.
- Pinch of Salt: A small amount of salt is a baker’s best friend. It balances the sweetness of the sugar and intensifies the chocolate notes, preventing the cookies from tasting flat.
- ½ cup (65g) Powdered Sugar (for rolling): This is the magic ingredient for the signature crinkle look. It serves two purposes: it creates the beautiful white, snowy coating, and as the cookie spreads, it absorbs a tiny bit of surface moisture, which helps the top dry out and crack dramatically.
Instructions
Following these steps carefully, particularly the chilling time, is the key to achieving perfectly fudgy cookies with dramatic, beautiful crinkles. The process is straightforward and rewarding.
Step 1: Combine the Dry Ingredients
In a medium-sized mixing bowl, add the all-purpose flour, unsweetened cocoa powder, baking powder, and the pinch of salt. Use a whisk to thoroughly combine these ingredients for at least 30 seconds. Whisking is more effective than stirring with a spoon because it not only breaks up any clumps (especially in the cocoa powder) but also aerates the mixture, ensuring the leavening agent and salt are evenly distributed throughout the flour. This simple step is crucial for a uniform texture and rise in your finished cookies. Set the bowl aside.
Step 2: Mix the Wet Ingredients
In a separate, larger bowl (or the bowl of a stand mixer fitted with the paddle attachment), add the granulated sugar and vegetable oil. Mix on medium speed with an electric hand mixer or your stand mixer for about 1-2 minutes. The mixture should look thick, glossy, and well-combined. Next, add the large eggs, one at a time, beating well after each addition until fully incorporated. Beat in the vanilla extract. The mixture will become lighter in color and slightly fluffy. This process emulsifies the ingredients, creating a stable base for the dough.
Step 3: Form the Dough
Pour the combined dry ingredients from the first bowl into the bowl of wet ingredients. Start mixing on a low speed to prevent a cloud of cocoa and flour from dusting your kitchen. Mix only until the flour streaks have just disappeared. It is vital not to overmix at this stage. Overmixing develops the gluten in the flour, which would result in a tough, cakey cookie rather than the desired soft, fudgy texture. The final dough will be very soft, sticky, and look more like a thick brownie batter than a typical cookie dough. Do not be alarmed by the stickiness; this is exactly what it should look like.
Step 4: Chill the Dough (The Most Important Step)
Cover the bowl of dough tightly with plastic wrap, pressing the wrap directly onto the surface of the dough to prevent a skin from forming. Place the bowl in the refrigerator to chill for a minimum of 4 hours, though overnight is even better. This chilling period is non-negotiable. It allows the oil to solidify, transforming the sticky, unmanageable dough into a firm, scoopable consistency. Chilling also allows the flavors to meld and deepen, and most importantly, it prevents the cookies from spreading too quickly in the oven, which is essential for achieving the signature crinkle effect.
Step 5: Preheat and Prepare for Baking
When you are ready to bake, preheat your oven to 350°F (175°C). Line two large baking sheets with parchment paper. This prevents the cookies from sticking, ensures even browning on the bottom, and makes for incredibly easy cleanup. Place the powdered sugar in a small, shallow bowl.
Step 6: Scoop and Roll the Cookies
Remove the chilled dough from the refrigerator. It should be firm to the touch. Using a small cookie scoop (about 1 tablespoon in size) or a regular tablespoon, scoop out portions of the dough. Roll each portion between your palms to form a smooth, uniform ball, about 1 inch in diameter.
Step 7: Coat in Powdered Sugar
Drop each dough ball directly into the bowl of powdered sugar. Roll it around generously until it is completely and thickly coated on all sides. Don’t be shy with the powdered sugar; a thick coating is necessary for a dramatic, white finish. The thicker the coat, the more pronounced the final crinkle will be.
Step 8: Bake the Cookies
Place the sugar-coated dough balls onto your prepared baking sheets, ensuring you leave at least 2 inches of space between each one to allow for spreading. Bake in the preheated oven for 10-12 minutes. The cookies will puff up, spread out, and the beautiful cracks will form across the surface. The edges should look set, but the center will still appear slightly soft. Be careful not to overbake, as this will dry out the fudgy center.
Step 9: Cool the Cookies
Remove the baking sheets from the oven and let the cookies cool on the sheets for 5 minutes. They will be very delicate at first, and this brief cooling period allows them to set up. After 5 minutes, use a thin spatula to carefully transfer the cookies to a wire cooling rack to cool completely. The cookies will firm up as they cool, developing their classic crisp-on-the-outside, chewy-on-the-inside texture.
Nutrition
- Serving Size: one normal portion
- Calories: 110
- Sugar: 10g
- Carbohydrates: 15g
- Protein: 1g


