

Of all the recipes that have become staples in my kitchen, this one for Cheesy Stuffed Bell Peppers holds a special place. I first made it on a whim, looking for a way to use up some beautiful bell peppers and ground beef I had in the fridge. I wasn’t expecting much more than a standard weeknight meal, but the reaction from my family was nothing short of ecstatic. The kids, who usually push vegetables around their plates, devoured every last bite, mesmerized by the colorful pepper “bowls” filled with savory, cheesy goodness. The aroma that filled the house as they baked—a rich blend of seasoned beef, fragrant garlic, and melting cheese—was enough to make everyone’s stomach rumble in anticipation. It’s since become our go-to comfort food, a dish that feels both wholesome and wonderfully indulgent. It’s a guaranteed home run, transforming simple ingredients into a meal that feels like a warm hug, and proving that sometimes, the most memorable dinners are the ones you least expect.
The Ultimate Cheesy Stuffed Bell Peppers: A Step-by-Step Guide to Perfection
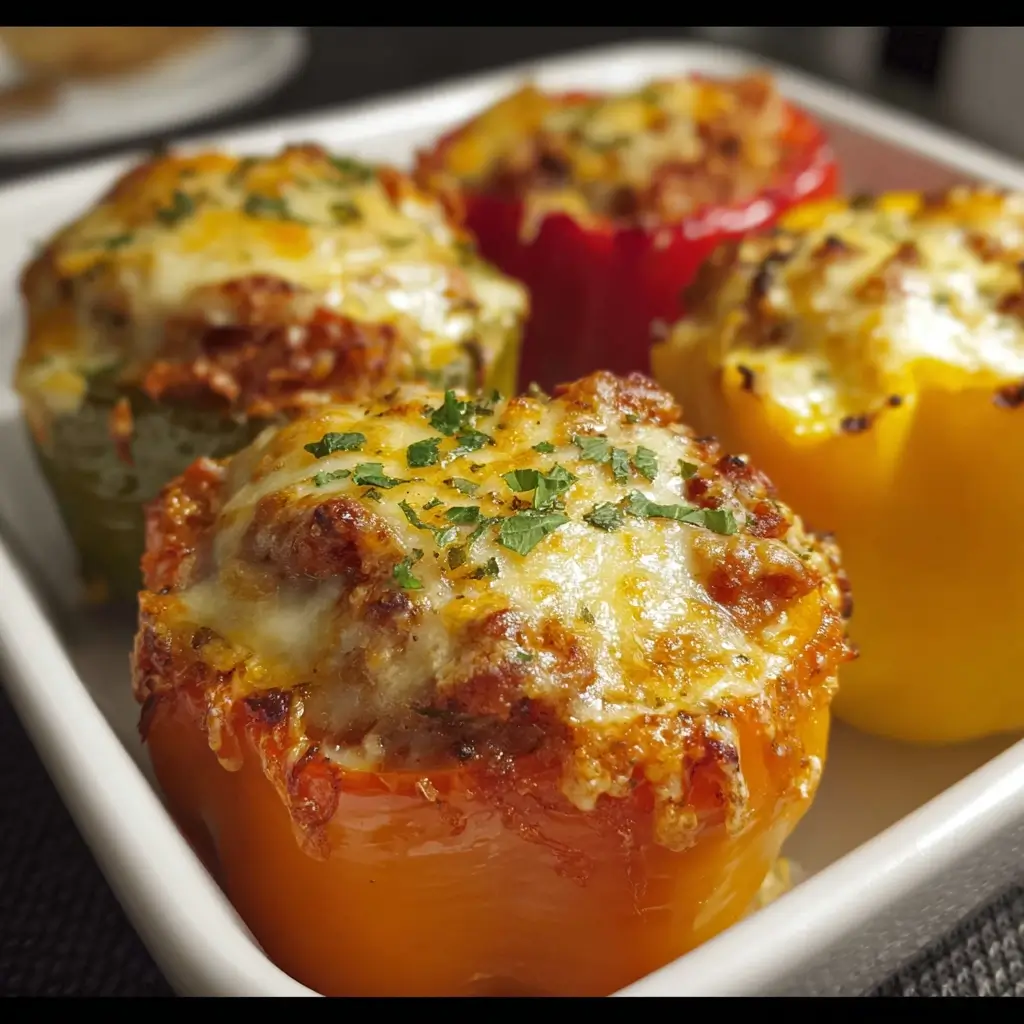
This recipe isn’t just about stuffing ingredients into a pepper; it’s a symphony of flavors and textures. We’ve perfected the balance to ensure every bite is bursting with savory beef, aromatic herbs, fluffy rice, and a generous, golden-brown blanket of melted cheese. The bell pepper itself isn’t just a vessel; it becomes sweet, tender, and an integral part of the meal. Prepare to discover your new favorite way to enjoy this classic dish, elevated to a whole new level of deliciousness.
Ingredients
Here is the curated list of ingredients you will need to create this masterpiece. Each component is chosen specifically to build layers of flavor, resulting in a perfectly balanced and satisfying dish.
- 6 large bell peppers – A mix of colors (red, yellow, orange) not only looks beautiful but provides a range of sweetness. Red peppers are the sweetest, while green are more savory.
- 1 lb ground beef (85/15) – This ratio provides enough fat for a rich flavor without making the filling overly greasy.
- 1 large yellow onion, finely chopped – Forms the aromatic base of the filling, adding a subtle, sweet depth.
- 3 cloves garlic, minced – Essential for its pungent, savory flavor that complements the beef perfectly.
- 1 cup cooked white or brown rice – Acts as a binder and adds a wonderful, fluffy texture to the filling. Using pre-cooked rice is a great time-saver.
- 1 (15-ounce) can of diced tomatoes, drained – Lends a touch of acidity and moisture, cutting through the richness of the cheese and beef.
- 1 (8-ounce) can of tomato sauce – Binds the filling together and infuses it with a classic, savory tomato flavor.
- 1 teaspoon dried oregano – Adds a classic Italian, earthy note that pairs beautifully with tomato and beef.
- 1 teaspoon dried basil – Provides a sweet, peppery aroma that enhances the overall fragrance of the dish.
- ½ teaspoon smoked paprika – A secret weapon that adds a subtle smokiness and a beautiful, rich color.
- Salt and freshly ground black pepper to taste – To season and elevate all the other flavors.
- 1 ½ cups shredded sharp cheddar cheese, divided – A sharp cheddar provides a robust, tangy flavor that stands up to the savory filling. We divide it for mixing in and topping.
- 1 cup shredded mozzarella cheese, divided – Mozzarella brings that irresistible, gooey cheese-pull and a mild, creamy taste.
- 2 tablespoons olive oil – For sautéing the aromatics and browning the beef.
- ¼ cup fresh parsley, chopped – For garnish, adding a touch of fresh, bright flavor and color at the end.
Instructions
Follow these detailed steps carefully to ensure your stuffed peppers are cooked to perfection, with a tender pepper shell and a hot, bubbly, and flavorful filling.
- Prepare the Bell Peppers: Begin by preheating your oven to 375°F (190°C). Wash the bell peppers thoroughly. Slice each pepper in half lengthwise, from the stem to the base. Carefully remove the seeds and the white membranes from the inside. For a more stable base, you can slice a very thin sliver off the rounded bottom of each pepper half, being careful not to create a hole.
- Par-Boil the Peppers (Optional but Recommended): Bring a large pot of salted water to a rolling boil. Place the pepper halves in the boiling water and cook for 3-4 minutes. This step, known as blanching, helps to soften the peppers and ensures they will be perfectly tender after baking, rather than unpleasantly crunchy. Immediately remove them with tongs and place them in an ice bath or run them under cold water to stop the cooking process. Pat them dry and arrange them cut-side-up in a 9×13-inch baking dish.
- Cook the Aromatics and Beef: In a large skillet or Dutch oven, heat the olive oil over medium-high heat. Add the finely chopped onion and cook until it becomes soft and translucent, about 5-6 minutes. Add the minced garlic and cook for another minute until fragrant, being careful not to let it burn.
- Brown the Filling: Add the ground beef to the skillet with the onions and garlic. Use a wooden spoon or spatula to break the beef apart. Cook until it is thoroughly browned and no pink remains, which should take about 7-8 minutes. Drain off any excess grease from the skillet.
- Combine the Filling Ingredients: Reduce the heat to medium. Stir in the drained diced tomatoes, tomato sauce, cooked rice, dried oregano, dried basil, and smoked paprika. Season generously with salt and black pepper. Mix everything together until it is well combined. Let the mixture simmer for about 5 minutes, allowing the flavors to meld together beautifully.
- Incorporate the Cheese: Remove the skillet from the heat. Stir in ½ cup of the shredded cheddar cheese and ½ cup of the shredded mozzarella cheese. Mixing cheese directly into the filling is the key to an ultra-cheesy experience in every single bite.
- Stuff the Peppers: Carefully spoon the beef and rice mixture evenly into each of the prepared bell pepper halves. Mound the filling generously, as it will settle slightly during baking.
- Prepare for Baking: Pour about ½ cup of water or beef broth into the bottom of the baking dish, around the peppers. This creates steam in the oven, which helps keep the peppers moist and cook them evenly.
- Add the Final Cheese Topping: In a small bowl, combine the remaining 1 cup of cheddar cheese and ½ cup of mozzarella cheese. Sprinkle this cheese mixture generously over the top of each stuffed pepper, ensuring the filling is completely covered.
- Bake to Perfection: Cover the baking dish loosely with aluminum foil. This prevents the cheese from browning too quickly before the filling is heated through. Bake in the preheated oven for 25 minutes.
- Final Browning: After 25 minutes, carefully remove the aluminum foil. Return the dish to the oven and bake for another 10-15 minutes, or until the filling is heated through and the cheese on top is completely melted, bubbly, and has developed beautiful golden-brown spots.
- Rest and Garnish: Remove the baking dish from the oven and let the stuffed peppers rest for at least 5-10 minutes. This allows the filling to set, making them easier to serve and preventing them from falling apart. Just before serving, sprinkle with freshly chopped parsley for a burst of color and freshness.
Nutrition Facts
This recipe is designed to be a balanced meal. The nutritional information is an estimate and can vary based on the specific ingredients used.
- Servings: 6 (1 pepper half per serving)
- Calories per serving: Approximately 480 kcal
- Protein: An excellent source of protein, crucial for muscle repair and keeping you feeling full and satisfied.
- Vitamin C: Bell peppers are packed with Vitamin C, a powerful antioxidant that supports immune function. Red peppers contain the highest amount.
- Fiber: The combination of bell peppers, tomatoes, and brown rice (if used) provides dietary fiber, which is important for digestive health.
- Iron: Ground beef is a great source of heme iron, which is easily absorbed by the body and essential for preventing anemia and maintaining energy levels.
- Calcium: The generous amount of cheese provides a good source of calcium, vital for bone health.
Preparation Time
This dish comes together with minimal fuss, making it perfect for a weeknight dinner that feels like a weekend treat.
- Active Preparation Time: 25 minutes (chopping vegetables, browning beef, assembling)
- Cook Time: 45 minutes (including blanching and baking)
- Total Time: Approximately 1 hour and 10 minutes from start to finish. The hands-on time is relatively short, with most of the time spent letting the oven do the work.
How to Serve
These Cheesy Stuffed Bell Peppers are a complete meal on their own, but pairing them with the right sides can elevate the dining experience. Here are some serving suggestions:
- For a Classic Comfort Meal:
- Creamy Mashed Potatoes: Serve a scoop of fluffy mashed potatoes alongside the pepper to soak up any delicious juices.
- Crusty Garlic Bread: Perfect for scooping up any leftover filling or simply enjoying the contrast of textures.
- For a Lighter, Fresher Pairing:
- Simple Arugula Salad: A bed of fresh arugula or a mixed green salad with a simple lemon vinaigrette provides a fresh, peppery contrast to the rich, cheesy peppers.
- Steamed or Roasted Vegetables: A side of steamed green beans, roasted asparagus, or broccoli adds extra nutrients and color to the plate.
- Grains and More:
- Cilantro Lime Rice: If you want to complement the rice in the filling, a zesty cilantro-lime rice on the side is a fantastic choice.
- Quinoa Salad: A cold quinoa salad with cucumber, cherry tomatoes, and a light dressing can be a refreshing and healthy accompaniment.
- Don’t Forget the Toppings:
- A dollop of sour cream or Greek yogurt: Adds a cool, tangy element that balances the warmth and richness of the filling.
- A sprinkle of red pepper flakes: For those who enjoy a little extra heat.
- Freshly chopped cilantro or chives: Offer an alternative fresh herb finish to parsley.
Additional Tips
Unlock the full potential of your stuffed peppers with these eight expert tips designed to guarantee success and allow for creative customization.
1. The Secret to Tender Peppers: Don’t skip the par-boiling step! While optional, blanching the peppers for just a few minutes before stuffing is the number one trick to avoid crunchy, undercooked peppers. It ensures the pepper “shell” is perfectly tender and cooked through at the same time as the filling.
2. Achieve the Perfect Filling Consistency: If your beef and tomato mixture seems a bit too wet after simmering, let it cook for a few extra minutes with the lid off to allow some of the excess liquid to evaporate. The ideal filling should be moist, but not watery, so it holds its shape within the pepper.
3. Make-Ahead for Easy Weeknights: This recipe is a meal-prepper’s dream. You can fully assemble the peppers (stuffing and all, but without the final cheese topping) up to 24 hours in advance. Store them covered in the refrigerator. When you’re ready to eat, simply add the cheese topping and bake as directed, adding about 10 extra minutes to the initial covered baking time.
4. Go Beyond the Beef: While ground beef is classic, feel free to experiment! This recipe works wonderfully with ground turkey, ground chicken, or even a spicy Italian sausage (a mix of sweet and spicy is delicious). The cooking process remains the same.
5. Grain Variations for Every Diet: Not a fan of rice? Substitute it with an equal amount of cooked quinoa for a protein boost, or use cooked cauliflower rice for a fantastic low-carb and keto-friendly alternative. You can also try other grains like farro or bulgur for a nuttier texture.
6. Pick Your Peppers Wisely: Look for large bell peppers that are uniform in size and have a relatively flat bottom so they can sit upright in the baking dish without tipping over. The color is up to you! Red, orange, and yellow peppers will be sweeter, while green peppers offer a more traditional, slightly bitter flavor profile that many people love.
7. How to Freeze for Future Meals: Cheesy Stuffed Bell Peppers freeze beautifully. You can freeze them either cooked or uncooked.
* Uncooked: Assemble the peppers completely but do not bake. Place them on a baking sheet and freeze until solid, then transfer to a freezer-safe bag or container. They can be baked from frozen, covered, for about 1 hour before uncovering to brown the cheese.
* Cooked: Let the baked peppers cool completely. Wrap them individually in plastic wrap and then place them in a freezer bag. Reheat in the oven at 350°F (175°C) until warmed through.
8. Don’t Be Shy with Seasoning: The rice and bell pepper will absorb a lot of flavor, so be sure to taste your filling mixture before stuffing the peppers. It should taste slightly more seasoned than you think it needs to be. Don’t be afraid to add an extra pinch of salt, pepper, or your favorite herbs.
FAQ Section
Here are answers to some of the most common questions about making Cheesy Stuffed Bell Peppers.
1. Why are my bell peppers still hard after baking?
This is a very common issue, usually caused by skipping the initial par-boiling step. Raw bell peppers require a significant amount of time to become tender in the oven. By blanching them in boiling water for 3-4 minutes before stuffing, you give them a head start, ensuring they come out of the oven perfectly soft and cooked through. Also, make sure to add a little water to the bottom of the baking dish to help steam them.
2. Can I make these stuffed peppers vegetarian?
Absolutely! To make a delicious vegetarian version, simply replace the ground beef with a plant-based alternative. A cup of cooked lentils, chopped mushrooms, crumbled tofu, or a store-bought plant-based ground “meat” all work wonderfully. Sauté the mushrooms or plant-based ground just as you would the beef.
3. My filling seems watery. What did I do wrong?
This can happen if the diced tomatoes weren’t drained well enough or if your ground beef had a very high fat content that wasn’t fully drained. To fix it, simply let the filling simmer for an extra 5-10 minutes on the stovetop before you add the cheese. This allows the excess liquid to evaporate, resulting in a thicker, richer filling.
4. Can I prepare the filling in advance?
Yes, this is a great time-saving strategy. You can cook the entire beef and rice filling up to two days ahead of time and store it in an airtight container in the refrigerator. When you’re ready to make the peppers, simply prepare the pepper shells, stuff them with the cold filling, and bake, adding about 10-15 minutes to the total baking time to ensure everything is heated through.
5. What is the best kind of cheese to use for stuffed peppers?
A combination of cheeses often yields the best result. Sharp cheddar provides a bold, tangy flavor that complements the beef, while mozzarella provides that classic, gooey “cheese pull” and a milder, creamier texture. Other great options include Monterey Jack, Colby, or a Provolone blend. For a touch of nutty flavor, you can also add some grated Parmesan to the topping.
6. How do I store and reheat leftovers?
Leftover stuffed peppers can be stored in an airtight container in the refrigerator for up to 4 days. The best way to reheat them is in the oven or a toaster oven at 350°F (175°C) for about 15-20 minutes, or until heated through. This method helps the cheese get bubbly again and prevents the pepper from becoming soggy, which can happen in the microwave.
7. Is it necessary to cover the peppers with foil while baking?
Yes, covering the peppers with foil for the first part of the baking process is crucial. It traps steam, which helps cook the peppers and the filling evenly without drying them out. It also prevents the cheese topping from burning before the inside is fully hot. Removing the foil for the last 10-15 minutes is what allows the cheese to get that beautiful, golden-brown, and bubbly finish.
8. Can I use different colored bell peppers? Does it change the taste?
Yes, you can and it does! Using a variety of colors not only makes the dish visually stunning but also offers a subtle range of flavors. Red peppers are the most mature and therefore the sweetest. Yellow and orange peppers are also sweet and mild. Green peppers are harvested earliest and have a more vegetal, slightly bitter taste. A mix provides a wonderful balance, but feel free to use whichever color you prefer.

Cheesy Stuffed Bell Peppers
Ingredients
Here is the curated list of ingredients you will need to create this masterpiece. Each component is chosen specifically to build layers of flavor, resulting in a perfectly balanced and satisfying dish.
- 6 large bell peppers – A mix of colors (red, yellow, orange) not only looks beautiful but provides a range of sweetness. Red peppers are the sweetest, while green are more savory.
- 1 lb ground beef (85/15) – This ratio provides enough fat for a rich flavor without making the filling overly greasy.
- 1 large yellow onion, finely chopped – Forms the aromatic base of the filling, adding a subtle, sweet depth.
- 3 cloves garlic, minced – Essential for its pungent, savory flavor that complements the beef perfectly.
- 1 cup cooked white or brown rice – Acts as a binder and adds a wonderful, fluffy texture to the filling. Using pre-cooked rice is a great time-saver.
- 1 (15-ounce) can of diced tomatoes, drained – Lends a touch of acidity and moisture, cutting through the richness of the cheese and beef.
- 1 (8-ounce) can of tomato sauce – Binds the filling together and infuses it with a classic, savory tomato flavor.
- 1 teaspoon dried oregano – Adds a classic Italian, earthy note that pairs beautifully with tomato and beef.
- 1 teaspoon dried basil – Provides a sweet, peppery aroma that enhances the overall fragrance of the dish.
- ½ teaspoon smoked paprika – A secret weapon that adds a subtle smokiness and a beautiful, rich color.
- Salt and freshly ground black pepper to taste – To season and elevate all the other flavors.
- 1 ½ cups shredded sharp cheddar cheese, divided – A sharp cheddar provides a robust, tangy flavor that stands up to the savory filling. We divide it for mixing in and topping.
- 1 cup shredded mozzarella cheese, divided – Mozzarella brings that irresistible, gooey cheese-pull and a mild, creamy taste.
- 2 tablespoons olive oil – For sautéing the aromatics and browning the beef.
- ¼ cup fresh parsley, chopped – For garnish, adding a touch of fresh, bright flavor and color at the end.
Instructions
Follow these detailed steps carefully to ensure your stuffed peppers are cooked to perfection, with a tender pepper shell and a hot, bubbly, and flavorful filling.
- Prepare the Bell Peppers: Begin by preheating your oven to 375°F (190°C). Wash the bell peppers thoroughly. Slice each pepper in half lengthwise, from the stem to the base. Carefully remove the seeds and the white membranes from the inside. For a more stable base, you can slice a very thin sliver off the rounded bottom of each pepper half, being careful not to create a hole.
- Par-Boil the Peppers (Optional but Recommended): Bring a large pot of salted water to a rolling boil. Place the pepper halves in the boiling water and cook for 3-4 minutes. This step, known as blanching, helps to soften the peppers and ensures they will be perfectly tender after baking, rather than unpleasantly crunchy. Immediately remove them with tongs and place them in an ice bath or run them under cold water to stop the cooking process. Pat them dry and arrange them cut-side-up in a 9×13-inch baking dish.
- Cook the Aromatics and Beef: In a large skillet or Dutch oven, heat the olive oil over medium-high heat. Add the finely chopped onion and cook until it becomes soft and translucent, about 5-6 minutes. Add the minced garlic and cook for another minute until fragrant, being careful not to let it burn.
- Brown the Filling: Add the ground beef to the skillet with the onions and garlic. Use a wooden spoon or spatula to break the beef apart. Cook until it is thoroughly browned and no pink remains, which should take about 7-8 minutes. Drain off any excess grease from the skillet.
- Combine the Filling Ingredients: Reduce the heat to medium. Stir in the drained diced tomatoes, tomato sauce, cooked rice, dried oregano, dried basil, and smoked paprika. Season generously with salt and black pepper. Mix everything together until it is well combined. Let the mixture simmer for about 5 minutes, allowing the flavors to meld together beautifully.
- Incorporate the Cheese: Remove the skillet from the heat. Stir in ½ cup of the shredded cheddar cheese and ½ cup of the shredded mozzarella cheese. Mixing cheese directly into the filling is the key to an ultra-cheesy experience in every single bite.
- Stuff the Peppers: Carefully spoon the beef and rice mixture evenly into each of the prepared bell pepper halves. Mound the filling generously, as it will settle slightly during baking.
- Prepare for Baking: Pour about ½ cup of water or beef broth into the bottom of the baking dish, around the peppers. This creates steam in the oven, which helps keep the peppers moist and cook them evenly.
- Add the Final Cheese Topping: In a small bowl, combine the remaining 1 cup of cheddar cheese and ½ cup of mozzarella cheese. Sprinkle this cheese mixture generously over the top of each stuffed pepper, ensuring the filling is completely covered.
- Bake to Perfection: Cover the baking dish loosely with aluminum foil. This prevents the cheese from browning too quickly before the filling is heated through. Bake in the preheated oven for 25 minutes.
- Final Browning: After 25 minutes, carefully remove the aluminum foil. Return the dish to the oven and bake for another 10-15 minutes, or until the filling is heated through and the cheese on top is completely melted, bubbly, and has developed beautiful golden-brown spots.
- Rest and Garnish: Remove the baking dish from the oven and let the stuffed peppers rest for at least 5-10 minutes. This allows the filling to set, making them easier to serve and preventing them from falling apart. Just before serving, sprinkle with freshly chopped parsley for a burst of color and freshness.
Nutrition
- Serving Size: one normal portion
- Calories: 480


