
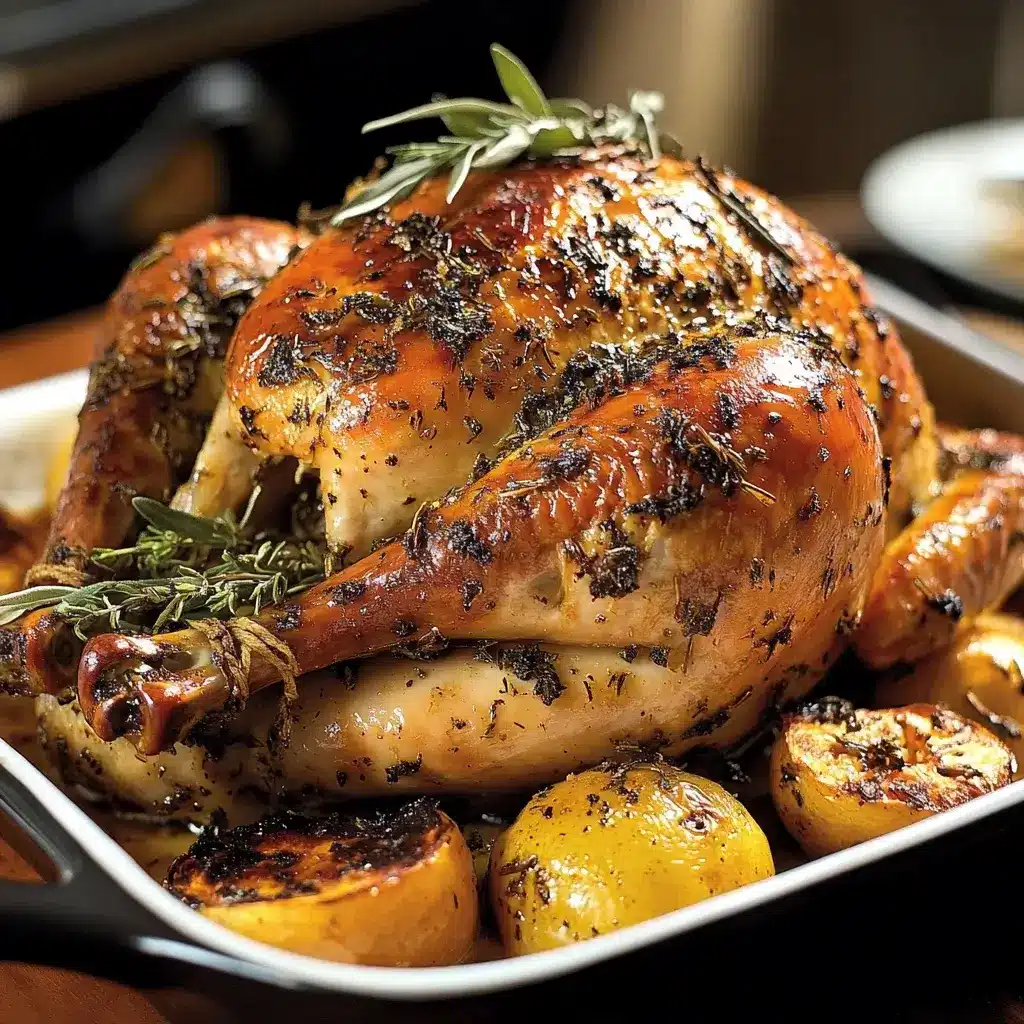

The aroma wafting from the oven last Thanksgiving was simply divine. It was the scent of roasted turkey, yes, but it was so much more than that. It was rich, buttery, and deeply herby, promising a taste that lived up to the anticipation. Following this Buttered Herb Roasted Turkey recipe was a game-changer for our holiday dinner. The turkey emerged from the oven with a beautifully bronzed skin, glistening with butter, and the meat inside was unbelievably moist and infused with the fragrant flavors of rosemary, thyme, and garlic. Even the picky eaters in the family couldn’t get enough, declaring it the best turkey they had ever tasted. This recipe isn’t just about roasting a turkey; it’s about creating a centerpiece that’s both stunning and utterly delicious, guaranteed to impress your guests and become a cherished holiday tradition.
Ingredients
To create this masterpiece of a Buttered Herb Roasted Turkey, you’ll need a selection of fresh, high-quality ingredients. The combination of butter and herbs is what truly elevates this recipe, so don’t skimp on quality. Here’s what you’ll need to gather:
- Turkey: 1 (12-14 pound) whole turkey, thawed if frozen. Choosing the right turkey is the foundation of this dish. For a family gathering, a 12-14 pound turkey is ideal, providing ample servings and leftovers. Consider a fresh, high-quality turkey if possible, as they tend to have better flavor and moisture retention compared to frozen birds. If using a frozen turkey, ensure it is completely thawed before you begin – this can take several days in the refrigerator, so plan ahead.
- Unsalted Butter: 1 cup (2 sticks), softened. Butter is the star of this recipe, contributing richness, flavor, and that gorgeous golden-brown skin. Unsalted butter allows you to control the saltiness of the dish, and softening it is crucial for creating the herb butter mixture and for easy application under the skin.
- Fresh Rosemary: 2 tablespoons, finely chopped. Rosemary brings a piney, slightly lemony aroma that complements turkey beautifully. Fresh rosemary is far superior to dried in this recipe, offering a brighter and more pronounced flavor. Finely chopping it ensures even distribution in the butter and optimal flavor release during roasting.
- Fresh Thyme: 2 tablespoons, finely chopped. Thyme adds an earthy, slightly minty note that balances the richness of the butter and the pungency of the garlic. Like rosemary, fresh thyme is essential for the best flavor. Finely chop it to maximize its aromatic contribution to the herb butter.
- Garlic: 6 cloves, minced. Garlic provides a pungent and savory base note to the herb butter, enhancing the overall flavor profile of the turkey. Freshly minced garlic is crucial for its robust flavor; avoid using pre-minced garlic as it often lacks the same intensity.
- Lemon: 1, halved. Lemon adds brightness and acidity, cutting through the richness of the butter and enhancing the other flavors. Halving the lemon allows you to insert one half into the cavity for internal flavoring and use the other half to squeeze over the turkey for added zest and to help with browning.
- Salt: 2 tablespoons, plus more to taste. Salt is essential for seasoning the turkey and bringing out its natural flavors. Use kosher salt or sea salt for best results. The amount may need to be adjusted based on the size of your turkey and personal preference.
- Black Pepper: 1 tablespoon, freshly ground, plus more to taste. Freshly ground black pepper provides a pungent and aromatic counterpoint to the salt and herbs. Grind it just before using for the most intense flavor.
- Optional: Chicken or Turkey Broth: 1 cup. Broth is optional but highly recommended for adding moisture to the roasting pan and creating flavorful pan drippings for gravy. Use low-sodium broth to control the salt level.
- Optional: Vegetables for Roasting Pan (Onions, Carrots, Celery): 2 cups, roughly chopped. Adding vegetables to the roasting pan is a fantastic way to infuse the pan drippings with even more flavor and create delicious roasted vegetables as a side dish. Onions, carrots, and celery are classic choices, but you can also include potatoes, parsnips, or other root vegetables.
Ingredient Quality Notes:
- Fresh Herbs: Emphasize using fresh herbs for the most vibrant and aromatic flavor. Dried herbs can be used in a pinch, but reduce the quantity to about one-third of the fresh amount as they are more concentrated.
- Good Quality Butter: Opt for a good quality unsalted butter, as it will directly impact the richness and flavor of the turkey. European-style butter, with a higher butterfat content, can add an extra layer of luxuriousness.
- Whole Turkey: Choose a turkey that is appropriate for your serving needs and dietary preferences. You can choose organic, free-range, or heritage breeds for potentially enhanced flavor and texture.
Instructions
Roasting a turkey can seem daunting, but with this step-by-step guide, you’ll find it’s quite straightforward. The key is to follow each step carefully and pay attention to the details, especially regarding temperature and cooking time.
- Prepare the Turkey: If using a frozen turkey, ensure it is completely thawed. Remove the turkey from its packaging and remove the giblets and neck from the cavity. Pat the turkey dry inside and out with paper towels. This step is crucial for achieving crispy skin. Excess moisture will steam the skin instead of allowing it to brown and crisp.
- Preheat Oven and Prepare Roasting Pan: Preheat your oven to 325°F (160°C). This lower temperature ensures even cooking and prevents the turkey from drying out before it’s cooked through. Place a roasting rack inside a large roasting pan. The rack elevates the turkey, allowing hot air to circulate evenly around it for more consistent cooking and crispier skin on the bottom. If you don’t have a roasting rack, you can use roughly chopped vegetables (onions, carrots, celery) as a makeshift rack.
- Make the Herb Butter: In a medium bowl, combine the softened butter, chopped rosemary, chopped thyme, minced garlic, salt, and pepper. Mix well with a fork or spatula until all ingredients are evenly incorporated and the butter is fragrant with herbs and garlic. This herb butter is the flavor powerhouse of the recipe. Ensure the butter is softened enough to easily mix with the herbs and spices.
- Loosen Turkey Skin: Gently loosen the skin of the turkey from the breast meat and thighs. Carefully slide your fingers or a spatula under the skin, starting from the neck cavity and working your way down. Be careful not to tear the skin. Creating pockets under the skin allows you to insert the herb butter directly onto the meat, maximizing flavor infusion and keeping the meat moist during roasting.
- Apply Herb Butter: Take generous spoonfuls of the herb butter and insert it under the skin, directly onto the breast meat and thighs. Spread the butter evenly under the skin using your hands, ensuring it covers as much of the meat as possible. Massage any remaining herb butter all over the outside of the turkey skin. This exterior butter layer will contribute to the beautiful golden-brown color and crispy skin.
- Stuff the Cavity (Optional): Place one lemon half inside the turkey cavity. You can also add aromatics like onion wedges, garlic cloves, or additional sprigs of rosemary and thyme for extra flavor. Stuffing the cavity with aromatics infuses the turkey from the inside out, adding another layer of flavor complexity. Avoid tightly packing the cavity with stuffing (if using a bread stuffing recipe), as this can impede cooking and increase cooking time.
- Truss the Turkey (Optional): Truss the turkey legs together with kitchen twine. Trussing helps the turkey cook more evenly and maintains a compact shape for more attractive presentation. It’s not strictly necessary, but it can contribute to a more evenly cooked bird.
- Add Broth and Vegetables (Optional): Pour chicken or turkey broth into the bottom of the roasting pan. If using, scatter roughly chopped vegetables around the turkey in the roasting pan. The broth adds moisture to the oven environment, preventing the turkey from drying out, and the vegetables will roast in the pan drippings, becoming incredibly flavorful.
- Roast the Turkey: Place the roasting pan in the preheated oven. Roast for approximately 13 minutes per pound of turkey, or until a meat thermometer inserted into the thickest part of the thigh (without touching bone) registers 165°F (74°C). Roasting time is an estimate and can vary depending on your oven and the size of the turkey. Always rely on a meat thermometer for accurate doneness.
- Baste (Optional but Recommended): Baste the turkey with pan drippings every 30-45 minutes during roasting. Basting helps to keep the turkey moist and promotes even browning. Use a bulb baster or spoon to collect the pan drippings and drizzle them over the turkey skin.
- Check for Doneness: Start checking the turkey for doneness about 30 minutes before the estimated roasting time is up. Insert a meat thermometer into the thickest part of the thigh, avoiding the bone. The turkey is done when the thermometer reads 165°F (74°C). Also, juices should run clear when you pierce the thigh with a fork.
- Rest the Turkey: Once the turkey is cooked, remove it from the oven and transfer it to a cutting board. Tent it loosely with aluminum foil and let it rest for at least 20-30 minutes before carving. Resting is crucial for allowing the juices to redistribute throughout the meat, resulting in a more moist and tender turkey. During resting, the internal temperature of the turkey will continue to rise slightly (carryover cooking).
- Carve and Serve: After resting, carve the turkey and serve immediately. Carve against the grain for the most tender slices. Serve with your favorite side dishes and pan gravy (if desired, made from the pan drippings).
Tips for Perfect Roasting:
- Thaw Turkey Completely: Ensure your turkey is fully thawed before roasting for even cooking.
- Don’t Overcrowd the Pan: Make sure there is enough space around the turkey in the roasting pan for air to circulate.
- Use a Meat Thermometer: Rely on a meat thermometer to ensure the turkey is cooked to a safe internal temperature.
- Rest the Turkey: Don’t skip the resting step; it’s essential for a juicy and tender turkey.
Nutrition Facts
(Please note that these are approximate values and can vary based on the specific turkey, ingredients, and serving size.)
- Servings: Approximately 12-16 servings (depending on turkey size and serving portions)
- Calories per Serving (estimated): 450-550 calories
Approximate Nutritional Breakdown per Serving (estimated):
- Protein: 50-60g
- Fat: 25-35g
- Saturated Fat: 15-20g
Disclaimer: These nutritional values are estimates and for informational purposes only. Actual values may vary. For precise nutritional information, use a nutrition calculator with the specific brands and quantities of ingredients used.
Preparation Time
- Prep Time: 30-40 minutes (includes making herb butter, prepping turkey, and preheating oven)
- Cook Time: Approximately 2.5-3.5 hours (depending on turkey size, approximately 13 minutes per pound)
- Resting Time: 20-30 minutes
- Total Time (Approximate): 3 hours 20 minutes – 4 hours 40 minutes
Important Note: Thawing time for a frozen turkey is not included in the preparation time. Thawing in the refrigerator can take several days, depending on the size of the turkey. Plan accordingly.
How to Serve
This Buttered Herb Roasted Turkey is incredibly versatile and pairs well with a wide array of classic and contemporary side dishes. Here are some serving suggestions to create a memorable meal:
- Classic Holiday Sides:
- Mashed Potatoes: Creamy mashed potatoes are a must-have, perfect for soaking up the delicious pan gravy.
- Stuffing or Dressing: Choose your favorite stuffing recipe – bread-based, cornbread, or sausage stuffing all complement turkey beautifully.
- Cranberry Sauce: Sweet and tart cranberry sauce provides a wonderful contrast to the savory turkey. Homemade or high-quality store-bought cranberry sauce both work well.
- Green Bean Casserole: A traditional holiday favorite, green bean casserole adds a creamy and comforting element to the meal.
- Sweet Potato Casserole: The sweetness of sweet potato casserole balances the savory flavors of the turkey and other sides.
- Dinner Rolls or Biscuits: Warm, soft rolls or biscuits are perfect for mopping up gravy and enjoying with butter.
- Vegetable Sides:
- Roasted Root Vegetables: Carrots, parsnips, potatoes, and sweet potatoes roasted alongside the turkey or separately are delicious and complement the herb flavors.
- Brussels Sprouts: Roasted or sautéed Brussels sprouts, perhaps with bacon or balsamic glaze, offer a slightly bitter and nutty counterpoint.
- Asparagus: Grilled or roasted asparagus provides a fresh and light side dish.
- Salad: A fresh green salad with a vinaigrette dressing can cleanse the palate and balance the richness of the meal.
- Gravy and Sauces:
- Pan Gravy: Definitely make gravy from the pan drippings! It’s incredibly flavorful and enhances the turkey.
- Au Jus: For a lighter sauce option, you can create a simple au jus from the pan drippings.
- Leftovers:
- Turkey Sandwiches: Classic turkey sandwiches are a must for leftovers!
- Turkey Soup: Use the leftover turkey carcass to make a flavorful and comforting turkey soup.
- Turkey Pot Pie: Transform leftover turkey into a hearty and delicious pot pie.
- Turkey Salad: Make turkey salad for sandwiches or to serve on crackers or lettuce wraps.
Presentation Tips:
- Garnish: Garnish the platter with fresh rosemary and thyme sprigs, orange slices, or cranberries for a festive touch.
- Carving Station: If serving a large crowd, set up a carving station so guests can serve themselves.
- Warm Platters: Keep serving platters warm to keep the turkey and side dishes at optimal temperature.
Additional Tips for the Best Buttered Herb Roasted Turkey
To truly master this Buttered Herb Roasted Turkey recipe and achieve consistently delicious results, consider these helpful tips:
- Brine Your Turkey for Extra Moisture: For an even juicier turkey, consider brining it before roasting. Brining involves soaking the turkey in a salt and sugar solution (often with added aromatics) for several hours or overnight. This process helps the turkey retain moisture during cooking, resulting in incredibly tender and flavorful meat. There are many brine recipes available online – choose one that suits your taste. Remember to rinse the turkey thoroughly after brining and pat it very dry before proceeding with the herb butter and roasting steps.
- Dry Brining for Crispy Skin and Flavor: If you prefer crispy skin but still want enhanced flavor and moisture retention, try dry brining. Dry brining involves rubbing the turkey with salt and allowing it to sit uncovered in the refrigerator for 12-24 hours. This method draws out moisture from the skin, which then evaporates in the dry refrigerator air, leading to crispier skin when roasted. The salt also penetrates the meat, seasoning it from the inside out. You can incorporate herbs and spices into your dry brine mixture for added flavor.
- Use a Meat Thermometer – It’s Non-Negotiable: Investing in a reliable meat thermometer is crucial for roasting turkey (or any meat) perfectly. Don’t rely solely on cooking time estimates, as oven temperatures can vary and turkey sizes differ. A meat thermometer ensures you cook the turkey to a safe internal temperature of 165°F (74°C) without overcooking and drying it out. Insert the thermometer into the thickest part of the thigh, avoiding the bone, to get an accurate reading.
- Let the Butter Come to Room Temperature (But Not Too Soft): Softened butter is essential for creating the herb butter mixture and for easy application under the turkey skin. However, avoid letting the butter become too soft or melted. It should be pliable but still hold its shape. If the butter is too soft, it will be difficult to work with and may melt too quickly under the skin during roasting. Take the butter out of the refrigerator about 30-45 minutes before you plan to make the herb butter to allow it to soften properly.
- Make-Ahead Herb Butter for Convenience: To save time on the day of roasting, you can make the herb butter mixture a day or two in advance. Simply combine the softened butter, herbs, garlic, salt, and pepper, mix well, and store it in an airtight container in the refrigerator. When you’re ready to roast the turkey, let the herb butter soften slightly at room temperature for about 15-20 minutes before using. This make-ahead tip can streamline your Thanksgiving or holiday meal preparation and reduce stress on the big day.
Frequently Asked Questions (FAQ)
Here are some common questions people have when making Buttered Herb Roasted Turkey:
Q1: Can I use dried herbs instead of fresh herbs?
A: While fresh herbs are highly recommended for the most vibrant and aromatic flavor, you can use dried herbs in a pinch. If using dried herbs, reduce the quantity to about one-third of the fresh amount, as dried herbs are more concentrated. For this recipe, you would use approximately 2 teaspoons each of dried rosemary and dried thyme. Keep in mind that the flavor profile will be slightly different, and fresh herbs will always provide a brighter and more pronounced taste.
Q2: How do I thaw a frozen turkey safely?
A: The safest way to thaw a frozen turkey is in the refrigerator. Allow approximately 24 hours of thawing time for every 5 pounds of turkey. For a 12-14 pound turkey, this means thawing for 3-3.5 days in the refrigerator. Place the turkey in its original packaging on a tray or in a pan to catch any drips. Ensure your refrigerator temperature is at 40°F (4°C) or below. Do not thaw a turkey at room temperature, as this can create a food safety risk. If you need to thaw a turkey more quickly, you can use the cold water method (submerge the turkey in its airtight packaging in cold water, changing the water every 30 minutes), but refrigerator thawing is the preferred and safest method.
Q3: What temperature should the turkey be cooked to?
A: The turkey should be cooked to an internal temperature of 165°F (74°C) as measured with a meat thermometer inserted into the thickest part of the thigh, without touching bone. This temperature ensures that the turkey is safe to eat and cooked through. The breast meat will typically reach a slightly higher temperature, around 170°F (77°C), but it’s essential to focus on the thigh temperature for doneness.
Q4: How long should I rest the turkey after roasting?
A: Resting the turkey is a crucial step for achieving a moist and tender result. Let the turkey rest for at least 20-30 minutes after removing it from the oven. Tent it loosely with aluminum foil during resting to keep it warm. Resting allows the juices to redistribute throughout the meat, preventing them from running out when you carve, resulting in a more flavorful and succulent turkey. Don’t skip this step!
Q5: Can I make gravy from the pan drippings even if I didn’t add broth to the pan?
A: Yes, you can absolutely make gravy from the pan drippings even if you didn’t add broth to the roasting pan initially. The turkey itself will release juices as it roasts, which will combine with the melted butter and herb flavors in the pan. These drippings are the base for delicious gravy. If you didn’t add broth, you might have less liquid in the pan, so you may need to add a bit of chicken or turkey broth or water when making the gravy to achieve your desired consistency. Scraping up all the browned bits from the bottom of the pan (fond) will add even more flavor to your gravy.
Print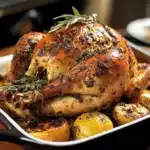
Buttered Herb Roasted Turkey Recipe
Ingredients
To create this masterpiece of a Buttered Herb Roasted Turkey, you’ll need a selection of fresh, high-quality ingredients. The combination of butter and herbs is what truly elevates this recipe, so don’t skimp on quality. Here’s what you’ll need to gather:
- Turkey: 1 (12-14 pound) whole turkey, thawed if frozen. Choosing the right turkey is the foundation of this dish. For a family gathering, a 12-14 pound turkey is ideal, providing ample servings and leftovers. Consider a fresh, high-quality turkey if possible, as they tend to have better flavor and moisture retention compared to frozen birds. If using a frozen turkey, ensure it is completely thawed before you begin – this can take several days in the refrigerator, so plan ahead.
- Unsalted Butter: 1 cup (2 sticks), softened. Butter is the star of this recipe, contributing richness, flavor, and that gorgeous golden-brown skin. Unsalted butter allows you to control the saltiness of the dish, and softening it is crucial for creating the herb butter mixture and for easy application under the skin.
- Fresh Rosemary: 2 tablespoons, finely chopped. Rosemary brings a piney, slightly lemony aroma that complements turkey beautifully. Fresh rosemary is far superior to dried in this recipe, offering a brighter and more pronounced flavor. Finely chopping it ensures even distribution in the butter and optimal flavor release during roasting.
- Fresh Thyme: 2 tablespoons, finely chopped. Thyme adds an earthy, slightly minty note that balances the richness of the butter and the pungency of the garlic. Like rosemary, fresh thyme is essential for the best flavor. Finely chop it to maximize its aromatic contribution to the herb butter.
- Garlic: 6 cloves, minced. Garlic provides a pungent and savory base note to the herb butter, enhancing the overall flavor profile of the turkey. Freshly minced garlic is crucial for its robust flavor; avoid using pre-minced garlic as it often lacks the same intensity.
- Lemon: 1, halved. Lemon adds brightness and acidity, cutting through the richness of the butter and enhancing the other flavors. Halving the lemon allows you to insert one half into the cavity for internal flavoring and use the other half to squeeze over the turkey for added zest and to help with browning.
- Salt: 2 tablespoons, plus more to taste. Salt is essential for seasoning the turkey and bringing out its natural flavors. Use kosher salt or sea salt for best results. The amount may need to be adjusted based on the size of your turkey and personal preference.
- Black Pepper: 1 tablespoon, freshly ground, plus more to taste. Freshly ground black pepper provides a pungent and aromatic counterpoint to the salt and herbs. Grind it just before using for the most intense flavor.
- Optional: Chicken or Turkey Broth: 1 cup. Broth is optional but highly recommended for adding moisture to the roasting pan and creating flavorful pan drippings for gravy. Use low-sodium broth to control the salt level.
- Optional: Vegetables for Roasting Pan (Onions, Carrots, Celery): 2 cups, roughly chopped. Adding vegetables to the roasting pan is a fantastic way to infuse the pan drippings with even more flavor and create delicious roasted vegetables as a side dish. Onions, carrots, and celery are classic choices, but you can also include potatoes, parsnips, or other root vegetables.
Instructions
Roasting a turkey can seem daunting, but with this step-by-step guide, you’ll find it’s quite straightforward. The key is to follow each step carefully and pay attention to the details, especially regarding temperature and cooking time.
- Prepare the Turkey: If using a frozen turkey, ensure it is completely thawed. Remove the turkey from its packaging and remove the giblets and neck from the cavity. Pat the turkey dry inside and out with paper towels. This step is crucial for achieving crispy skin. Excess moisture will steam the skin instead of allowing it to brown and crisp.
- Preheat Oven and Prepare Roasting Pan: Preheat your oven to 325°F (160°C). This lower temperature ensures even cooking and prevents the turkey from drying out before it’s cooked through. Place a roasting rack inside a large roasting pan. The rack elevates the turkey, allowing hot air to circulate evenly around it for more consistent cooking and crispier skin on the bottom. If you don’t have a roasting rack, you can use roughly chopped vegetables (onions, carrots, celery) as a makeshift rack.
- Make the Herb Butter: In a medium bowl, combine the softened butter, chopped rosemary, chopped thyme, minced garlic, salt, and pepper. Mix well with a fork or spatula until all ingredients are evenly incorporated and the butter is fragrant with herbs and garlic. This herb butter is the flavor powerhouse of the recipe. Ensure the butter is softened enough to easily mix with the herbs and spices.
- Loosen Turkey Skin: Gently loosen the skin of the turkey from the breast meat and thighs. Carefully slide your fingers or a spatula under the skin, starting from the neck cavity and working your way down. Be careful not to tear the skin. Creating pockets under the skin allows you to insert the herb butter directly onto the meat, maximizing flavor infusion and keeping the meat moist during roasting.
- Apply Herb Butter: Take generous spoonfuls of the herb butter and insert it under the skin, directly onto the breast meat and thighs. Spread the butter evenly under the skin using your hands, ensuring it covers as much of the meat as possible. Massage any remaining herb butter all over the outside of the turkey skin. This exterior butter layer will contribute to the beautiful golden-brown color and crispy skin.
- Stuff the Cavity (Optional): Place one lemon half inside the turkey cavity. You can also add aromatics like onion wedges, garlic cloves, or additional sprigs of rosemary and thyme for extra flavor. Stuffing the cavity with aromatics infuses the turkey from the inside out, adding another layer of flavor complexity. Avoid tightly packing the cavity with stuffing (if using a bread stuffing recipe), as this can impede cooking and increase cooking time.
- Truss the Turkey (Optional): Truss the turkey legs together with kitchen twine. Trussing helps the turkey cook more evenly and maintains a compact shape for more attractive presentation. It’s not strictly necessary, but it can contribute to a more evenly cooked bird.
- Add Broth and Vegetables (Optional): Pour chicken or turkey broth into the bottom of the roasting pan. If using, scatter roughly chopped vegetables around the turkey in the roasting pan. The broth adds moisture to the oven environment, preventing the turkey from drying out, and the vegetables will roast in the pan drippings, becoming incredibly flavorful.
- Roast the Turkey: Place the roasting pan in the preheated oven. Roast for approximately 13 minutes per pound of turkey, or until a meat thermometer inserted into the thickest part of the thigh (without touching bone) registers 165°F (74°C). Roasting time is an estimate and can vary depending on your oven and the size of the turkey. Always rely on a meat thermometer for accurate doneness.
- Baste (Optional but Recommended): Baste the turkey with pan drippings every 30-45 minutes during roasting. Basting helps to keep the turkey moist and promotes even browning. Use a bulb baster or spoon to collect the pan drippings and drizzle them over the turkey skin.
- Check for Doneness: Start checking the turkey for doneness about 30 minutes before the estimated roasting time is up. Insert a meat thermometer into the thickest part of the thigh, avoiding the bone. The turkey is done when the thermometer reads 165°F (74°C). Also, juices should run clear when you pierce the thigh with a fork.
- Rest the Turkey: Once the turkey is cooked, remove it from the oven and transfer it to a cutting board. Tent it loosely with aluminum foil and let it rest for at least 20-30 minutes before carving. Resting is crucial for allowing the juices to redistribute throughout the meat, resulting in a more moist and tender turkey. During resting, the internal temperature of the turkey will continue to rise slightly (carryover cooking).
- Carve and Serve: After resting, carve the turkey and serve immediately. Carve against the grain for the most tender slices. Serve with your favorite side dishes and pan gravy (if desired, made from the pan drippings).
Nutrition
- Serving Size: one normal portion
- Calories: 550
- Fat: 35g
- Saturated Fat: 20g
- Protein: 60g


