


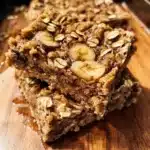
Our household has a constant battle: finding snacks that are both healthy and genuinely delicious, especially ones that appeal to everyone from the discerning toddler to the health-conscious adult. These Baked Banana Oat Bars? They’re the reigning champions. The first time I made them, the aroma alone was enough to draw everyone to the kitchen – a warm, comforting scent of baked bananas and cinnamon that promised a delicious treat. My kids, usually a tough crowd for “healthy” baked goods, devoured these bars, asking for seconds before the first batch had even fully cooled. I felt a surge of parental victory! They’ve become our go-to for hectic weekday mornings when a sit-down breakfast isn’t feasible, a perfect accompaniment to a mid-morning coffee, and an ideal after-school snack that doesn’t come with a sugar crash. What I love most is their versatility; they’re satisfyingly simple as is, but also a fantastic canvas for various add-ins like chocolate chips (a kid-favorite, naturally) or crunchy walnuts for the adults. They’re wonderfully moist, chewy, and packed with the natural sweetness of ripe bananas, making them a guilt-free pleasure we can all enjoy. This recipe isn’t just about a tasty treat; it’s about creating something nourishing and delightful that brings a little bit of homemade joy into our busy lives.
Ingredients
Here’s what you’ll need to create these delightful baked banana oat bars. Each ingredient plays a crucial role in achieving the perfect texture and flavor.
- 3 large (or 4 medium) Very Ripe Bananas: The riper, the sweeter and easier to mash. Look for bananas with plenty of brown spots; these are key for natural sweetness and moisture. (Approx. 1 ½ to 2 cups mashed)
- 2 cups Rolled Oats (Old-Fashioned Oats): These provide the best chewy texture. Avoid instant oats as they can make the bars mushy, and steel-cut oats won’t cook properly in this timeframe.
- ¼ cup Maple Syrup or Honey: For added sweetness. You can adjust this to your preference, especially depending on the ripeness of your bananas. For a vegan option, stick with maple syrup.
- ¼ cup Unsweetened Applesauce or Melted Coconut Oil/Butter: Applesauce keeps them lower in fat and wonderfully moist. Melted coconut oil or butter will add a richer flavor.
- 1 large Egg (or 1 Flax Egg for vegan): Acts as a binder to hold the bars together. To make a flax egg, mix 1 tablespoon of ground flaxseed with 3 tablespoons of water and let it sit for 5-10 minutes to thicken.
- 1 teaspoon Vanilla Extract: Enhances all the other flavors in the bars. Pure vanilla extract is recommended for the best taste.
- 1 teaspoon Ground Cinnamon: Adds warmth and a classic pairing with banana and oats. Feel free to add a pinch of nutmeg or cardamom too.
- ½ teaspoon Baking Soda: Helps the bars to rise slightly and achieve a lighter texture.
- ¼ teaspoon Salt: Balances the sweetness and brings out the flavors.
- Optional Add-ins (up to ¾ cup total):
- ½ cup Chocolate Chips (dairy-free for vegan): Semi-sweet, milk, or dark chocolate chips all work wonderfully.
- ½ cup Chopped Nuts (walnuts, pecans): Adds a lovely crunch and healthy fats.
- ½ cup Dried Fruit (raisins, cranberries, chopped dates): Provides extra sweetness and chewiness.
- 2 tablespoons Chia Seeds or Hemp Seeds: For an extra nutritional boost.
Instructions
Follow these simple steps to bake a batch of delicious and wholesome banana oat bars. This recipe is designed to be straightforward and rewarding!
- Preheat and Prepare: Preheat your oven to 350°F (175°C). Grease and lightly flour an 8×8 inch (20×20 cm) square baking pan, or line it with parchment paper, leaving an overhang on two sides to easily lift the bars out later. This overhang trick is a real timesaver for clean removal.
- Mash the Bananas: In a large mixing bowl, peel the ripe bananas and mash them thoroughly with a fork or a potato masher until mostly smooth. A few small lumps are perfectly fine and add to the texture.
- Combine Wet Ingredients: To the mashed bananas, add the maple syrup (or honey), unsweetened applesauce (or melted coconut oil/butter), egg (or prepared flax egg), and vanilla extract. Whisk everything together until well combined and the mixture is smooth.
- Combine Dry Ingredients: In a separate medium-sized bowl, whisk together the rolled oats, ground cinnamon, baking soda, and salt. Make sure the baking soda is evenly distributed to avoid any bitter spots.
- Mix Wet and Dry: Pour the wet banana mixture into the bowl with the dry oat mixture. Stir with a spatula or wooden spoon until just combined. Be careful not to overmix; overmixing can lead to tougher bars.
- Fold in Add-ins (Optional): If using, gently fold in your chosen add-ins like chocolate chips, chopped nuts, or dried fruit. Distribute them evenly throughout the batter.
- Transfer to Pan: Pour the batter into your prepared baking pan. Spread it evenly with the back of a spoon or an offset spatula, ensuring it reaches all corners and has a relatively level surface.
- Bake: Place the pan in the preheated oven and bake for 25-30 minutes. The bars are done when they are golden brown around the edges, firm to the touch, and a toothpick inserted into the center comes out clean (or with a few moist crumbs, but no wet batter).
- Cool Completely: Once baked, remove the pan from the oven and place it on a wire cooling rack. Let the bars cool completely in the pan for at least 30 minutes to an hour before attempting to cut them. Cooling is crucial as they firm up significantly during this time and will be much easier to slice neatly. If you try to cut them while too warm, they might crumble.
- Slice and Serve: Once cooled, if you used parchment paper, lift the bars out of the pan using the overhang. Place them on a cutting board and slice into squares or rectangles (e.g., 12 or 16 bars). Serve immediately or store for later.
Nutrition Facts
Understanding the nutritional profile can help you incorporate these bars into your balanced diet.
- Servings: This recipe yields approximately 12-16 bars, depending on how you slice them.
- Calories per serving (approximate for 1 of 12 bars): Around 130-180 calories, varying based on optional add-ins and choice of fat (applesauce vs. oil/butter).
- Key Nutrition Highlights:
- Dietary Fiber: Rich in fiber from oats and bananas, promoting digestive health and providing a feeling of fullness, which can help with weight management.
- Potassium: Bananas are a great source of potassium, an essential mineral for maintaining healthy blood pressure, heart function, and fluid balance.
- Complex Carbohydrates: Oats provide slow-releasing carbohydrates, offering sustained energy throughout your morning or afternoon, rather than a quick sugar spike and crash.
- Manganese: Oats are a good source of manganese, an important trace mineral involved in bone formation, metabolism, and antioxidant defense.
- Whole Grains: Made with whole grain rolled oats, these bars contribute to your daily whole grain intake, which is linked to a reduced risk of chronic diseases.
Disclaimer: Nutritional information is an estimate and can vary based on specific ingredients and portion sizes used.
Preparation Time
Knowing the time commitment helps you plan when to bake these tasty treats.
- Total Time: Approximately 40-50 minutes
- Prep Time: 10-15 minutes. This includes gathering your ingredients, mashing the bananas, mixing the batter, and preparing the baking pan. If you’re quick, you might even do it in 10!
- Cook Time: 25-30 minutes. This is the active baking time in the oven until the bars are golden brown and cooked through.
- Cooling Time (Important!): Allow at least 30 minutes to 1 hour for the bars to cool completely before slicing. This isn’t active work time, but it’s crucial for the bars to set properly.
How to Serve
These Baked Banana Oat Bars are incredibly versatile. Here are some delightful ways to enjoy them:
- As a Quick Breakfast:
- Grab one on your way out the door for a speedy and nourishing start to your day.
- Serve alongside a cup of coffee, tea, or a glass of milk (dairy or plant-based).
- Pair with a small bowl of Greek yogurt or cottage cheese for added protein.
- Crumble a bar over a smoothie bowl for extra texture and flavor.
- For a Healthy Snack:
- Perfect for a mid-morning or mid-afternoon pick-me-up to curb hunger pangs.
- Pack them in lunchboxes for kids (and adults!).
- An excellent pre-workout or post-workout snack to fuel your energy levels.
- As a Light Dessert:
- Warm a bar slightly in the microwave (about 10-15 seconds) for a comforting treat.
- Drizzle with a little extra honey, maple syrup, or a thin layer of nut butter (peanut, almond).
- Serve with a small scoop of vanilla ice cream or frozen yogurt for a more indulgent dessert.
- Top with fresh berries or sliced banana for added freshness.
- For Gatherings:
- Arrange them on a platter for potlucks, brunches, or casual get-togethers.
- They are great for bake sales or as a homemade gift.
Additional Tips
Elevate your baked banana oat bar game with these handy tips and tricks!
- The Ripest Bananas are Best: Don’t shy away from those very brown, almost overripe bananas. They are significantly sweeter, meaning you might even be able to reduce the added sweetener slightly, and they mash much more easily, contributing to a moister bar.
- Oat Selection Matters: For the chewiest, most satisfying texture, stick with rolled oats (old-fashioned). Quick oats can be used in a pinch, but they absorb liquid differently and may result in a slightly softer, more cake-like texture. Steel-cut oats are not suitable for this recipe as they require much longer cooking times.
- Customize Your Sweetness: The amount of maple syrup or honey can be adjusted. If your bananas are super ripe or you prefer a less sweet bar, try reducing the sweetener by a tablespoon or two. You can also experiment with date paste or agave nectar.
- Spice it Up: While cinnamon is classic, don’t be afraid to experiment with other warm spices. A pinch of nutmeg, allspice, cardamom, or even a tiny bit of ground ginger can add wonderful complexity. Pumpkin pie spice blend also works beautifully.
- Don’t Overbake: Overbaking is the primary culprit for dry oat bars. Keep an eye on them and pull them out once the edges are golden and a toothpick comes out clean or with just a few moist crumbs. They will continue to firm up as they cool.
- Parchment Paper Power: Using parchment paper with an overhang not only prevents sticking but makes cleanup a breeze and allows you to lift the entire block of bars out for easy, neat slicing on a cutting board.
- Cool Completely for Clean Cuts: This cannot be stressed enough! Warm bars are fragile and will crumble if you try to slice them. Patience during the cooling stage will reward you with perfectly shaped bars. If you’re in a hurry, you can speed up cooling by placing the pan (once it’s no longer hot) in the refrigerator for about 20-30 minutes.
- Storage Solutions: Store cooled bars in an airtight container at room temperature for up to 3 days, or in the refrigerator for up to a week for longer freshness. For longer-term storage, they freeze beautifully.
FAQ Section
Got questions? We’ve got answers to help you perfect your Baked Banana Oat Bars.
- Q: Can I use unripe or less ripe bananas for this recipe?
A: It’s not recommended. Unripe bananas are less sweet, harder to mash, and won’t provide the same level of moisture or banana flavor. The riper the banana (think lots of brown spots), the better the results. - Q: Are these baked banana oat bars gluten-free?
A: They can be made gluten-free if you use certified gluten-free rolled oats. Oats are naturally gluten-free but are often processed in facilities that also handle wheat, so cross-contamination can be an issue for those with celiac disease or severe gluten sensitivity. - Q: How long do these baked banana oat bars last?
A: Stored in an airtight container, they will last for about 2-3 days at room temperature. If you refrigerate them, they can last up to a week. For optimal texture, bring refrigerated bars to room temperature or warm them slightly before eating. - Q: Can I freeze these oat bars?
A: Yes, they freeze very well! Once completely cooled and sliced, wrap individual bars tightly in plastic wrap or aluminum foil, then place them in a freezer-safe bag or container. They can be frozen for up to 3 months. Thaw at room temperature or microwave briefly. - Q: How can I make these bars vegan?
A: Easily! Use maple syrup instead of honey. For the egg, substitute with a “flax egg” (1 tablespoon ground flaxseed mixed with 3 tablespoons water, let sit for 5-10 minutes to thicken) or use an additional ¼ cup of unsweetened applesauce or mashed banana. Ensure any chocolate chips used are dairy-free. - Q: What kind of oats are best for this recipe? Can I use instant oats?
A: Rolled oats (old-fashioned oats) are highly recommended for the best chewy texture. Quick oats can be used, but the texture will be softer and less defined. Do not use steel-cut oats, as they require a different cooking method and much longer cooking time. - Q: Can I reduce the amount of sweetener in the recipe?
A: Absolutely. If your bananas are very ripe and sweet, or if you simply prefer a less sweet bar, you can reduce the maple syrup or honey. Try cutting it by 1-2 tablespoons to start. You can also omit it entirely if your bananas are exceptionally sweet and you’re aiming for no added sugar. - Q: My bars turned out a bit dry or too crumbly. What might have gone wrong?
A: Several factors could contribute:- Overbaking: Baking for too long is a common cause of dryness.
- Too many dry ingredients / Not enough wet ingredients: Ensure accurate measurements, especially for the mashed banana (aim for 1.5 to 2 cups).
- Type of oats: Instant oats might absorb more liquid, potentially leading to a drier result if not adjusted.
- Cooling: Cutting them while still warm can cause them to crumble. They need time to set.
- Overmixing: Mixing the batter too much can develop gluten (if using regular oats) and lead to a tougher, sometimes drier bar. Mix until just combined.
Baked Banana Oat Bars
Ingredients
Here’s what you’ll need to create these delightful baked banana oat bars. Each ingredient plays a crucial role in achieving the perfect texture and flavor.
- 3 large (or 4 medium) Very Ripe Bananas: The riper, the sweeter and easier to mash. Look for bananas with plenty of brown spots; these are key for natural sweetness and moisture. (Approx. 1 ½ to 2 cups mashed)
- 2 cups Rolled Oats (Old-Fashioned Oats): These provide the best chewy texture. Avoid instant oats as they can make the bars mushy, and steel-cut oats won’t cook properly in this timeframe.
- ¼ cup Maple Syrup or Honey: For added sweetness. You can adjust this to your preference, especially depending on the ripeness of your bananas. For a vegan option, stick with maple syrup.
- ¼ cup Unsweetened Applesauce or Melted Coconut Oil/Butter: Applesauce keeps them lower in fat and wonderfully moist. Melted coconut oil or butter will add a richer flavor.
- 1 large Egg (or 1 Flax Egg for vegan): Acts as a binder to hold the bars together. To make a flax egg, mix 1 tablespoon of ground flaxseed with 3 tablespoons of water and let it sit for 5–10 minutes to thicken.
- 1 teaspoon Vanilla Extract: Enhances all the other flavors in the bars. Pure vanilla extract is recommended for the best taste.
- 1 teaspoon Ground Cinnamon: Adds warmth and a classic pairing with banana and oats. Feel free to add a pinch of nutmeg or cardamom too.
- ½ teaspoon Baking Soda: Helps the bars to rise slightly and achieve a lighter texture.
- ¼ teaspoon Salt: Balances the sweetness and brings out the flavors.
- Optional Add-ins (up to ¾ cup total):
- ½ cup Chocolate Chips (dairy-free for vegan): Semi-sweet, milk, or dark chocolate chips all work wonderfully.
- ½ cup Chopped Nuts (walnuts, pecans): Adds a lovely crunch and healthy fats.
- ½ cup Dried Fruit (raisins, cranberries, chopped dates): Provides extra sweetness and chewiness.
- 2 tablespoons Chia Seeds or Hemp Seeds: For an extra nutritional boost.
Instructions
Follow these simple steps to bake a batch of delicious and wholesome banana oat bars. This recipe is designed to be straightforward and rewarding!
- Preheat and Prepare: Preheat your oven to 350°F (175°C). Grease and lightly flour an 8×8 inch (20×20 cm) square baking pan, or line it with parchment paper, leaving an overhang on two sides to easily lift the bars out later. This overhang trick is a real timesaver for clean removal.
- Mash the Bananas: In a large mixing bowl, peel the ripe bananas and mash them thoroughly with a fork or a potato masher until mostly smooth. A few small lumps are perfectly fine and add to the texture.
- Combine Wet Ingredients: To the mashed bananas, add the maple syrup (or honey), unsweetened applesauce (or melted coconut oil/butter), egg (or prepared flax egg), and vanilla extract. Whisk everything together until well combined and the mixture is smooth.
- Combine Dry Ingredients: In a separate medium-sized bowl, whisk together the rolled oats, ground cinnamon, baking soda, and salt. Make sure the baking soda is evenly distributed to avoid any bitter spots.
- Mix Wet and Dry: Pour the wet banana mixture into the bowl with the dry oat mixture. Stir with a spatula or wooden spoon until just combined. Be careful not to overmix; overmixing can lead to tougher bars.
- Fold in Add-ins (Optional): If using, gently fold in your chosen add-ins like chocolate chips, chopped nuts, or dried fruit. Distribute them evenly throughout the batter.
- Transfer to Pan: Pour the batter into your prepared baking pan. Spread it evenly with the back of a spoon or an offset spatula, ensuring it reaches all corners and has a relatively level surface.
- Bake: Place the pan in the preheated oven and bake for 25-30 minutes. The bars are done when they are golden brown around the edges, firm to the touch, and a toothpick inserted into the center comes out clean (or with a few moist crumbs, but no wet batter).
- Cool Completely: Once baked, remove the pan from the oven and place it on a wire cooling rack. Let the bars cool completely in the pan for at least 30 minutes to an hour before attempting to cut them. Cooling is crucial as they firm up significantly during this time and will be much easier to slice neatly. If you try to cut them while too warm, they might crumble.
- Slice and Serve: Once cooled, if you used parchment paper, lift the bars out of the pan using the overhang. Place them on a cutting board and slice into squares or rectangles (e.g., 12 or 16 bars). Serve immediately or store for later.
Nutrition
- Serving Size: one normal portion
- Calories: 180


