
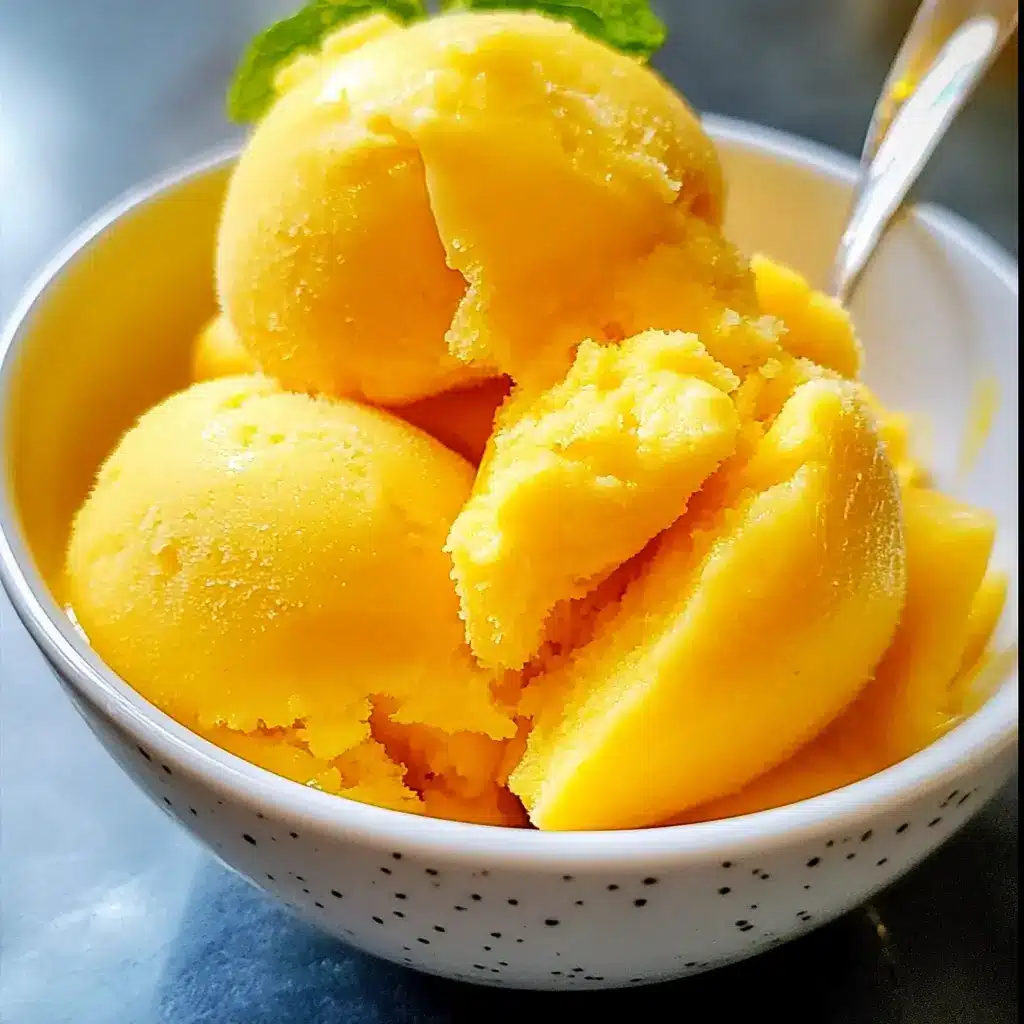

Of all the culinary adventures I’ve embarked on in my own kitchen, none bring a smile to my family’s faces quite like this sweet mango sorbet. I still remember the first time I perfected the recipe. It was a sweltering July afternoon, the kind where the air feels thick and heavy. We’d cancelled our plans for the park, and the kids were getting restless. Rummaging through the fridge, I found a pile of perfectly ripe, sun-kissed mangoes I’d bought from the farmer’s market. An idea sparked. A few hours later, I presented them with scoops of the most vibrant, electric orange dessert they had ever seen. The silence that followed the first spoonful, quickly replaced by exclamations of “Wow!” and “This is the best thing ever!”, was my ultimate reward. This isn’t just a recipe; it’s a jar of liquid sunshine, a guaranteed mood-lifter. It’s the taste of a tropical vacation in a bowl, with a velvety smooth texture that melts on your tongue, leaving behind a pure, unadulterated mango flavor. It has become our go-to treat for summer birthdays, backyard barbecues, and those days when we just need a little something special. It’s incredibly simple, yet tastes profoundly luxurious. This is the recipe that proves you don’t need a long list of fancy ingredients or complicated techniques to create something truly magical.
Ingredients
- 4 cups Ripe Mango Chunks (from about 3-4 large mangoes): This is the heart and soul of your sorbet. Use fresh, intensely fragrant, and sweet mangoes for the best flavor. Varieties like Ataulfo (honey), Kent, or Keitt are fantastic choices as they are less fibrous and have a rich, buttery texture.
- ¾ cup Granulated Sugar: This does more than just sweeten; it’s crucial for the sorbet’s texture. Sugar lowers the freezing point of the mixture, preventing it from turning into a solid, icy block and ensuring it stays scoopable and smooth.
- ¾ cup Water: Used to create a simple syrup with the sugar, which dissolves the sugar crystals completely and integrates them seamlessly into the mango puree for a non-gritty texture.
- 2 tablespoons Fresh Lime Juice: This is the secret weapon. A small amount of acidity doesn’t make the sorbet taste like lime; instead, it brightens and intensifies the mango flavor, cutting through the sweetness and making the overall taste more vibrant and balanced.
- Pinch of Salt: Just a tiny pinch enhances all the other flavors. It makes the sweet sweeter and the mango more mango-ey, rounding out the flavor profile beautifully.
Instructions
This recipe can be made with or without an ice cream maker. The ice cream maker method is faster and yields a creamier result with less effort, but the no-churn method is just as delicious with a little patience!
Step 1: Prepare the Simple Syrup
In a small saucepan, combine the ¾ cup of sugar and ¾ cup of water. Place the saucepan over medium heat. Stir constantly until the sugar has completely dissolved. You don’t need to bring it to a rolling boil; just heat it enough for the sugar to disappear into the water, creating a clear syrup. Once dissolved, remove the saucepan from the heat and set it aside to cool down completely. This step is vital because adding hot syrup to cold fruit can affect the final texture.
Step 2: Prepare the Mango Puree
While the syrup is cooling, prepare your mangoes. Wash, peel, and chop the mango flesh, discarding the pit and skin. You should have approximately 4 cups of mango chunks. Place these chunks into the jar of a high-powered blender or a food processor. Add the 2 tablespoons of fresh lime juice and the pinch of salt.
Step 3: Blend to Perfection
Pour the completely cooled simple syrup into the blender with the mango chunks. Blend everything on high speed for 1-2 minutes, or until the mixture is completely silky smooth. There should be absolutely no lumps or fibrous bits remaining. Scrape down the sides of the blender a few times to ensure everything is incorporated. The resulting puree should be vibrant, fragrant, and lusciously smooth.
Step 4: Chill the Mixture
This is a non-negotiable step for achieving the creamiest sorbet. Pour the mango puree into a bowl or airtight container, cover it, and place it in the refrigerator to chill for at least 2 hours, but preferably 4 hours or even overnight. A thoroughly cold base will freeze faster and more evenly in the next step, resulting in smaller ice crystals and a much smoother, creamier final product.
Step 5-A: Churning the Sorbet (Ice Cream Maker Method)
If you are using an ice cream maker, make sure the freezer bowl has been frozen according to the manufacturer’s instructions (usually for at least 24 hours). Once the mango base is thoroughly chilled, pour it into the frozen bowl of your ice cream maker. Churn for 20-30 minutes, or until it has thickened to the consistency of a very thick, soft-serve ice cream.
Step 5-B: Freezing the Sorbet (No-Churn Method)
If you don’t have an ice cream maker, pour the chilled mango base into a shallow, freezer-safe container (a metal loaf pan or brownie pan works great as metal gets colder faster). Cover it tightly with a lid or plastic wrap. Place it in the freezer. After 45 minutes, remove the container from the freezer. The edges will have started to freeze. Use a fork or a small whisk to vigorously stir the mixture, breaking up any ice crystals and scraping the frozen parts from the sides into the slushy center. Return it to the freezer. Repeat this process of removing and stirring vigorously every 30-45 minutes for the next 3-4 hours. This manual stirring mimics the churning of an ice cream maker, breaking down large ice crystals and incorporating air, which is key to a smooth texture.
Step 6: The Final Freeze (Ripening)
Whether you used an ice cream maker or the no-churn method, the sorbet now needs to “ripen” to achieve a firm, scoopable consistency. Transfer the sorbet from the ice cream maker bowl (or the shallow pan from the no-churn method) into a freezer-safe, airtight container. Press a piece of parchment paper or plastic wrap directly onto the surface of the sorbet to prevent ice crystals from forming on top. Seal the container and place it in the back of your freezer for at least 4-6 hours, or until firm.
Nutrition Facts
- Servings: This recipe makes approximately 1 quart (about 8 servings).
- Calories per Serving: Approximately 150-170 kcal.
- Vitamin C: Mangoes are an excellent source of this powerful antioxidant, which supports a healthy immune system and skin health. One serving provides a significant portion of your daily requirement.
- Natural Sugars & Fiber: The majority of the sweetness and calories come from the mangoes themselves, which also provide dietary fiber. Fiber aids in digestion and helps to moderate the absorption of sugar.
- Low in Fat: This sorbet is naturally fat-free, making it a lighter alternative to traditional ice cream.
Preparation Time
- Active Time: 20 minutes. This includes making the simple syrup, and peeling, chopping, and blending the mangoes.
- Inactive Chilling & Freezing Time: 6-8 hours. This includes the initial 2-hour chill of the puree, followed by the 4-6 hour final freeze (or the intermittent freezing and stirring for the no-churn method). Proper planning is key, as most of the time is hands-off.
How to Serve
Transform your simple scoop of mango sorbet into a show-stopping dessert with these serving suggestions:
- The Purist: Serve it simply as is, in a chilled bowl or cone. This allows the intense, pure mango flavor to be the star of the show. Let it soften on the counter for 5-10 minutes before scooping for the perfect texture.
- Garnished and Glamorous: Elevate your scoops with beautiful and flavorful garnishes.
- Fresh Mint Sprigs: The cool aroma and flavor of mint provide a refreshing contrast to the sweet mango.
- Lime Zest or Wedges: A little extra lime zest sprinkled on top adds a pop of color and a burst of citrus aroma that enhances the mango.
- Toasted Coconut Flakes: This adds a delightful crunch and a complementary tropical flavor.
- Small Dice of Fresh Mango: Reinforce the star ingredient with a textural contrast.
- Tropical Sorbet Float: Place a generous scoop of mango sorbet in a tall glass and pour over a sparkling beverage.
- Sparkling Water or Club Soda: For a simple, refreshing, and less sweet option.
- Prosecco or Champagne: Creates an elegant and festive adult dessert cocktail.
- Ginger Ale or Lemon-Lime Soda: Adds an extra layer of flavor and sweetness.
- Dessert Pairing Partner: Use the sorbet as a vibrant accompaniment to other desserts. A scoop alongside a slice of rich, buttery pound cake, a dense chocolate brownie, or a light angel food cake creates a wonderful temperature and flavor contrast. It’s also a classic pairing for Thai coconut sticky rice.
- Mango Sorbet Parfait: Layer the sorbet in a clear glass with other ingredients for a beautiful and delicious parfait. Alternate layers of mango sorbet with:
- Greek yogurt or coconut yogurt.
- Crunchy granola.
- Fresh berries like raspberries or blueberries.
Additional Tips
- Choose the Ripest Mangoes: The quality of your sorbet is directly tied to the quality of your mangoes. Look for mangoes that yield slightly to gentle pressure and have a strong, sweet, fruity fragrance at the stem. Avoid hard, underripe mangoes, as they lack sweetness and flavor, and overly stringy varieties, which can be difficult to blend smooth.
- Don’t Skip the Simple Syrup: It might be tempting to just blend sugar with the mango, but creating a simple syrup first is crucial. It ensures the sugar is fully dissolved, preventing a grainy texture in your finished sorbet. A smooth base is the foundation of a smooth sorbet.
- The Magic of Invert Sugar (or a Splash of Alcohol): For an even creamier, less icy sorbet, you can add 1-2 tablespoons of corn syrup, glucose syrup, or honey along with the sugar. These are “invert sugars” that are even better at inhibiting ice crystallization. Alternatively, adding 1 tablespoon of a neutral spirit like vodka or a complementary liqueur like Grand Marnier will lower the freezing point further, resulting in a softer, more scoopable sorbet (this is for adults only, of course!).
- The Colder, The Better: We can’t stress this enough: make sure your sorbet base is ice-cold before it goes into the ice cream maker or the freezer for the no-churn method. A cold base freezes faster, and faster freezing means smaller ice crystals. Smaller ice crystals mean a creamier, less icy sorbet. Don’t rush the chilling step.
- Achieve Ultimate Smoothness: A high-powered blender is your best friend for this recipe. If you find your mangoes are a bit fibrous even after blending, take the extra step of pushing the puree through a fine-mesh sieve before chilling. This will remove any lingering fibers and guarantee a silky-smooth mouthfeel.
- Proper Storage is Key: To prevent your homemade sorbet from becoming a block of ice after a day or two, storage is critical. Store it in a shallow, airtight container. Pressing plastic wrap or parchment paper directly against the surface of the sorbet before sealing the lid minimizes contact with air and prevents ice crystals from forming on top.
- Adjust Sweetness to Your Fruit: The amount of sugar in the recipe is a guideline. If your mangoes are exceptionally sweet, you might be able to reduce the sugar slightly (perhaps to ⅔ cup). If they are a bit tart, you might need the full ¾ cup or even a touch more. Taste the puree before you chill it. It should taste slightly sweeter than you want the final sorbet to be, as freezing dulls sweetness.
- Experiment with Flavor Infusions: Use this recipe as a base for experimentation. You can infuse your simple syrup with other flavors while it heats. Try adding a stalk of lemongrass, a few slices of fresh ginger, a cinnamon stick, or a star anise. Just be sure to strain the syrup before you cool it to remove the solids. You can also blend in a handful of fresh basil or mint leaves with the mango for an herbaceous twist.
Frequently Asked Questions (FAQ)
1. Why is my homemade sorbet icy instead of creamy?
Icy sorbet is almost always caused by the formation of large ice crystals. The two main culprits are an imbalanced sugar-to-water ratio and the freezing process itself. If there’s not enough sugar, the water in the fruit freezes too hard. If the mixture isn’t chilled enough before churning, or if the no-churn method isn’t stirred frequently enough, large ice crystals have time to form. Following this recipe’s ratios and chilling/churning steps carefully will give you the best defense against iciness.
2. Can I use frozen mango chunks instead of fresh ones?
Yes, you absolutely can! Using frozen mango is a great shortcut. Let the frozen chunks thaw for about 15-20 minutes at room temperature so they are soft enough to blend easily but still very cold. You can then blend them with the cooled simple syrup and other ingredients. Since the base will already be very cold, you may be able to shorten the initial chilling time in the refrigerator to about 1 hour before churning.
3. Do I really need an ice cream maker to make good sorbet?
No, you don’t! An ice cream maker makes the process easier and often yields a slightly creamier result because of the constant, even churning. However, the no-churn method described in the instructions is highly effective. The key is to be diligent about stirring the mixture every 30-45 minutes to manually break up ice crystals. It takes more hands-on time, but the delicious result is well worth it.
4. How long will my homemade mango sorbet last in the freezer?
For the best texture and flavor, homemade sorbet is best enjoyed within 1-2 weeks. After that, it’s still safe to eat, but it may begin to develop more ice crystals and lose some of its creamy texture, even with proper storage. Always store it in an airtight container in the coldest part of your freezer (usually the back).
5. Is this sweet mango sorbet recipe vegan and dairy-free?
Yes, it is! This recipe is naturally vegan, dairy-free, and gluten-free. It contains only fruit, sugar, water, lime, and salt, making it a wonderful dessert option for those with various dietary restrictions or preferences.
6. Can I reduce the amount of sugar to make it healthier?
You can reduce the sugar, but do so with caution. Sugar is not just for sweetness in sorbet; it’s a critical component for texture. It lowers the freezing point, keeping the sorbet soft and scoopable. If you reduce the sugar too much, your sorbet will freeze rock solid and be very icy. If you want to try, reduce it by no more than 2-3 tablespoons and consider adding 1 tablespoon of corn syrup to help with the texture.
7. What is the difference between sorbet, sherbet, and ice cream?
The main difference is dairy content. Sorbet is dairy-free, made from fruit puree/juice and sugar. Sherbet is like sorbet but contains a small amount of dairy (like milk or cream), making it slightly creamier. Ice cream has the highest dairy content, typically containing at least 10% milkfat from cream and often including eggs, which gives it its rich, creamy, and custard-like consistency.
8. Can I use this base recipe with other fruits?
Absolutely! This recipe is a fantastic template for other fruit sorbets. It works best with fruits that have a smooth, creamy texture and a good balance of sweetness and pectin when blended, such as peaches, strawberries, raspberries, or pineapple. You may need to adjust the sugar level depending on the natural sweetness of the fruit you choose. For berry sorbets, it’s highly recommended to strain the puree to remove the tiny seeds.

Sweet Mango Sorbet Recipe
Ingredients
- 4 cups Ripe Mango Chunks (from about 3-4 large mangoes): This is the heart and soul of your sorbet. Use fresh, intensely fragrant, and sweet mangoes for the best flavor. Varieties like Ataulfo (honey), Kent, or Keitt are fantastic choices as they are less fibrous and have a rich, buttery texture.
- ¾ cup Granulated Sugar: This does more than just sweeten; it’s crucial for the sorbet’s texture. Sugar lowers the freezing point of the mixture, preventing it from turning into a solid, icy block and ensuring it stays scoopable and smooth.
- ¾ cup Water: Used to create a simple syrup with the sugar, which dissolves the sugar crystals completely and integrates them seamlessly into the mango puree for a non-gritty texture.
- 2 tablespoons Fresh Lime Juice: This is the secret weapon. A small amount of acidity doesn’t make the sorbet taste like lime; instead, it brightens and intensifies the mango flavor, cutting through the sweetness and making the overall taste more vibrant and balanced.
- Pinch of Salt: Just a tiny pinch enhances all the other flavors. It makes the sweet sweeter and the mango more mango-ey, rounding out the flavor profile beautifully.
Instructions
This recipe can be made with or without an ice cream maker. The ice cream maker method is faster and yields a creamier result with less effort, but the no-churn method is just as delicious with a little patience!
Step 1: Prepare the Simple Syrup
In a small saucepan, combine the ¾ cup of sugar and ¾ cup of water. Place the saucepan over medium heat. Stir constantly until the sugar has completely dissolved. You don’t need to bring it to a rolling boil; just heat it enough for the sugar to disappear into the water, creating a clear syrup. Once dissolved, remove the saucepan from the heat and set it aside to cool down completely. This step is vital because adding hot syrup to cold fruit can affect the final texture.
Step 2: Prepare the Mango Puree
While the syrup is cooling, prepare your mangoes. Wash, peel, and chop the mango flesh, discarding the pit and skin. You should have approximately 4 cups of mango chunks. Place these chunks into the jar of a high-powered blender or a food processor. Add the 2 tablespoons of fresh lime juice and the pinch of salt.
Step 3: Blend to Perfection
Pour the completely cooled simple syrup into the blender with the mango chunks. Blend everything on high speed for 1-2 minutes, or until the mixture is completely silky smooth. There should be absolutely no lumps or fibrous bits remaining. Scrape down the sides of the blender a few times to ensure everything is incorporated. The resulting puree should be vibrant, fragrant, and lusciously smooth.
Step 4: Chill the Mixture
This is a non-negotiable step for achieving the creamiest sorbet. Pour the mango puree into a bowl or airtight container, cover it, and place it in the refrigerator to chill for at least 2 hours, but preferably 4 hours or even overnight. A thoroughly cold base will freeze faster and more evenly in the next step, resulting in smaller ice crystals and a much smoother, creamier final product.
Step 5-A: Churning the Sorbet (Ice Cream Maker Method)
If you are using an ice cream maker, make sure the freezer bowl has been frozen according to the manufacturer’s instructions (usually for at least 24 hours). Once the mango base is thoroughly chilled, pour it into the frozen bowl of your ice cream maker. Churn for 20-30 minutes, or until it has thickened to the consistency of a very thick, soft-serve ice cream.
Step 5-B: Freezing the Sorbet (No-Churn Method)
If you don’t have an ice cream maker, pour the chilled mango base into a shallow, freezer-safe container (a metal loaf pan or brownie pan works great as metal gets colder faster). Cover it tightly with a lid or plastic wrap. Place it in the freezer. After 45 minutes, remove the container from the freezer. The edges will have started to freeze. Use a fork or a small whisk to vigorously stir the mixture, breaking up any ice crystals and scraping the frozen parts from the sides into the slushy center. Return it to the freezer. Repeat this process of removing and stirring vigorously every 30-45 minutes for the next 3-4 hours. This manual stirring mimics the churning of an ice cream maker, breaking down large ice crystals and incorporating air, which is key to a smooth texture.
Step 6: The Final Freeze (Ripening)
Whether you used an ice cream maker or the no-churn method, the sorbet now needs to “ripen” to achieve a firm, scoopable consistency. Transfer the sorbet from the ice cream maker bowl (or the shallow pan from the no-churn method) into a freezer-safe, airtight container. Press a piece of parchment paper or plastic wrap directly onto the surface of the sorbet to prevent ice crystals from forming on top. Seal the container and place it in the back of your freezer for at least 4-6 hours, or until firm.
Nutrition
- Serving Size: one normal portion
- Calories: 170


