
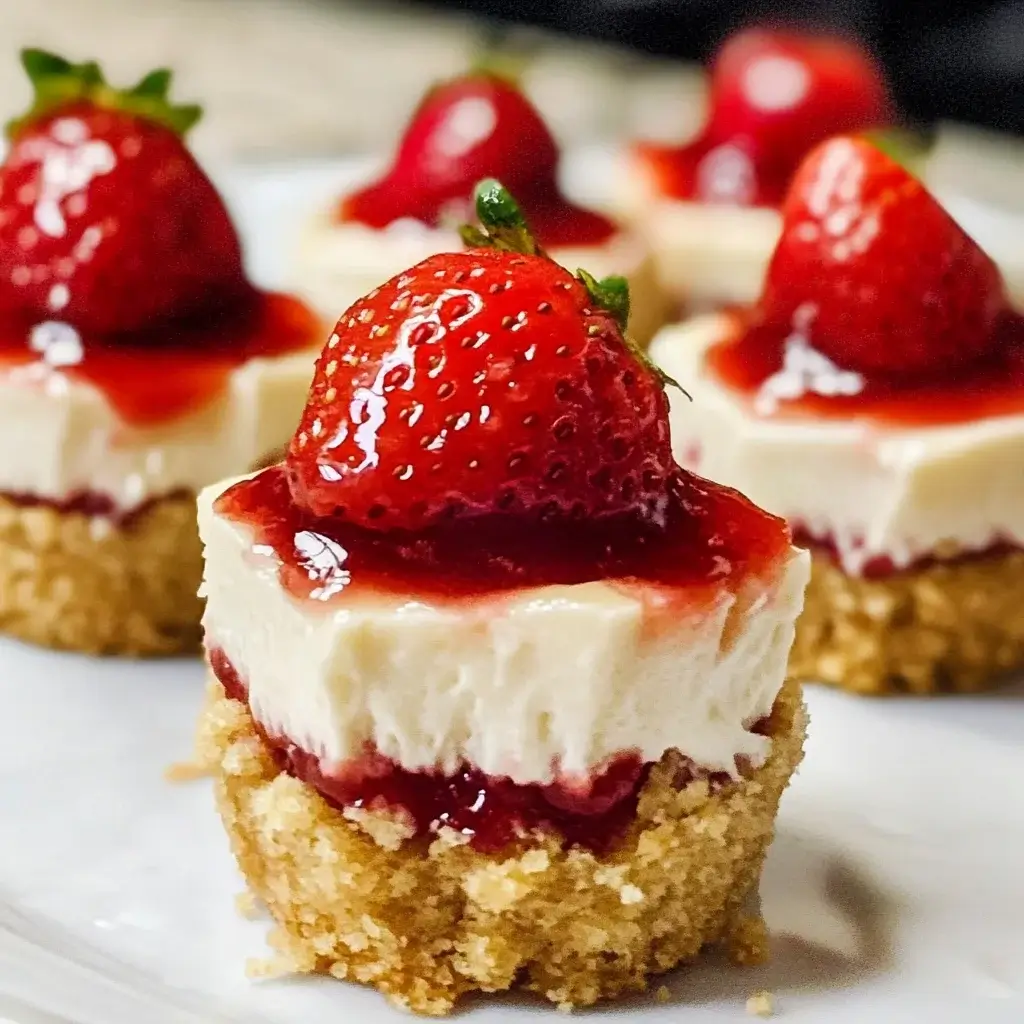

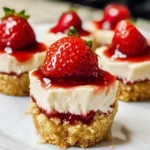
Let me tell you, the first time I made these Strawberry Cheesecake Bites, I wasn’t sure what to expect. I love cheesecake, adore strawberries, and the idea of combining them into cute, individual portions seemed perfect for a family gathering we were hosting. I needed something impressive but manageable, something that wouldn’t require intricate slicing and potential messy servings. When I pulled these little gems out of the oven, their golden crusts and creamy tops looked promising. After chilling and topping them with vibrant red strawberries, they looked like little jewels. The real test, however, was the family’s reaction. They disappeared. Vanished. Within minutes, the platter was empty, accompanied by murmurs of “What are these?” and “Can I have another one?”. My kids, usually picky about desserts that aren’t pure chocolate, were asking for seconds. My husband, a notorious cheesecake critic, declared them “dangerously good.” The buttery, crisp graham cracker crust perfectly complemented the smooth, tangy, yet sweet cream cheese filling, and the fresh strawberry topping added a burst of bright, fruity freshness that cut through the richness. They were perfectly portioned, easy to eat while mingling, and undeniably delicious. Since then, these Strawberry Cheesecake Bites have become my go-to dessert for potlucks, parties, or even just a special weeknight treat. They are consistently a crowd-pleaser, relatively simple to whip up, and the results always feel far more sophisticated than the effort involved suggests. They truly are little bites of happiness.
Ingredients
Here’s what you’ll need to create these delightful Strawberry Cheesecake Bites:
For the Graham Cracker Crust:
- 1 ½ cups Graham Cracker Crumbs: (About 10-12 full sheets) Finely crushed, these form the sweet, buttery base of our bites. You can buy pre-crushed crumbs or crush your own using a food processor or rolling pin.
- ¼ cup Granulated Sugar: Adds a touch of sweetness to the crust, balancing the savory butter.
- 6 tablespoons Unsalted Butter: Melted. This binds the crumbs and sugar together, creating a firm yet tender crust when baked.
For the Cheesecake Filling:
- 16 ounces (2 blocks) Full-Fat Cream Cheese: Softened to room temperature. This is crucial for a smooth, lump-free filling. Full-fat provides the richest flavor and texture.
- ¾ cup Granulated Sugar: Provides the primary sweetness for the creamy cheesecake filling.
- 1 teaspoon Vanilla Extract: Enhances the other flavors and adds a warm, aromatic depth. Use pure vanilla extract for the best taste.
- 2 Large Eggs: Room temperature. Eggs act as a binder and contribute to the richness and structure of the cheesecake. Room temperature eggs incorporate more easily.
- ¼ cup Sour Cream or Plain Greek Yogurt: Room temperature. Adds moisture and a slight tanginess that balances the richness of the cream cheese.
For the Fresh Strawberry Topping:
- 1 pint (about 2 cups) Fresh Strawberries: Washed, hulled, and diced. These provide the bright, fresh, fruity counterpoint to the creamy cheesecake.
- 1-2 tablespoons Granulated Sugar: (Optional, adjust to strawberry sweetness) Macerating the strawberries with a little sugar draws out their natural juices, creating a light syrupy sauce.
- 1 teaspoon Lemon Juice: (Optional) Brightens the flavor of the strawberries and adds a subtle zing.
Instructions
Follow these steps carefully for perfect Strawberry Cheesecake Bites every time:
1. Prepare the Pan and Oven:
- Preheat your oven to 325°F (160°C).
- Line a standard 12-cup muffin tin with paper or silicone liners. If you have a 24-cup mini muffin tin, you can use that for smaller, more numerous bites (adjust baking time accordingly, likely reducing it). Using liners makes removal much easier and keeps the bites neat.
2. Make the Graham Cracker Crust:
- In a medium bowl, combine the graham cracker crumbs and ¼ cup of granulated sugar. Stir well to ensure the sugar is evenly distributed.
- Pour the 6 tablespoons of melted unsalted butter over the crumb mixture.
- Stir with a fork until all the crumbs are moistened and the mixture resembles wet sand.
- Press approximately 1 to 1.5 tablespoons of the crust mixture firmly and evenly into the bottom of each muffin liner. The back of a small spoon or the bottom of a small glass or spice jar works well for tamping it down.
- Bake the crusts for 5-7 minutes, just until set and lightly fragrant. Remove from the oven and let them cool slightly while you prepare the filling. Do not turn off the oven.
3. Prepare the Cheesecake Filling:
- Ensure your cream cheese, eggs, and sour cream (or Greek yogurt) are at room temperature. This is critical for achieving a smooth, non-lumpy filling. If your cream cheese is cold, microwave it in short bursts (15-20 seconds) until softened but not melted.
- In a large bowl, using an electric hand mixer or a stand mixer fitted with the paddle attachment, beat the softened cream cheese on medium speed until completely smooth and creamy, with no lumps remaining. This usually takes about 2-3 minutes. Scrape down the sides and bottom of the bowl frequently.
- Gradually add the ¾ cup of granulated sugar and continue beating on medium-low speed until well combined and smooth. Scrape the bowl again.
- Beat in the 1 teaspoon of vanilla extract and the ¼ cup of room temperature sour cream or Greek yogurt until just combined. Be careful not to overmix at this stage.
- Add the room temperature eggs one at a time, beating on low speed just until each egg is incorporated. Overmixing after adding the eggs can incorporate too much air, leading to cracks during baking or a rubbery texture. Stop mixing as soon as the yellow streaks disappear. Scrape the bowl one last time to ensure everything is homogenous.
4. Fill the Muffin Cups:
- Divide the cheesecake filling evenly among the prepared muffin cups, filling each liner about two-thirds to three-quarters full, right over the pre-baked crusts. A cookie scoop or spoon works well for portioning.
5. Bake the Cheesecake Bites:
- Carefully place the muffin tin into the preheated 325°F (160°C) oven.
- Bake for 18-22 minutes for standard size muffin cups (or about 12-15 minutes for mini muffin cups). The cheesecakes are done when the edges are set, and the centers are almost set but still have a very slight jiggle when the pan is gently nudged. They will continue to set as they cool. Avoid overbaking, as this can lead to dryness and cracking.
6. Cool the Cheesecakes Properly:
- Turn off the oven but leave the cheesecake bites inside with the oven door slightly ajar for about 30 minutes to an hour. This slow cooling process helps prevent drastic temperature changes, which is a major cause of cracking.
- After cooling in the oven, remove the muffin tin and let the cheesecake bites cool completely on a wire rack at room temperature (another 1-2 hours).
7. Chill Thoroughly:
- Once completely cool, cover the muffin tin loosely with plastic wrap (try not to let the wrap touch the tops) and transfer it to the refrigerator.
- Chill for at least 4 hours, but preferably overnight. Chilling is essential for the cheesecake to fully set and develop its characteristic creamy texture and flavor. Do not skip this step!
8. Prepare the Strawberry Topping:
- Just before serving, or up to a few hours ahead, prepare the strawberry topping.
- In a small bowl, combine the diced fresh strawberries with 1-2 tablespoons of granulated sugar (adjust based on how sweet your berries are) and the optional 1 teaspoon of lemon juice.
- Gently stir to combine. Let the mixture sit for about 10-15 minutes at room temperature. The sugar will draw out some juices, creating a light, natural syrup (this process is called macerating).
9. Assemble and Serve:
- Carefully remove the chilled cheesecake bites from the muffin liners.
- Top each cheesecake bite generously with a spoonful of the fresh strawberry topping, including some of the juices.
- Serve immediately and enjoy!
Nutrition Facts
Please note that these are estimates and can vary based on specific ingredients used.
- Serving Size: 1 Strawberry Cheesecake Bite (assuming recipe makes 12 standard-sized bites)
- Calories: Approximately 250-300 kcal per bite. This provides a measure of the energy content in each individual portion, useful for dietary tracking.
- Total Fat: Approximately 18-22g. Includes fats from the butter, cream cheese, and eggs, contributing significantly to the rich texture and satiety.
- Saturated Fat: Approximately 10-13g. A subset of total fat, primarily from butter and full-fat dairy, which is important to monitor for heart health.
- Carbohydrates: Approximately 18-23g. Includes sugars from the crust, filling, and strawberries, as well as complex carbs from the graham crackers.
- Sugar: Approximately 14-18g. Represents both added sugars (granulated sugar) and natural sugars (from strawberries and dairy), contributing to the sweetness.
These values highlight that while delicious, these bites are an indulgent treat best enjoyed in moderation as part of a balanced diet.
Preparation Time
- Prep Time: 25-30 minutes. This includes crushing the graham crackers (if necessary), mixing the crust, preparing the filling, and filling the muffin cups. Having ingredients at room temperature speeds this up slightly.
- Bake Time: 18-22 minutes (for standard size). The active cooking phase where the cheesecake sets in the oven.
- Cooling & Chilling Time: Minimum 5.5 hours (30-60 mins in oven off, 1-2 hours room temp, 4+ hours fridge). This passive time is crucial for the texture and stability of the final cheesecake bites. Overnight chilling is highly recommended for the best results.
- Total Time (including chilling): Approximately 6.5 – 7 hours minimum.
How to Serve
These Strawberry Cheesecake Bites are versatile! Here are some lovely ways to serve them:
- Classic Presentation: Simply arrange the topped bites on a platter. Their individual nature makes them perfect for buffets and parties, requiring no cutting.
- Dessert Course: Serve one or two bites per person on a small dessert plate.
- With Whipped Cream: Add a small dollop of freshly whipped cream alongside or on top of the strawberry topping for extra decadence.
- Chocolate Drizzle: Gently drizzle melted dark, milk, or white chocolate over the top just before serving for a beautiful look and complementary flavor.
- Mint Garnish: A small fresh mint sprig next to the strawberries adds a pop of color and a hint of freshness.
- Party Platter Assortment: Include them as part of a larger dessert platter featuring other mini treats like brownies, cookies, or fruit tarts.
- Afternoon Tea: Their petite size makes them a perfect addition to an afternoon tea spread alongside scones and finger sandwiches.
- Picnic Perfect: Pack the chilled, untopped cheesecake bites in a container and bring the macerated strawberries separately. Top just before serving outdoors.
Additional Tips
Make your Strawberry Cheesecake Bites even better with these handy tips:
- Room Temperature is Key: Seriously, don’t shortcut bringing your cream cheese, eggs, and sour cream/yogurt to room temperature. Cold ingredients result in a lumpy batter that’s hard to smooth out, and they don’t incorporate as well, potentially affecting the final texture. Set them out 1-2 hours before you plan to start.
- Don’t Overmix the Eggs: Once you add the eggs, mix only on low speed and just until the yellow streaks disappear. Overmixing incorporates excess air, which expands during baking and then collapses upon cooling, leading to cracks and a potentially tough texture.
- Smooth Cream Cheese First: Beat the softened cream cheese by itself until absolutely smooth before adding sugar or other ingredients. This is your best chance to eliminate lumps. Scrape the bowl down frequently throughout the mixing process.
- Perfect Crust Pressing: Use the bottom of a small glass, spice jar, or even a shot glass that fits snugly into the muffin cups to press the graham cracker crust down firmly and evenly. This ensures a stable base that doesn’t crumble easily.
- Slow Cooling Prevents Cracks: The gradual cooling process (leaving them in the turned-off oven with the door ajar, then cooling completely at room temp before chilling) is crucial for preventing surface cracks. Avoid sudden temperature changes.
- Chill Thoroughly: Don’t rush the chilling time. Cheesecake needs ample time in the refrigerator (at least 4 hours, preferably overnight) to fully set, firm up, and allow the flavors to meld and deepen. They will taste significantly better after proper chilling.
- Topping Variations: While fresh strawberries are classic, feel free to get creative! You could use other berries (raspberries, blueberries, mixed berries), a cherry pie filling, salted caramel sauce, lemon curd, or a simple dusting of powdered sugar. Prepare toppings just before serving for freshness.
- Make Ahead Strategy: The cheesecake bites (without topping) can be made 1-2 days in advance and kept covered in the refrigerator. Prepare and add the fresh strawberry topping just before serving for the best appearance and texture.
Frequently Asked Questions (FAQ)
Q1: Can I use low-fat or fat-free cream cheese for these Strawberry Cheesecake Bites?
A1: While you technically can, it’s highly recommended to use full-fat block cream cheese. Low-fat or fat-free versions contain more water and stabilizers, which can negatively impact the texture (making it more watery or rubbery) and the richness of the flavor. For the best classic cheesecake results, stick with full-fat.
Q2: My cheesecake bites cracked! What did I do wrong?
A2: Cracking usually happens due to overmixing (especially after adding eggs), overbaking, or cooling too quickly. Ensure your ingredients are at room temperature, mix eggs in gently on low speed just until combined, bake only until the center is almost set, and follow the slow cooling process (in the turned-off oven, then room temp, then fridge). A little cracking is okay taste-wise, especially since they’ll be covered with topping!
Q3: Can I make these Strawberry Cheesecake Bites without muffin liners?
A3: You can, but it’s much trickier to remove them cleanly. If you choose to go liner-free, grease the muffin tin very well (butter and flour, or a good baking spray). Allow the bites to chill completely, perhaps even freeze briefly (15-20 mins), before attempting to carefully loosen the edges with a thin knife and lift them out. Liners are definitely the easier, cleaner option.
Q4: How long do these Strawberry Cheesecake Bites last, and how should I store them?
A4: Store leftover cheesecake bites (preferably untopped, store topping separately) in an airtight container in the refrigerator. They will last for 3-4 days. If topped, the strawberries may become slightly softer, but they’ll still be delicious for a couple of days.
Q5: Can I freeze Strawberry Cheesecake Bites?
A5: Yes! Cheesecake freezes quite well. Let the bites cool and chill completely as directed. Place them (untopped) on a baking sheet in the freezer until firm, then transfer them to an airtight container or freezer bag, placing wax paper between layers if needed. Freeze for up to 1-2 months. Thaw overnight in the refrigerator before topping and serving. The texture might be slightly denser after freezing, but still enjoyable. Do not freeze with the fresh strawberry topping.
Q6: Can I use frozen strawberries for the topping?
A6: You can, but fresh strawberries provide the best texture and flavor. If using frozen, thaw them completely and drain any excess liquid very well before dicing and mixing with sugar. The resulting topping might be softer and more watery than using fresh berries. Consider cooking the thawed, drained strawberries with sugar into a quick compote instead.
Q7: What can I use instead of graham cracker crumbs for the crust?
A7: Absolutely! You can substitute other crushed cookies. Vanilla wafers, digestive biscuits, shortbread cookies, or even Oreos (remove cream filling first, or use the whole cookie for a chocolatey version) work well. Keep the butter and sugar ratio similar, adjusting sugar slightly based on the sweetness of the cookie.
Q8: Can I make this recipe in a different pan, like a square baking dish?
A8: Yes, you can adapt this recipe for an 8×8 or 9×9 inch square baking pan to make cheesecake bars instead of bites. Press the crust into the bottom of the lined or greased pan, pour the filling over, and bake. The baking time will likely increase significantly (closer to 30-40 minutes). Check for doneness the same way (set edges, slightly jiggly center). Cool and chill completely before cutting into squares and topping.
Strawberry Cheesecake Bites
Ingredients
Here’s what you’ll need to create these delightful Strawberry Cheesecake Bites:
For the Graham Cracker Crust:
- 1 ½ cups Graham Cracker Crumbs: (About 10–12 full sheets) Finely crushed, these form the sweet, buttery base of our bites. You can buy pre-crushed crumbs or crush your own using a food processor or rolling pin.
- ¼ cup Granulated Sugar: Adds a touch of sweetness to the crust, balancing the savory butter.
- 6 tablespoons Unsalted Butter: Melted. This binds the crumbs and sugar together, creating a firm yet tender crust when baked.
For the Cheesecake Filling:
- 16 ounces (2 blocks) Full-Fat Cream Cheese: Softened to room temperature. This is crucial for a smooth, lump-free filling. Full-fat provides the richest flavor and texture.
- ¾ cup Granulated Sugar: Provides the primary sweetness for the creamy cheesecake filling.
- 1 teaspoon Vanilla Extract: Enhances the other flavors and adds a warm, aromatic depth. Use pure vanilla extract for the best taste.
- 2 Large Eggs: Room temperature. Eggs act as a binder and contribute to the richness and structure of the cheesecake. Room temperature eggs incorporate more easily.
- ¼ cup Sour Cream or Plain Greek Yogurt: Room temperature. Adds moisture and a slight tanginess that balances the richness of the cream cheese.
For the Fresh Strawberry Topping:
- 1 pint (about 2 cups) Fresh Strawberries: Washed, hulled, and diced. These provide the bright, fresh, fruity counterpoint to the creamy cheesecake.
- 1–2 tablespoons Granulated Sugar: (Optional, adjust to strawberry sweetness) Macerating the strawberries with a little sugar draws out their natural juices, creating a light syrupy sauce.
- 1 teaspoon Lemon Juice: (Optional) Brightens the flavor of the strawberries and adds a subtle zing.
Instructions
Follow these steps carefully for perfect Strawberry Cheesecake Bites every time:
1. Prepare the Pan and Oven:
- Preheat your oven to 325°F (160°C).
- Line a standard 12-cup muffin tin with paper or silicone liners. If you have a 24-cup mini muffin tin, you can use that for smaller, more numerous bites (adjust baking time accordingly, likely reducing it). Using liners makes removal much easier and keeps the bites neat.
2. Make the Graham Cracker Crust:
- In a medium bowl, combine the graham cracker crumbs and ¼ cup of granulated sugar. Stir well to ensure the sugar is evenly distributed.
- Pour the 6 tablespoons of melted unsalted butter over the crumb mixture.
- Stir with a fork until all the crumbs are moistened and the mixture resembles wet sand.
- Press approximately 1 to 1.5 tablespoons of the crust mixture firmly and evenly into the bottom of each muffin liner. The back of a small spoon or the bottom of a small glass or spice jar works well for tamping it down.
- Bake the crusts for 5-7 minutes, just until set and lightly fragrant. Remove from the oven and let them cool slightly while you prepare the filling. Do not turn off the oven.
3. Prepare the Cheesecake Filling:
- Ensure your cream cheese, eggs, and sour cream (or Greek yogurt) are at room temperature. This is critical for achieving a smooth, non-lumpy filling. If your cream cheese is cold, microwave it in short bursts (15-20 seconds) until softened but not melted.
- In a large bowl, using an electric hand mixer or a stand mixer fitted with the paddle attachment, beat the softened cream cheese on medium speed until completely smooth and creamy, with no lumps remaining. This usually takes about 2-3 minutes. Scrape down the sides and bottom of the bowl frequently.
- Gradually add the ¾ cup of granulated sugar and continue beating on medium-low speed until well combined and smooth. Scrape the bowl again.
- Beat in the 1 teaspoon of vanilla extract and the ¼ cup of room temperature sour cream or Greek yogurt until just combined. Be careful not to overmix at this stage.
- Add the room temperature eggs one at a time, beating on low speed just until each egg is incorporated. Overmixing after adding the eggs can incorporate too much air, leading to cracks during baking or a rubbery texture. Stop mixing as soon as the yellow streaks disappear. Scrape the bowl one last time to ensure everything is homogenous.
4. Fill the Muffin Cups:
- Divide the cheesecake filling evenly among the prepared muffin cups, filling each liner about two-thirds to three-quarters full, right over the pre-baked crusts. A cookie scoop or spoon works well for portioning.
5. Bake the Cheesecake Bites:
- Carefully place the muffin tin into the preheated 325°F (160°C) oven.
- Bake for 18-22 minutes for standard size muffin cups (or about 12-15 minutes for mini muffin cups). The cheesecakes are done when the edges are set, and the centers are almost set but still have a very slight jiggle when the pan is gently nudged. They will continue to set as they cool. Avoid overbaking, as this can lead to dryness and cracking.
6. Cool the Cheesecakes Properly:
- Turn off the oven but leave the cheesecake bites inside with the oven door slightly ajar for about 30 minutes to an hour. This slow cooling process helps prevent drastic temperature changes, which is a major cause of cracking.
- After cooling in the oven, remove the muffin tin and let the cheesecake bites cool completely on a wire rack at room temperature (another 1-2 hours).
7. Chill Thoroughly:
- Once completely cool, cover the muffin tin loosely with plastic wrap (try not to let the wrap touch the tops) and transfer it to the refrigerator.
- Chill for at least 4 hours, but preferably overnight. Chilling is essential for the cheesecake to fully set and develop its characteristic creamy texture and flavor. Do not skip this step!
8. Prepare the Strawberry Topping:
- Just before serving, or up to a few hours ahead, prepare the strawberry topping.
- In a small bowl, combine the diced fresh strawberries with 1-2 tablespoons of granulated sugar (adjust based on how sweet your berries are) and the optional 1 teaspoon of lemon juice.
- Gently stir to combine. Let the mixture sit for about 10-15 minutes at room temperature. The sugar will draw out some juices, creating a light, natural syrup (this process is called macerating).
9. Assemble and Serve:
- Carefully remove the chilled cheesecake bites from the muffin liners.
- Top each cheesecake bite generously with a spoonful of the fresh strawberry topping, including some of the juices.
- Serve immediately and enjoy!
Nutrition
- Serving Size: one normal portion
- Calories: 300
- Sugar: 18g
- Fat: 22g
- Saturated Fat: 13g
- Carbohydrates: 23g


