

Of all the dishes in my weekly rotation, the ones that bring the most comfort are often the simplest. There’s a certain magic in transforming a few humble pantry staples into a meal that feels both nourishing and incredibly satisfying. This Simple Tuna and Peas Pasta recipe is the undisputed champion of that magic in our household. I still remember the first time I made it on a frantic Tuesday evening. The day had been a whirlwind of deadlines and after-school activities, and the thought of cooking an elaborate dinner was daunting. I opened the pantry, saw a can of tuna, a box of pasta, and a bag of frozen peas, and a lightbulb went off. Twenty-five minutes later, we were sitting down to steaming bowls of creamy, savory pasta, flecked with sweet green peas and savory tuna. The kids, usually my toughest critics, were silent except for the happy sounds of slurping noodles. My husband looked up from his bowl and declared, “This is a keeper.” And it has been ever since. It’s our go-to for busy weeknights, lazy weekends, and those days when we just need a culinary hug. It proves that you don’t need a long list of fancy ingredients or hours in the kitchen to create a meal that feels special and brings the whole family together.
Simple Tuna and Peas Pasta: A Creamy, Comforting Weeknight Meal
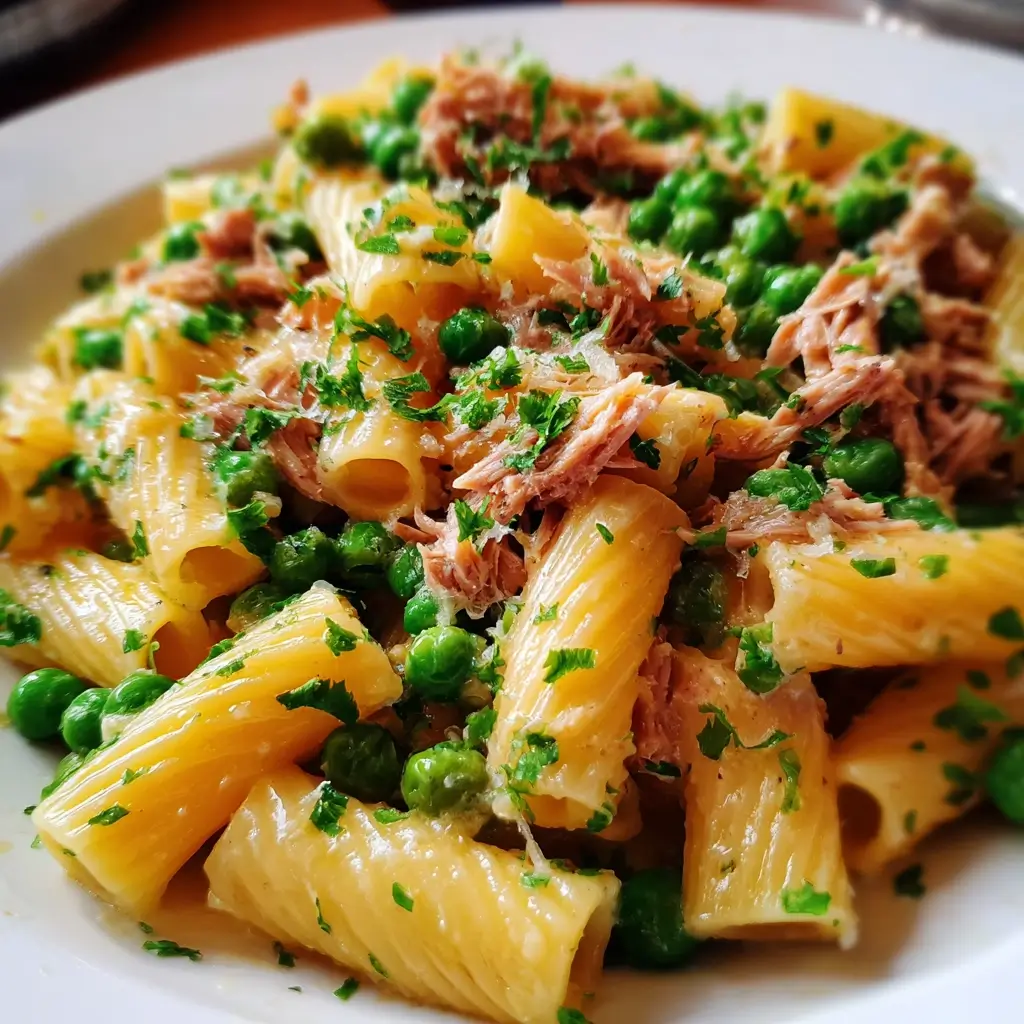
This recipe is the epitome of pantry-to-plate perfection. It’s a beautifully balanced dish where the saltiness of the tuna, the sweetness of the peas, and the richness of the creamy sauce come together in perfect harmony. The zesty finish from fresh lemon cuts through the creaminess, making every bite feel bright and exciting. It’s a versatile, forgiving, and incredibly delicious meal that you’ll find yourself making again and again.
Ingredients For The Perfect Tuna and Peas Pasta
The beauty of this recipe lies in its simplicity and the accessibility of its components. Each ingredient plays a crucial role in building layers of flavor and texture, transforming everyday staples into an extraordinary meal.
- Pasta (1 pound / 450g): The foundation of our dish. Choose a short pasta shape like penne, fusilli, rotini, or shells. These shapes are experts at trapping the creamy sauce and little bits of tuna and peas in their nooks and crannies, ensuring a perfect bite every time.
- Canned Tuna (2 x 5-ounce / 142g cans): The star protein. For the richest flavor, I recommend using tuna packed in olive oil and not draining it fully; that flavored oil adds incredible depth to the sauce. If you prefer a lighter dish, tuna in water works well too—just be sure to drain it thoroughly.
- Frozen Sweet Peas (1 ½ cups / 220g): These little green gems add a burst of sweetness and vibrant color. Using frozen peas is a fantastic shortcut; they are flash-frozen at peak freshness and cook in minutes right in the sauce.
- Extra Virgin Olive Oil (2 tablespoons): Used for sautéing the aromatics, this provides a classic, fruity base note that complements the other ingredients.
- Yellow Onion (1 medium): Finely chopped, the onion provides a sweet, aromatic foundation for the sauce, adding a layer of complexity that you can’t get otherwise.
- Garlic (4 cloves): Minced garlic is essential for its pungent, savory flavor. It infuses the sauce with an irresistible aroma and taste. Don’t be shy with the garlic!
- Heavy Cream (1 cup / 240ml): This is the key to an ultra-creamy, luxurious sauce. It coats every piece of pasta and brings all the flavors together. For a lighter version, you can substitute with half-and-half or evaporated milk.
- Grated Parmesan Cheese (¾ cup / 75g, plus more for serving): Use freshly grated Parmesan for the best results. It melts beautifully into the sauce, adding a salty, nutty, and umami-rich flavor that is simply divine.
- Lemon (1 whole): We’ll use both the zest and the juice. The zest adds a fragrant citrus aroma, while the juice provides a bright, acidic kick that cuts through the richness of the cream and tuna, balancing the entire dish.
- Reserved Pasta Water (1 cup / 240ml): This is the secret ingredient of professional chefs. The starchy water that the pasta cooked in helps to emulsify the sauce, making it creamier and helping it cling perfectly to the noodles. Never pour it all down the drain!
- Salt and Black Pepper (to taste): Essential for seasoning every layer of the dish, from the pasta water to the final sauce.
- Fresh Parsley (¼ cup, chopped): An optional but highly recommended garnish. It adds a fresh, herbaceous note and a pop of color that makes the finished dish look as good as it tastes.
Step-by-Step Instructions
Follow these detailed steps to ensure your tuna and pea pasta is flawless. The process is quick and straightforward, perfect for any skill level.
- Cook the Pasta to Perfection: Bring a large pot of water to a rolling boil. Be generous with the salt—it should taste like the sea. This is your only chance to season the pasta itself. Add your chosen pasta and cook according to the package directions until it is al dente (cooked through but still has a firm bite). Just before draining, carefully scoop out and reserve at least 1 cup of the starchy pasta water. Drain the pasta and set it aside.
- Sauté the Aromatics: While the pasta is cooking, heat the olive oil in a large skillet or Dutch oven over medium heat. Add the finely chopped onion and sauté for 4-5 minutes, until it becomes soft and translucent. Add the minced garlic and cook for another minute until fragrant. Be careful not to let the garlic burn, as it will become bitter.
- Build the Creamy Sauce: Reduce the heat to medium-low. Pour in the heavy cream and bring it to a gentle simmer, stirring occasionally. Let it simmer for 2-3 minutes to thicken slightly. Stir in the grated Parmesan cheese until it has completely melted into the cream, creating a smooth, velvety sauce.
- Introduce the Stars: Gently flake the canned tuna into the skillet with a fork, incorporating it into the sauce. Add the frozen peas, the zest of one lemon, and a generous pinch of salt and freshly ground black pepper. Stir everything together and let it cook for 3-4 minutes, just until the peas are tender and bright green and the tuna is heated through.
- Unite the Pasta and Sauce: Add the drained pasta to the skillet with the sauce. Toss everything together until the pasta is thoroughly coated. If the sauce seems too thick, add a splash of the reserved pasta water. Start with a ¼ cup and add more as needed until the sauce reaches your desired consistency. The starchy water will help the sauce cling to every noodle.
- Finish and Serve: Turn off the heat. Squeeze in the juice from half of the lemon and stir. Give the pasta a final taste and adjust the seasoning with more salt, pepper, or lemon juice if needed. Serve immediately in warm bowls, garnished with a sprinkle of fresh parsley and an extra dusting of Parmesan cheese.
Nutrition Facts
This dish provides a balanced mix of macronutrients, making it a satisfying and wholesome meal.
- Servings: 4-6 servings
- Calories per Serving: Approximately 550-650 kcal (based on 6 servings)
- Protein: A significant source of protein from the tuna and cheese, crucial for muscle repair and keeping you feeling full and satisfied long after your meal.
- Carbohydrates: Provides essential energy from the pasta to fuel your day’s activities. Choosing whole-wheat pasta can increase the fiber content.
- Fat: Contains healthy fats from olive oil and tuna, along with saturated fat from the cream and cheese, which contributes to the dish’s rich flavor and texture.
- Fiber: The peas and whole-wheat pasta (if used) contribute dietary fiber, which is important for digestive health.
- Omega-3 Fatty Acids: Canned tuna is a great source of omega-3s, which are known to support brain health and reduce inflammation.
Preparation Time
This recipe is designed for speed and efficiency, making it an ideal choice for any night of the week.
- Prep Time: 10 minutes (chopping onion, mincing garlic, gathering ingredients)
- Cook Time: 15-20 minutes
- Total Time: Approximately 25-30 minutes
In less than 30 minutes, you can have a gourmet-tasting, comforting pasta dish on the table, leaving you with more time to relax and enjoy your evening.
How to Serve Your Tuna and Peas Pasta
Presentation and pairings can elevate this simple dish into a memorable dining experience. Here are some ideas on how to serve it for maximum enjoyment.
- Classic and Simple:
- Serve hot, directly from the skillet into warmed pasta bowls.
- A generous final garnish is key. Don’t skip the extra Parmesan cheese and fresh parsley.
- Place a wedge of lemon on the side of each bowl for those who enjoy an extra citrusy kick.
- With Perfect Pairings:
- Garlic Bread: A slice of crusty, warm garlic bread is the perfect vessel for sopping up any leftover creamy sauce.
- Simple Green Salad: A light salad with a simple vinaigrette dressing provides a fresh, crisp contrast to the rich pasta. Think mixed greens, cherry tomatoes, and cucumber.
- Steamed or Roasted Vegetables: For an extra dose of nutrients, serve alongside steamed broccoli, asparagus, or roasted cherry tomatoes.
- For a Touch of Elegance:
- Toasted Breadcrumbs: For a delightful crunch, toast some panko breadcrumbs in a little butter or olive oil until golden brown and sprinkle them over the top just before serving.
- Red Pepper Flakes: For those who like a bit of heat, a small bowl of red pepper flakes on the table allows everyone to customize their spice level.
- Wine Pairing: This creamy pasta pairs beautifully with a crisp, dry white wine like a Pinot Grigio, Sauvignon Blanc, or an unoaked Chardonnay. The acidity of the wine cuts through the richness of the sauce perfectly.
Additional Tips for Recipe Success
These eight tips will help you master this recipe and customize it to your liking, ensuring delicious results every single time.
- Don’t Overcook the Pasta: The golden rule of any pasta dish is to cook it al dente. The pasta will continue to cook slightly when you toss it with the hot sauce. Overcooked pasta can become mushy and won’t hold the sauce as well. Start testing it a minute or two before the package time suggests.
- Harness the Power of Pasta Water: This starchy, salty liquid is liquid gold. It’s the key to creating a restaurant-quality sauce that’s silky and emulsified, not greasy or broken. It helps thin the sauce to the perfect consistency while also helping it adhere beautifully to the pasta.
- Choose Your Tuna Wisely: While any canned tuna will work, using a high-quality tuna packed in olive oil will yield a more flavorful and moist result. The oil itself is infused with tuna flavor and can be added directly to the sauce for an extra layer of richness.
- Control the Creaminess: This recipe is easily adaptable. For an even richer sauce, stir in a tablespoon of butter along with the cream. For a lighter version, replace the heavy cream with half-and-half, whole milk, or even a combination of milk and a spoonful of Greek yogurt or cream cheese for tang and thickness.
- Boost the Veggies: Feel free to add more vegetables to the sauce. Sautéed mushrooms, wilted spinach, chopped sun-dried tomatoes, or roasted red peppers all make fantastic additions. Add heartier vegetables with the onions and delicate greens like spinach at the very end.
- Spice It Up Your Way: If you enjoy a little heat, add a pinch of red pepper flakes along with the garlic. A dash of smoked paprika can also add a lovely, smoky depth to the sauce.
- Don’t Skip the Lemon: The fresh lemon juice and zest are not just a garnish; they are a critical component of the flavor profile. The acidity brightens the entire dish and prevents the creamy sauce from feeling too heavy. Always use a fresh lemon for the best flavor.
- Make-Ahead & Storage Savvy: You can chop the onion and garlic ahead of time to make weeknight prep even faster. Store leftovers in an airtight container in the refrigerator for up to 3 days. When reheating, add a splash of milk or water to loosen the sauce, as it will thicken upon sitting.
Frequently Asked Questions (FAQ)
Here are answers to some common questions about this Simple Tuna and Peas Pasta recipe.
1. Can I make this recipe gluten-free?
Absolutely! To make this dish gluten-free, simply substitute the traditional wheat pasta with your favorite gluten-free pasta variety. Brands made from corn, rice, quinoa, or chickpeas all work well. Be sure to follow the cooking instructions on the package, as gluten-free pastas can have different cooking times and textures. Also, remember to reserve the gluten-free pasta water, as it will still contain the starches needed to emulsify the sauce.
2. How can I make this recipe dairy-free?
Yes, you can easily adapt this recipe to be dairy-free. For the cream, use a full-fat, unsweetened coconut milk or a dairy-free cooking cream alternative made from oat or soy. For the cheese, substitute with a nutritional yeast blend or your favorite store-bought dairy-free Parmesan alternative. Use a dairy-free butter or stick to olive oil. The result will be a delicious, creamy pasta that everyone can enjoy.
3. What is the best type of pasta to use for this recipe?
Short, textured pasta shapes are ideal. The ridges, twists, and hollows of shapes like fusilli, rotini, penne, rigatoni, and shells are perfect for catching and holding onto the creamy sauce, tuna, and peas. This ensures you get a perfect combination of all the ingredients in every single bite. Long pasta like spaghetti or fettuccine can also work, but short pasta is generally preferred.
4. My sauce is too thick (or too thin). How do I fix it?
This is a very common and easy-to-fix issue. If your sauce is too thick, simply stir in a small amount of the reserved pasta water, a splash at a time, until it reaches your desired consistency. If your sauce is too thin, let it simmer on low heat for a few more minutes to reduce and thicken. You can also add an extra tablespoon or two of Parmesan cheese, which will help thicken the sauce as it melts.
5. Can I use fresh tuna instead of canned?
While this recipe is designed for the convenience and specific flavor of canned tuna, you could use fresh tuna. You would need to cook it separately first. Season a fresh tuna steak with salt and pepper, sear it in a hot pan for a few minutes on each side until cooked to your liking, and then flake it into the finished sauce. This will create a different, albeit delicious, version of the dish.
6. How long does this tuna and pea pasta last in the refrigerator?
Leftovers can be stored in an airtight container in the refrigerator for up to 3 days. The pasta will absorb some of the sauce as it sits, so the texture may change slightly. When reheating, it’s best to do so gently on the stovetop over low heat with a splash of milk, cream, or water to help loosen the sauce and restore its creaminess.
7. Can I freeze this pasta?
I generally do not recommend freezing this dish. Cream-based sauces have a tendency to separate and become grainy when thawed and reheated. The pasta itself can also become overly soft and mushy after freezing. This dish is at its absolute best when served fresh, and since it comes together so quickly, making a fresh batch is always the best option.
8. How can I make this recipe more kid-friendly?
This recipe is already quite popular with kids, but you can make a few tweaks. Use a fun pasta shape that they love, like bowties (farfalle) or wagon wheels. You can also finely chop the onion so it melts into the sauce, or even grate it for a less noticeable texture. If your child is hesitant about peas, you could substitute them with sweetcorn or finely chopped carrots, which also add a touch of sweetness.

Simple Tuna and Peas Pasta Recipe
Ingredients
The beauty of this recipe lies in its simplicity and the accessibility of its components. Each ingredient plays a crucial role in building layers of flavor and texture, transforming everyday staples into an extraordinary meal.
- Pasta (1 pound / 450g): The foundation of our dish. Choose a short pasta shape like penne, fusilli, rotini, or shells. These shapes are experts at trapping the creamy sauce and little bits of tuna and peas in their nooks and crannies, ensuring a perfect bite every time.
- Canned Tuna (2 x 5-ounce / 142g cans): The star protein. For the richest flavor, I recommend using tuna packed in olive oil and not draining it fully; that flavored oil adds incredible depth to the sauce. If you prefer a lighter dish, tuna in water works well too—just be sure to drain it thoroughly.
- Frozen Sweet Peas (1 ½ cups / 220g): These little green gems add a burst of sweetness and vibrant color. Using frozen peas is a fantastic shortcut; they are flash-frozen at peak freshness and cook in minutes right in the sauce.
- Extra Virgin Olive Oil (2 tablespoons): Used for sautéing the aromatics, this provides a classic, fruity base note that complements the other ingredients.
- Yellow Onion (1 medium): Finely chopped, the onion provides a sweet, aromatic foundation for the sauce, adding a layer of complexity that you can’t get otherwise.
- Garlic (4 cloves): Minced garlic is essential for its pungent, savory flavor. It infuses the sauce with an irresistible aroma and taste. Don’t be shy with the garlic!
- Heavy Cream (1 cup / 240ml): This is the key to an ultra-creamy, luxurious sauce. It coats every piece of pasta and brings all the flavors together. For a lighter version, you can substitute with half-and-half or evaporated milk.
- Grated Parmesan Cheese (¾ cup / 75g, plus more for serving): Use freshly grated Parmesan for the best results. It melts beautifully into the sauce, adding a salty, nutty, and umami-rich flavor that is simply divine.
- Lemon (1 whole): We’ll use both the zest and the juice. The zest adds a fragrant citrus aroma, while the juice provides a bright, acidic kick that cuts through the richness of the cream and tuna, balancing the entire dish.
- Reserved Pasta Water (1 cup / 240ml): This is the secret ingredient of professional chefs. The starchy water that the pasta cooked in helps to emulsify the sauce, making it creamier and helping it cling perfectly to the noodles. Never pour it all down the drain!
- Salt and Black Pepper (to taste): Essential for seasoning every layer of the dish, from the pasta water to the final sauce.
- Fresh Parsley (¼ cup, chopped): An optional but highly recommended garnish. It adds a fresh, herbaceous note and a pop of color that makes the finished dish look as good as it tastes.
Instructions
Follow these detailed steps to ensure your tuna and pea pasta is flawless. The process is quick and straightforward, perfect for any skill level.
- Cook the Pasta to Perfection: Bring a large pot of water to a rolling boil. Be generous with the salt—it should taste like the sea. This is your only chance to season the pasta itself. Add your chosen pasta and cook according to the package directions until it is al dente (cooked through but still has a firm bite). Just before draining, carefully scoop out and reserve at least 1 cup of the starchy pasta water. Drain the pasta and set it aside.
- Sauté the Aromatics: While the pasta is cooking, heat the olive oil in a large skillet or Dutch oven over medium heat. Add the finely chopped onion and sauté for 4-5 minutes, until it becomes soft and translucent. Add the minced garlic and cook for another minute until fragrant. Be careful not to let the garlic burn, as it will become bitter.
- Build the Creamy Sauce: Reduce the heat to medium-low. Pour in the heavy cream and bring it to a gentle simmer, stirring occasionally. Let it simmer for 2-3 minutes to thicken slightly. Stir in the grated Parmesan cheese until it has completely melted into the cream, creating a smooth, velvety sauce.
- Introduce the Stars: Gently flake the canned tuna into the skillet with a fork, incorporating it into the sauce. Add the frozen peas, the zest of one lemon, and a generous pinch of salt and freshly ground black pepper. Stir everything together and let it cook for 3-4 minutes, just until the peas are tender and bright green and the tuna is heated through.
- Unite the Pasta and Sauce: Add the drained pasta to the skillet with the sauce. Toss everything together until the pasta is thoroughly coated. If the sauce seems too thick, add a splash of the reserved pasta water. Start with a ¼ cup and add more as needed until the sauce reaches your desired consistency. The starchy water will help the sauce cling to every noodle.
- Finish and Serve: Turn off the heat. Squeeze in the juice from half of the lemon and stir. Give the pasta a final taste and adjust the seasoning with more salt, pepper, or lemon juice if needed. Serve immediately in warm bowls, garnished with a sprinkle of fresh parsley and an extra dusting of Parmesan cheese.
Nutrition
- Serving Size: one normal portion
- Calories: 650


