
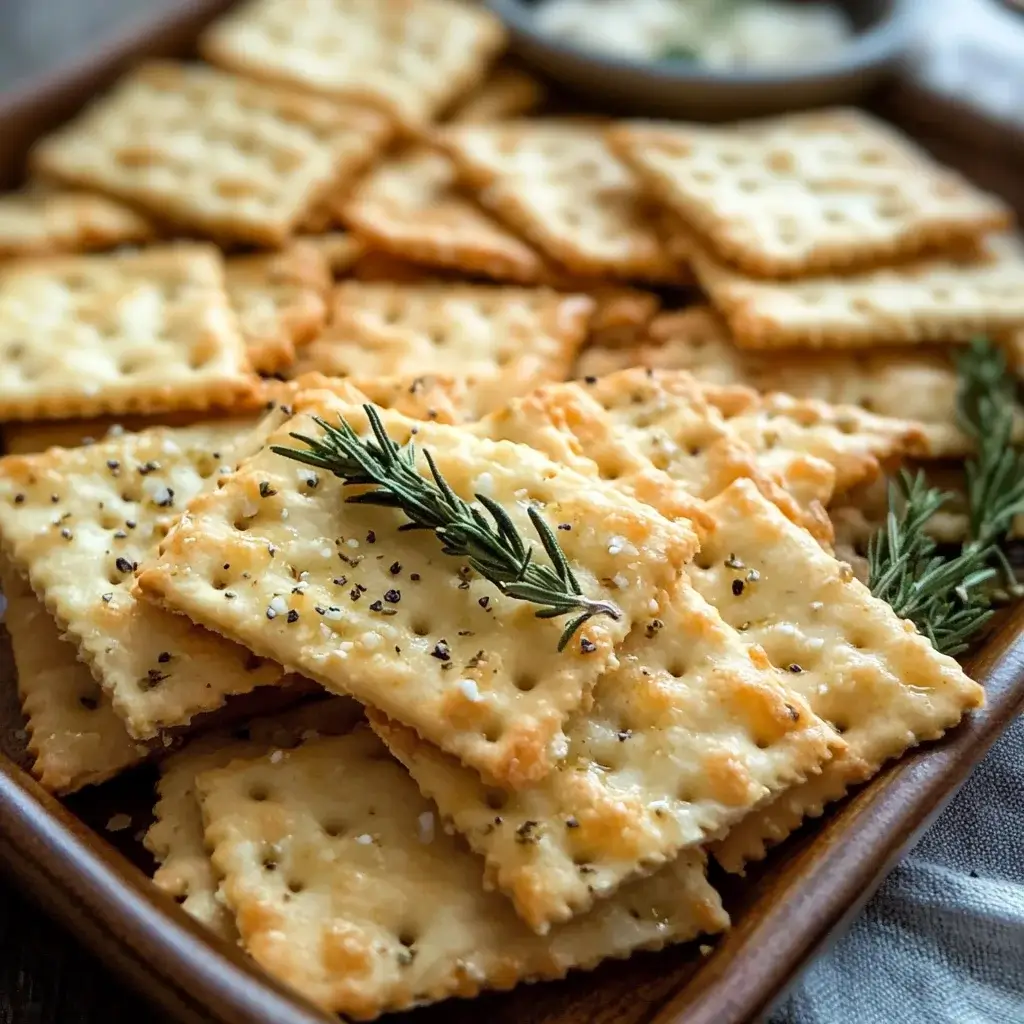

From the moment the aroma of baking cheese and herbs wafted through my kitchen, I knew these Savory Homemade Herb & Cheese Crackers were going to be a hit. And boy, was I right! My family devoured them straight from the cooling rack, their crispy edges and intensely flavorful centers disappearing in minutes. Honestly, store-bought crackers pale in comparison to the fresh, vibrant taste of these homemade delights. They’re incredibly versatile, perfect for snacking, pairing with cheeses, or adding a delightful crunch to soups and salads. If you’re looking for a recipe to elevate your snack game and impress your guests, look no further. These crackers are not only easy to make but are guaranteed to become a new favorite in your household. Get ready to experience the satisfying snap and irresistible taste of homemade goodness!
Ingredients You’ll Need to Bake Flavorful Herb & Cheese Crackers
The beauty of these savory crackers lies in the simplicity of their ingredients. You likely have many of these pantry staples already on hand. Let’s break down what you’ll need to create these crispy, cheesy delights, and explore some options for customization to suit your taste preferences.
- All-Purpose Flour: The foundation of our cracker, all-purpose flour provides the structure. For a slightly nuttier flavor and added texture, you could substitute up to half of the all-purpose flour with whole wheat flour. However, keep in mind that whole wheat flour can absorb more liquid, so you might need to slightly adjust the liquid content if you make this substitution. For a gluten-free version, you can explore gluten-free all-purpose flour blends, but be aware that the texture and baking time might need adjustments.
- Cold Butter: Cold butter is crucial for achieving that flaky, crisp texture in crackers. Just like in pie crusts, cold butter creates pockets of air during baking, resulting in a light and airy cracker. Use unsalted butter to control the saltiness of your crackers, especially since we’ll be adding cheese and potentially other salty ingredients. Make sure your butter is truly cold, straight from the refrigerator, when you start the recipe.
- Shredded Cheese: This is where you can really get creative! The type of cheese you choose will significantly impact the flavor profile of your crackers. Here are some excellent cheese options to consider:
- Sharp Cheddar: Provides a classic, robust cheese flavor that pairs wonderfully with herbs. Aged cheddar will offer a more intense taste.
- Parmesan: Adds a salty, nutty, and savory depth. Freshly grated Parmesan is always preferred for the best flavor and texture.
- Gruyere: Offers a slightly nutty and subtly sweet flavor that melts beautifully into the crackers.
- Monterey Jack: A milder, creamy cheese that melts well and provides a pleasant, subtle cheesy flavor. It’s a good choice if you want the herb flavors to be more prominent.
- Pepper Jack: For a spicy kick! Pepper Jack cheese adds a lovely heat that complements the savory herbs.
- A Blend of Cheeses: Don’t be afraid to mix and match! Combining cheddar and Parmesan, or Gruyere and Monterey Jack can create a more complex and nuanced flavor profile.
- Fresh Herbs: Fresh herbs are the stars of these crackers, infusing them with aromatic and vibrant flavors. Here are some excellent herb choices and combinations:
- Rosemary: Woody, piney, and intensely aromatic, rosemary pairs beautifully with cheese.
- Thyme: Earthy, slightly lemony, and versatile, thyme is a classic herb for savory dishes.
- Chives: Mild oniony flavor that adds a fresh, delicate touch.
- Parsley: Fresh and slightly peppery, parsley brightens up the flavor and adds a vibrant green color.
- Oregano: Robust and slightly peppery, oregano adds a Mediterranean flair.
- Herb Combinations: Consider combinations like rosemary and thyme, chives and parsley, or oregano and thyme for a more complex herb blend. Use about 1-2 tablespoons of finely chopped fresh herbs in total. You can also use dried herbs if fresh are not available, but use about half the amount and keep in mind that fresh herbs offer a brighter, more vibrant flavor.
- Cold Water: Cold water helps to bring the dough together and maintain the cold temperature of the butter, crucial for a flaky texture. Add water gradually until the dough just comes together.
- Salt: Essential for enhancing the flavors of the cheese and herbs. Use kosher salt or sea salt for the best flavor.
- Black Pepper: Adds a touch of spice and depth of flavor. Freshly ground black pepper is always recommended for the best aroma and taste.
- Optional Additions (for Flavor Variations):
- Garlic Powder: A pinch of garlic powder can enhance the savory notes.
- Onion Powder: Similar to garlic powder, onion powder adds depth and savory complexity.
- Red Pepper Flakes: For a touch of heat, add a pinch of red pepper flakes along with the herbs.
- Everything Bagel Seasoning: Sprinkle everything bagel seasoning on top of the crackers before baking for extra flavor and texture.
- Sesame Seeds, Poppy Seeds: These seeds can be sprinkled on top for added crunch and visual appeal.
Precise Measurements (Example Recipe – Adjust based on desired quantity):
- 1 ½ cups (190g) all-purpose flour
- ½ cup (1 stick, 113g) cold unsalted butter, cut into small cubes
- 1 cup (100-120g) shredded cheese of your choice (or a blend)
- 2 tablespoons finely chopped fresh herbs (or 1 tablespoon dried)
- ½ teaspoon salt (or to taste, depending on cheese saltiness)
- ¼ teaspoon black pepper
- ¼ – ½ cup ice water, as needed
Step-by-Step Instructions for Making Herb & Cheese Crackers
Making these savory crackers is surprisingly straightforward. Follow these detailed instructions to ensure cracker perfection!
- Prepare Your Ingredients: The key to success starts with preparation. Measure out all your ingredients. Cube your cold butter and keep it chilled until ready to use. Finely chop your fresh herbs. Shred your cheese and have it ready. Having everything prepped will make the process smooth and efficient.
- Combine Dry Ingredients: In a large mixing bowl, whisk together the all-purpose flour, salt, and black pepper. If you are using any powdered spices like garlic powder or onion powder, add them to the dry ingredients at this stage. Whisking ensures that the salt and spices are evenly distributed throughout the flour.
- Incorporate Cold Butter: Add the cubed cold butter to the flour mixture. This is where technique comes in. You want to cut the butter into the flour until it resembles coarse crumbs with some pea-sized pieces of butter remaining. You can use several methods to do this:
- Pastry Blender: A pastry blender is a tool specifically designed for cutting butter into flour. Press down and twist the blender to cut through the butter.
- Two Knives: Use two knives in a scissor-like motion to cut the butter into the flour.
- Fingertips (Quickly): You can use your fingertips, but work quickly to prevent the butter from warming up too much. Rub the butter and flour together until you reach the desired crumbly texture.
- Food Processor (Pulse Method): For speed and ease, a food processor can be used. Pulse the flour and butter mixture in short bursts until it reaches the coarse crumb stage. Be careful not to over-process, as this can warm the butter and develop too much gluten, leading to tougher crackers.
- Add Cheese and Herbs: Once the butter is incorporated, add the shredded cheese and chopped fresh herbs to the bowl. Gently toss everything together with your hands or a spatula until the cheese and herbs are evenly distributed throughout the flour and butter mixture.
- Add Cold Water and Form Dough: Now, gradually add the ice water, a tablespoon at a time, mixing gently after each addition. Use your hands or a spatula to bring the dough together. You want to add just enough water so that the dough comes together into a shaggy ball. Be careful not to add too much water, as this can make the dough sticky and tough. The dough should be slightly moist but not wet or sticky.
- Form Dough into a Disc and Chill: Turn the dough out onto a lightly floured surface. Gently knead it a few times just until it comes together into a smooth disc. Wrap the dough tightly in plastic wrap and flatten it into a disc about 1 inch thick. Chilling the dough is crucial! It allows the gluten to relax, making the dough easier to roll out, and it firms up the butter, preventing the crackers from spreading too much during baking. Refrigerate the dough for at least 30 minutes, or up to 2 hours. For longer chilling, you can refrigerate it for up to overnight.
- Preheat Oven and Prepare Baking Sheets: Preheat your oven to 375°F (190°C). Line baking sheets with parchment paper or silicone baking mats. Parchment paper prevents sticking and makes cleanup easy, while silicone mats provide even heat distribution.
- Roll Out the Dough: Once the dough is chilled, remove it from the refrigerator. Lightly flour your work surface and rolling pin. Roll out the dough as thinly as possible, about 1/8 inch thick or even thinner if you can manage. The thinner you roll the dough, the crispier your crackers will be. Work quickly as the dough will warm up as you roll. If the dough becomes too sticky or warm while rolling, return it to the refrigerator for a few minutes to chill.
- Cut Out Crackers: Use a pizza cutter, a sharp knife, or cookie cutters to cut the dough into desired shapes. You can make squares, rectangles, circles, or any fun shapes you like. For uniform crackers, use a ruler to guide your cuts if making squares or rectangles. Alternatively, for a more rustic look, you can simply break the rolled-out dough into irregular cracker shapes.
- Transfer Crackers to Baking Sheets: Carefully transfer the cut-out crackers to the prepared baking sheets. Arrange them in a single layer, leaving a little space between each cracker. You can use a thin spatula or offset spatula to help lift and transfer the delicate crackers.
- Dock the Crackers (Optional but Recommended): Docking the crackers means poking small holes in them with a fork. This prevents them from puffing up too much during baking and ensures they bake evenly and remain flat and crispy. Dock each cracker several times with a fork.
- Bake the Crackers: Bake in the preheated oven for 12-18 minutes, or until the crackers are golden brown around the edges and lightly golden in the center. Baking time will vary depending on the thickness of your crackers and your oven. Keep a close eye on them towards the end of baking to prevent burning. Rotate the baking sheets halfway through baking to ensure even browning.
- Cool Completely: Once baked, remove the baking sheets from the oven and let the crackers cool completely on the baking sheets. As they cool, they will crisp up further. Resist the urge to move them while they are still warm, as they are delicate and can break easily. Once completely cooled, they will be wonderfully crisp and ready to enjoy!
- Store Properly: Store the cooled crackers in an airtight container at room temperature. Properly stored, they will stay crisp for several days, typically about 3-5 days. If they lose some crispness, you can briefly re-crisp them in a low oven (around 300°F or 150°C) for a few minutes.
Nutrition Facts (Estimated)
- Servings: Approximately 4-6 servings (depending on cracker size and serving size)
- Calories per Serving (Estimated): Around 200-250 calories per serving (This is an estimate and can vary based on the type of cheese, butter, and serving size. For a more precise calculation, use a nutrition calculator app and input the specific ingredients you used).
Important Note: These are estimated nutritional values. Homemade recipes can vary significantly based on ingredient choices and portion sizes. For accurate nutritional information, it’s best to use a recipe analyzer with the specific brands and quantities of ingredients you use.
Preparation Time
- Prep Time: 20-25 minutes (including ingredient prep and dough making)
- Chill Time: 30 minutes to 2 hours (or overnight)
- Cook Time: 12-18 minutes per batch
- Total Time: Approximately 1 hour – 2 hours 30 minutes (including chill time)
How to Serve Your Savory Herb & Cheese Crackers
These versatile crackers are delicious on their own, but they truly shine when paired with other flavors and textures. Here are some delightful ways to serve them:
- Cheese Boards & Charcuterie Platters:
- Classic Pairing: Serve alongside a variety of cheeses, such as cheddar, brie, goat cheese, and blue cheese. The savory crackers provide a perfect textural contrast and complement the richness of the cheese.
- Charcuterie Companions: Add them to your charcuterie board with cured meats like salami, prosciutto, and chorizo. The crackers balance the saltiness of the meats.
- Olive & Antipasto Platters: Include them on platters with olives, marinated vegetables, artichoke hearts, and roasted red peppers for a Mediterranean-inspired spread.
- Dips & Spreads:
- Cream Cheese Dips: Pair them with creamy dips like spinach artichoke dip, French onion dip, or a simple herbed cream cheese.
- Hummus & Baba Ghanoush: The crackers are excellent for scooping up hummus, baba ghanoush, or other Middle Eastern dips.
- Guacamole & Salsa: For a lighter option, serve them with guacamole, salsa, or pico de gallo.
- White Bean Dip: A flavorful white bean dip with herbs and garlic would be a delicious and healthy pairing.
- Soups & Salads:
- Soup Toppers: Crumble crackers over creamy soups like tomato soup, potato soup, or butternut squash soup for added texture and flavor.
- Salad Crunch: Break crackers into bite-sized pieces and use them as croutons in salads. They add a savory, cheesy crunch to green salads or Caesar salads.
- Snacking & Appetizers:
- Simple Snack: Enjoy them straight out of the jar as a satisfying and flavorful snack.
- Wine & Cheese Appetizer: Serve them with a glass of wine and a selection of cheeses for an elegant and easy appetizer.
- Party Nibbles: They are perfect for parties and gatherings. Arrange them on platters for guests to enjoy.
- Breakfast & Brunch (Unconventional but Delicious!):
- Breakfast with Eggs: Crumble them over scrambled eggs or frittatas for a savory breakfast twist.
- Avocado Toast Topping: Use them as a crunchy topping for avocado toast instead of everything bagel seasoning.
Additional Tips for Perfect Homemade Herb & Cheese Crackers
- Keep Ingredients Cold: Maintaining cold ingredients, especially the butter and water, is crucial for achieving a flaky and crisp texture. Work quickly and don’t let the dough get too warm. If needed, chill the dough or even your rolling pin and work surface if your kitchen is warm.
- Don’t Overwork the Dough: Overworking the dough develops gluten, which can result in tough crackers. Mix just until the dough comes together and avoid excessive kneading. Gentle handling is key.
- Roll Dough Thinly and Evenly: The thinner you roll the dough, the crispier your crackers will be. Aim for a thickness of about 1/8 inch. Roll the dough as evenly as possible for uniform baking. Uneven thickness can lead to some crackers burning while others are still underbaked.
- Dock the Crackers: Don’t skip docking! Poking holes in the crackers with a fork prevents them from puffing up and ensures they bake flat and crispy. This step is essential for achieving that classic cracker texture.
- Watch Baking Time Carefully: Crackers can go from perfectly golden brown to burnt quickly. Keep a close eye on them during the last few minutes of baking. Baking time will vary depending on your oven and cracker thickness. Remove them from the oven when they are golden brown around the edges and lightly golden in the center. They will continue to crisp up as they cool.
Frequently Asked Questions (FAQ) About Herb & Cheese Crackers
Q1: Can I use different types of cheese?
A: Absolutely! Experiment with different cheeses to create your own unique flavor combinations. Sharp cheddar, Parmesan, Gruyere, Monterey Jack, and Pepper Jack are all excellent choices. You can also blend cheeses for a more complex flavor profile.
Q2: Can I use dried herbs instead of fresh?
A: Yes, you can use dried herbs if fresh herbs are not available. Use about half the amount of dried herbs as you would fresh herbs (e.g., 1 tablespoon dried herbs instead of 2 tablespoons fresh). Keep in mind that fresh herbs provide a brighter, more vibrant flavor, but dried herbs will still work well.
Q3: My cracker dough is too sticky. What should I do?
A: If your dough is too sticky, it likely means you’ve added too much water. Sprinkle a little extra flour, about a tablespoon at a time, onto your work surface and gently knead it into the dough until it’s easier to handle and no longer sticky. Be careful not to add too much flour, as this can make the crackers tough. You can also chill the dough for a bit longer, as cold dough is less sticky.
Q4: How do I store leftover crackers to keep them crisp?
A: To keep your homemade herb & cheese crackers crisp, store them in an airtight container at room temperature. Make sure they are completely cooled before storing them. Properly stored, they should stay crisp for 3-5 days. Avoid storing them in humid environments, as moisture can make them lose their crispness.
Q5: Can I make the dough ahead of time?
A: Yes, you can make the cracker dough ahead of time. Wrap the dough disc tightly in plastic wrap and store it in the refrigerator for up to 2 days. When you’re ready to bake, let the dough sit at room temperature for about 10-15 minutes to soften slightly before rolling it out. You can also freeze the dough for longer storage. Wrap it tightly and freeze for up to 2 months. Thaw it overnight in the refrigerator before rolling and baking.
Savory Homemade Herb & Cheese Crackers
Ingredients
The beauty of these savory crackers lies in the simplicity of their ingredients. You likely have many of these pantry staples already on hand. Let’s break down what you’ll need to create these crispy, cheesy delights, and explore some options for customization to suit your taste preferences.
- All-Purpose Flour: The foundation of our cracker, all-purpose flour provides the structure. For a slightly nuttier flavor and added texture, you could substitute up to half of the all-purpose flour with whole wheat flour. However, keep in mind that whole wheat flour can absorb more liquid, so you might need to slightly adjust the liquid content if you make this substitution. For a gluten-free version, you can explore gluten-free all-purpose flour blends, but be aware that the texture and baking time might need adjustments.
- Cold Butter: Cold butter is crucial for achieving that flaky, crisp texture in crackers. Just like in pie crusts, cold butter creates pockets of air during baking, resulting in a light and airy cracker. Use unsalted butter to control the saltiness of your crackers, especially since we’ll be adding cheese and potentially other salty ingredients. Make sure your butter is truly cold, straight from the refrigerator, when you start the recipe.
- Shredded Cheese: This is where you can really get creative! The type of cheese you choose will significantly impact the flavor profile of your crackers. Here are some excellent cheese options to consider:
- Sharp Cheddar: Provides a classic, robust cheese flavor that pairs wonderfully with herbs. Aged cheddar will offer a more intense taste.
- Parmesan: Adds a salty, nutty, and savory depth. Freshly grated Parmesan is always preferred for the best flavor and texture.
- Gruyere: Offers a slightly nutty and subtly sweet flavor that melts beautifully into the crackers.
- Monterey Jack: A milder, creamy cheese that melts well and provides a pleasant, subtle cheesy flavor. It’s a good choice if you want the herb flavors to be more prominent.
- Pepper Jack: For a spicy kick! Pepper Jack cheese adds a lovely heat that complements the savory herbs.
- A Blend of Cheeses: Don’t be afraid to mix and match! Combining cheddar and Parmesan, or Gruyere and Monterey Jack can create a more complex and nuanced flavor profile.
- Fresh Herbs: Fresh herbs are the stars of these crackers, infusing them with aromatic and vibrant flavors. Here are some excellent herb choices and combinations:
- Rosemary: Woody, piney, and intensely aromatic, rosemary pairs beautifully with cheese.
- Thyme: Earthy, slightly lemony, and versatile, thyme is a classic herb for savory dishes.
- Chives: Mild oniony flavor that adds a fresh, delicate touch.
- Parsley: Fresh and slightly peppery, parsley brightens up the flavor and adds a vibrant green color.
- Oregano: Robust and slightly peppery, oregano adds a Mediterranean flair.
- Herb Combinations: Consider combinations like rosemary and thyme, chives and parsley, or oregano and thyme for a more complex herb blend. Use about 1-2 tablespoons of finely chopped fresh herbs in total. You can also use dried herbs if fresh are not available, but use about half the amount and keep in mind that fresh herbs offer a brighter, more vibrant flavor.
- Cold Water: Cold water helps to bring the dough together and maintain the cold temperature of the butter, crucial for a flaky texture. Add water gradually until the dough just comes together.
- Salt: Essential for enhancing the flavors of the cheese and herbs. Use kosher salt or sea salt for the best flavor.
- Black Pepper: Adds a touch of spice and depth of flavor. Freshly ground black pepper is always recommended for the best aroma and taste.
- Optional Additions (for Flavor Variations):
- Garlic Powder: A pinch of garlic powder can enhance the savory notes.
- Onion Powder: Similar to garlic powder, onion powder adds depth and savory complexity.
- Red Pepper Flakes: For a touch of heat, add a pinch of red pepper flakes along with the herbs.
- Everything Bagel Seasoning: Sprinkle everything bagel seasoning on top of the crackers before baking for extra flavor and texture.
- Sesame Seeds, Poppy Seeds: These seeds can be sprinkled on top for added crunch and visual appeal.
Instructions
Making these savory crackers is surprisingly straightforward. Follow these detailed instructions to ensure cracker perfection!
- Prepare Your Ingredients: The key to success starts with preparation. Measure out all your ingredients. Cube your cold butter and keep it chilled until ready to use. Finely chop your fresh herbs. Shred your cheese and have it ready. Having everything prepped will make the process smooth and efficient.
- Combine Dry Ingredients: In a large mixing bowl, whisk together the all-purpose flour, salt, and black pepper. If you are using any powdered spices like garlic powder or onion powder, add them to the dry ingredients at this stage. Whisking ensures that the salt and spices are evenly distributed throughout the flour.
- Incorporate Cold Butter: Add the cubed cold butter to the flour mixture. This is where technique comes in. You want to cut the butter into the flour until it resembles coarse crumbs with some pea-sized pieces of butter remaining. You can use several methods to do this:
- Pastry Blender: A pastry blender is a tool specifically designed for cutting butter into flour. Press down and twist the blender to cut through the butter.
- Two Knives: Use two knives in a scissor-like motion to cut the butter into the flour.
- Fingertips (Quickly): You can use your fingertips, but work quickly to prevent the butter from warming up too much. Rub the butter and flour together until you reach the desired crumbly texture.
- Food Processor (Pulse Method): For speed and ease, a food processor can be used. Pulse the flour and butter mixture in short bursts until it reaches the coarse crumb stage. Be careful not to over-process, as this can warm the butter and develop too much gluten, leading to tougher crackers.
- Add Cheese and Herbs: Once the butter is incorporated, add the shredded cheese and chopped fresh herbs to the bowl. Gently toss everything together with your hands or a spatula until the cheese and herbs are evenly distributed throughout the flour and butter mixture.
- Add Cold Water and Form Dough: Now, gradually add the ice water, a tablespoon at a time, mixing gently after each addition. Use your hands or a spatula to bring the dough together. You want to add just enough water so that the dough comes together into a shaggy ball. Be careful not to add too much water, as this can make the dough sticky and tough. The dough should be slightly moist but not wet or sticky.
- Form Dough into a Disc and Chill: Turn the dough out onto a lightly floured surface. Gently knead it a few times just until it comes together into a smooth disc. Wrap the dough tightly in plastic wrap and flatten it into a disc about 1 inch thick. Chilling the dough is crucial! It allows the gluten to relax, making the dough easier to roll out, and it firms up the butter, preventing the crackers from spreading too much during baking. Refrigerate the dough for at least 30 minutes, or up to 2 hours. For longer chilling, you can refrigerate it for up to overnight.
- Preheat Oven and Prepare Baking Sheets: Preheat your oven to 375°F (190°C). Line baking sheets with parchment paper or silicone baking mats. Parchment paper prevents sticking and makes cleanup easy, while silicone mats provide even heat distribution.
- Roll Out the Dough: Once the dough is chilled, remove it from the refrigerator. Lightly flour your work surface and rolling pin. Roll out the dough as thinly as possible, about 1/8 inch thick or even thinner if you can manage. The thinner you roll the dough, the crispier your crackers will be. Work quickly as the dough will warm up as you roll. If the dough becomes too sticky or warm while rolling, return it to the refrigerator for a few minutes to chill.
- Cut Out Crackers: Use a pizza cutter, a sharp knife, or cookie cutters to cut the dough into desired shapes. You can make squares, rectangles, circles, or any fun shapes you like. For uniform crackers, use a ruler to guide your cuts if making squares or rectangles. Alternatively, for a more rustic look, you can simply break the rolled-out dough into irregular cracker shapes.
- Transfer Crackers to Baking Sheets: Carefully transfer the cut-out crackers to the prepared baking sheets. Arrange them in a single layer, leaving a little space between each cracker. You can use a thin spatula or offset spatula to help lift and transfer the delicate crackers.
- Dock the Crackers (Optional but Recommended): Docking the crackers means poking small holes in them with a fork. This prevents them from puffing up too much during baking and ensures they bake evenly and remain flat and crispy. Dock each cracker several times with a fork.
- Bake the Crackers: Bake in the preheated oven for 12-18 minutes, or until the crackers are golden brown around the edges and lightly golden in the center. Baking time will vary depending on the thickness of your crackers and your oven. Keep a close eye on them towards the end of baking to prevent burning. Rotate the baking sheets halfway through baking to ensure even browning.
- Cool Completely: Once baked, remove the baking sheets from the oven and let the crackers cool completely on the baking sheets. As they cool, they will crisp up further. Resist the urge to move them while they are still warm, as they are delicate and can break easily. Once completely cooled, they will be wonderfully crisp and ready to enjoy!
- Store Properly: Store the cooled crackers in an airtight container at room temperature. Properly stored, they will stay crisp for several days, typically about 3-5 days. If they lose some crispness, you can briefly re-crisp them in a low oven (around 300°F or 150°C) for a few minutes.
Nutrition
- Serving Size: one normal portion
- Calories: 250


