

There are some recipes that just become instant classics in a household, and this roasted vegetable tart is undoubtedly one of them in mine. From the first time I pulled this golden beauty out of the oven, the aroma alone was enough to gather everyone in the kitchen, noses twitching with anticipation. The vibrant colors of the roasted vegetables nestled in a flaky, buttery crust are not just visually stunning, they promise a burst of flavors in every bite. What I love most about this recipe is its incredible versatility. It’s elegant enough to serve at a dinner party, yet comforting and satisfying enough for a simple weeknight meal. My kids, usually vegetable-averse, devour this tart without complaint, and my husband always requests it for weekend brunches. It’s become our go-to for showcasing seasonal produce, and it’s a recipe I’m thrilled to share with you. Get ready to experience a symphony of textures and tastes in this easy-to-make, utterly delicious roasted vegetable tart that will quickly become a favorite in your home too.
Ingredients: The Heart of the Tart
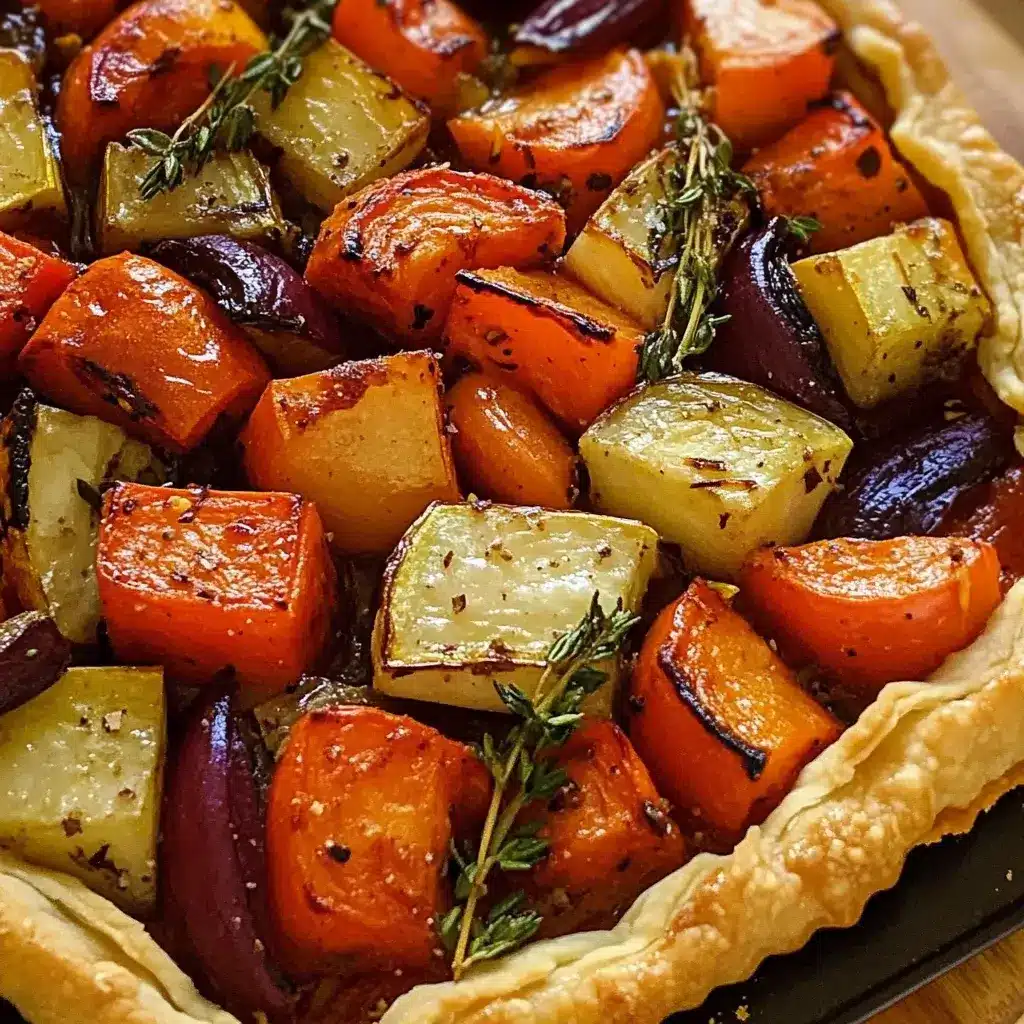
This roasted vegetable tart is all about showcasing the natural sweetness and flavors of fresh vegetables. Here’s what you’ll need to create this vibrant and delicious dish:
- For the Crust:
- All-Purpose Flour: (2 1/2 cups) – Forms the base of our flaky and tender tart crust, providing structure and a neutral flavor.
- Cold Unsalted Butter: (1 cup, 2 sticks) – The key to a truly flaky crust! Cold butter creates pockets of steam during baking, resulting in layers of delicious flakiness.
- Ice Water: (1/2 cup to 3/4 cup) – Used to bring the dough together, keeping it cold and preventing gluten development for a tender crust.
- Salt: (1 teaspoon) – Enhances the flavors of the crust and balances the sweetness of the vegetables.
- For the Roasted Vegetables:
- Assorted Vegetables (about 2 lbs total):
- Bell Peppers (2-3, various colors): Adds sweetness and vibrant color. Red and yellow peppers are particularly sweet when roasted.
- Zucchini or Yellow Squash (2 medium): Provides a mild, slightly sweet flavor and tender texture when roasted.
- Eggplant (1 medium): Offers a meaty texture and slightly smoky flavor after roasting.
- Red Onion (1 large): Becomes sweet and mellow when roasted, adding depth of flavor.
- Cherry or Grape Tomatoes (1 pint): Burst with juicy sweetness and add a touch of acidity.
- Olive Oil: (1/4 cup) – Used for roasting the vegetables, it helps them caramelize and develop rich flavors.
- Balsamic Vinegar: (2 tablespoons) – Adds a touch of tangy sweetness that complements the roasted vegetables beautifully.
- Dried Herbs (1 tablespoon total): (such as Italian seasoning, thyme, rosemary, or oregano) – Enhances the savory flavors of the vegetables.
- Salt and Black Pepper: To taste – Essential for seasoning and bringing out the best flavors in the vegetables.
- Assorted Vegetables (about 2 lbs total):
- For the Tart Filling:
- Cream Cheese: (4 ounces, softened) – Creates a creamy and tangy base for the roasted vegetables, adding richness and flavor.
- Sour Cream or Greek Yogurt: (1/4 cup) – Adds a touch of tanginess and thins the cream cheese slightly for easier spreading.
- Garlic: (2 cloves, minced) – Infuses the cream cheese mixture with a savory aroma and flavor.
- Fresh Herbs (optional, for garnish): (such as basil, parsley, or chives, chopped) – Adds a fresh, vibrant finish and visual appeal.
- Shredded Cheese (optional, for topping): (such as Gruyere, Parmesan, or mozzarella) – Adds a melted, cheesy layer and extra flavor (choose vegetarian options if needed).
Instructions: Baking Your Masterpiece
Follow these step-by-step instructions to create a stunning and flavorful roasted vegetable tart. Don’t be intimidated by the multiple steps; each is straightforward and rewarding!
Step 1: Prepare the Tart Crust
- Combine Dry Ingredients: In a large bowl, whisk together the all-purpose flour and salt. This ensures the salt is evenly distributed throughout the dough, which is important for flavor.
- Cut in the Butter: Cut the cold butter into small cubes. Add the cold butter to the flour mixture. Using a pastry blender or your fingertips, cut the butter into the flour until the mixture resembles coarse crumbs with some pea-sized pieces of butter remaining. The goal is to keep the butter cold and in small pieces to create flakiness. Work quickly to prevent the butter from melting.
- Add Ice Water Gradually: Drizzle ice water, one tablespoon at a time, over the flour and butter mixture, mixing gently with a fork after each addition. Continue adding ice water until the dough just comes together and forms a shaggy ball. Be careful not to add too much water, as this can make the crust tough. You want the dough to be moist enough to hold together but not sticky.
- Form and Chill the Dough: Turn the dough out onto a lightly floured surface. Gently gather it into a disc about 1 inch thick. Wrap the dough tightly in plastic wrap and refrigerate for at least 1 hour, or preferably 2 hours. This chilling time is crucial as it allows the gluten to relax, making the dough easier to roll and preventing shrinkage during baking. Cold dough also helps maintain the butter’s texture, contributing to flakiness.
Step 2: Roast the Vegetables
- Preheat Oven and Prepare Vegetables: Preheat your oven to 400°F (200°C). Wash and dry all the vegetables. For the bell peppers, remove the cores and seeds and cut them into 1-inch pieces. Trim the ends off the zucchini and yellow squash and cut them into 1/2-inch thick rounds or half-moons if they are large. For the eggplant, trim the ends and cut it into 1-inch cubes. Peel the red onion, halve it, and then slice it into wedges. Leave the cherry or grape tomatoes whole.
- Toss Vegetables with Oil and Seasoning: In a large bowl, toss all the prepared vegetables with olive oil, balsamic vinegar, dried herbs, salt, and black pepper. Make sure the vegetables are evenly coated with oil and seasoning to ensure they roast properly and are full of flavor.
- Roast the Vegetables: Spread the vegetables in a single layer on a large baking sheet or two baking sheets if needed to avoid overcrowding. Overcrowding can cause the vegetables to steam instead of roast. Roast in the preheated oven for 25-35 minutes, or until the vegetables are tender and slightly caramelized, stirring halfway through. Roasting time may vary depending on the size and density of your vegetables and your oven. Check for tenderness by piercing a piece of eggplant or potato (if using) with a fork. They should be easily pierced but not mushy. The edges of the vegetables should be slightly browned and caramelized, indicating they have developed rich, roasted flavors.
- Cool the Vegetables: Once roasted, remove the vegetables from the oven and let them cool slightly while you prepare the tart crust. Cooling allows the vegetables to retain their shape and prevents them from making the tart filling too watery.
Step 3: Assemble and Bake the Tart
- Prepare the Cream Cheese Filling: While the vegetables are roasting and cooling, prepare the cream cheese filling. In a medium bowl, combine the softened cream cheese, sour cream or Greek yogurt, and minced garlic. Mix until smooth and well combined. Taste and adjust seasoning with salt and pepper if needed. This simple filling adds a creamy, flavorful base to the tart that complements the roasted vegetables perfectly.
- Roll Out the Tart Crust: Lightly flour a clean work surface. Remove the chilled tart dough from the refrigerator. Roll out the dough into a 13-inch circle, about 1/8-inch thick. If the dough is sticking, lightly flour your rolling pin and the work surface as needed. Rolling to the correct thickness ensures the crust will bake through and be flaky.
- Transfer Dough to Tart Pan: Gently transfer the rolled-out dough to a 9 or 10-inch tart pan with a removable bottom. Press the dough into the bottom and up the sides of the pan, trimming off any excess dough hanging over the edge. You can use a rolling pin to roll over the top edge of the pan to neatly trim the dough. Alternatively, you can crimp the edges decoratively using your fingers or a fork.
- Pre-bake the Tart Crust (Blind Bake – Optional but Recommended for a Crispier Crust): For a crispier crust, pre-bake it before adding the filling. Line the tart crust with parchment paper and fill with pie weights or dried beans. Bake in the preheated oven at 375°F (190°C) for 15 minutes. Remove the parchment paper and pie weights and bake for another 5-7 minutes, or until the crust is lightly golden brown. Pre-baking helps prevent the bottom crust from becoming soggy from the moist vegetable filling. If you skip pre-baking, ensure you bake the tart for a longer time in the final baking step to ensure the crust is cooked through.
- Assemble the Tart: Spread the cream cheese filling evenly over the bottom of the pre-baked or unbaked tart crust. Arrange the roasted vegetables attractively over the cream cheese filling. You can create a pattern or simply scatter them evenly. If using shredded cheese, sprinkle it over the vegetables now.
- Bake the Tart: Bake the assembled tart in the oven at 375°F (190°C) for 20-25 minutes, or until the crust is golden brown and the filling is heated through and bubbly (if cheese is used, until melted and golden). If you did not pre-bake the crust, you may need to bake it slightly longer, about 30-35 minutes, to ensure the crust is fully cooked.
- Cool and Serve: Remove the roasted vegetable tart from the oven and let it cool in the tart pan for at least 10-15 minutes before removing the outer ring of the tart pan. This allows the filling to set slightly and makes slicing easier. Garnish with fresh herbs, if desired, and serve warm or at room temperature.
Nutrition Facts: A Wholesome Delight
This roasted vegetable tart is not only delicious but also packed with nutrients from the colorful array of vegetables. Here are approximate nutrition facts per serving (based on 8 servings, and may vary depending on specific ingredients and portion sizes):
- Servings: 8
- Calories per Serving: Approximately 350-400 kcal
- Total Fat: 20-25g
Note: These are estimated values and can vary based on specific ingredients used (e.g., type of cheese, vegetables, fat content of dairy). This tart is a good source of fiber, vitamins, and minerals from the vegetables.
Preparation Time: Plan Your Baking
This recipe involves a few steps, but it’s well worth the effort! Here’s a breakdown of the preparation time:
- Prep Time: 45-60 minutes (includes making the crust and chopping vegetables)
- Chill Time (Crust): Minimum 1 hour (ideally 2 hours)
- Cook Time (Roasting Vegetables): 25-35 minutes
- Cook Time (Baking Tart): 20-35 minutes (depending on pre-baking crust)
- Total Time: Approximately 3-4 hours (including chill time), but active cooking and prep time is around 1.5-2 hours.
Description: While the total time might seem long due to the chilling of the dough, much of this is inactive time. You can easily prepare the dough in advance and even roast the vegetables ahead of time to streamline the assembly process. This tart is perfect for weekend baking or when you want to impress with a homemade dish.
How to Serve: Tart Versatility
This roasted vegetable tart is incredibly versatile and can be enjoyed in various ways. Here are some serving suggestions:
- Warm or at Room Temperature: The tart is delicious both warm, fresh from the oven, and at room temperature. It retains its flavor and texture well as it cools.
- As a Main Course: Serve a generous slice of the tart as a vegetarian main course for lunch or dinner. It’s satisfying and flavorful enough to stand on its own.
- As a Side Dish: Cut into smaller slices or squares, it makes a wonderful side dish for grilled meats, roasted chicken, or fish.
- With a Salad: Pair it with a fresh green salad dressed with a light vinaigrette to create a balanced and complete meal. Arugula, spinach, or mixed greens salad works particularly well.
- For Brunch or Lunch: This tart is a fantastic addition to brunch spreads or lunch gatherings. It’s elegant and flavorful, perfect for special occasions or casual get-togethers.
- For Parties and Potlucks: The tart is visually appealing and travels well, making it ideal for bringing to parties, potlucks, or picnics.
- With a Dipping Sauce: Consider serving it with a side of balsamic glaze, pesto, or a creamy herb dip for extra flavor and dipping options.
Additional Tips: Elevate Your Tart
Want to make your roasted vegetable tart even better? Here are some helpful tips and variations:
- Customize Your Vegetables: Feel free to use a variety of seasonal vegetables based on your preferences and what’s available. Consider adding roasted asparagus, broccoli florets, sweet potatoes, butternut squash, or mushrooms. Roasting different vegetables will create unique flavor profiles.
- Experiment with Cheese: If you like cheese, try different types beyond the optional shredded cheese topping. Crumble goat cheese or feta cheese over the roasted vegetables before baking for a tangy and creamy addition. You can also incorporate cheese into the cream cheese filling, such as adding grated Parmesan or Pecorino Romano.
- Make it Vegan: To make this tart vegan, use a vegan butter alternative for the crust and a vegan cream cheese alternative for the filling. Ensure any shredded cheese topping is also vegan. The roasted vegetables themselves are naturally vegan.
- Gluten-Free Crust Option: For a gluten-free version, use a gluten-free all-purpose flour blend to make the tart crust. Follow the recipe instructions as usual, but be mindful that gluten-free doughs can be more delicate.
- Make-Ahead Crust: The tart crust dough can be made ahead of time and stored in the refrigerator for up to 2 days or frozen for up to a month. Thaw the dough in the refrigerator overnight before rolling it out. This is a great time-saver when preparing for a gathering.
- Roast Vegetables Ahead: Roasting the vegetables can also be done a day in advance. Store roasted vegetables in an airtight container in the refrigerator. Reheat them slightly before assembling the tart to remove excess moisture if needed.
- Blind Baking for Extra Crispness: Blind baking the tart crust, as described in the instructions, is highly recommended for a truly crispy bottom crust. This is especially important if you are using juicy vegetables.
- Don’t Overcrowd the Vegetables: When roasting vegetables, ensure they are spread in a single layer on the baking sheet. Overcrowding will cause them to steam instead of roast, resulting in less flavorful and less caramelized vegetables. Use two baking sheets if necessary.
FAQ: Your Tart Questions Answered
Here are some frequently asked questions about making roasted vegetable tart:
Q1: Can I use store-bought pie crust to save time?
A: Yes, you can definitely use store-bought pie crust to save time. Choose a good quality refrigerated pie crust. You’ll need one crust for this recipe. Follow the package instructions for preparing the crust, and then proceed with the recipe instructions for the filling and roasting vegetables. Using store-bought crust will significantly reduce the prep time.
Q2: What other vegetables would be good in this tart?
A: The possibilities are endless! Consider adding roasted Brussels sprouts, carrots, parsnips, fennel, butternut squash, sweet potatoes, or even corn kernels. Heartier vegetables like potatoes and root vegetables will need a slightly longer roasting time. Seasonal vegetables are always a great choice to maximize flavor.
Q3: Can I make this tart ahead of time?
A: Yes, you can prepare many components of this tart in advance. The tart crust dough can be made ahead and chilled or frozen. Roasted vegetables can be made a day ahead. You can assemble the tart a few hours before baking and keep it refrigerated. However, for the best crust texture, it’s recommended to bake the tart closer to serving time. Leftover baked tart can be stored in the refrigerator for 2-3 days and reheated gently in the oven or microwave.
Q4: How do I prevent the tart crust from shrinking during baking?
A: Chilling the dough thoroughly before rolling and baking is crucial to prevent shrinkage. Blind baking the crust with pie weights also helps to keep its shape. Avoid overworking the dough when making it, as this can develop gluten and lead to shrinkage.
Q5: Can I freeze the baked roasted vegetable tart?
A: Yes, you can freeze baked roasted vegetable tart. Let the tart cool completely after baking. Wrap it tightly in plastic wrap and then in aluminum foil. Freeze for up to 2-3 months. To reheat, thaw overnight in the refrigerator and then bake in a preheated oven at 350°F (175°C) for about 20-30 minutes, or until heated through. The crust might lose some of its original crispness after freezing and thawing.
Q6: I don’t have balsamic vinegar. Can I substitute something else?
A: Yes, you can substitute balsamic vinegar with red wine vinegar or apple cider vinegar. These will provide a similar tangy flavor. You can also add a touch of honey or maple syrup to mimic the sweetness of balsamic vinegar if desired.
Q7: My roasted vegetables are releasing a lot of water. What should I do?
A: Some vegetables, like zucchini and eggplant, can release moisture during roasting. To minimize this, make sure you don’t overcrowd the baking sheet. You can also toss the vegetables with a little salt before roasting, which helps draw out excess moisture. If your vegetables are still watery after roasting, you can drain off any excess liquid before adding them to the tart.
Q8: Can I add protein to this tart to make it a more substantial meal?
A: Absolutely! You can add protein to make it even more filling. Consider adding crumbled cooked sausage (vegetarian or meat-based), chickpeas, white beans, or lentils to the roasted vegetable mixture before assembling the tart. You could also top the tart with crumbled feta or goat cheese for added protein and flavor.

Roasted Vegetable Tart
Ingredients
This roasted vegetable tart is all about showcasing the natural sweetness and flavors of fresh vegetables. Here’s what you’ll need to create this vibrant and delicious dish:
- For the Crust:
- All-Purpose Flour: (2 1/2 cups) – Forms the base of our flaky and tender tart crust, providing structure and a neutral flavor.
- Cold Unsalted Butter: (1 cup, 2 sticks) – The key to a truly flaky crust! Cold butter creates pockets of steam during baking, resulting in layers of delicious flakiness.
- Ice Water: (1/2 cup to 3/4 cup) – Used to bring the dough together, keeping it cold and preventing gluten development for a tender crust.
- Salt: (1 teaspoon) – Enhances the flavors of the crust and balances the sweetness of the vegetables.
- For the Roasted Vegetables:
- Assorted Vegetables (about 2 lbs total):
- Bell Peppers (2-3, various colors): Adds sweetness and vibrant color. Red and yellow peppers are particularly sweet when roasted.
- Zucchini or Yellow Squash (2 medium): Provides a mild, slightly sweet flavor and tender texture when roasted.
- Eggplant (1 medium): Offers a meaty texture and slightly smoky flavor after roasting.
- Red Onion (1 large): Becomes sweet and mellow when roasted, adding depth of flavor.
- Cherry or Grape Tomatoes (1 pint): Burst with juicy sweetness and add a touch of acidity.
- Olive Oil: (1/4 cup) – Used for roasting the vegetables, it helps them caramelize and develop rich flavors.
- Balsamic Vinegar: (2 tablespoons) – Adds a touch of tangy sweetness that complements the roasted vegetables beautifully.
- Dried Herbs (1 tablespoon total): (such as Italian seasoning, thyme, rosemary, or oregano) – Enhances the savory flavors of the vegetables.
- Salt and Black Pepper: To taste – Essential for seasoning and bringing out the best flavors in the vegetables.
- Assorted Vegetables (about 2 lbs total):
- For the Tart Filling:
- Cream Cheese: (4 ounces, softened) – Creates a creamy and tangy base for the roasted vegetables, adding richness and flavor.
- Sour Cream or Greek Yogurt: (1/4 cup) – Adds a touch of tanginess and thins the cream cheese slightly for easier spreading.
- Garlic: (2 cloves, minced) – Infuses the cream cheese mixture with a savory aroma and flavor.
- Fresh Herbs (optional, for garnish): (such as basil, parsley, or chives, chopped) – Adds a fresh, vibrant finish and visual appeal.
- Shredded Cheese (optional, for topping): (such as Gruyere, Parmesan, or mozzarella) – Adds a melted, cheesy layer and extra flavor (choose vegetarian options if needed).
Instructions
Follow these step-by-step instructions to create a stunning and flavorful roasted vegetable tart. Don’t be intimidated by the multiple steps; each is straightforward and rewarding!
Step 1: Prepare the Tart Crust
- Combine Dry Ingredients: In a large bowl, whisk together the all-purpose flour and salt. This ensures the salt is evenly distributed throughout the dough, which is important for flavor.
- Cut in the Butter: Cut the cold butter into small cubes. Add the cold butter to the flour mixture. Using a pastry blender or your fingertips, cut the butter into the flour until the mixture resembles coarse crumbs with some pea-sized pieces of butter remaining. The goal is to keep the butter cold and in small pieces to create flakiness. Work quickly to prevent the butter from melting.
- Add Ice Water Gradually: Drizzle ice water, one tablespoon at a time, over the flour and butter mixture, mixing gently with a fork after each addition. Continue adding ice water until the dough just comes together and forms a shaggy ball. Be careful not to add too much water, as this can make the crust tough. You want the dough to be moist enough to hold together but not sticky.
- Form and Chill the Dough: Turn the dough out onto a lightly floured surface. Gently gather it into a disc about 1 inch thick. Wrap the dough tightly in plastic wrap and refrigerate for at least 1 hour, or preferably 2 hours. This chilling time is crucial as it allows the gluten to relax, making the dough easier to roll and preventing shrinkage during baking. Cold dough also helps maintain the butter’s texture, contributing to flakiness.
Step 2: Roast the Vegetables
- Preheat Oven and Prepare Vegetables: Preheat your oven to 400°F (200°C). Wash and dry all the vegetables. For the bell peppers, remove the cores and seeds and cut them into 1-inch pieces. Trim the ends off the zucchini and yellow squash and cut them into 1/2-inch thick rounds or half-moons if they are large. For the eggplant, trim the ends and cut it into 1-inch cubes. Peel the red onion, halve it, and then slice it into wedges. Leave the cherry or grape tomatoes whole.
- Toss Vegetables with Oil and Seasoning: In a large bowl, toss all the prepared vegetables with olive oil, balsamic vinegar, dried herbs, salt, and black pepper. Make sure the vegetables are evenly coated with oil and seasoning to ensure they roast properly and are full of flavor.
- Roast the Vegetables: Spread the vegetables in a single layer on a large baking sheet or two baking sheets if needed to avoid overcrowding. Overcrowding can cause the vegetables to steam instead of roast. Roast in the preheated oven for 25-35 minutes, or until the vegetables are tender and slightly caramelized, stirring halfway through. Roasting time may vary depending on the size and density of your vegetables and your oven. Check for tenderness by piercing a piece of eggplant or potato (if using) with a fork. They should be easily pierced but not mushy. The edges of the vegetables should be slightly browned and caramelized, indicating they have developed rich, roasted flavors.
- Cool the Vegetables: Once roasted, remove the vegetables from the oven and let them cool slightly while you prepare the tart crust. Cooling allows the vegetables to retain their shape and prevents them from making the tart filling too watery.
Step 3: Assemble and Bake the Tart
- Prepare the Cream Cheese Filling: While the vegetables are roasting and cooling, prepare the cream cheese filling. In a medium bowl, combine the softened cream cheese, sour cream or Greek yogurt, and minced garlic. Mix until smooth and well combined. Taste and adjust seasoning with salt and pepper if needed. This simple filling adds a creamy, flavorful base to the tart that complements the roasted vegetables perfectly.
- Roll Out the Tart Crust: Lightly flour a clean work surface. Remove the chilled tart dough from the refrigerator. Roll out the dough into a 13-inch circle, about 1/8-inch thick. If the dough is sticking, lightly flour your rolling pin and the work surface as needed. Rolling to the correct thickness ensures the crust will bake through and be flaky.
- Transfer Dough to Tart Pan: Gently transfer the rolled-out dough to a 9 or 10-inch tart pan with a removable bottom. Press the dough into the bottom and up the sides of the pan, trimming off any excess dough hanging over the edge. You can use a rolling pin to roll over the top edge of the pan to neatly trim the dough. Alternatively, you can crimp the edges decoratively using your fingers or a fork.
- Pre-bake the Tart Crust (Blind Bake – Optional but Recommended for a Crispier Crust): For a crispier crust, pre-bake it before adding the filling. Line the tart crust with parchment paper and fill with pie weights or dried beans. Bake in the preheated oven at 375°F (190°C) for 15 minutes. Remove the parchment paper and pie weights and bake for another 5-7 minutes, or until the crust is lightly golden brown. Pre-baking helps prevent the bottom crust from becoming soggy from the moist vegetable filling. If you skip pre-baking, ensure you bake the tart for a longer time in the final baking step to ensure the crust is cooked through.
- Assemble the Tart: Spread the cream cheese filling evenly over the bottom of the pre-baked or unbaked tart crust. Arrange the roasted vegetables attractively over the cream cheese filling. You can create a pattern or simply scatter them evenly. If using shredded cheese, sprinkle it over the vegetables now.
- Bake the Tart: Bake the assembled tart in the oven at 375°F (190°C) for 20-25 minutes, or until the crust is golden brown and the filling is heated through and bubbly (if cheese is used, until melted and golden). If you did not pre-bake the crust, you may need to bake it slightly longer, about 30-35 minutes, to ensure the crust is fully cooked.
- Cool and Serve: Remove the roasted vegetable tart from the oven and let it cool in the tart pan for at least 10-15 minutes before removing the outer ring of the tart pan. This allows the filling to set slightly and makes slicing easier. Garnish with fresh herbs, if desired, and serve warm or at room temperature.
Nutrition
- Serving Size: one normal portion
- Calories: 400
- Fat: 25g


