

I still remember the first time I whipped up this Roasted Red Pepper Vegetarian Dip. It was for a last-minute family get-together, and I needed something quick, impressive, and universally appealing. I’d always loved the smoky sweetness of roasted peppers, and the idea of transforming them into a creamy, vibrant dip seemed like a winner. The moment of truth came when my notoriously picky nephew, who usually shies away from anything with visible vegetables, not only tried it but went back for seconds, then thirds! He even asked if we could have it “all the time.” The adults were equally smitten; the bowl was scraped clean in record time, accompanied by a chorus of “What IS this? It’s amazing!” Since then, this dip has become a staple in our home. It’s my go-to for potlucks, a healthy afternoon snack with veggie sticks, or even a flavorful spread for sandwiches. Its vibrant color brightens any table, and its rich, complex flavor profile – smoky, sweet, tangy, and savory – never fails to delight. It’s proof that simple, wholesome ingredients can create something truly spectacular.
Ingredients
Here’s what you’ll need to create this crowd-pleasing Roasted Red Pepper Vegetarian Dip:
- 3 large red bell peppers: These are the star of the show, providing sweetness and a beautiful smoky flavor once roasted. Look for firm, glossy peppers.
- 1 head of garlic: Roasting garlic mellows its pungency, transforming it into a sweet, creamy, and deeply flavorful addition.
- 1/4 cup good quality extra virgin olive oil: Plus a little extra for roasting. This adds richness and helps emulsify the dip.
- 1 (15-ounce) can cannellini beans (or white kidney beans), rinsed and drained: These beans provide a creamy texture and a protein boost, making the dip more substantial.
- 1/4 cup walnuts or almonds, toasted (optional but recommended): Adds a lovely nutty depth and a bit of texture. For a nut-free version, omit or use toasted sunflower seeds.
- 2 tablespoons fresh lemon juice: Brightens all the flavors and adds a necessary tang. Always use fresh if possible.
- 1 tablespoon tahini (sesame paste): Contributes to the creaminess and adds a subtle, earthy, nutty flavor common in Mediterranean dips.
- 1 teaspoon smoked paprika: Enhances the smoky flavor from the roasted peppers and adds a beautiful color.
- 1/2 teaspoon ground cumin: Provides a warm, earthy note that complements the peppers.
- 1/4 teaspoon cayenne pepper (or more, to taste): For a gentle kick of heat. Adjust according to your preference.
- Salt and freshly ground black pepper to taste: Essential for seasoning and bringing all the flavors together.
- 2-4 tablespoons water or aquafaba (the liquid from the can of beans): To adjust consistency if the dip is too thick.
- Fresh parsley or chives, chopped (for garnish): Adds a pop of color and freshness.
Instructions
Follow these steps for a perfectly smooth and flavorful dip:
- Roast the Peppers and Garlic:
- Preheat your oven to 400°F (200°C). Line a baking sheet with parchment paper for easier cleanup.
- Wash the red bell peppers. You can either leave them whole or halve them and remove the seeds and membranes now (which makes peeling slightly easier later). Place them on the baking sheet.
- Take the whole head of garlic, slice off the top 1/4 inch to expose the cloves. Drizzle the exposed cloves with a little olive oil, then wrap the head loosely in aluminum foil. Place it on the baking sheet with the peppers.
- Roast for 30-40 minutes, or until the pepper skins are blistered and charred in spots, and the garlic is soft and fragrant. If you left the peppers whole, turn them occasionally to ensure even roasting.
- Once roasted, remove the peppers from the oven and immediately place them in a heatproof bowl. Cover the bowl tightly with plastic wrap or a plate. Let them steam for 10-15 minutes. This process loosens the skins, making them much easier to peel. The garlic can be removed from the oven and set aside to cool slightly.
- Prepare the Roasted Ingredients:
- Once the peppers have steamed and are cool enough to handle, peel off the charred skins. They should come off easily. Remove the stems and seeds (if you hadn’t already). Roughly chop the roasted pepper flesh.
- Unwrap the roasted garlic. Squeeze the softened, golden cloves out of their skins into a small bowl. They should pop out easily.
- Toast the Nuts (if using):
- While the peppers are roasting or steaming, you can toast the nuts. Place the walnuts or almonds in a dry skillet over medium heat. Toast for 3-5 minutes, stirring frequently, until fragrant and lightly golden. Be careful not to burn them. Remove from heat and let cool.
- Blend the Dip:
- In the bowl of a food processor, combine the roasted red pepper flesh, squeezed roasted garlic cloves, rinsed and drained cannellini beans, toasted nuts (if using), 1/4 cup extra virgin olive oil, fresh lemon juice, tahini, smoked paprika, ground cumin, and cayenne pepper.
- Process the mixture until it’s very smooth and creamy. This might take a couple of minutes. Scrape down the sides of the food processor bowl as needed to ensure everything is well incorporated.
- Taste the dip and season generously with salt and freshly ground black pepper. Adjust any other seasonings to your liking – perhaps more lemon juice for tang, or more cayenne for heat.
- Adjust Consistency:
- If the dip is too thick for your liking, add 1 tablespoon of water or aquafaba at a time, processing briefly after each addition, until you reach your desired consistency.
- Chill and Serve:
- Transfer the dip to a serving bowl. For the best flavor, cover and refrigerate for at least 30 minutes to an hour to allow the flavors to meld.
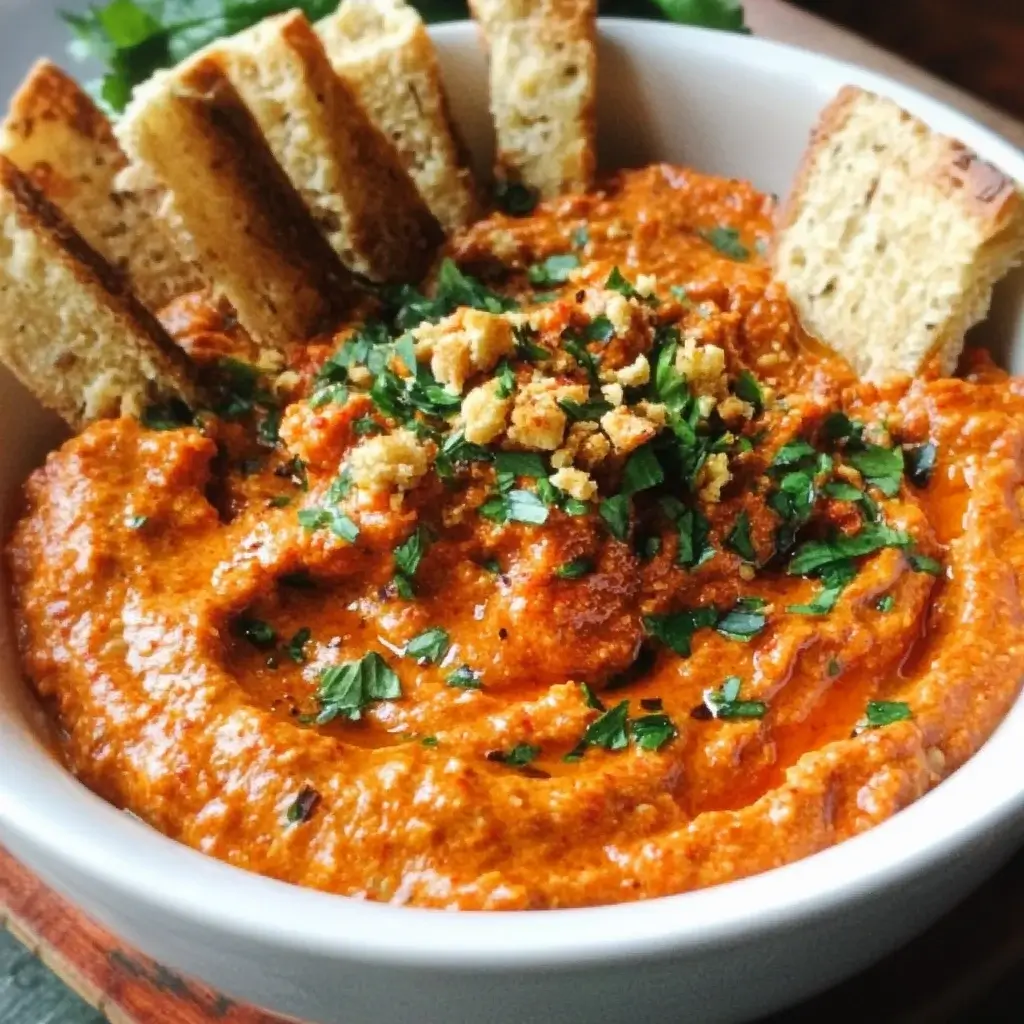
- Before serving, you can drizzle with a little extra olive oil and garnish with chopped fresh parsley or chives.
Nutrition Facts
- Servings: This recipe yields approximately 2.5 to 3 cups of dip, serving about 8-10 people as an appetizer.
- Calories per serving (approx. 1/4 cup): Roughly 120-150 calories, depending on the exact amount of oil and nuts used.
- Healthy Fats: Primarily from olive oil, tahini, and nuts, these monounsaturated and polyunsaturated fats are heart-healthy.
- Fiber: Good source of dietary fiber from the bell peppers, beans, and nuts, aiding digestion and promoting satiety.
- Vitamin C & A: Bell peppers are packed with these powerful antioxidants, supporting immune function and vision.
- Plant-Based Protein: Beans and nuts contribute a decent amount of plant-based protein, making the dip more filling.
Preparation Time
- Active Prep Time: Approximately 20-25 minutes (chopping peppers if desired, preparing garlic, toasting nuts, blending).
- Roasting Time: 30-40 minutes for peppers and garlic.
- Steaming/Cooling Time: 15-20 minutes for peppers to steam and cool enough to handle.
- Chilling Time (Recommended): At least 30 minutes to 1 hour.
- Total Time (excluding chilling): Roughly 1 hour 5 minutes to 1 hour 25 minutes.
This dip is relatively straightforward, with the oven doing most of the heavy lifting during the roasting process. The hands-on time is minimal, making it a great option even for busier days, especially if you prep components in advance.
How to Serve
This Roasted Red Pepper Vegetarian Dip is incredibly versatile! Here are some fantastic ways to serve it:
- Classic Dipper Platter:
- Vegetable Sticks: Carrot sticks, celery sticks, cucumber rounds, bell pepper strips (various colors), cherry tomatoes, broccoli florets, cauliflower florets.
- Breads & Crackers:
- Toasted pita bread triangles (whole wheat or white)
- Crusty baguette slices, lightly grilled or toasted
- Whole-grain crackers
- Seed crackers
- Rice cakes or corn thins (for a gluten-free option)
- Pretzel crisps or pretzel rods
- Chips:
- Pita chips (store-bought or homemade)
- Tortilla chips
- As a Spread:
- Sandwiches and Wraps: Use it as a flavorful and healthier alternative to mayonnaise or other spreads in vegetarian or even chicken/turkey sandwiches and wraps. It pairs wonderfully with grilled vegetables, feta cheese, and fresh greens.
- Burgers: A dollop on a veggie burger or even a traditional burger adds a delicious smoky sweetness.
- Toast/Crostini: Spread on toasted bread or crostini, perhaps topped with a sprinkle of feta cheese, fresh herbs, or a drizzle of balsamic glaze for an elegant appetizer.
- Accompaniment to Main Dishes:
- Grilled Proteins: Serve alongside grilled chicken, fish, shrimp, or tofu skewers. The smoky dip complements the char from the grill.
- Roasted Vegetables: A dollop alongside a platter of roasted root vegetables or Mediterranean vegetables enhances their natural sweetness.
- Grain Bowls: Add a generous spoonful to a quinoa, farro, or rice bowl for extra flavor and creaminess.
- Falafel: A perfect accompaniment to falafel, either in a pita or on a plate.
- Baked Potatoes: Use as a flavorful topping for baked potatoes or sweet potatoes.
- In Other Dishes:
- Pasta Sauce: Thin it out with a little pasta water or vegetable broth to create a quick, creamy pasta sauce.
- Salad Dressing: Whisk with a bit more olive oil and lemon juice, or even a little yogurt, to create a creamy salad dressing.
- Base for Flatbreads/Pizzas: Spread it on a flatbread or pizza crust as a base instead of tomato sauce, then top with your favorite toppings like feta, olives, and spinach.
- Party Perfect:
- Serve in a decorative bowl, garnished attractively.
- Provide small individual ramekins for guests if preferred.
- Label it clearly, especially if catering to various dietary needs (e.g., “Vegan Roasted Red Pepper Dip” if you’ve made vegan substitutions).
Additional Tips
To make your Roasted Red Pepper Vegetarian Dip even more spectacular, or to tailor it to your preferences, consider these tips:
- Vary the Peppers: While red bell peppers are classic for their sweetness, you can experiment by adding one yellow or orange bell pepper for a slightly different flavor profile and color variation. Avoid green bell peppers as they can be bitter.
- Spice it Up (or Down): For more heat, add a pinch more cayenne pepper, a dash of your favorite hot sauce, or even roast a small jalapeño or serrano pepper (seeds removed for less heat) along with the bell peppers. For a milder dip, omit the cayenne entirely.
- Nut-Free Option: If there are nut allergies, simply omit the walnuts or almonds. The dip will still be delicious. For a similar textural element, you could try adding a tablespoon or two of toasted sunflower seeds or pepitas (pumpkin seeds).
- Smokier Flavor: If you love a deep smoky taste, ensure your peppers get nicely charred. You can also use a bit more smoked paprika or even a drop or two of liquid smoke (use very sparingly, as it’s potent). Grilling the peppers instead of roasting them in the oven will also impart a fantastic smoky char.
- Make it Creamier: For an ultra-creamy dip, you can add a tablespoon or two of plain Greek yogurt (if not strictly vegan) or a vegan yogurt alternative. A little extra tahini can also boost creaminess.
- Herb Variations: While parsley is a great garnish, feel free to stir in other fresh herbs into the dip itself. Fresh basil, cilantro (if you enjoy its flavor with peppers), or even a hint of fresh oregano or thyme could add interesting dimensions.
- Storage: Store the dip in an airtight container in the refrigerator. It will keep well for 4-5 days. The flavors often meld and improve after a day.
- Freezing: While you can freeze this dip, the texture might change slightly upon thawing, becoming a bit more watery. If you do freeze it, thaw it in the refrigerator and give it a good stir (or a quick whiz in the food processor) to re-emulsify before serving. It’s best enjoyed fresh or within a few days from the fridge.
FAQ Section
Here are answers to some frequently asked questions about this Roasted Red Pepper Vegetarian Dip:
- Q: Can I make this dip vegan?
A: Yes, absolutely! This recipe is inherently vegetarian. To ensure it’s fully vegan, simply double-check that your tahini is purely sesame-based and avoid any non-vegan additions like Greek yogurt mentioned in the tips. The base recipe as written is vegan. - Q: Can I use jarred roasted red peppers instead of roasting my own?
A: Yes, you can use jarred roasted red peppers as a shortcut. You’ll need about 1.5 to 2 cups of drained, jarred roasted red peppers (typically two 12-ounce jars, drained). However, roasting your own peppers and garlic provides a fresher, deeper, and often more satisfying smoky flavor. If using jarred, you might want to roast the garlic separately or use a bit more smoked paprika to compensate for the flavor difference. - Q: My dip is too thick/thin. How can I fix it?
A: If your dip is too thick, add a tablespoon of water, aquafaba (the liquid from the can of beans), or even a bit more lemon juice or olive oil at a time, blending until you reach the desired consistency. If it’s too thin (unlikely with this recipe, but possible if too much liquid was added), you can try adding a few more cannellini beans or a bit more toasted nuts (if using) and blending again. Chilling the dip will also help it thicken. - Q: How long will this dip last in the refrigerator?
A: Stored in an airtight container in the refrigerator, the Roasted Red Pepper Vegetarian Dip should last for about 4-5 days. The flavors often get even better the next day! - Q: What if I don’t have a food processor? Can I use a blender?
A: Yes, a high-powered blender will work well for this recipe and can often achieve an even smoother consistency than some food processors. You may need to stop and scrape down the sides of the blender jug more frequently. If using a standard blender, you might need to add a little extra liquid to help it blend properly. - Q: Is this dip gluten-free?
A: Yes, the dip itself is naturally gluten-free. Just be sure to serve it with gluten-free dippers like vegetable sticks, rice crackers, or gluten-free bread if you or your guests are avoiding gluten. - Q: Can I prepare any components in advance?
A: Definitely! You can roast the peppers and garlic a day or two in advance. Peel the peppers, store them and the roasted garlic cloves in an airtight container in the fridge. You can also toast the nuts ahead of time and store them at room temperature in an airtight container. This makes assembly on the day of serving very quick. - Q: What can I use instead of cannellini beans?
A: Great Northern beans or even chickpeas (garbanzo beans) would be good substitutes for cannellini beans. Chickpeas will give it a slightly different texture and flavor, more akin to hummus, but still delicious. Ensure they are rinsed and drained well.

Roasted Red Pepper Vegetarian Dip
Ingredients
Here’s what you’ll need to create this crowd-pleasing Roasted Red Pepper Vegetarian Dip:
- 3 large red bell peppers: These are the star of the show, providing sweetness and a beautiful smoky flavor once roasted. Look for firm, glossy peppers.
- 1 head of garlic: Roasting garlic mellows its pungency, transforming it into a sweet, creamy, and deeply flavorful addition.
- 1/4 cup good quality extra virgin olive oil: Plus a little extra for roasting. This adds richness and helps emulsify the dip.
- 1 (15-ounce) can cannellini beans (or white kidney beans), rinsed and drained: These beans provide a creamy texture and a protein boost, making the dip more substantial.
- 1/4 cup walnuts or almonds, toasted (optional but recommended): Adds a lovely nutty depth and a bit of texture. For a nut-free version, omit or use toasted sunflower seeds.
- 2 tablespoons fresh lemon juice: Brightens all the flavors and adds a necessary tang. Always use fresh if possible.
- 1 tablespoon tahini (sesame paste): Contributes to the creaminess and adds a subtle, earthy, nutty flavor common in Mediterranean dips.
- 1 teaspoon smoked paprika: Enhances the smoky flavor from the roasted peppers and adds a beautiful color.
- 1/2 teaspoon ground cumin: Provides a warm, earthy note that complements the peppers.
- 1/4 teaspoon cayenne pepper (or more, to taste): For a gentle kick of heat. Adjust according to your preference.
- Salt and freshly ground black pepper to taste: Essential for seasoning and bringing all the flavors together.
- 2–4 tablespoons water or aquafaba (the liquid from the can of beans): To adjust consistency if the dip is too thick.
- Fresh parsley or chives, chopped (for garnish): Adds a pop of color and freshness.
Instructions
Follow these steps for a perfectly smooth and flavorful dip:
- Roast the Peppers and Garlic:
- Preheat your oven to 400°F (200°C). Line a baking sheet with parchment paper for easier cleanup.
- Wash the red bell peppers. You can either leave them whole or halve them and remove the seeds and membranes now (which makes peeling slightly easier later). Place them on the baking sheet.
- Take the whole head of garlic, slice off the top 1/4 inch to expose the cloves. Drizzle the exposed cloves with a little olive oil, then wrap the head loosely in aluminum foil. Place it on the baking sheet with the peppers.
- Roast for 30-40 minutes, or until the pepper skins are blistered and charred in spots, and the garlic is soft and fragrant. If you left the peppers whole, turn them occasionally to ensure even roasting.
- Once roasted, remove the peppers from the oven and immediately place them in a heatproof bowl. Cover the bowl tightly with plastic wrap or a plate. Let them steam for 10-15 minutes. This process loosens the skins, making them much easier to peel. The garlic can be removed from the oven and set aside to cool slightly.
- Prepare the Roasted Ingredients:
- Once the peppers have steamed and are cool enough to handle, peel off the charred skins. They should come off easily. Remove the stems and seeds (if you hadn’t already). Roughly chop the roasted pepper flesh.
- Unwrap the roasted garlic. Squeeze the softened, golden cloves out of their skins into a small bowl. They should pop out easily.
- Toast the Nuts (if using):
- While the peppers are roasting or steaming, you can toast the nuts. Place the walnuts or almonds in a dry skillet over medium heat. Toast for 3-5 minutes, stirring frequently, until fragrant and lightly golden. Be careful not to burn them. Remove from heat and let cool.
- Blend the Dip:
- In the bowl of a food processor, combine the roasted red pepper flesh, squeezed roasted garlic cloves, rinsed and drained cannellini beans, toasted nuts (if using), 1/4 cup extra virgin olive oil, fresh lemon juice, tahini, smoked paprika, ground cumin, and cayenne pepper.
- Process the mixture until it’s very smooth and creamy. This might take a couple of minutes. Scrape down the sides of the food processor bowl as needed to ensure everything is well incorporated.
- Taste the dip and season generously with salt and freshly ground black pepper. Adjust any other seasonings to your liking – perhaps more lemon juice for tang, or more cayenne for heat.
- Adjust Consistency:
- If the dip is too thick for your liking, add 1 tablespoon of water or aquafaba at a time, processing briefly after each addition, until you reach your desired consistency.
- Chill and Serve:
- Transfer the dip to a serving bowl. For the best flavor, cover and refrigerate for at least 30 minutes to an hour to allow the flavors to meld.
- Before serving, you can drizzle with a little extra olive oil and garnish with chopped fresh parsley or chives.
Nutrition
- Serving Size: one normal portion
- Calories: 150


