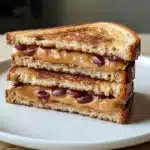
Ingredients
Scale
- 8 slices Soft White or Whole Wheat Bread: Choose a bread that’s relatively soft and easy to roll or press flat. Whole wheat adds a bit more fiber and a nutty flavor, while white bread offers classic comfort. Ensure it’s fresh for the best results.
- 1 cup Creamy Peanut Butter: Opt for a smooth, spreadable peanut butter. Regular commercial creamy peanut butter (like Jif or Skippy) works best as natural peanut butters can be too oily or separate, making the bites messy.
- Optional: 2-4 tablespoons Honey or Maple Syrup: If you prefer a sweeter bite, especially if your peanut butter is unsweetened, a little drizzle mixed into the peanut butter can elevate the flavor. Adjust to your sweetness preference.
- Optional: 1/4 cup Jam or Jelly (any flavor): For a PB&J twist, have your favorite fruit spread ready. Strawberry, grape, and raspberry are classic choices that pair wonderfully with peanut butter.
- Optional Toppings/Mix-ins: Sprinkles, mini chocolate chips, desiccated coconut, or finely chopped nuts for added texture and fun.
Instructions
Crafting these Quick Peanut Butter Sandwich Bites is a delightful process, almost as enjoyable as eating them! The simplicity is key, making it a fantastic recipe to involve children in. Below is a detailed guide to ensure your bites turn out perfectly every single time.
- Prepare Your Workspace:
- Clear a clean, flat surface like a countertop or a large cutting board. This will be your assembly station.
- Gather all your ingredients and necessary tools: bread, peanut butter, knife for spreading, a rolling pin (optional, but helpful), and a sharp knife or pizza cutter for cutting the sandwiches. If you’re using cookie cutters, have those ready too.
- Prepare the Bread (The Foundation):
- Crusts On or Off? This is purely a matter of preference. If you or your little ones are anti-crust, now is the time to carefully trim them off all 8 slices of bread using a sharp knife. If you don’t mind the crusts, you can leave them on; they add a little extra texture.
- Flattening (Optional but Recommended): For neater, more compact bites, it’s a good idea to slightly flatten each slice of bread. You can do this by gently pressing down with the palm of your hand or, for a more uniform result, use a rolling pin to lightly roll each slice. This makes the bread denser and easier to cut into clean shapes. Don’t press too hard, or the bread might tear.
- Spread the Peanut Butter:
- Take 4 of your prepared bread slices. These will be the bottom halves of your sandwiches.
- Using a butter knife or a small spatula, spread a generous, even layer of creamy peanut butter onto one side of each of these 4 slices. Aim for about 2 tablespoons of peanut butter per slice, but feel free to adjust based on your love for peanut butter! Ensure you spread it close to the edges, especially if you’ve removed the crusts.
- Sweetener Boost (Optional): If you’re adding honey or maple syrup for extra sweetness, you can either drizzle it directly over the peanut butter layer now or mix it into your bowl of peanut butter before spreading.
- Add Jam/Jelly (The Classic Twist – Optional):
- If you’re making PB&J bites, take the remaining 4 slices of bread (the top halves).
- Spread a thin, even layer of your chosen jam or jelly onto one side of each of these slices. Be careful not to use too much, as it can make the bites soggy and overly messy, especially if you’re making them ahead of time. About 1 tablespoon per slice is usually sufficient.
- Assemble the Sandwiches:
- Carefully place a jam-covered slice (if using) or a plain flattened slice of bread on top of each peanut butter-covered slice, aligning the edges as neatly as possible.
- Gently press down on the assembled sandwiches to help the layers adhere and to make them a bit more compact for cutting.
- Cut into Bites:
- This is where the “bites” come to life! You have several options:
- Classic Squares/Rectangles: Using a sharp knife or a pizza cutter, cut each sandwich into four equal squares (by cutting it in half, then in half again in the other direction). For smaller bites, you can cut them into nine small squares.
- Triangles: Cut each sandwich diagonally one way, then diagonally the other way to create four small triangles.
- Strips/Fingers: Cut each sandwich into 3 or 4 long strips.
- Cookie Cutters: For extra fun, especially for kids, use small cookie cutters (stars, hearts, circles, animal shapes) to cut out shapes from the sandwiches. You’ll have some leftover bread scraps, which make excellent chef’s snacks or can be saved for breadcrumbs or croutons. Press firmly with the cookie cutter to get a clean cut.
- Work carefully to ensure the fillings don’t squeeze out too much. A gentle sawing motion with a sharp knife is often better than pressing straight down.
- This is where the “bites” come to life! You have several options:
- Add Toppings (Optional Flair):
- If you want to add an extra touch of fun or flavor, now is the time!
- Sprinkles: Lightly press the cut edges of the bites into a shallow dish of sprinkles for a colorful border.
- Mini Chocolate Chips: Gently press a few mini chocolate chips onto the top of each bite or onto the exposed peanut butter edges.
- Desiccated Coconut: Similar to sprinkles, you can roll the edges in coconut.
- Dipping: You could even have a small bowl of melted chocolate for dipping one edge of the bites. Allow the chocolate to set before serving.
- Serve and Enjoy:
- Arrange your Quick Peanut Butter Sandwich Bites on a plate or platter.
- Serve immediately for the best texture, or store them for later (see storage tips in the FAQ).
These simple steps will lead you to a batch of irresistible peanut butter bites that are perfect for any occasion. The beauty of this recipe lies in its adaptability, so feel free to get creative with your spreads and shapes!
Nutrition
- Serving Size: one normal portion
- Calories: 250
- Fat: 14g
- Carbohydrates: 25g
- Fiber: 4g
- Protein: 10g