


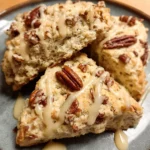
Of all the scents that can fill a home, the aroma of baking is perhaps the most comforting. For my family, the signal of a truly special weekend morning isn’t the sound of the coffee brewing, but the warm, nutty, and sweet fragrance of these Quick Maple Pecan Scones wafting from the kitchen. This recipe has become more than just a set of instructions; it’s a cherished ritual. I remember the first time I made them, I was nervous about getting that perfect, tender, flaky texture that defines a good scone. But this recipe is wonderfully forgiving and astonishingly quick. The moment my husband took his first bite, his eyes widened, and he declared them “the best thing to ever come out of our oven.” Now, my children beg for “the maple drizzly scones” on rainy afternoons and for special birthday breakfasts. They love helping to press the dough and, of course, generously drizzle the sweet maple glaze over the top. These scones are buttery and rich, with a crumb that’s both soft and substantial. The toasted pecans add a delightful crunch and a deep, earthy flavor that pairs perfectly with the sweet, unmistakable taste of pure maple syrup. They are the perfect centerpiece for a slow breakfast, a delightful companion to a cup of tea, and a guaranteed way to make any day feel a little more special. This isn’t just a recipe; it’s a little piece of our family’s joy, and I’m so excited to share it with you.
Ingredients
Here is everything you’ll need to create these wonderfully tender and flavorful scones. Using high-quality, cold ingredients is the key to achieving that perfect texture.
For the Scones:
- 2 ½ cups (300g) All-Purpose Flour: This provides the main structure for the scones. Be sure to measure it correctly by spooning it into your measuring cup and leveling it off.
- ⅓ cup (67g) Granulated Sugar: Adds a touch of sweetness to the scone dough itself, balancing the other flavors.
- 1 tablespoon Baking Powder: This is the primary leavening agent that gives the scones their impressive height and light texture.
- ½ teaspoon Baking Soda: Works in tandem with the baking powder and the slight acidity of the buttermilk or cream to ensure a tender crumb.
- ½ teaspoon Salt: Crucial for enhancing all the other flavors in the recipe; don’t skip it!
- ½ cup (1 stick or 113g) Cold, Unsalted Butter: The most important ingredient for flaky layers. It must be very cold and should be cut into small cubes.
- 1 cup (120g) Toasted Pecans: Roughly chopped. Toasting the pecans beforehand deepens their flavor and makes them crunchier.
- ⅔ cup (160ml) Buttermilk or Heavy Cream: Provides moisture and richness. Buttermilk will add a slight tang, while heavy cream will make the scones even richer. Ensure this is also cold.
- 1 large Egg: This helps to bind the ingredients together and adds to the richness and color of the scones.
- 1 teaspoon Vanilla Extract: Adds a background note of warmth that complements the maple and pecan flavors beautifully.
For the Maple Glaze:
- 1 cup (120g) Powdered Sugar: Also known as confectioners’ sugar, this dissolves easily to create a smooth, pourable glaze.
- ¼ cup (60ml) Pure Maple Syrup: The star of the show! Use real, high-quality maple syrup for the best, most authentic flavor.
- 1-2 tablespoons Milk or Cream: Used to thin the glaze to the perfect drizzling consistency.
- A pinch of Salt: A tiny amount balances the sweetness of the glaze and makes the maple flavor pop.
Instructions
Follow these steps carefully for scones that are flaky, tender, and absolutely irresistible. The key is to work quickly and keep the dough as cold as possible.
Step 1: Prepare Your Station and Dry Ingredients
Preheat your oven to 400°F (200°C). Line a large baking sheet with parchment paper to prevent sticking and ensure even browning. In a large mixing bowl, combine the all-purpose flour, granulated sugar, baking powder, baking soda, and salt. Whisk them together for about 30 seconds. This step is important as it evenly distributes the leavening agents, which helps the scones rise uniformly.
Step 2: Cut in the Butter
Take your cold, cubed butter and add it to the dry ingredients. Using a pastry blender, two knives, or your fingertips, cut the butter into the flour mixture. You want to work quickly to prevent the butter from melting. Continue until the mixture resembles coarse crumbs with some pea-sized pieces of butter still visible. These visible butter pieces are what will melt in the oven, creating steam and those coveted flaky layers.
Step 3: Add the Pecans
Stir in the chopped toasted pecans until they are evenly distributed throughout the flour and butter mixture.
Step 4: Mix the Wet Ingredients
In a separate, smaller bowl, whisk together the cold buttermilk (or heavy cream), the large egg, and the vanilla extract until just combined.
Step 5: Combine Wet and Dry
Pour the wet mixture into the dry mixture. Use a fork or a rubber spatula to gently stir until a shaggy, slightly sticky dough begins to form. Be very careful not to overmix at this stage. Overmixing develops the gluten in the flour, which will result in tough, dense scones instead of light and tender ones. Stop mixing as soon as the flour is mostly hydrated.
Step 6: Gently Knead and Shape
Turn the dough out onto a lightly floured surface. Gently knead it just a few times—no more than 5 or 6 turns—to bring it together into a cohesive ball. Pat the dough into a circle that is about 1 inch thick.
Step 7: Cut the Scones
Using a large, sharp knife or a bench scraper, cut the circle into 8 equal wedges, like you would a pizza. Alternatively, you can use a 2.5-inch round biscuit cutter to cut out circles. If using a cutter, press straight down and pull straight up; do not twist the cutter, as this can seal the edges and prevent the scones from rising to their full potential.
Step 8: Arrange and Bake
Carefully place the cut scones onto the prepared baking sheet, leaving about 2 inches of space between each one to allow for spreading. For a slightly softer side, you can place them closer together. If you like, you can brush the tops with a little extra buttermilk or heavy cream for a deeper golden-brown color.
Step 9: Bake to Perfection
Bake in the preheated oven for 15-18 minutes, or until the tops are a beautiful golden brown and a toothpick inserted into the center of a scone comes out clean or with moist crumbs attached.
Step 10: Cool the Scones
Remove the baking sheet from the oven and let the scones cool on the sheet for about 5 minutes. Then, transfer them to a wire rack to cool more completely. It’s important to let them cool for at least 15-20 minutes before glazing, otherwise the glaze will melt and run right off.
Step 11: Prepare the Maple Glaze
While the scones are cooling, prepare the glaze. In a medium bowl, whisk together the powdered sugar, pure maple syrup, and a pinch of salt. Add 1 tablespoon of milk or cream and whisk until smooth. If the glaze is too thick, add more milk, one teaspoon at a time, until you reach your desired consistency. It should be thick but still pourable.
Step 12: Glaze and Serve
Once the scones are mostly cool, use a spoon or a whisk to drizzle the maple glaze generously over the top of each scone. Let the glaze set for a few minutes before serving. Enjoy them warm for the best experience.
Nutrition Facts
This is an approximation. Actual values may vary based on specific ingredients used.
- Servings: 8 Scones
- Calories per serving: Approximately 450 kcal
- Fat: This recipe contains a good amount of fat, primarily from the butter and pecans. This fat is essential for creating the tender, flaky texture and rich flavor that makes scones so delicious.
- Carbohydrates: The primary source of energy in these scones comes from the flour and sugar. The pure maple syrup also contributes natural sugars and flavor.
- Protein: The egg, buttermilk, and pecans provide a moderate amount of protein, which contributes to the structure of the scone and adds to its satisfying quality.
- Sugar: A significant portion of the sweetness comes from the granulated sugar in the dough and the powdered sugar and maple syrup in the glaze, making this a wonderful treat.
- Sodium: The salt added to the dough and glaze is not just for taste; it plays a crucial role in balancing the sweetness and enhancing the complex flavors of the maple and pecan.
Preparation Time
This recipe is designed to be quick and straightforward, perfect for a spontaneous baking session.
- Prep Time: 20 minutes
- Bake Time: 15-18 minutes
- Total Time: Approximately 40 minutes
The total time from start to finish is under an hour, making these homemade maple pecan scones a perfectly achievable treat for a weekend breakfast or an afternoon pick-me-up.
How to Serve
These scones are incredibly versatile and can be served in many delightful ways. Here are a few ideas to get you started:
- The Classic Way:
- Serve them warm, just as they are. The melty glaze and warm, buttery interior are heavenly on their own.
- Offer a side of high-quality salted butter. The saltiness of the butter cuts through the sweetness beautifully.
- A dollop of clotted cream or crème fraîche adds a luxurious, tangy element that is traditional with scones.
- For a Brunch Spread:
- Make them the sweet centerpiece of a brunch menu.
- Serve alongside savory items like a quiche, scrambled eggs, or breakfast sausages to create a balanced meal.
- A large bowl of fresh fruit salad or a platter of seasonal berries provides a fresh, light contrast.
- Pair with a yogurt parfait layered with granola and fruit for a complete and elegant spread.
- With a Warm Beverage:
- The ultimate companion is a hot cup of coffee. The robust, slightly bitter notes of coffee are a perfect match for the sweet maple and nutty pecan.
- A classic black tea, like an English Breakfast or Earl Grey, is a traditional and perfect pairing.
- For a truly cozy experience, serve with a spiced chai latte or a mug of rich hot chocolate.
- As a Dessert:
- Transform the scone into a decadent dessert by serving it warm with a scoop of ice cream. Vanilla bean, butter pecan, or even salted caramel ice cream would be phenomenal.
- Add an extra drizzle of warm maple syrup or a spoonful of caramel sauce over the scone and ice cream for a final touch of indulgence.
Additional Tips
Follow these eight tips to elevate your scones from good to bakery-quality perfect every single time.
1. The Colder, The Better: This is the golden rule of scone making. Your butter, buttermilk/cream, and egg should be as cold as possible. Cold butter creates steam pockets when it melts in the hot oven, which is the secret to a light, flaky texture. You can even place your stick of butter in the freezer for 15-20 minutes before using it.
2. Grate Your Frozen Butter: Instead of cubing the butter, try grating it on the large holes of a box grater while it’s frozen. This creates small, uniform pieces of butter that incorporate into the flour mix more easily and evenly, leading to an exceptionally flaky and tender scone with less effort.
3. Do Not Overwork the Dough: This is the most common mistake in scone making. The moment you add the wet ingredients to the dry, you are activating gluten. The more you mix and knead, the more gluten develops, leading to tough, chewy scones. Mix only until the dough just comes together. A shaggy, slightly sticky dough is what you’re aiming for.
4. Toast Your Pecans: While you can use raw pecans, taking 5-7 minutes to toast them in a dry skillet over medium heat or in the oven makes a world of difference. Toasting releases the oils in the nuts, deepening their flavor and making them crunchier and more aromatic. Let them cool completely before chopping and adding to the dough.
5. The Fold and Pat Technique for Layers: For extra-flaky layers, try a simple lamination technique. After the dough comes together, pat it into a rectangle on your floured surface. Fold it into thirds, like a letter. Rotate the dough 90 degrees and pat it out again into a 1-inch thick circle before cutting. This simple fold creates more buttery layers.
6. A Straight Cut is Crucial: When using a biscuit cutter or a knife, make a decisive, straight-down cut. Do not twist the cutter. Twisting the cutter seals the edges of the scone, which prevents it from rising to its full, glorious height in the oven. A clean cut allows the layers to separate and climb.
7. Use Buttermilk for Tenderness: While heavy cream creates a very rich scone, buttermilk is a baker’s secret weapon for tenderness. The acidity in buttermilk reacts with the baking soda to create a softer, lighter crumb and adds a subtle, pleasant tang that balances the sweetness of the glaze.
8. Don’t Over-Bake: Keep a close eye on your scones as they approach the end of their baking time. They are done when they are a light golden brown and a tester comes out clean. Over-baking will result in a dry, crumbly scone. It’s better to err on the side of slightly under-baked, as they will continue to cook from residual heat on the baking sheet.
FAQ Section
Here are answers to some of the most frequently asked questions about making Quick Maple Pecan Scones.
1. Can I make these scones ahead of time?
Yes, absolutely! There are two great ways to do this. You can prepare the dough, cut the scones, and place them on the baking sheet. Cover them tightly with plastic wrap and refrigerate for up to 24 hours. When you’re ready, bake them straight from the fridge; you may need to add 2-3 minutes to the baking time. Alternatively, you can bake the scones completely, let them cool, and store them. See the storage question below for more details.
2. How do I properly store leftover scones?
Leftover scones are best enjoyed within 1-2 days. Store them in an airtight container at room temperature. Do not refrigerate baked scones, as the cold air will dry them out quickly. To refresh a day-old scone, you can warm it in the microwave for 15-20 seconds or in a 300°F (150°C) oven for 5-7 minutes to bring back some of its warmth and softness.
3. Can I freeze these scones?
Yes, scones freeze exceptionally well! For best results, freeze them before baking. Place the unbaked, cut scones on a baking sheet and freeze until solid. Then, transfer them to a freezer-safe bag or container. They can be stored for up to 3 months. When ready to eat, you can bake them directly from frozen. Place them on a parchment-lined sheet and bake at 400°F (200°C), adding about 5-7 minutes to the original baking time. Do not glaze them until after they are baked and cooled.
4. My scones turned out dry and hard. What did I do wrong?
This is a common issue and it usually comes down to one of two things: over-mixing the dough or over-baking the scones. Over-mixing develops too much gluten, making them tough. Remember to mix just until combined. Over-baking simply dries them out. Pull them from the oven as soon as they are golden brown. Another culprit could be adding too much flour, so be sure to measure your flour correctly by spooning and leveling, not scooping.
5. Can I use a different kind of nut or leave them out?
Of course! This recipe is very adaptable. Walnuts would be a fantastic substitute for pecans. Toasted almonds or even hazelnuts would also be delicious. If you have a nut allergy or simply prefer them without, you can omit the nuts entirely. You could even replace them with something like dried cranberries or chocolate chips for a different flavor profile.
6. How can I make these scones gluten-free?
To make a gluten-free version, you can substitute the all-purpose flour with a high-quality, 1-to-1 gluten-free baking flour blend that contains xanthan gum. Brands like Bob’s Red Mill or King Arthur Flour have excellent options. The texture may be slightly different—often a bit more delicate or crumbly—but they will still be delicious. No other changes to the recipe should be necessary.
7. My maple glaze is too thin/thick. How do I fix it?
Glaze consistency is easy to adjust. If your glaze is too thin and runny, simply whisk in more powdered sugar, a tablespoon at a time, until it reaches the desired thickness. If your glaze is too thick and won’t drizzle, add more milk or cream, just one teaspoon at a time, and whisk until it’s smooth and pourable.
8. What is the real difference between a scone and an American biscuit?
This is a great question! While they are similar, the key differences are in the ingredients and texture. Scones typically contain eggs and more sugar than biscuits, giving them a slightly richer, denser, and more cake-like crumb. American biscuits, on the other hand, rarely contain eggs or sugar and are meant to be lighter and flakier, often served with savory dishes like gravy. These maple pecan scones fall firmly in the sweet, rich scone category.
Quick Maple Pecan Scones
Ingredients
Here is everything you’ll need to create these wonderfully tender and flavorful scones. Using high-quality, cold ingredients is the key to achieving that perfect texture.
For the Scones:
- 2 ½ cups (300g) All-Purpose Flour: This provides the main structure for the scones. Be sure to measure it correctly by spooning it into your measuring cup and leveling it off.
- ⅓ cup (67g) Granulated Sugar: Adds a touch of sweetness to the scone dough itself, balancing the other flavors.
- 1 tablespoon Baking Powder: This is the primary leavening agent that gives the scones their impressive height and light texture.
- ½ teaspoon Baking Soda: Works in tandem with the baking powder and the slight acidity of the buttermilk or cream to ensure a tender crumb.
- ½ teaspoon Salt: Crucial for enhancing all the other flavors in the recipe; don’t skip it!
- ½ cup (1 stick or 113g) Cold, Unsalted Butter: The most important ingredient for flaky layers. It must be very cold and should be cut into small cubes.
- 1 cup (120g) Toasted Pecans: Roughly chopped. Toasting the pecans beforehand deepens their flavor and makes them crunchier.
- ⅔ cup (160ml) Buttermilk or Heavy Cream: Provides moisture and richness. Buttermilk will add a slight tang, while heavy cream will make the scones even richer. Ensure this is also cold.
- 1 large Egg: This helps to bind the ingredients together and adds to the richness and color of the scones.
- 1 teaspoon Vanilla Extract: Adds a background note of warmth that complements the maple and pecan flavors beautifully.
For the Maple Glaze:
- 1 cup (120g) Powdered Sugar: Also known as confectioners’ sugar, this dissolves easily to create a smooth, pourable glaze.
- ¼ cup (60ml) Pure Maple Syrup: The star of the show! Use real, high-quality maple syrup for the best, most authentic flavor.
- 1–2 tablespoons Milk or Cream: Used to thin the glaze to the perfect drizzling consistency.
- A pinch of Salt: A tiny amount balances the sweetness of the glaze and makes the maple flavor pop.
Instructions
Follow these steps carefully for scones that are flaky, tender, and absolutely irresistible. The key is to work quickly and keep the dough as cold as possible.
Step 1: Prepare Your Station and Dry Ingredients
Preheat your oven to 400°F (200°C). Line a large baking sheet with parchment paper to prevent sticking and ensure even browning. In a large mixing bowl, combine the all-purpose flour, granulated sugar, baking powder, baking soda, and salt. Whisk them together for about 30 seconds. This step is important as it evenly distributes the leavening agents, which helps the scones rise uniformly.
Step 2: Cut in the Butter
Take your cold, cubed butter and add it to the dry ingredients. Using a pastry blender, two knives, or your fingertips, cut the butter into the flour mixture. You want to work quickly to prevent the butter from melting. Continue until the mixture resembles coarse crumbs with some pea-sized pieces of butter still visible. These visible butter pieces are what will melt in the oven, creating steam and those coveted flaky layers.
Step 3: Add the Pecans
Stir in the chopped toasted pecans until they are evenly distributed throughout the flour and butter mixture.
Step 4: Mix the Wet Ingredients
In a separate, smaller bowl, whisk together the cold buttermilk (or heavy cream), the large egg, and the vanilla extract until just combined.
Step 5: Combine Wet and Dry
Pour the wet mixture into the dry mixture. Use a fork or a rubber spatula to gently stir until a shaggy, slightly sticky dough begins to form. Be very careful not to overmix at this stage. Overmixing develops the gluten in the flour, which will result in tough, dense scones instead of light and tender ones. Stop mixing as soon as the flour is mostly hydrated.
Step 6: Gently Knead and Shape
Turn the dough out onto a lightly floured surface. Gently knead it just a few times—no more than 5 or 6 turns—to bring it together into a cohesive ball. Pat the dough into a circle that is about 1 inch thick.
Step 7: Cut the Scones
Using a large, sharp knife or a bench scraper, cut the circle into 8 equal wedges, like you would a pizza. Alternatively, you can use a 2.5-inch round biscuit cutter to cut out circles. If using a cutter, press straight down and pull straight up; do not twist the cutter, as this can seal the edges and prevent the scones from rising to their full potential.
Step 8: Arrange and Bake
Carefully place the cut scones onto the prepared baking sheet, leaving about 2 inches of space between each one to allow for spreading. For a slightly softer side, you can place them closer together. If you like, you can brush the tops with a little extra buttermilk or heavy cream for a deeper golden-brown color.
Step 9: Bake to Perfection
Bake in the preheated oven for 15-18 minutes, or until the tops are a beautiful golden brown and a toothpick inserted into the center of a scone comes out clean or with moist crumbs attached.
Step 10: Cool the Scones
Remove the baking sheet from the oven and let the scones cool on the sheet for about 5 minutes. Then, transfer them to a wire rack to cool more completely. It’s important to let them cool for at least 15-20 minutes before glazing, otherwise the glaze will melt and run right off.
Step 11: Prepare the Maple Glaze
While the scones are cooling, prepare the glaze. In a medium bowl, whisk together the powdered sugar, pure maple syrup, and a pinch of salt. Add 1 tablespoon of milk or cream and whisk until smooth. If the glaze is too thick, add more milk, one teaspoon at a time, until you reach your desired consistency. It should be thick but still pourable.
Step 12: Glaze and Serve
Once the scones are mostly cool, use a spoon or a whisk to drizzle the maple glaze generously over the top of each scone. Let the glaze set for a few minutes before serving. Enjoy them warm for the best experience.
Nutrition
- Serving Size: one normal portion
- Calories: 450


