
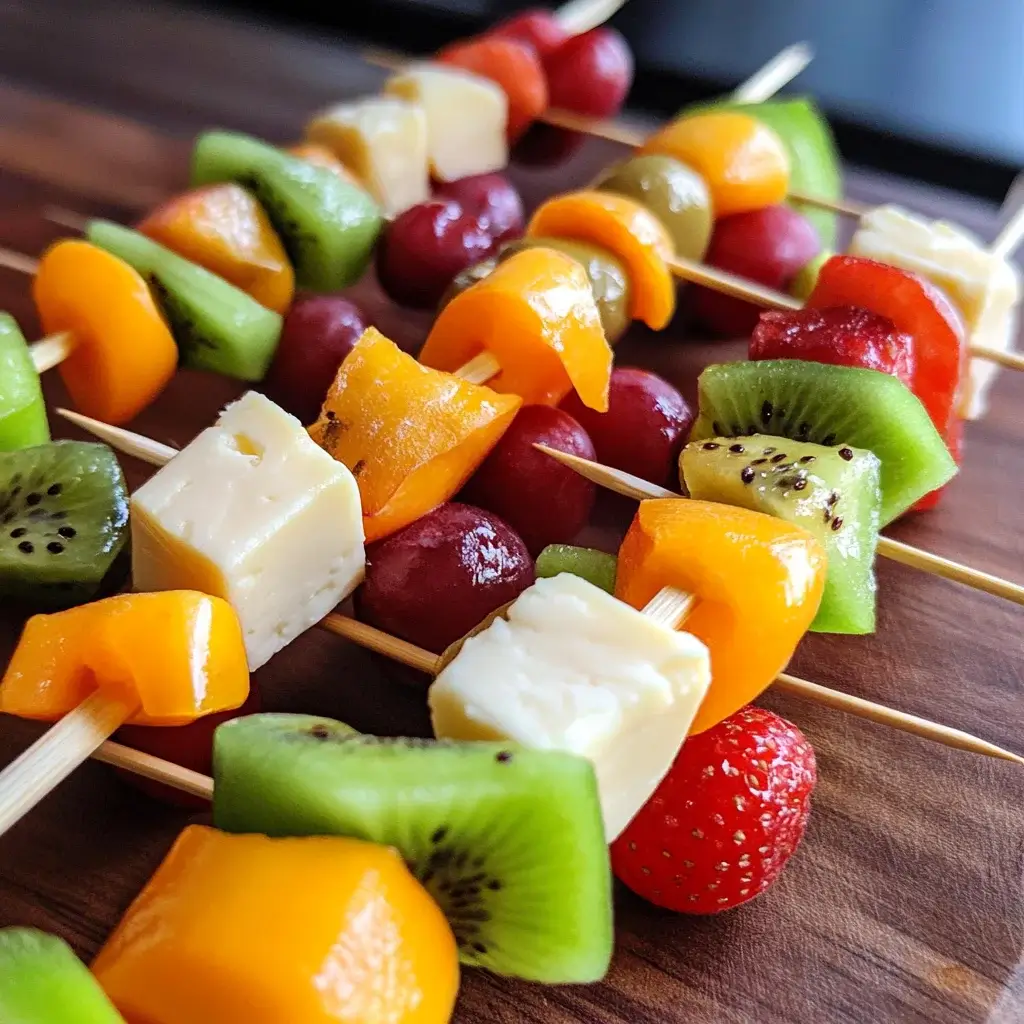

Summer afternoons in our home often call for a snack that’s both refreshing and satisfying, something to bridge the gap between lunch and dinner without being too heavy. That’s where these Quick Cheese and Fruit Skewers have become an absolute lifesaver. Honestly, they’re a hit every single time I make them. Even my pickiest eater, who usually shies away from fruit, reaches for these vibrant skewers. The combination of sweet, juicy fruits with the creamy, savory cheese is just irresistible. They are incredibly easy to assemble, making them perfect for impromptu gatherings or just a fun afternoon treat for the family. Plus, they look so cheerful and colorful on a platter – it’s like sunshine on a stick! If you’re looking for a no-fuss, crowd-pleasing snack that’s both delicious and visually appealing, you absolutely must try these.
Ingredients
- Assorted Cheeses: 2 cups, cubed. Choose a variety for flavor and texture. Options include cheddar for sharpness, mozzarella for mildness, provolone for a smooth taste, and Monterey Jack for a creamy texture. Cubing them into bite-sized pieces ensures easy skewering and enjoyable eating.
- Fresh Strawberries: 1 pint, hulled. Sweet strawberries provide a burst of summer flavor and vibrant red color. Hulling them is essential for easy eating and presentation.
- Green Grapes: 1 cup, seedless. Green grapes offer a crisp, slightly tart counterpoint to the sweetness of other fruits and the richness of cheese. Seedless varieties make them convenient and enjoyable.
- Pineapple Chunks: 1 cup, fresh or canned (drained). Pineapple adds a tropical sweetness and a slightly tangy edge. Fresh pineapple is ideal for the best flavor and texture, but canned chunks, well-drained, are a convenient alternative.
- Blueberries: 1/2 cup. Small and sweet, blueberries contribute a pop of color and antioxidants. Their size is perfect for skewers, and they add a delicate sweetness.
- Kiwi: 2, peeled and sliced. Kiwi offers a tangy-sweet flavor and a vibrant green hue. Peeling and slicing them into bite-sized pieces makes them easy to skewer and eat.
- Wooden or Bamboo Skewers: 15-20, 6-inch or longer. Skewers are the foundation of this recipe, holding the cheese and fruit together. Wooden or bamboo skewers are readily available and work perfectly. Soaking wooden skewers in water for 30 minutes before assembling can prevent them from burning if you plan to grill them briefly (though this recipe is typically served chilled).
Instructions
- Prepare the Cheese and Fruit: Begin by washing all the fruits thoroughly and patting them dry. This step is crucial for food safety and ensures the fruit will adhere better to the skewers. If using canned pineapple, make sure to drain it well to prevent soggy skewers. Cut the cheeses into uniform cubes, approximately ½ to ¾ inch in size. This size is ideal for balancing flavor and ease of eating on a skewer. Hull the strawberries and slice the kiwi into rounds or half-moons, depending on size preference.
- Assemble the Skewers: Now, the fun part – assembling the skewers! Take a skewer and start threading the ingredients. There’s no strict order, but for visual appeal and flavor balance, it’s a good idea to alternate colors and textures. For example, you might start with a grape, then a cube of cheddar, followed by a strawberry, a piece of pineapple, a cube of mozzarella, a blueberry, and a slice of kiwi. Feel free to get creative and arrange the ingredients in any order you like. Ensure that you leave a little space at each end of the skewer for easy handling. Repeat this process until all ingredients are used up or you have made the desired number of skewers.
- Chill (Optional but Recommended): Once the skewers are assembled, you can serve them immediately. However, chilling them in the refrigerator for about 20-30 minutes is highly recommended. Chilling helps the cheese firm up slightly and makes the fruit even more refreshing, especially on a warm day. It also allows the flavors to meld together a bit. If you are preparing these ahead of time, chilling is a must.
- Serve and Enjoy: Arrange the chilled cheese and fruit skewers on a platter or serving dish. They are now ready to be served as a delightful snack, appetizer, or even a light dessert. You can serve them plain or with a side of yogurt dip, honey, or a balsamic glaze for added flavor. Watch as they disappear quickly – they are always a crowd-pleaser!
Nutrition Facts
(Per Serving – approximately 2 skewers, Note: Nutritional values are estimates and can vary based on specific ingredients and portion sizes.)
- Servings: Approximately 8-10 servings (depending on the number of skewers made and portion size)
- Calories per serving: Approximately 180-250 kcal
- Fat: 10-15g
Preparation Time
Prep Time: 20 minutes. This recipe is incredibly quick to prepare. Most of the time is spent washing and chopping the fruits and cheese. The actual assembly of the skewers is very fast and can even be a fun activity to do with kids. From start to finish, you can have these refreshing and delicious skewers ready in under half an hour, making them ideal for last-minute gatherings or quick snacks.
How to Serve
These Quick Cheese and Fruit Skewers are incredibly versatile and can be served in various ways for different occasions. Here are some ideas to elevate your serving presentation and experience:
- As a Refreshing Snack: Perfect for a midday pick-me-up or an afternoon treat. Serve them chilled straight from the refrigerator for a refreshing and light snack.
- Party Appetizer: Ideal for parties, potlucks, or gatherings. Arrange them artfully on a platter for a colorful and appealing appetizer that guests can easily grab and enjoy.
- Kids’ Party Food: A healthy and fun option for children’s parties. Kids love the vibrant colors and the interactive nature of skewers. They can even help assemble them!
- Picnic or BBQ Side: Easy to transport and enjoy outdoors. Pack them in a container with ice packs to keep them chilled for picnics, barbecues, or outdoor events.
- Light Dessert: A healthier alternative to heavy desserts. Serve them after a meal as a light and refreshing dessert option that satisfies a sweet craving without being overly indulgent.
- Breakfast or Brunch Addition: Add them to a brunch spread for a touch of sweetness and freshness alongside savory dishes. They complement egg dishes, pancakes, or waffles beautifully.
- Paired with Dips: Enhance the flavor profile by serving them with various dips. Consider:
- Yogurt Dip: Plain Greek yogurt, honey yogurt, or flavored yogurt (like vanilla or lemon) for a creamy and slightly tangy dip.
- Honey Drizzle: A simple drizzle of honey over the skewers adds extra sweetness and complements the cheese and fruit.
- Balsamic Glaze: A sophisticated touch. The tangy and sweet balsamic glaze contrasts beautifully with the sweetness of the fruit and the richness of the cheese.
- Fruit Salsa: A chunky fruit salsa with mint or basil can add another layer of fresh fruit flavor.
- Presentation Ideas:
- Tiered Platter: Arrange them on a tiered platter for a visually stunning presentation.
- Skewered in a Fruit: For a fun and unique display, stick the skewers into half a melon or a pineapple.
- Individual Cups: Serve a few skewers in individual cups for easy grab-and-go portions at parties.
- Garnishes: Garnish the platter with fresh mint sprigs, edible flowers, or extra fruit slices to enhance the visual appeal.
Additional Tips
To make your Quick Cheese and Fruit Skewers even better and ensure they are a success every time, consider these helpful tips:
- Cheese Variety is Key: Don’t be afraid to experiment with different types of cheese. Beyond the basics like cheddar and mozzarella, try adding pepper jack for a spicy kick, brie for creamy richness (ensure it’s firm enough to skewer, chill it well first), or even small cubes of goat cheese for a tangy flavor. A mix of textures and flavors will make the skewers more interesting.
- Fruit Freshness Matters: Use the freshest, ripest fruits you can find. Ripe fruits are sweeter and more flavorful, enhancing the overall taste of the skewers. Avoid fruits that are bruised or overly soft. Seasonal fruits are often at their peak flavor and are more cost-effective.
- Soak Wooden Skewers: If using wooden skewers, soak them in water for at least 30 minutes before assembling. This prevents them from drying out and potentially splintering, and if you were to briefly grill these (though not typically done), it would prevent burning.
- Cut Ingredients Uniformly: Try to cut the cheese and fruit into roughly the same size pieces. This not only makes the skewers look more visually appealing but also ensures a more balanced flavor and texture in each bite. Uniform sizes also make them easier to skewer.
- Get Creative with Fruit Combinations: While the classic fruits are delicious, feel free to branch out. Consider adding:
- Cantaloupe or Honeydew Melon: Adds sweetness and a refreshing melon flavor.
- Blackberries or Raspberries: Offer a slightly tart and juicy burst.
- Mango: Tropical sweetness and a creamy texture.
- Peaches or Nectarines: Summer stone fruit sweetness.
- Starfruit (Carambola): Adds a unique star shape and a slightly tart flavor.
- Figs: Adds a touch of Mediterranean sweetness (fresh or dried, if using dried, ensure they are soft and easy to skewer).
- Consider Adding Herbs: For an unexpected twist, thread small fresh mint leaves or basil leaves between the cheese and fruit pieces. These herbs add a refreshing aroma and a subtle herbaceous note that complements both the cheese and fruit beautifully. Rosemary sprigs can also be used for a more savory and aromatic skewer.
- Make-Ahead Tips: These skewers can be prepared a few hours in advance. Assemble them and then store them in an airtight container in the refrigerator. To prevent the fruit from drying out, you can lightly brush the cut fruit surfaces with a bit of lemon juice (especially apples, pears, or bananas – though these are not in the basic recipe, this tip is useful if you add them). However, it’s best to assemble them no more than 4-6 hours before serving for optimal freshness.
- Presentation Matters: Take a few extra moments to arrange the skewers attractively on a platter. A colorful and visually appealing presentation makes them even more enticing. Use a platter that complements the colors of the fruit and cheese. Garnishing with extra fruit slices or fresh herbs can elevate the presentation further.
Frequently Asked Questions (FAQs)
Q1: Can I use pre-cut fruit to save time?
A: Yes, you can use pre-cut fruit to save time, especially if you are in a rush. However, keep in mind that pre-cut fruit might not be as fresh as fruit you cut yourself, and it may not last as long once skewered. If using pre-cut fruit, choose options that look vibrant and are stored properly. Check the expiration date and ensure they are still firm and not overly moist.
Q2: What’s the best type of cheese to use for skewers?
A: The best type of cheese for skewers is firm enough to hold its shape when cubed and skewered, and complements the sweetness of the fruit. Good options include cheddar, mozzarella, provolone, Monterey Jack, Colby, and even firmer varieties of feta or goat cheese (if well-chilled). A variety of cheeses adds interest. Avoid very soft cheeses like brie or ricotta unless you can find a firm version or chill them extensively before cubing.
Q3: Can I make these skewers vegan?
A: Yes, you can easily make vegan cheese and fruit skewers! Simply substitute the dairy cheese with vegan cheese alternatives. There are many delicious vegan cheese blocks available made from nuts, soy, or coconut oil. Choose vegan cheese that is firm enough to cube, such as vegan cheddar, mozzarella, or pepper jack. Ensure all other ingredients are also vegan-friendly.
Q4: How long can I store leftover cheese and fruit skewers?
A: Leftover cheese and fruit skewers are best consumed within 24 hours when stored properly in the refrigerator in an airtight container. After this time, the fruit may start to soften and release moisture, and the cheese may also change in texture. For the best quality and food safety, it’s recommended to enjoy them as fresh as possible.
Q5: Can I add chocolate to these skewers?
A: Yes, you can definitely add chocolate! For a decadent twist, you can drizzle melted dark chocolate or milk chocolate over the assembled skewers. Alternatively, you can dip the tips of some fruit pieces (like strawberries or pineapple) in melted chocolate before skewering for a chocolate-dipped element. Mini chocolate chips can also be threaded onto the skewers for a fun touch.
Q6: Are these skewers suitable for people with allergies?
A: These skewers can be made allergy-friendly with some careful ingredient selection. For dairy allergies, use vegan cheese. For nut allergies, ensure that any vegan cheese and other components are nut-free. Always check the labels of all ingredients to ensure they are free from specific allergens. Be mindful of cross-contamination during preparation if allergies are severe.
Q7: Can I grill these cheese and fruit skewers?
A: While typically served chilled, you can briefly grill these skewers for a warm, caramelized effect. If grilling, use firmer cheeses that hold their shape well under heat, like halloumi or grilling cheese, along with fruits that grill well, such as pineapple, peaches, or watermelon. Grill them quickly over medium heat, turning occasionally, just until they get slight grill marks and the cheese softens slightly but doesn’t melt completely. Soak wooden skewers well if grilling to prevent burning.
Q8: Can I make these skewers ahead of time for a large party?
A: Yes, you can prepare these skewers ahead of time for a large party. Assemble them up to 4-6 hours before serving and store them in a single layer in airtight containers in the refrigerator. To maintain freshness, you can place a slightly damp paper towel in the container to help prevent the fruit from drying out. For very large quantities, consider assembling components (cubing cheese and fruit) separately and then assembling skewers closer to serving time if possible to maximize freshness.
Print
Quick Cheese and Fruit Skewers
Ingredients
- Assorted Cheeses: 2 cups, cubed. Choose a variety for flavor and texture. Options include cheddar for sharpness, mozzarella for mildness, provolone for a smooth taste, and Monterey Jack for a creamy texture. Cubing them into bite-sized pieces ensures easy skewering and enjoyable eating.
- Fresh Strawberries: 1 pint, hulled. Sweet strawberries provide a burst of summer flavor and vibrant red color. Hulling them is essential for easy eating and presentation.
- Green Grapes: 1 cup, seedless. Green grapes offer a crisp, slightly tart counterpoint to the sweetness of other fruits and the richness of cheese. Seedless varieties make them convenient and enjoyable.
- Pineapple Chunks: 1 cup, fresh or canned (drained). Pineapple adds a tropical sweetness and a slightly tangy edge. Fresh pineapple is ideal for the best flavor and texture, but canned chunks, well-drained, are a convenient alternative.
- Blueberries: 1/2 cup. Small and sweet, blueberries contribute a pop of color and antioxidants. Their size is perfect for skewers, and they add a delicate sweetness.
- Kiwi: 2, peeled and sliced. Kiwi offers a tangy-sweet flavor and a vibrant green hue. Peeling and slicing them into bite-sized pieces makes them easy to skewer and eat.
- Wooden or Bamboo Skewers: 15-20, 6-inch or longer. Skewers are the foundation of this recipe, holding the cheese and fruit together. Wooden or bamboo skewers are readily available and work perfectly. Soaking wooden skewers in water for 30 minutes before assembling can prevent them from burning if you plan to grill them briefly (though this recipe is typically served chilled).
Instructions
- Prepare the Cheese and Fruit: Begin by washing all the fruits thoroughly and patting them dry. This step is crucial for food safety and ensures the fruit will adhere better to the skewers. If using canned pineapple, make sure to drain it well to prevent soggy skewers. Cut the cheeses into uniform cubes, approximately ½ to ¾ inch in size. This size is ideal for balancing flavor and ease of eating on a skewer. Hull the strawberries and slice the kiwi into rounds or half-moons, depending on size preference.
- Assemble the Skewers: Now, the fun part – assembling the skewers! Take a skewer and start threading the ingredients. There’s no strict order, but for visual appeal and flavor balance, it’s a good idea to alternate colors and textures. For example, you might start with a grape, then a cube of cheddar, followed by a strawberry, a piece of pineapple, a cube of mozzarella, a blueberry, and a slice of kiwi. Feel free to get creative and arrange the ingredients in any order you like. Ensure that you leave a little space at each end of the skewer for easy handling. Repeat this process until all ingredients are used up or you have made the desired number of skewers.
- Chill (Optional but Recommended): Once the skewers are assembled, you can serve them immediately. However, chilling them in the refrigerator for about 20-30 minutes is highly recommended. Chilling helps the cheese firm up slightly and makes the fruit even more refreshing, especially on a warm day. It also allows the flavors to meld together a bit. If you are preparing these ahead of time, chilling is a must.
- Serve and Enjoy: Arrange the chilled cheese and fruit skewers on a platter or serving dish. They are now ready to be served as a delightful snack, appetizer, or even a light dessert. You can serve them plain or with a side of yogurt dip, honey, or a balsamic glaze for added flavor. Watch as they disappear quickly – they are always a crowd-pleaser!
Nutrition
- Serving Size: one normal portion
- Calories: 250
- Fat: 15g


