


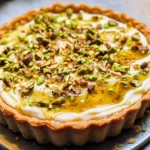
The first time I made this Pistachio Honey Mascarpone Tart, it was for a rather discerning crowd: my in-laws. I wanted something elegant, a little different, but not overly complicated, as I’d also be juggling the main course. I stumbled upon the idea of combining these three hero ingredients, and a little voice in my head whispered, “This could be magical.” The preparation was surprisingly straightforward, and the aroma of toasted pistachios and sweet honey filled my kitchen, building anticipation. When I finally presented it, beautifully green and glistening, there was a moment of appreciative silence before the first forks dove in. The verdict? An absolute triumph! My father-in-law, usually a man of few words when it comes to dessert, declared it “restaurant-quality,” and my mother-in-law immediately asked for the recipe. Even my usually dessert-skeptical husband went back for a second, smaller slice. The creamy, luxurious mascarpone, perfectly balanced by the floral sweetness of honey and the rich, nutty crunch of pistachios, all nestled in a buttery crust, was a symphony of textures and flavors. It has since become my go-to dessert for special occasions, potlucks, or even just a weekend treat when I want to feel a little fancy. It never fails to impress, and the best part is, it looks far more complicated to make than it actually is!
Ingredients
- For the Crust:
- 1 ½ cups (150g) shelled pistachios: Raw, unsalted. A portion will be toasted for deeper flavor.
- ½ cup (50g) all-purpose flour: Provides structure to the crust.
- ¼ cup (50g) granulated sugar: Adds a touch of sweetness to the crust.
- ¼ teaspoon salt: Balances the sweetness.
- ½ cup (113g) unsalted butter: Chilled and cut into small cubes, essential for a tender, flaky crust.
- 1-2 tablespoons ice water: To bring the dough together.
- For the Mascarpone Filling:
- 16 oz (450g) mascarpone cheese: Full-fat, good quality, at room temperature for smooth blending.
- ½ cup (170g) good quality honey: Preferably a light, floral variety like acacia or orange blossom; plus extra for drizzling.
- 1 teaspoon vanilla extract: Enhances the flavors.
- Pinch of salt: Balances the sweetness of the honey.
- Zest of 1 small lemon (optional): Adds a lovely brightness to cut through the richness.
- ½ cup (120ml) heavy whipping cream: Chilled, to lighten the mascarpone filling.
- For Garnish:
- ¼ cup (25g) shelled pistachios: Roughly chopped, for sprinkling.
- Extra honey: For drizzling over the finished tart.
- Edible flowers or fresh berries (optional): For added visual appeal.
Instructions
- Prepare the Pistachios for the Crust:
- Take ½ cup of the shelled pistachios for the crust and spread them on a baking sheet.
- Toast in a preheated oven at 350°F (175°C) for 5-7 minutes, or until fragrant. Keep a close eye on them as they can burn quickly.
- Let them cool completely. Once cooled, grind these toasted pistachios along with the remaining 1 cup of raw pistachios for the crust in a food processor until they are finely ground, but not yet a paste.
- Make the Tart Crust:
- In the food processor bowl with the ground pistachios, add the flour, granulated sugar, and salt. Pulse a few times to combine.
- Add the chilled, cubed butter to the food processor. Pulse until the mixture resembles coarse breadcrumbs with some pea-sized butter pieces remaining.
- With the processor running on low, gradually add the ice water, 1 tablespoon at a time, just until the dough starts to come together. Be careful not to add too much water.
- Turn the dough out onto a lightly floured surface and gently gather it into a disc. Wrap it in plastic wrap and chill in the refrigerator for at least 30 minutes. This helps the butter firm up, making the dough easier to roll and resulting in a flakier crust.
- Blind Bake the Crust:
- Preheat your oven to 375°F (190°C).
- On a lightly floured surface, roll out the chilled dough to about ⅛-inch thickness, large enough to fit a 9-inch tart pan with a removable bottom.
- Carefully transfer the dough to the tart pan, pressing it gently into the bottom and up the sides. Trim any excess dough from the edges.
- Prick the bottom of the crust with a fork. Line the crust with parchment paper and fill with pie weights or dried beans.
- Bake for 15-20 minutes. Remove the parchment paper and pie weights, then bake for another 10-12 minutes, or until the crust is golden brown and cooked through.
- Let the crust cool completely in the tart pan on a wire rack. This is crucial before adding the filling.
- Prepare the Mascarpone Filling:
- In a large bowl, combine the room temperature mascarpone cheese, honey, vanilla extract, pinch of salt, and optional lemon zest.
- Using an electric mixer on low speed (or a whisk), beat gently until just smooth and combined. Avoid overmixing, as mascarpone can curdle if beaten too vigorously or for too long.
- In a separate, clean bowl, whip the chilled heavy cream using an electric mixer until soft peaks form.
- Gently fold about one-third of the whipped cream into the mascarpone mixture to lighten it. Then, fold in the remaining whipped cream until just combined and the mixture is smooth and airy. Be careful not to deflate the whipped cream.
- Assemble the Tart:
- Once the tart crust is completely cool, carefully spread the mascarpone filling evenly into the crust using a spatula. Smooth the top.
- Chill the Tart:
- Cover the tart loosely with plastic wrap (try not to let it touch the filling) and refrigerate for at least 4 hours, or preferably overnight. This allows the filling to set properly and the flavors to meld.
- Garnish and Serve:
- Just before serving, sprinkle the top of the tart with the roughly chopped pistachios.
- Drizzle generously with extra honey.
- If using, arrange edible flowers or fresh berries for an extra touch of elegance.
- Carefully remove the outer ring of the tart pan. Slice and serve chilled.
Nutrition Facts
- Servings: 8-10 slices
- Calories per serving (approximate for 1/8th of tart): 550-650 kcal. A rich and indulgent dessert, perfect for special occasions.
- Total Fat: Approximately 45-55g. Primarily from mascarpone, butter, and pistachios, including healthy unsaturated fats.
- Saturated Fat: Approximately 25-30g. Mainly from the butter and mascarpone cheese.
- Carbohydrates: Approximately 30-40g. From the flour, sugar, and honey.
- Sugars: Approximately 20-28g. Mostly from honey and added sugar in the crust.
(Note: These are estimates and can vary based on specific ingredient brands and precise measurements.)
Preparation Time
- Active Preparation Time: Approximately 45-60 minutes (includes making the crust, toasting nuts, and preparing the filling).
- Chilling Time (Dough): At least 30 minutes.
- Baking Time (Crust): Approximately 25-32 minutes.
- Chilling Time (Assembled Tart): At least 4 hours, preferably overnight.
- Total Time (excluding chilling): Approximately 1 hour 10 minutes – 1 hour 30 minutes.
- Total Time (including chilling): Minimum 5 hours 40 minutes, ideally longer for optimal setting.
This tart requires some patience for chilling, but the active work is quite manageable and well worth the wait for the delicious result.
How to Serve
This Pistachio Honey Mascarpone Tart is a showstopper on its own, but here are a few ways to elevate its presentation and enjoyment:
- Classic Elegance:
- Serve chilled, sliced neatly.
- A simple dusting of powdered sugar around the edge of the plate can add a touch of finesse.
- With Fresh Fruit:
- Berries: A small handful of fresh raspberries, blueberries, or sliced strawberries alongside provides a lovely color contrast and a tart counterpoint to the sweetness.
- Figs: Sliced fresh figs, when in season, complement the honey and pistachio beautifully.
- A Touch of Cream:
- While the filling is creamy, a small dollop of lightly sweetened whipped cream or a quenelle of crème fraîche on the side can add an extra layer of luxury.
- Sauce Drizzle:
- Besides the honey drizzle, a very light drizzle of high-quality balsamic glaze (the syrupy kind) can offer an intriguing sweet-savory note for adventurous palates.
- A subtle raspberry coulis could also work well.
- Beverage Pairings:
- Coffee: A strong espresso or a rich Americano cuts through the richness perfectly.
- Tea: A fragrant Earl Grey, a delicate white tea, or even a mint tea would be delightful.
- Dessert Wine: A late-harvest Riesling, a Moscato d’Asti, or a sweet Vin Santo would complement the honey and nutty flavors.
- For a Gathering:
- Present the whole tart on a beautiful cake stand before slicing.
- If making for a larger group, consider making individual tartlets for easier serving and portion control.
- Garnish Power:
- Don’t underestimate the power of the final garnish. Ensure the chopped pistachios are vibrant green and the honey drizzle is artful.
- A few carefully placed edible flowers (like violas or pansies) or mint leaves can make it look professionally made.
Additional Tips
- Quality Ingredients are Key: The flavor of this tart heavily relies on the quality of its main components. Use fresh, good-quality mascarpone (check the expiry date!), flavorful raw honey (wildflower or orange blossom works beautifully), and fresh pistachios. Stale nuts can ruin the taste.
- Don’t Overwork the Mascarpone: Mascarpone cheese can curdle or become grainy if overmixed. Mix it gently and just until combined with the honey and vanilla. When folding in the whipped cream, do so with a light hand to maintain the airy texture.
- Chill Thoroughly: This isn’t a tart to rush. The crust needs to chill before baking for flakiness, cool completely before filling to prevent a soggy bottom, and the assembled tart needs several hours (preferably overnight) in the refrigerator for the filling to set firmly. This also allows the flavors to meld beautifully.
- Crust Variations: While the pistachio crust is divine, you could experiment. For a quicker, no-bake version, consider a crust made from crushed digestive biscuits or graham crackers mixed with melted butter and finely chopped pistachios, pressed into the pan and chilled.
- Toast Pistachios for Garnish Too: For an extra flavor boost, lightly toast the pistachios used for garnishing. It only takes a few minutes in a dry pan over medium heat or in the oven, but it deepens their nutty aroma and flavor.
- Adjust Sweetness: Taste your honey. Some honeys are much sweeter than others. You can slightly adjust the amount of honey in the filling based on your preference and the sweetness of your specific honey. Remember, the crust also has sugar.
- Clean Slices: For perfectly clean slices, dip a sharp knife in hot water and wipe it dry before each cut. This helps the knife glide through the creamy filling without dragging.
- Make-Ahead Magic: The tart (without the final pistachio and honey garnish on top) can be made a day in advance and kept refrigerated. Add the final garnishes just before serving to keep the pistachios crunchy and the honey drizzle fresh-looking.
FAQ Section
Q1: Can I make this tart gluten-free?
A1: Yes, absolutely! To make the crust gluten-free, substitute the all-purpose flour with a good quality gluten-free all-purpose flour blend (one that contains xanthan gum or add it if your blend doesn’t). Ensure your pistachios are processed in a gluten-free environment if celiac disease is a concern. The filling is naturally gluten-free.
Q2: My mascarpone filling seems a bit runny. What went wrong?
A2: Several things could contribute to a runny filling. Ensure your mascarpone was at room temperature but not warm, and that you didn’t overmix it, which can cause it to break down. Also, ensure your heavy cream was whipped to soft, stable peaks before folding it in. Finally, adequate chilling time (at least 4 hours, preferably longer) is crucial for the filling to set properly.
Q3: Can I use a different type of nut for the crust or garnish?
A3: While pistachios are the star, you could experiment. Almonds or hazelnuts would be good alternatives for the crust, offering a different nutty profile. For garnish, toasted slivered almonds or chopped hazelnuts could also work, though the characteristic green of pistachios will be missed.
Q4: How long will this Pistachio Honey Mascarpone Tart last in the refrigerator?
A4: Properly covered, the tart will keep well in the refrigerator for up to 3-4 days. The crust may soften slightly over time, but the flavors will remain delicious. It’s best enjoyed within the first two days for optimal texture.
Q5: Can I freeze this tart?
A5: Mascarpone-based desserts can sometimes change texture upon thawing (becoming a bit grainy or watery). While some people have success freezing it, it’s generally best enjoyed fresh. If you do freeze it, wrap it very well in plastic wrap and then foil. Thaw slowly in the refrigerator. The crust’s texture might be compromised.
Q6: What if I can’t find mascarpone cheese? Can I substitute it?
A6: Mascarpone has a unique rich, slightly sweet flavor and creamy texture. The closest substitute would be full-fat cream cheese, but it will have a tangier flavor. You might need to adjust the sweetness slightly. To mimic mascarpone’s richness, you could blend cream cheese with a bit of heavy cream. However, for the true essence of this tart, mascarpone is highly recommended.
Q7: Is it possible to make individual tartlets instead of one large tart?
A7: Yes, individual tartlets would be a lovely presentation! You’ll need individual tartlet pans. Divide the crust dough and filling among the pans. Baking time for the small crusts will be shorter, so keep an eye on them. Chilling time for the filling should still be adequate. This is great for portion control and elegant individual servings.
Q8: The recipe calls for a baked crust. Could I use a no-bake press-in crust instead?
A8: Yes, you can. A popular no-bake option involves crushing digestive biscuits or graham crackers (about 1.5-2 cups of crumbs), mixing them with 1/4 to 1/2 cup of finely ground pistachios and about 6 tablespoons of melted butter. Press this mixture firmly into the bottom and up the sides of your tart pan and chill thoroughly (at least 30 minutes to an hour) until firm before adding the mascarpone filling. This variation saves oven time and offers a different textural experience.
Pistachio Honey Mascarpone Tart
Ingredients
- For the Crust:
- 1 ½ cups (150g) shelled pistachios: Raw, unsalted. A portion will be toasted for deeper flavor.
- ½ cup (50g) all-purpose flour: Provides structure to the crust.
- ¼ cup (50g) granulated sugar: Adds a touch of sweetness to the crust.
- ¼ teaspoon salt: Balances the sweetness.
- ½ cup (113g) unsalted butter: Chilled and cut into small cubes, essential for a tender, flaky crust.
- 1–2 tablespoons ice water: To bring the dough together.
- For the Mascarpone Filling:
- 16 oz (450g) mascarpone cheese: Full-fat, good quality, at room temperature for smooth blending.
- ½ cup (170g) good quality honey: Preferably a light, floral variety like acacia or orange blossom; plus extra for drizzling.
- 1 teaspoon vanilla extract: Enhances the flavors.
- Pinch of salt: Balances the sweetness of the honey.
- Zest of 1 small lemon (optional): Adds a lovely brightness to cut through the richness.
- ½ cup (120ml) heavy whipping cream: Chilled, to lighten the mascarpone filling.
- For Garnish:
- ¼ cup (25g) shelled pistachios: Roughly chopped, for sprinkling.
- Extra honey: For drizzling over the finished tart.
- Edible flowers or fresh berries (optional): For added visual appeal.
Instructions
- Prepare the Pistachios for the Crust:
- Take ½ cup of the shelled pistachios for the crust and spread them on a baking sheet.
- Toast in a preheated oven at 350°F (175°C) for 5-7 minutes, or until fragrant. Keep a close eye on them as they can burn quickly.
- Let them cool completely. Once cooled, grind these toasted pistachios along with the remaining 1 cup of raw pistachios for the crust in a food processor until they are finely ground, but not yet a paste.
- Make the Tart Crust:
- In the food processor bowl with the ground pistachios, add the flour, granulated sugar, and salt. Pulse a few times to combine.
- Add the chilled, cubed butter to the food processor. Pulse until the mixture resembles coarse breadcrumbs with some pea-sized butter pieces remaining.
- With the processor running on low, gradually add the ice water, 1 tablespoon at a time, just until the dough starts to come together. Be careful not to add too much water.
- Turn the dough out onto a lightly floured surface and gently gather it into a disc. Wrap it in plastic wrap and chill in the refrigerator for at least 30 minutes. This helps the butter firm up, making the dough easier to roll and resulting in a flakier crust.
- Blind Bake the Crust:
- Preheat your oven to 375°F (190°C).
- On a lightly floured surface, roll out the chilled dough to about ⅛-inch thickness, large enough to fit a 9-inch tart pan with a removable bottom.
- Carefully transfer the dough to the tart pan, pressing it gently into the bottom and up the sides. Trim any excess dough from the edges.
- Prick the bottom of the crust with a fork. Line the crust with parchment paper and fill with pie weights or dried beans.
- Bake for 15-20 minutes. Remove the parchment paper and pie weights, then bake for another 10-12 minutes, or until the crust is golden brown and cooked through.
- Let the crust cool completely in the tart pan on a wire rack. This is crucial before adding the filling.
- Prepare the Mascarpone Filling:
- In a large bowl, combine the room temperature mascarpone cheese, honey, vanilla extract, pinch of salt, and optional lemon zest.
- Using an electric mixer on low speed (or a whisk), beat gently until just smooth and combined. Avoid overmixing, as mascarpone can curdle if beaten too vigorously or for too long.
- In a separate, clean bowl, whip the chilled heavy cream using an electric mixer until soft peaks form.
- Gently fold about one-third of the whipped cream into the mascarpone mixture to lighten it. Then, fold in the remaining whipped cream until just combined and the mixture is smooth and airy. Be careful not to deflate the whipped cream.
- Assemble the Tart:
- Once the tart crust is completely cool, carefully spread the mascarpone filling evenly into the crust using a spatula. Smooth the top.
- Chill the Tart:
- Cover the tart loosely with plastic wrap (try not to let it touch the filling) and refrigerate for at least 4 hours, or preferably overnight. This allows the filling to set properly and the flavors to meld.
- Garnish and Serve:
- Just before serving, sprinkle the top of the tart with the roughly chopped pistachios.
- Drizzle generously with extra honey.
- If using, arrange edible flowers or fresh berries for an extra touch of elegance.
- Carefully remove the outer ring of the tart pan. Slice and serve chilled.
Nutrition
- Serving Size: one normal portion
- Calories: 650
- Sugar: 28g
- Fat: 55g
- Saturated Fat: 30g
- Carbohydrates: 40g


