

Of all the desserts in my family’s recipe box, none evoke the pure, unadulterated joy of summer quite like this Pineapple Cream Dessert. I first made it for a last-minute neighborhood potluck on a sweltering July afternoon. I needed something fast, something that didn’t require turning on the oven, and something that could please a crowd of all ages. This recipe, a treasured hand-me-down from my grandmother, was the answer. I remember the moment of truth: after a long afternoon of burgers and lawn games, I brought out the chilled glass trifle bowl, its layers of creamy pineapple filling and buttery graham cracker crust catching the golden hour light. The first spoonful was met with a chorus of “oohs” and “aahs.” The kids, who usually only go for chocolate, came back for seconds. The adults, my friends and neighbors, crowded around me asking for the recipe. It was cool, creamy, and bursting with a sweet-yet-tangy pineapple flavor that was utterly refreshing. It wasn’t just a dessert; it was the perfect end to a perfect day. Since then, it has become our go-to for family gatherings, holidays, and any occasion that calls for a guaranteed crowd-pleaser. It’s more than just a recipe; it’s a slice of pure happiness, and I’m so excited to share it with you.
Ingredients
This Pineapple Cream Dessert recipe relies on a handful of simple, easy-to-find ingredients that come together to create something truly magical. For the best results, use high-quality ingredients, especially full-fat dairy, which provides the rich and creamy texture this dessert is famous for.
For the Graham Cracker Crust:
- 2 cups Graham Cracker Crumbs (about 14-16 full sheets): These form the buttery, slightly sweet, and crunchy base of our dessert. You can buy pre-made crumbs or make your own by pulsing full sheets in a food processor.
- ½ cup Unsalted Butter, melted: This is the binder that holds the crust together. Using unsalted butter allows you to control the overall saltiness of the dessert.
- ¼ cup Granulated Sugar: This adds a touch of extra sweetness and helps the crust caramelize slightly, deepening its flavor.
For the Pineapple Cream Filling:
- 2 cans (20 ounces each) Crushed Pineapple in 100% Juice: This is the star of the show. It is absolutely crucial that you drain the pineapple extremely well to avoid a runny dessert. The tangy, sweet flavor is what makes this dessert so refreshing.
- 2 packages (8 ounces each) Full-Fat Cream Cheese, softened to room temperature: Do not substitute with low-fat or fat-free versions. Full-fat cream cheese is essential for the thick, rich, and creamy consistency of the filling. Softening it ensures a smooth, lump-free texture.
- 1 cup Powdered Sugar (Confectioners’ Sugar): This dissolves easily into the cream cheese without creating a grainy texture, providing a smooth sweetness that balances the tang of the pineapple and cream cheese.
- 1 container (16 ounces) Frozen Whipped Topping (like Cool Whip), thawed: This is the key to the light, airy, and fluffy texture of the dessert. Make sure it is fully thawed in the refrigerator before you begin.
- 1 teaspoon Vanilla Extract: A small amount of pure vanilla extract enhances all the other flavors in the dessert, adding a layer of aromatic warmth.
Instructions
Follow these step-by-step instructions carefully to achieve the perfect balance of texture and flavor. The process is simple and doesn’t require any baking, but a few key steps—like thoroughly draining the pineapple and allowing for adequate chilling time—are non-negotiable for success.
Step 1: Prepare the Pineapple
This is the most critical step for ensuring your dessert sets up properly. Open both cans of crushed pineapple and pour them into a fine-mesh sieve or strainer set over a bowl. Using the back of a large spoon or a spatula, press down firmly on the pineapple to squeeze out as much juice as possible. Let it sit and continue to drain while you prepare the crust. You want the pineapple pulp to be as dry as you can get it.
Step 2: Make the Graham Cracker Crust
In a medium bowl, combine the 2 cups of graham cracker crumbs and ¼ cup of granulated sugar. Pour the ½ cup of melted unsalted butter over the crumb mixture. Stir with a fork until all the crumbs are evenly moistened and the mixture resembles wet sand. Reserve about ½ cup of this mixture for topping the dessert later. Press the remaining crumb mixture firmly and evenly into the bottom of a 9×13-inch glass baking dish or a large trifle bowl. Use the bottom of a measuring cup to pack it down tightly. Place the crust in the refrigerator to chill and firm up while you make the filling.
Step 3: Create the Cream Cheese Base
In a large mixing bowl, place the 2 packages of softened, room-temperature cream cheese. Using an electric hand mixer or a stand mixer fitted with the paddle attachment, beat the cream cheese on medium speed for about 2-3 minutes, until it is completely smooth, light, and fluffy with no lumps. Scrape down the sides and bottom of the bowl with a spatula to ensure everything is incorporated.
Step 4: Sweeten the Filling
Add the 1 cup of powdered sugar and the 1 teaspoon of vanilla extract to the whipped cream cheese. Start the mixer on low speed to prevent the sugar from flying everywhere, then increase to medium speed. Beat for another 2 minutes until the sugar is fully dissolved and the mixture is silky smooth.
Step 5: Fold in the Whipped Topping
Switch from the mixer to a rubber spatula. Add the entire container of thawed frozen whipped topping to the cream cheese mixture. Gently fold the whipped topping into the cream cheese base. Use a scooping motion, bringing your spatula down through the middle, scraping along the bottom, and folding it back over the top. Continue this gentle folding motion until no white streaks of whipped topping remain. Be careful not to overmix or stir vigorously, as this will deflate the whipped topping and make your filling dense instead of light and airy.
Step 6: Incorporate the Pineapple
Add the thoroughly drained crushed pineapple to the cream cheese mixture. Once again, use your spatula to gently fold the pineapple in until it is evenly distributed throughout the creamy filling.
Step 7: Assemble the Dessert
Remove your chilled crust from the refrigerator. Carefully spoon the pineapple cream filling over the graham cracker crust, spreading it into an even layer with your spatula.
Step 8: Top and Chill
Take the ½ cup of reserved graham cracker crumb mixture and sprinkle it evenly over the top of the pineapple filling. This adds a nice textural contrast. Cover the dish tightly with plastic wrap or a lid. Place the dessert in the refrigerator to chill for at least 6 hours, but preferably overnight. This chilling time is essential; it allows the filling to set and firm up, and it lets the flavors meld together beautifully. Do not skip this step!
Nutrition Facts
Please note that these nutrition facts are an estimate and can vary based on the specific brands of ingredients used. This recipe is considered a dessert and should be enjoyed in moderation.
- Servings: 16 servings
- Calories per serving: Approximately 380 kcal
- Carbohydrates: This dessert is a significant source of carbohydrates, primarily from the graham crackers and various sugars, providing quick energy.
- Fat: The full-fat cream cheese, butter, and whipped topping contribute to the fat content, which is crucial for the dessert’s rich flavor and creamy mouthfeel.
- Sugar: The combination of granulated sugar, powdered sugar, and the natural sugars in the pineapple give this dessert its characteristic sweetness.
Preparation Time
The beauty of this Pineapple Cream Dessert lies in its simplicity and minimal hands-on effort.
- Active Preparation Time: 20-25 minutes. This includes the time it takes to drain the pineapple, mix the crust, and whip together the filling.
- Chilling Time: 6 hours to overnight. The majority of the “preparation” is passive chilling time in the refrigerator. This crucial period allows the dessert to set firmly and for the flavors to fully develop, so plan accordingly.
How to Serve
Presentation can elevate this simple dessert from a humble treat to a show-stopping centerpiece. Here are a few wonderful ways to serve your Pineapple Cream Dessert:
- Classic Family-Style:
- Serve it directly from the 9×13-inch glass baking dish. The visible layers of crust and cream look beautiful.
- Cut into squares and use a small spatula to lift each piece onto a dessert plate. This is perfect for potlucks, BBQs, and large family gatherings.
- Elegant Trifle Bowl:
- For a more dramatic presentation, layer the dessert in a large glass trifle bowl.
- Start with a layer of the graham cracker crust, followed by a layer of the pineapple cream filling. Repeat the layers until you reach the top, finishing with a layer of filling.
- Sprinkle the reserved crumb mixture over the top. The visible layers through the glass are stunning.
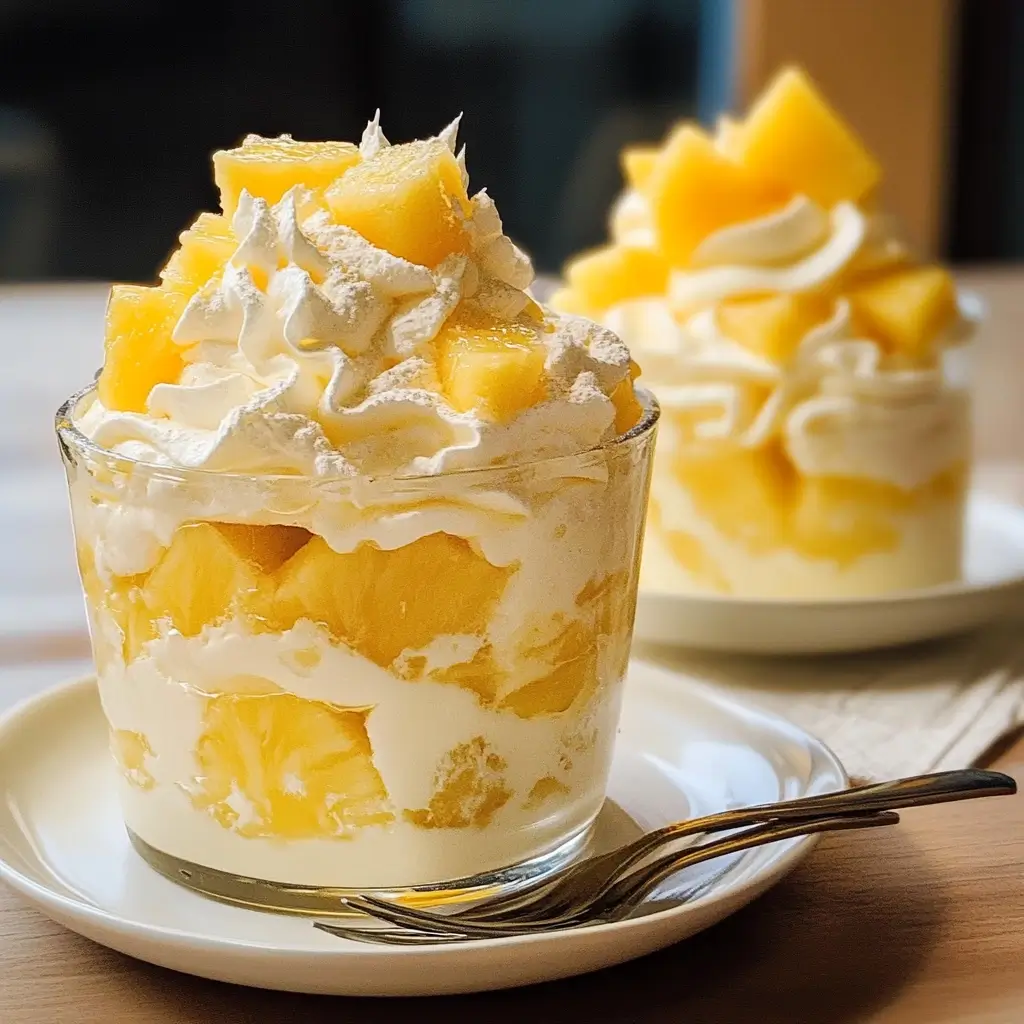
- Individual Parfaits or Glasses:
- For sophisticated individual portions, layer the components in small glass tumblers, wine glasses, or mason jars.
- Alternate layers of the graham cracker crumbs and the pineapple cream filling. This is a great option for dinner parties and makes serving incredibly easy.
- Garnish for a Final Touch:
- No matter how you serve it, a final garnish adds a professional touch. Consider adding:
- Toasted Coconut: Sprinkle toasted sweetened or unsweetened coconut flakes over the top for a nutty crunch and tropical flair.
- Maraschino Cherries: A bright red cherry placed on top of each serving adds a pop of color and a touch of nostalgic charm.
- Fresh Mint Sprigs: A small sprig of fresh mint provides a beautiful color contrast and a hint of fresh aroma.
- Small Pineapple Wedges: A thin slice or wedge of fresh pineapple on the side of the dish or on top of each serving reinforces the star ingredient.
- No matter how you serve it, a final garnish adds a professional touch. Consider adding:
Additional Tips
To ensure your Pineapple Cream Dessert is perfect every single time, keep these eight expert tips in mind.
1. The Golden Rule: Room Temperature Ingredients
For the filling, it is absolutely essential that your cream cheese is softened to room temperature. Cold cream cheese will not blend smoothly and will result in a lumpy, unpleasant texture. Take it out of the fridge at least 1-2 hours before you start.
2. Master the Art of Draining
I cannot stress this enough: thoroughly drain the pineapple. A watery filling is the most common pitfall with this recipe. After pressing it in a sieve, you can even transfer the pineapple to a clean kitchen towel or a few layers of paper towels and squeeze gently to remove any final excess moisture.
3. The Gentle Art of Folding
When combining the whipped topping with the cream cheese base, use a gentle folding technique, not a vigorous stirring motion. Over-mixing will deflate the air from the whipped topping, resulting in a dense, heavy filling instead of the light, fluffy cloud you’re aiming for.
4. Patience is a Virtue (Especially with Chilling)
While it’s tempting to dig in right away, the mandatory 6+ hour chilling time is not a suggestion. This period is when the magic happens. The filling firms up, the flavors meld, and the crust softens just enough to be sliceable. Chilling overnight is even better for the best possible texture and taste.
5. Make-Ahead Marvel
This dessert is a fantastic make-ahead option, which is perfect for reducing stress when planning for a party or holiday. You can assemble it completely up to 24-48 hours in advance. Just keep it tightly covered in the refrigerator. The flavors will be even more developed.
6. Explore Flavor Variations
While the classic recipe is divine, don’t be afraid to experiment. Add the zest of one lime to the cream cheese mixture for a zesty tropical twist. A teaspoon of coconut extract can be added with the vanilla for a piña colada-inspired flavor. You can also swap the graham cracker crust for a crust made from vanilla wafers, shortbread cookies, or even Biscoff cookies.
7. Perfecting the Press-In Crust
To get a perfectly even and compact crust that doesn’t crumble when you serve, use the flat bottom of a drinking glass or a metal measuring cup to press the crumb mixture firmly into the pan. This applies even pressure and creates a solid, stable base for your filling.
8. Storing Leftovers Like a Pro
Store any leftover dessert tightly covered with plastic wrap or in an airtight container in the refrigerator. It will stay fresh and delicious for up to 4 days. After that, the crust may become too soft. I do not recommend freezing the finished dessert, as the cream cheese texture can become grainy and separate upon thawing.
FAQ Section
Here are answers to some of the most frequently asked questions about making this delightful Pineapple Cream Dessert.
1. Can I use fresh pineapple instead of canned?
Unfortunately, for this no-bake recipe, fresh pineapple is not a suitable substitute. Fresh pineapple contains an enzyme called bromelain, which breaks down proteins. Since the cream cheese and whipped topping are dairy proteins, the bromelain would prevent the filling from setting up, resulting in a soupy mess. The canning process deactivates this enzyme, making canned pineapple the only choice for no-bake dairy desserts.
2. My dessert turned out runny. What did I do wrong?
A runny dessert is almost always caused by one of two things. First, the pineapple was not drained well enough, introducing too much liquid into the filling. Second, you may have used low-fat or fat-free cream cheese or whipped topping. The fat content in these ingredients is crucial for providing the structure and stability the dessert needs to set properly. Always use full-fat versions and drain your pineapple meticulously.
3. Can I make this dessert gluten-free?
Yes, absolutely! This recipe is very easy to adapt to be gluten-free. Simply substitute the traditional graham crackers with your favorite brand of gluten-free graham-style crackers or gluten-free vanilla cookies for the crust. The filling ingredients are naturally gluten-free, but always double-check the labels on your whipped topping and powdered sugar to be safe from cross-contamination.
4. Is it possible to make a dairy-free or vegan version?
Yes, with some careful substitutions, you can create a dairy-free or vegan version. Use a high-quality vegan cream cheese alternative (brands like Kite Hill or Miyoko’s work well) and a dairy-free whipped topping (such as So Delicious CocoWhip). For the crust, ensure your cookies are vegan and use melted coconut oil or a vegan butter substitute instead of dairy butter. The results will be delicious!
5. What is the difference between this and “Pineapple Fluff” or “Pineapple Pretzel Salad”?
While they share pineapple as a key ingredient, they are distinct desserts. “Pineapple Fluff” is typically a much lighter, looser mixture, often containing mini marshmallows and sometimes pudding mix, and it usually doesn’t have a crust. “Pineapple Pretzel Salad” is a layered dessert famous for its sweet and salty combination, featuring a crust made from crushed pretzels, a sweet cream cheese layer, and a top layer of pineapple set in gelatin (Jell-O). This Pineapple Cream Dessert is richer and creamier than fluff and lacks the pretzel crust and gelatin top of the salad.
6. I don’t have powdered sugar. Can I use granulated sugar in the filling?
It’s not recommended. Powdered sugar contains cornstarch, which helps stabilize the filling, and its fine texture dissolves instantly into the cream cheese, creating a silky-smooth consistency. Granulated sugar is much coarser and will not dissolve completely, leaving your filling with a gritty or sandy texture. If you’re in a pinch, you can make your own powdered sugar by blending granulated sugar in a high-powered blender until it’s a fine powder.
7. Can I use a different kind of cookie for the crust?
Certainly! A graham cracker crust is classic, but many other cookies work wonderfully. Crushed Nilla Wafers, shortbread cookies, Biscoff (speculoos) cookies, or even golden Oreos (with the cream removed) would all make a delicious and unique crust for this dessert. Simply follow the same ratio of crumbs to melted butter.
8. How far in advance can I make the crust?
You can make the crust portion of the recipe up to 2 days ahead of time. Just press it into your baking dish, cover it tightly with plastic wrap, and store it in the refrigerator. This can be a great time-saving step when you’re preparing for an event. You can then whip up the filling and assemble the dessert the day you plan to serve it or the night before.

Pineapple Cream Dessert Recipe
Ingredients
This Pineapple Cream Dessert recipe relies on a handful of simple, easy-to-find ingredients that come together to create something truly magical. For the best results, use high-quality ingredients, especially full-fat dairy, which provides the rich and creamy texture this dessert is famous for.
For the Graham Cracker Crust:
- 2 cups Graham Cracker Crumbs (about 14–16 full sheets): These form the buttery, slightly sweet, and crunchy base of our dessert. You can buy pre-made crumbs or make your own by pulsing full sheets in a food processor.
- ½ cup Unsalted Butter, melted: This is the binder that holds the crust together. Using unsalted butter allows you to control the overall saltiness of the dessert.
- ¼ cup Granulated Sugar: This adds a touch of extra sweetness and helps the crust caramelize slightly, deepening its flavor.
For the Pineapple Cream Filling:
- 2 cans (20 ounces each) Crushed Pineapple in 100% Juice: This is the star of the show. It is absolutely crucial that you drain the pineapple extremely well to avoid a runny dessert. The tangy, sweet flavor is what makes this dessert so refreshing.
- 2 packages (8 ounces each) Full-Fat Cream Cheese, softened to room temperature: Do not substitute with low-fat or fat-free versions. Full-fat cream cheese is essential for the thick, rich, and creamy consistency of the filling. Softening it ensures a smooth, lump-free texture.
- 1 cup Powdered Sugar (Confectioners’ Sugar): This dissolves easily into the cream cheese without creating a grainy texture, providing a smooth sweetness that balances the tang of the pineapple and cream cheese.
- 1 container (16 ounces) Frozen Whipped Topping (like Cool Whip), thawed: This is the key to the light, airy, and fluffy texture of the dessert. Make sure it is fully thawed in the refrigerator before you begin.
- 1 teaspoon Vanilla Extract: A small amount of pure vanilla extract enhances all the other flavors in the dessert, adding a layer of aromatic warmth.
Instructions
Follow these step-by-step instructions carefully to achieve the perfect balance of texture and flavor. The process is simple and doesn’t require any baking, but a few key steps—like thoroughly draining the pineapple and allowing for adequate chilling time—are non-negotiable for success.
Step 1: Prepare the Pineapple
This is the most critical step for ensuring your dessert sets up properly. Open both cans of crushed pineapple and pour them into a fine-mesh sieve or strainer set over a bowl. Using the back of a large spoon or a spatula, press down firmly on the pineapple to squeeze out as much juice as possible. Let it sit and continue to drain while you prepare the crust. You want the pineapple pulp to be as dry as you can get it.
Step 2: Make the Graham Cracker Crust
In a medium bowl, combine the 2 cups of graham cracker crumbs and ¼ cup of granulated sugar. Pour the ½ cup of melted unsalted butter over the crumb mixture. Stir with a fork until all the crumbs are evenly moistened and the mixture resembles wet sand. Reserve about ½ cup of this mixture for topping the dessert later. Press the remaining crumb mixture firmly and evenly into the bottom of a 9×13-inch glass baking dish or a large trifle bowl. Use the bottom of a measuring cup to pack it down tightly. Place the crust in the refrigerator to chill and firm up while you make the filling.
Step 3: Create the Cream Cheese Base
In a large mixing bowl, place the 2 packages of softened, room-temperature cream cheese. Using an electric hand mixer or a stand mixer fitted with the paddle attachment, beat the cream cheese on medium speed for about 2-3 minutes, until it is completely smooth, light, and fluffy with no lumps. Scrape down the sides and bottom of the bowl with a spatula to ensure everything is incorporated.
Step 4: Sweeten the Filling
Add the 1 cup of powdered sugar and the 1 teaspoon of vanilla extract to the whipped cream cheese. Start the mixer on low speed to prevent the sugar from flying everywhere, then increase to medium speed. Beat for another 2 minutes until the sugar is fully dissolved and the mixture is silky smooth.
Step 5: Fold in the Whipped Topping
Switch from the mixer to a rubber spatula. Add the entire container of thawed frozen whipped topping to the cream cheese mixture. Gently fold the whipped topping into the cream cheese base. Use a scooping motion, bringing your spatula down through the middle, scraping along the bottom, and folding it back over the top. Continue this gentle folding motion until no white streaks of whipped topping remain. Be careful not to overmix or stir vigorously, as this will deflate the whipped topping and make your filling dense instead of light and airy.
Step 6: Incorporate the Pineapple
Add the thoroughly drained crushed pineapple to the cream cheese mixture. Once again, use your spatula to gently fold the pineapple in until it is evenly distributed throughout the creamy filling.
Step 7: Assemble the Dessert
Remove your chilled crust from the refrigerator. Carefully spoon the pineapple cream filling over the graham cracker crust, spreading it into an even layer with your spatula.
Step 8: Top and Chill
Take the ½ cup of reserved graham cracker crumb mixture and sprinkle it evenly over the top of the pineapple filling. This adds a nice textural contrast. Cover the dish tightly with plastic wrap or a lid. Place the dessert in the refrigerator to chill for at least 6 hours, but preferably overnight. This chilling time is essential; it allows the filling to set and firm up, and it lets the flavors meld together beautifully. Do not skip this step!
Nutrition
- Serving Size: one normal portion
- Calories: 380


