
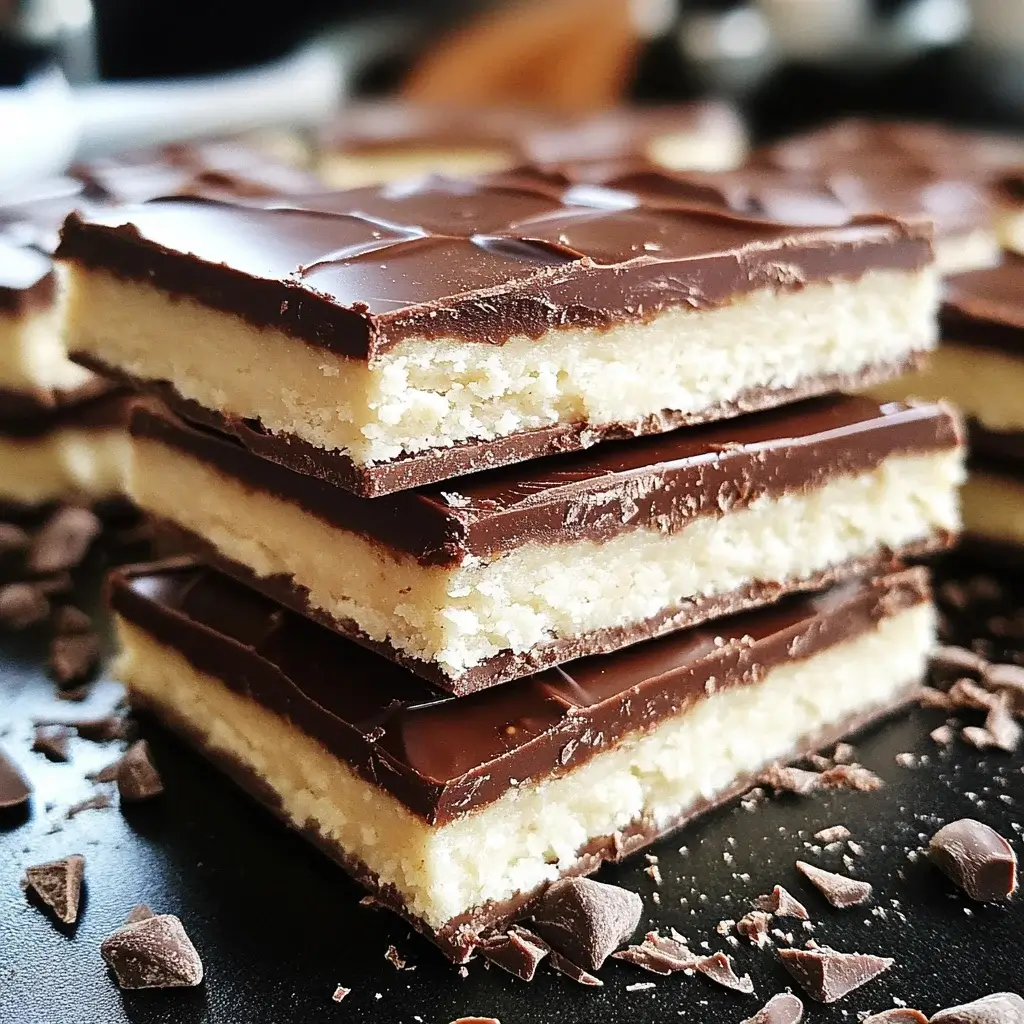

After a long day, sometimes all you crave is a sweet treat that requires minimal effort but delivers maximum deliciousness. That’s precisely where these No-Bake Milk Chocolate Bars come into play. In my household, these bars are nothing short of a magical dessert solution. From weeknight cravings to impromptu weekend gatherings, they’ve become our go-to treat. The first time I made them, I was honestly surprised at how quickly they came together and how incredibly rich and satisfying they were. My kids, usually picky eaters, devoured them in minutes, and my husband, a self-proclaimed chocolate connoisseur, declared them “dangerously good.” The best part? No oven needed! Just a few simple ingredients, a little bit of chilling time, and you’re rewarded with fudgy, melt-in-your-mouth milk chocolate bars that are perfect for any occasion (or no occasion at all!). If you’re looking for an easy, crowd-pleasing dessert that will satisfy your sweet tooth without heating up your kitchen, you absolutely have to try these No-Bake Milk Chocolate Bars. Trust me, they are a game-changer!
Ingredients for No-Bake Milk Chocolate Bars
- Milk Chocolate: 24 ounces of high-quality milk chocolate, roughly chopped. The star of the show, choose a good quality milk chocolate for the best flavor and smooth melt. Chocolate chips or bars work equally well, just ensure they are chopped into smaller pieces for even melting.
- Sweetened Condensed Milk: 1 (14-ounce) can of sweetened condensed milk. This is the magic ingredient that creates the fudgy texture and sweetness of the bars. Do not confuse it with evaporated milk; sweetened condensed milk is thick and sweet.
- Unsalted Butter: 1/2 cup (1 stick) of unsalted butter. Butter adds richness and a smooth, melt-in-your-mouth texture to the chocolate bars. Unsalted butter is preferred to control the overall saltiness of the recipe.
- Vanilla Extract: 1 teaspoon of pure vanilla extract. Vanilla extract enhances the chocolate flavor and adds a touch of warmth to the bars. Use pure vanilla extract for the best flavor, but imitation vanilla can be used in a pinch.
- Pinch of Salt: A small pinch of salt. Salt balances the sweetness of the chocolate and other ingredients, enhancing the overall flavor profile of the bars.
- Optional Toppings: (Nuts, sprinkles, sea salt flakes, etc.) For added texture and visual appeal, consider optional toppings. Chopped nuts like walnuts, pecans, or almonds add a delightful crunch. Sprinkles are perfect for a festive touch, and a sprinkle of sea salt flakes can elevate the flavor profile with a salty-sweet contrast.
Instructions for Making No-Bake Milk Chocolate Bars
- Prepare Your Pan: Line an 8×8 inch square baking pan with parchment paper, leaving an overhang on the sides. This parchment paper sling will make it incredibly easy to lift the finished chocolate bars out of the pan for cutting. Ensure the parchment paper fits snugly into the pan and extends over the edges for easy removal.
- Combine Chocolate and Butter in a Heatproof Bowl: In a large, heatproof bowl (glass or stainless steel works best), combine the chopped milk chocolate and unsalted butter. Make sure the chocolate is evenly chopped so it melts smoothly and consistently with the butter.
- Melt Chocolate and Butter Using Double Boiler Method: The best way to melt chocolate gently and prevent burning is using a double boiler. Fill a saucepan with about an inch or two of water and bring it to a simmer over medium heat. Place the heatproof bowl with the chocolate and butter over the simmering water, ensuring the bottom of the bowl does not touch the water. The steam from the simmering water will gently melt the chocolate and butter. Stir occasionally with a spatula or spoon as the chocolate and butter melt, ensuring they combine smoothly.
- Alternative Melting Method – Microwave (with Caution): If you prefer using a microwave, proceed with caution to avoid burning the chocolate. Microwave the chocolate and butter in 30-second intervals at 50% power, stirring well after each interval. Continue microwaving in short bursts and stirring until the chocolate and butter are almost completely melted. The residual heat will melt any remaining pieces as you stir. Be very careful not to overheat the chocolate in the microwave, as burnt chocolate can become grainy and unusable.
- Stir in Sweetened Condensed Milk: Once the chocolate and butter are completely melted and smooth, remove the bowl from the heat (or microwave). Pour in the entire can of sweetened condensed milk. Stir continuously and thoroughly until the sweetened condensed milk is fully incorporated into the melted chocolate mixture. The mixture should become thick, glossy, and well combined. Ensure there are no streaks of sweetened condensed milk remaining.
- Add Vanilla Extract and Salt: Stir in the vanilla extract and a pinch of salt. Mix until they are evenly distributed throughout the chocolate mixture. These additions enhance the overall flavor profile and balance the sweetness.
- Pour Mixture into Prepared Pan: Pour the thick chocolate mixture into the parchment-lined baking pan. Use a spatula to spread the mixture evenly across the bottom of the pan, ensuring it reaches all corners and creates a smooth, level surface.
- Add Optional Toppings (If Desired): If you are using any optional toppings such as chopped nuts, sprinkles, or sea salt flakes, now is the time to add them. Sprinkle the toppings evenly over the top of the chocolate mixture. Gently press the toppings into the surface of the chocolate using your fingers or the back of a spoon to ensure they adhere well.
- Chill in Refrigerator: Place the baking pan in the refrigerator. Chill for at least 2-3 hours, or preferably overnight, to allow the chocolate bars to fully set and firm up. Chilling is essential for the bars to achieve the desired fudgy texture and to make them easy to cut.
- Cut into Bars: Once the chocolate bars are completely chilled and firm, remove the pan from the refrigerator. Using the parchment paper overhang, carefully lift the slab of chocolate bars out of the pan and onto a cutting board. Use a sharp knife to cut the chocolate slab into even-sized bars. You can cut them into squares, rectangles, or any shape you prefer. For clean cuts, you can warm the knife under hot water and wipe it dry between cuts.
- Serve and Enjoy: Your No-Bake Milk Chocolate Bars are now ready to serve! Enjoy these decadent, fudgy bars straight from the refrigerator for a refreshing treat. Store any leftover bars in an airtight container in the refrigerator to maintain their firmness and freshness.
Nutrition Facts for No-Bake Milk Chocolate Bars
(Per Serving, approximate)
- Servings: Approximately 16 servings (depending on bar size)
- Calories: Approximately 250-300 calories
- Fat: 15-20g
Please note: Nutritional values are estimates and can vary based on specific ingredients used and serving sizes. For precise nutritional information, use a nutrition calculator with the exact brands and quantities of ingredients you use.
Preparation Time for No-Bake Milk Chocolate Bars
Active Time: 15-20 minutes
Chill Time: 2-3 hours (minimum, preferably overnight)
These No-Bake Milk Chocolate Bars are incredibly quick to prepare, with most of the time being hands-off chilling in the refrigerator. The active preparation time, which includes melting the chocolate, mixing the ingredients, and assembling the bars, is just around 15-20 minutes. This makes them a perfect dessert option when you are short on time or need a last-minute treat. However, patience is key when it comes to chilling. The chilling time of at least 2-3 hours, or ideally overnight, is crucial for the bars to set properly and achieve their signature fudgy texture. While you can technically eat them sooner, they will be softer and less firm. So, plan ahead and allow ample chilling time for the best results. The total time from start to finish, including chilling, is approximately 2 hours and 15 minutes to 3 hours, but the hands-on time is minimal, making this recipe a breeze!
How to Serve No-Bake Milk Chocolate Bars
These versatile No-Bake Milk Chocolate Bars can be served in a variety of ways to suit different occasions and preferences. Here are some delightful serving suggestions:
- Chilled Straight from the Fridge: The most classic way to enjoy these bars is chilled directly from the refrigerator. The cold temperature enhances their fudgy texture and makes them incredibly refreshing, especially on warm days.
- With a Scoop of Ice Cream: Elevate these chocolate bars into a decadent dessert by serving them alongside a scoop of your favorite ice cream. Vanilla, chocolate, or even a contrasting flavor like mint chocolate chip or salted caramel ice cream would pair beautifully.
- Drizzled with Caramel or Chocolate Sauce: For an extra touch of indulgence, drizzle the chocolate bars with warm caramel sauce, hot fudge sauce, or even a white chocolate sauce. The added sauce creates a beautiful presentation and enhances the sweetness and richness.
- Alongside Fresh Fruit: Balance the richness of the chocolate bars with the freshness of seasonal fruits. Berries like strawberries, raspberries, and blueberries, or sliced bananas and peaches, make a wonderful accompaniment.
- As a Party Dessert: These no-bake bars are perfect for parties and gatherings. Cut them into smaller squares or bite-sized pieces and arrange them attractively on a platter. They are easy to eat, require no utensils, and are always a crowd-pleaser.
- Paired with Coffee or Milk: Enjoy these chocolate bars as an afternoon treat or after-dinner dessert alongside a cup of hot coffee, a glass of cold milk, or even a creamy latte. The combination of chocolate and coffee or milk is always a comforting and satisfying pairing.
- In Dessert Charcuterie Boards: Incorporate these chocolate bars into a dessert charcuterie board. Arrange them alongside other sweet treats like cookies, brownies, candies, fruits, and dips for a visually stunning and diverse dessert spread.
- Wrapped as Gifts: These no-bake bars make a thoughtful homemade gift. Wrap individual bars or small stacks in parchment paper and tie with a ribbon. They are perfect for holiday treats, thank-you gifts, or just a sweet gesture for friends and family.
Additional Tips for Perfect No-Bake Milk Chocolate Bars
To ensure your No-Bake Milk Chocolate Bars are absolutely perfect every time, here are some additional tips and tricks:
- Use High-Quality Chocolate: The flavor of these bars heavily relies on the quality of the milk chocolate. Opt for a good quality milk chocolate that you enjoy eating on its own. Using better chocolate will result in a richer, more flavorful final product. Avoid using cheap or low-quality chocolate, as it can sometimes be waxy or have an artificial taste.
- Don’t Overheat the Chocolate: When melting the chocolate, whether using a double boiler or microwave, be very careful not to overheat it. Overheated chocolate can seize and become grainy. Melt it gently and slowly, stirring frequently. If using a microwave, use short intervals and lower power settings.
- Line the Pan Properly: Always line your baking pan with parchment paper, leaving an overhang. This parchment paper sling is crucial for easily removing the bars from the pan after they have chilled. It prevents sticking and makes for clean, effortless removal and cutting.
- Chill Thoroughly: Allow ample time for the chocolate bars to chill in the refrigerator. A minimum of 2-3 hours is necessary, but overnight chilling is even better. Proper chilling ensures the bars are firm enough to cut cleanly and have the desired fudgy texture. Rushing the chilling process can result in softer, messier bars.
- Warm Knife for Clean Cuts: For clean, professional-looking cuts, warm your knife under hot water and wipe it dry before each cut. This helps the knife glide through the chilled chocolate more smoothly without dragging or crumbling. Repeat warming the knife as needed for each row or section of bars.
- Customize with Add-ins: Get creative and customize your chocolate bars with various add-ins. Consider stirring in chopped nuts (almonds, pecans, walnuts), dried fruits (cranberries, raisins), pretzels, toffee bits, or even mini marshmallows into the chocolate mixture before pouring it into the pan.
- Explore Different Chocolate Variations: While this recipe is for milk chocolate bars, you can easily adapt it using different types of chocolate. Try using semi-sweet chocolate, dark chocolate, or even white chocolate for different flavor profiles. Each type of chocolate will result in a slightly different taste and level of sweetness.
- Proper Storage is Key: Store leftover No-Bake Milk Chocolate Bars in an airtight container in the refrigerator. This will keep them firm and fresh for up to a week. Avoid storing them at room temperature, as they will become too soft and lose their shape. For longer storage, you can also freeze them for up to 2-3 months. Thaw in the refrigerator before serving.
Frequently Asked Questions (FAQ) About No-Bake Milk Chocolate Bars
Q1: Can I use dark chocolate instead of milk chocolate?
A1: Yes, absolutely! You can easily substitute dark chocolate for milk chocolate in this recipe. Using dark chocolate will result in a richer, less sweet chocolate bar with a more intense chocolate flavor. The texture will remain similarly fudgy. You can use the same amount of dark chocolate as milk chocolate. For a less intense dark chocolate flavor, you could also use semi-sweet chocolate.
Q2: Can I use evaporated milk instead of sweetened condensed milk?
A2: No, you cannot substitute evaporated milk for sweetened condensed milk in this recipe. Sweetened condensed milk is a key ingredient that provides both sweetness and a thick, fudgy texture to the bars. Evaporated milk is unsweetened and has a thinner consistency, which will not work the same way and will result in bars that are not sweet or fudgy. Ensure you are using sweetened condensed milk, not evaporated milk.
Q3: How long do these chocolate bars need to chill in the refrigerator?
A3: The bars need to chill for a minimum of 2-3 hours to set properly. However, for the best results and firmest texture, it is recommended to chill them overnight. While they might be somewhat firm after 2-3 hours, they will be much easier to cut and have a better texture after a longer chilling time.
Q4: How should I store leftover No-Bake Milk Chocolate Bars?
A4: Store leftover chocolate bars in an airtight container in the refrigerator. This will keep them firm, fresh, and prevent them from becoming too soft. Stored properly in the refrigerator, they will last for up to a week. If you need to store them for longer, you can also freeze them for up to 2-3 months in an airtight container or freezer bag. Thaw in the refrigerator before serving.
Q5: Can I add nuts or other mix-ins to these chocolate bars?
A5: Yes, definitely! Adding nuts or other mix-ins is a great way to customize these chocolate bars. You can stir in chopped nuts like walnuts, pecans, almonds, or peanuts. Other delicious additions include dried fruits, pretzels, toffee bits, mini marshmallows, or even chocolate chips. Simply stir your chosen mix-ins into the chocolate mixture before pouring it into the pan.
Q6: Why are my chocolate bars crumbly when I cut them?
A6: Crumbly chocolate bars can be due to a few reasons. One common reason is that the chocolate wasn’t melted smoothly and may have seized. Ensure you melt the chocolate gently and avoid overheating it. Another reason could be that they weren’t chilled long enough. Make sure the bars are thoroughly chilled until firm before cutting. Warming your knife under hot water and wiping it dry between cuts, as mentioned in the tips, can also help prevent crumbling.
Q7: Can I double or triple this recipe?
A7: Yes, you can easily double or triple this recipe if you need to make a larger batch. Simply double or triple all the ingredients proportionally. If doubling or tripling, you may need to use a larger baking pan. For a doubled recipe, a 9×13 inch pan works well. For a tripled recipe, you might need to use two 8×8 inch pans or a very large baking dish. Adjust the chilling time slightly if using a larger pan, as the bars might take a little longer to firm up completely in a thicker layer.
Q8: Can I use chocolate chips instead of chopped chocolate bars?
A8: Yes, you can use chocolate chips instead of chopped chocolate bars. Ensure you are using good quality chocolate chips for the best flavor. You will use the same amount of chocolate chips as chopped chocolate bars, which is 24 ounces. Chocolate chips often contain stabilizers to help them hold their shape, so they might take slightly longer to melt than chopped chocolate. Melt them gently and stir frequently to ensure smooth melting.
Print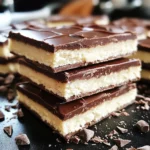
No-Bake Milk Chocolate Bars
Ingredients
- Milk Chocolate: 24 ounces of high-quality milk chocolate, roughly chopped. The star of the show, choose a good quality milk chocolate for the best flavor and smooth melt. Chocolate chips or bars work equally well, just ensure they are chopped into smaller pieces for even melting.
- Sweetened Condensed Milk: 1 (14-ounce) can of sweetened condensed milk. This is the magic ingredient that creates the fudgy texture and sweetness of the bars. Do not confuse it with evaporated milk; sweetened condensed milk is thick and sweet.
- Unsalted Butter: 1/2 cup (1 stick) of unsalted butter. Butter adds richness and a smooth, melt-in-your-mouth texture to the chocolate bars. Unsalted butter is preferred to control the overall saltiness of the recipe.
- Vanilla Extract: 1 teaspoon of pure vanilla extract. Vanilla extract enhances the chocolate flavor and adds a touch of warmth to the bars. Use pure vanilla extract for the best flavor, but imitation vanilla can be used in a pinch.
- Pinch of Salt: A small pinch of salt. Salt balances the sweetness of the chocolate and other ingredients, enhancing the overall flavor profile of the bars.
- Optional Toppings: (Nuts, sprinkles, sea salt flakes, etc.) For added texture and visual appeal, consider optional toppings. Chopped nuts like walnuts, pecans, or almonds add a delightful crunch. Sprinkles are perfect for a festive touch, and a sprinkle of sea salt flakes can elevate the flavor profile with a salty-sweet contrast.
Instructions
- Prepare Your Pan: Line an 8×8 inch square baking pan with parchment paper, leaving an overhang on the sides. This parchment paper sling will make it incredibly easy to lift the finished chocolate bars out of the pan for cutting. Ensure the parchment paper fits snugly into the pan and extends over the edges for easy removal.
- Combine Chocolate and Butter in a Heatproof Bowl: In a large, heatproof bowl (glass or stainless steel works best), combine the chopped milk chocolate and unsalted butter. Make sure the chocolate is evenly chopped so it melts smoothly and consistently with the butter.
- Melt Chocolate and Butter Using Double Boiler Method: The best way to melt chocolate gently and prevent burning is using a double boiler. Fill a saucepan with about an inch or two of water and bring it to a simmer over medium heat. Place the heatproof bowl with the chocolate and butter over the simmering water, ensuring the bottom of the bowl does not touch the water. The steam from the simmering water will gently melt the chocolate and butter. Stir occasionally with a spatula or spoon as the chocolate and butter melt, ensuring they combine smoothly.
- Alternative Melting Method – Microwave (with Caution): If you prefer using a microwave, proceed with caution to avoid burning the chocolate. Microwave the chocolate and butter in 30-second intervals at 50% power, stirring well after each interval. Continue microwaving in short bursts and stirring until the chocolate and butter are almost completely melted. The residual heat will melt any remaining pieces as you stir. Be very careful not to overheat the chocolate in the microwave, as burnt chocolate can become grainy and unusable.
- Stir in Sweetened Condensed Milk: Once the chocolate and butter are completely melted and smooth, remove the bowl from the heat (or microwave). Pour in the entire can of sweetened condensed milk. Stir continuously and thoroughly until the sweetened condensed milk is fully incorporated into the melted chocolate mixture. The mixture should become thick, glossy, and well combined. Ensure there are no streaks of sweetened condensed milk remaining.
- Add Vanilla Extract and Salt: Stir in the vanilla extract and a pinch of salt. Mix until they are evenly distributed throughout the chocolate mixture. These additions enhance the overall flavor profile and balance the sweetness.
- Pour Mixture into Prepared Pan: Pour the thick chocolate mixture into the parchment-lined baking pan. Use a spatula to spread the mixture evenly across the bottom of the pan, ensuring it reaches all corners and creates a smooth, level surface.
- Add Optional Toppings (If Desired): If you are using any optional toppings such as chopped nuts, sprinkles, or sea salt flakes, now is the time to add them. Sprinkle the toppings evenly over the top of the chocolate mixture. Gently press the toppings into the surface of the chocolate using your fingers or the back of a spoon to ensure they adhere well.
- Chill in Refrigerator: Place the baking pan in the refrigerator. Chill for at least 2-3 hours, or preferably overnight, to allow the chocolate bars to fully set and firm up. Chilling is essential for the bars to achieve the desired fudgy texture and to make them easy to cut.
- Cut into Bars: Once the chocolate bars are completely chilled and firm, remove the pan from the refrigerator. Using the parchment paper overhang, carefully lift the slab of chocolate bars out of the pan and onto a cutting board. Use a sharp knife to cut the chocolate slab into even-sized bars. You can cut them into squares, rectangles, or any shape you prefer. For clean cuts, you can warm the knife under hot water and wipe it dry between cuts.
- Serve and Enjoy: Your No-Bake Milk Chocolate Bars are now ready to serve! Enjoy these decadent, fudgy bars straight from the refrigerator for a refreshing treat. Store any leftover bars in an airtight container in the refrigerator to maintain their firmness and freshness.
Nutrition
- Serving Size: one normal portion
- Calories: 300
- Fat: 20g


