


Let me tell you, this No-Bake Lemon Cheesecake recipe has become an absolute legend in our household. I first whipped it up on a sweltering summer afternoon when the thought of turning on the oven was simply unbearable. I was a little skeptical about a “no-bake” cheesecake, worried it might lack that rich, decadent texture I adore. Boy, was I wrong! From the moment I took that first bite – the cool, creamy lemon filling, zesty and sweet, perfectly contrasted by the buttery graham cracker crust – I was hooked. My kids, who can be notoriously picky, devoured their slices and immediately asked when I’d be making it again. My husband, a self-proclaimed cheesecake connoisseur, declared it one of the best he’s ever had, praising its refreshing lightness. It’s since become our go-to for potlucks, family gatherings, or just a special weeknight treat. The sheer simplicity combined with its show-stopping flavor makes it a winner every single time. It’s practically foolproof, and the vibrant, sunny taste is like a burst of happiness on a plate.
The Enduring Allure of No-Bake Lemon Cheesecake
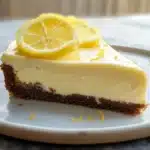
There’s a certain magic to a no-bake dessert, isn’t there? Especially when it’s a cheesecake. The very words “no-bake” conjure images of effortless elegance, a sophisticated treat achieved without the fuss and heat of an oven. And when you add “lemon” to the mix, you elevate it to a whole new level of desirability. The No-Bake Lemon Cheesecake is a culinary masterpiece of contrasts: the rich creaminess of the cheesecake filling played against the bright, tangy zest of fresh lemons, all resting on a bed of sweet, crumbly graham cracker crust.
Why has this particular dessert captured the hearts (and taste buds) of so many?
- Effortless Preparation: This is arguably its biggest draw. In a world where time is a precious commodity, a dessert that comes together quickly with minimal active work is a godsend. No worrying about water baths, cracking tops, or long baking and cooling times (beyond chilling, of course).
- Refreshing Flavor Profile: Lemon is a universally loved flavor, known for its ability to cut through richness and provide a clean, zesty finish. In a cheesecake, it transforms what could be a heavy dessert into something light, airy, and incredibly refreshing, making it perfect for warmer months or as a palate cleanser after a hearty meal.
- Crowd-Pleaser: It’s rare to find someone who doesn’t enjoy a good lemon dessert or a creamy cheesecake. This recipe combines the best of both worlds, making it a surefire hit for gatherings of all ages. Its vibrant yellow hue is also visually appealing, promising a taste of sunshine.
- Versatility: While perfect as is, it’s also a fantastic canvas for creativity. A dollop of whipped cream, a scattering of fresh berries, or a drizzle of lemon curd can elevate it further.
- Make-Ahead Marvel: This cheesecake needs to be made ahead of time to allow it to set properly. This is a huge advantage for entertaining, as you can prepare it a day in advance, freeing you up to focus on other aspects of your meal or event.
The No-Bake Lemon Cheesecake isn’t just a recipe; it’s a solution. It’s the answer to “what dessert should I make that’s easy but impressive?” It’s the perfect ending to a summer barbecue, a delightful treat for a spring brunch, or a comforting pick-me-up any time of year. Its simplicity belies its sophisticated flavor, making it a staple in any baker’s (or non-baker’s!) repertoire.
Ingredients for Your Zesty Delight
Here’s what you’ll need to create this sunshine-in-a-slice dessert:
For the Graham Cracker Crust:
- 1 ½ cups (about 150g) graham cracker crumbs: The classic, crumbly foundation. You can buy pre-made crumbs or crush whole graham crackers yourself.
- ¼ cup (50g) granulated sugar: Adds a touch of sweetness to complement the buttery crumbs.
- 6 tablespoons (85g) unsalted butter, melted: The binder that holds the crust together and imparts a rich, buttery flavor.
For the Lemon Cheesecake Filling:
- 16 ounces (452g) cream cheese, softened to room temperature: This is crucial! Softened cream cheese ensures a smooth, lump-free filling. Full-fat is recommended for the best texture and flavor.
- 1 (14-ounce) can sweetened condensed milk: Provides sweetness, creaminess, and helps the cheesecake set without baking. Do not substitute with evaporated milk.
- ½ cup (120ml) fresh lemon juice: The star of the show! Freshly squeezed juice offers the brightest, most authentic lemon flavor. You’ll likely need 2-3 medium lemons.
- 1 tablespoon lemon zest: Adds an intense burst of lemon aroma and flavor. Zest your lemons before juicing them.
- 1 teaspoon vanilla extract: Enhances the other flavors and adds a touch of warmth.
- Optional: 2-3 drops yellow food coloring: Purely for aesthetics, to give your cheesecake a sunnier hue.
Step-by-Step to Perfection: Crafting Your No-Bake Lemon Cheesecake
Follow these simple instructions for a flawless, creamy cheesecake every time.
Part 1: Prepare the Graham Cracker Crust
- Crush the Crackers (if needed): If you’re not using pre-made crumbs, place graham crackers in a food processor and pulse until they form fine crumbs. Alternatively, place them in a zip-top bag and crush them with a rolling pin.
- Combine Crust Ingredients: In a medium bowl, combine the graham cracker crumbs and granulated sugar. Pour the melted butter over the crumb mixture and stir with a fork until all the crumbs are moistened and the mixture resembles wet sand.
- Press into Pan: Transfer the crumb mixture to a 9-inch springform pan (or a 9-inch pie dish). Press the crumbs firmly and evenly into the bottom and slightly up the sides of the pan. Using the bottom of a flat glass or measuring cup can help create a compact and even crust.
- Chill the Crust: Place the pan in the freezer for at least 15-20 minutes (or the refrigerator for 30 minutes) while you prepare the filling. This helps the crust set and prevents it from crumbling when you add the filling.
Part 2: Create the Creamy Lemon Filling
- Beat the Cream Cheese: In a large mixing bowl, using an electric hand mixer or a stand mixer fitted with the paddle attachment, beat the softened cream cheese on medium speed until it’s completely smooth and creamy, with no lumps. This might take 2-3 minutes. Scrape down the sides and bottom of the bowl occasionally.
- Add Sweetened Condensed Milk: Gradually pour in the sweetened condensed milk while beating on low speed. Continue to beat until well combined and smooth. Scrape the bowl again.
- Incorporate Lemon and Vanilla: Add the fresh lemon juice, lemon zest, and vanilla extract to the cream cheese mixture. Beat on low speed until everything is just combined and the filling is smooth. Be careful not to overmix at this stage.
- Add Food Coloring (Optional): If using, add a few drops of yellow food coloring and mix briefly until the desired color is achieved.
- Taste Test (Optional but Recommended): Give the filling a quick taste. If you prefer a tarter cheesecake, you can add a little more lemon juice, a teaspoon at a time, mixing gently after each addition.
Part 3: Assemble and Chill
- Pour Filling into Crust: Retrieve the chilled crust from the freezer. Pour the lemon cheesecake filling evenly over the prepared crust. Use a spatula to spread it smoothly.
- Chill to Set: Cover the cheesecake loosely with plastic wrap (try not to let the plastic touch the surface of the filling) or foil. Refrigerate for at least 6-8 hours, but preferably overnight, until the cheesecake is firm and fully set. The longer it chills, the better it will set and the cleaner the slices will be.
- Serve: Once fully chilled and set, carefully remove the outer ring of the springform pan. If you used a pie dish, you can serve directly from it. Slice with a sharp knife, wiping the blade clean between cuts for neat slices.
Nutritional Snapshot: Understanding Your Indulgence
While this No-Bake Lemon Cheesecake is undoubtedly a treat, here’s an approximate nutritional overview. Please note these values can vary based on specific brands and precise ingredient measurements.
- Servings: This recipe typically yields 8-10 generous servings.
- Calories per serving (approx. for 8 servings): Around 450-550 calories.
- Fat: A significant portion of the calories comes from fat, primarily from the cream cheese and butter. This contributes to its rich, creamy texture.
- Sugar: Contains a notable amount of sugar from the sweetened condensed milk and the sugar in the crust. This provides the necessary sweetness to balance the tart lemon.
- Carbohydrates: Mainly from the graham cracker crust and sugars.
- Protein: A modest amount from the cream cheese.
- Sodium: A small amount, naturally occurring in ingredients and from any salt in the graham crackers or butter.
Enjoy this dessert as part of a balanced diet, savoring each delicious bite!
Time Investment: Quick Prep for Lasting Enjoyment
One of the beauties of this recipe is its minimal active preparation time.
- Active Preparation Time: Approximately 20-25 minutes. This includes making the crust and mixing the filling.
- Chilling Time: At least 6-8 hours, or ideally overnight. This is crucial for the cheesecake to set properly.
- Total Time (including chilling): Roughly 6.5 hours to 8.5 hours or more.
The hands-off chilling time makes it an excellent make-ahead dessert, perfect for reducing stress when entertaining.
How to Serve: Elevating Your Lemon Cheesecake Experience
This No-Bake Lemon Cheesecake is delightful on its own, but a few simple additions can take it to the next level of presentation and flavor.
- Classic Simplicity:
- Serve chilled, as is, for the pure, unadulterated lemon cheesecake experience.
- With Whipped Cream:
- A generous dollop or elegant swirl of freshly whipped cream (sweetened or unsweetened) on each slice.
- Garnish the whipped cream with a fine grating of lemon zest or a thin lemon slice.
- Berry Bliss:
- Top with fresh berries like:
- Blueberries
- Raspberries
- Sliced strawberries
- A mixed berry medley
- The tartness and sweetness of the berries complement the lemon beautifully.
- Top with fresh berries like:
- Sauce it Up:
- Drizzle with a fruit coulis (raspberry or strawberry works wonderfully).
- A spoonful of lemon curd on the side or drizzled over the top for an extra lemon punch.
- Crunch and Texture:
- Sprinkle with toasted slivered almonds or crushed pistachios for a nutty crunch.
- A few crumbled graham crackers or shortbread cookies on top can add textural contrast.
- Herbal Notes:
- A sprig of fresh mint can add a touch of color and a subtle, refreshing aroma.
- Presentation Pointers:
- Always use a sharp, clean knife to slice the cheesecake. Wipe the blade with a damp cloth between cuts for the neatest slices.
- If using a springform pan, release the ring carefully after the cheesecake is fully set. You can gently run a thin knife around the edge before releasing if needed.
- Serve on individual dessert plates for an elegant presentation.
Additional Tips for a Flawless No-Bake Lemon Cheesecake
Unlock the secrets to the perfect no-bake cheesecake with these expert tips:
- Room Temperature Cream Cheese is Key: This cannot be stressed enough! Softened cream cheese whips up smooth and creamy. Cold cream cheese will result in a lumpy filling, no matter how much you beat it. Take it out of the fridge at least 1-2 hours before you start.
- Fresh Lemon Juice Always: While bottled lemon juice is convenient, the flavor of freshly squeezed lemon juice is far superior and brighter. It makes a noticeable difference in the final taste. Remember to zest your lemons before juicing them!
- Don’t Overmix After Adding Lemon: Once you add the lemon juice, mix only until just combined. Overmixing can sometimes affect the setting ability or texture. The acidity of the lemon juice interacts with the dairy to help thicken the filling.
- Compact the Crust Well: Press the graham cracker crust firmly into the pan. A well-compacted crust will hold together better and be less crumbly when slicing and serving. Chilling the crust before adding the filling also helps it firm up.
- Patience with Chilling: Resist the urge to slice into the cheesecake too early. It needs adequate chilling time (at least 6-8 hours, preferably overnight) to fully set and develop its flavors. A well-chilled cheesecake will also slice more cleanly.
- Achieving the Right Zest: Use a microplane or fine grater for the lemon zest. You only want the yellow part of the peel, not the white pith underneath, which can be bitter.
- Gentle Folding (If Adding Whipped Cream to Filling): Some variations include folding whipped heavy cream into the filling for an even lighter, mousse-like texture. If you do this, ensure the whipped cream is folded in gently to maintain its airiness. (Note: This recipe as written does not include this step, but it’s a common variation).
- Taste and Adjust Sweetness/Tartness (Carefully): Before pouring the filling into the crust, give it a tiny taste. If you feel it needs a bit more tartness, you can add a smidge more lemon juice. If you prefer it sweeter (though sweetened condensed milk provides ample sweetness), it’s harder to adjust at this stage without affecting consistency, so it’s best to stick to the recipe.
Frequently Asked Questions (FAQ) about No-Bake Lemon Cheesecake
Got questions? We’ve got answers!
- Q: Can I use bottled lemon juice instead of fresh?
- A: You can, but for the best, brightest flavor, fresh lemon juice is highly recommended. Bottled juice can sometimes have a duller or slightly metallic taste. If you must use bottled, opt for a high-quality one.
- Q: My no-bake cheesecake didn’t set properly. What went wrong?
- A: There are a few common culprits:
- Not enough chilling time: It truly needs 6-8 hours or overnight.
- Incorrect ingredient ratios: Too much liquid or not enough cream cheese/sweetened condensed milk.
- Cream cheese not at room temperature: This can affect how well it incorporates and sets.
- Overmixing after adding acidic ingredients: Though less common, vigorous overmixing can sometimes break down the structure.
- A: There are a few common culprits:
- Q: Can I make this cheesecake gluten-free?
- A: Absolutely! Simply substitute the graham crackers with your favorite gluten-free cookies (like gluten-free graham-style crackers, shortbread, or vanilla wafers) for the crust. Ensure all other ingredients are certified gluten-free if celiac disease is a concern.
- Q: Can I freeze No-Bake Lemon Cheesecake?
- A: Yes, you can. Wrap it tightly in plastic wrap and then in foil. It can be frozen for up to 1-2 months. Thaw it overnight in the refrigerator before serving. The texture might be slightly different after freezing and thawing, but it will still be delicious.
- Q: How long does this cheesecake last in the refrigerator?
- A: Properly covered, it will last for 3-4 days in the refrigerator. After that, the crust may start to get a bit soggy.
- Q: Can I use low-fat cream cheese or reduced-sugar sweetened condensed milk?
- A: You can try, but it may affect the final texture and richness. Full-fat cream cheese provides the creamiest result. Reduced-sugar sweetened condensed milk might alter the sweetness and setting properties. For the best, most reliable outcome, stick to the original ingredient types.
- Q: I don’t have a springform pan. Can I use a regular pie dish?
- A: Yes, a 9-inch deep-dish pie plate works well. You won’t be able to remove the sides, so you’ll serve slices directly from the dish, which is perfectly fine!
- Q: Why is my cream cheese lumpy in the filling?
- A: This almost always happens if the cream cheese was too cold when you started beating it. It needs to be fully softened to room temperature to achieve a smooth, velvety consistency. Ensure you beat it thoroughly until completely smooth before adding other ingredients.
No-Bake Lemon Cheesecake
Ingredients
Here’s what you’ll need to create this sunshine-in-a-slice dessert:
For the Graham Cracker Crust:
- 1 ½ cups (about 150g) graham cracker crumbs: The classic, crumbly foundation. You can buy pre-made crumbs or crush whole graham crackers yourself.
- ¼ cup (50g) granulated sugar: Adds a touch of sweetness to complement the buttery crumbs.
- 6 tablespoons (85g) unsalted butter, melted: The binder that holds the crust together and imparts a rich, buttery flavor.
For the Lemon Cheesecake Filling:
- 16 ounces (452g) cream cheese, softened to room temperature: This is crucial! Softened cream cheese ensures a smooth, lump-free filling. Full-fat is recommended for the best texture and flavor.
- 1 (14-ounce) can sweetened condensed milk: Provides sweetness, creaminess, and helps the cheesecake set without baking. Do not substitute with evaporated milk.
- ½ cup (120ml) fresh lemon juice: The star of the show! Freshly squeezed juice offers the brightest, most authentic lemon flavor. You’ll likely need 2-3 medium lemons.
- 1 tablespoon lemon zest: Adds an intense burst of lemon aroma and flavor. Zest your lemons before juicing them.
- 1 teaspoon vanilla extract: Enhances the other flavors and adds a touch of warmth.
- Optional: 2-3 drops yellow food coloring: Purely for aesthetics, to give your cheesecake a sunnier hue.
Instructions
Follow these simple instructions for a flawless, creamy cheesecake every time.
Part 1: Prepare the Graham Cracker Crust
- Crush the Crackers (if needed): If you’re not using pre-made crumbs, place graham crackers in a food processor and pulse until they form fine crumbs. Alternatively, place them in a zip-top bag and crush them with a rolling pin.
- Combine Crust Ingredients: In a medium bowl, combine the graham cracker crumbs and granulated sugar. Pour the melted butter over the crumb mixture and stir with a fork until all the crumbs are moistened and the mixture resembles wet sand.
- Press into Pan: Transfer the crumb mixture to a 9-inch springform pan (or a 9-inch pie dish). Press the crumbs firmly and evenly into the bottom and slightly up the sides of the pan. Using the bottom of a flat glass or measuring cup can help create a compact and even crust.
- Chill the Crust: Place the pan in the freezer for at least 15-20 minutes (or the refrigerator for 30 minutes) while you prepare the filling. This helps the crust set and prevents it from crumbling when you add the filling.
Part 2: Create the Creamy Lemon Filling
- Beat the Cream Cheese: In a large mixing bowl, using an electric hand mixer or a stand mixer fitted with the paddle attachment, beat the softened cream cheese on medium speed until it’s completely smooth and creamy, with no lumps. This might take 2-3 minutes. Scrape down the sides and bottom of the bowl occasionally.
- Add Sweetened Condensed Milk: Gradually pour in the sweetened condensed milk while beating on low speed. Continue to beat until well combined and smooth. Scrape the bowl again.
- Incorporate Lemon and Vanilla: Add the fresh lemon juice, lemon zest, and vanilla extract to the cream cheese mixture. Beat on low speed until everything is just combined and the filling is smooth. Be careful not to overmix at this stage.
- Add Food Coloring (Optional): If using, add a few drops of yellow food coloring and mix briefly until the desired color is achieved.
- Taste Test (Optional but Recommended): Give the filling a quick taste. If you prefer a tarter cheesecake, you can add a little more lemon juice, a teaspoon at a time, mixing gently after each addition.
Part 3: Assemble and Chill
- Pour Filling into Crust: Retrieve the chilled crust from the freezer. Pour the lemon cheesecake filling evenly over the prepared crust. Use a spatula to spread it smoothly.
- Chill to Set: Cover the cheesecake loosely with plastic wrap (try not to let the plastic touch the surface of the filling) or foil. Refrigerate for at least 6-8 hours, but preferably overnight, until the cheesecake is firm and fully set. The longer it chills, the better it will set and the cleaner the slices will be.
- Serve: Once fully chilled and set, carefully remove the outer ring of the springform pan. If you used a pie dish, you can serve directly from it. Slice with a sharp knife, wiping the blade clean between cuts for neat slices.
Nutrition
- Serving Size: one normal portion
- Calories: 550


