

Oh, the holidays! The season of twinkling lights, cozy sweaters, and the aroma of delicious treats wafting from the kitchen. This year, amidst the hustle and bustle of holiday preparations, I stumbled upon a recipe that has quickly become a family favorite – No-Bake Coconut Snowballs. Let me tell you, these little spheres of coconutty goodness are simply magical. From the moment my kids saw them, they were captivated by their snowy white appearance, and the first bite sealed the deal. The creamy sweetness, the delightful chew of coconut, and the sheer ease of making them – it’s a winning combination! Even my usually picky eater declared them “the best snowballs ever!” This recipe is not just about creating a dessert; it’s about creating a joyful experience, perfect for involving little hands in the kitchen and sharing sweet moments with loved ones. If you’re looking for a fuss-free, crowd-pleasing treat that embodies the spirit of winter wonder, look no further. These No-Bake Coconut Snowballs are your answer!
Ingredients for No-Bake Coconut Snowballs
- Sweetened Condensed Milk: 1 (14-ounce) can. This is the magic binder that holds our snowballs together and adds a rich, creamy sweetness. It creates a luscious texture that is simply irresistible.
- Desiccated Coconut (Unsweetened): 4 cups, plus extra for rolling. We need a generous amount of desiccated coconut for both the inside and outside of our snowballs. Unsweetened is key here as the sweetened condensed milk provides ample sweetness. The coconut provides the signature flavor and delightful texture of these treats.
- Vanilla Extract: 1 teaspoon. A touch of vanilla extract enhances the overall flavor profile, adding warmth and depth to the coconut and sweet condensed milk. It elevates the simple ingredients to something truly special.
- Pinch of Salt: A tiny pinch, just a 1/8 teaspoon. Salt might seem counterintuitive in a sweet recipe, but it plays a crucial role in balancing the sweetness and enhancing the other flavors, making the coconut snowballs even more delicious.
Instructions: Crafting Your Coconut Snowballs
- Combine the Ingredients: In a large mixing bowl, pour in the entire can of sweetened condensed milk. This luscious, thick liquid will form the base of our snowballs, providing sweetness and binding power. Add the vanilla extract and the pinch of salt to the sweetened condensed milk. The vanilla will infuse a subtle warmth, while the salt will enhance the sweetness and balance the flavors beautifully. Stir these wet ingredients together until they are well combined, creating a smooth and fragrant base for our coconut snowballs.
- Incorporate the Coconut: Now, gradually add the desiccated coconut to the wet mixture. It’s important to add it in stages, about one cup at a time, mixing well after each addition. This ensures that the coconut is evenly distributed throughout the sweetened condensed milk and that no clumps form. As you mix, you’ll notice the mixture starting to thicken and come together. Continue adding coconut and mixing until you have incorporated all four cups. The mixture should be moist but firm enough to hold its shape when you scoop it. It should resemble a thick, sticky dough.
- Chill for Firmness: Once all the coconut is incorporated, cover the bowl with plastic wrap or a lid. Place the bowl in the refrigerator and chill for at least 30 minutes, or even better, for an hour. Chilling is a crucial step in this no-bake recipe. It allows the sweetened condensed milk to firm up and the coconut to absorb the moisture, making the mixture much easier to handle and shape into snowballs. Don’t skip this step! It will prevent your snowballs from being too sticky and falling apart.
- Shape into Snowballs: After chilling, remove the coconut mixture from the refrigerator. Prepare a plate or baking sheet lined with parchment paper. This will prevent the snowballs from sticking and make cleanup easier. Take a tablespoon or a small cookie scoop and scoop out portions of the coconut mixture. Roll each portion between your palms to form smooth, round balls, resembling miniature snowballs. Aim for roughly 1-inch to 1.5-inch diameter balls, but feel free to adjust the size to your preference. If the mixture is still a bit sticky, you can lightly dampen your hands with water to make rolling easier.
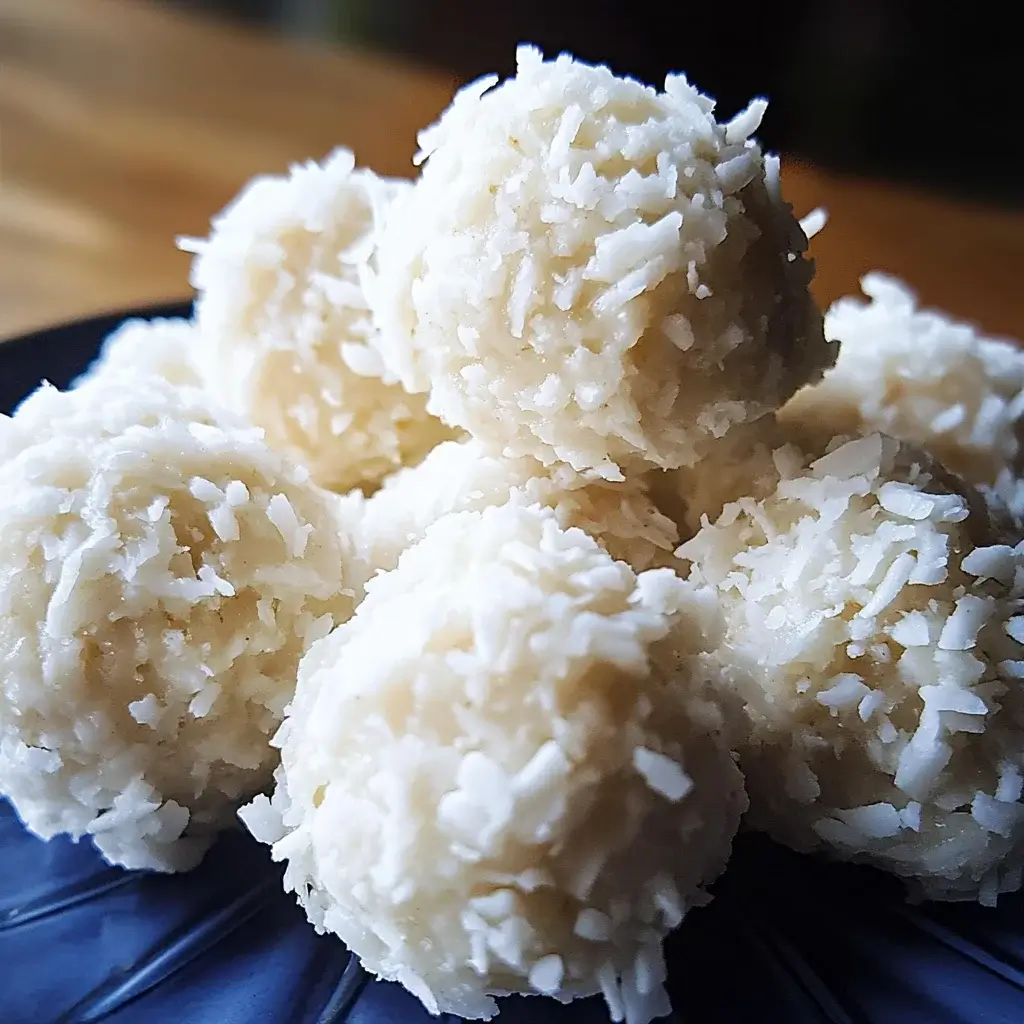
- Coat in Coconut: Pour the extra desiccated coconut into a shallow bowl or plate. Take each rolled snowball and gently roll it in the coconut, ensuring it’s fully coated on all sides. The extra coconut coating not only enhances the flavor but also gives the snowballs their signature snowy white appearance and a delightful textural contrast. The fine coconut flakes cling beautifully to the slightly sticky surface of the snowballs, creating a perfect finish.
- Set and Serve (or Store): Place the coconut-coated snowballs onto the prepared parchment-lined plate or baking sheet. If you want them to firm up even further, you can chill them in the refrigerator for another 15-20 minutes. However, they are ready to serve immediately! Arrange them on a platter and watch them disappear. If you are not serving them right away, store the No-Bake Coconut Snowballs in an airtight container in the refrigerator. They will keep well for up to 3-4 days, making them a perfect make-ahead treat for parties or holiday gatherings.
Nutrition Facts for No-Bake Coconut Snowballs (Per Serving)
Serving Size: 1 Coconut Snowball (approx. 1.5 inch diameter)
Servings Per Recipe: Approximately 24 snowballs (depending on size)
- Calories: Approximately 120-150 kcal
- Total Fat: 8-10g
- Saturated Fat: 7-9g
Please note: Nutritional values are estimates and can vary based on specific ingredient brands and portion sizes. For precise nutritional information, refer to the nutritional labels of your ingredients and use a nutrition calculator.
Preparation Time: Quick and Easy Sweetness
Total Preparation Time: Approximately 20 minutes (excluding chilling time)
These No-Bake Coconut Snowballs are a dream for busy bakers! The active preparation time, from gathering ingredients to rolling the snowballs, is incredibly short, usually taking around 20 minutes. The beauty of this recipe lies in its simplicity and speed. There’s no oven preheating, no complex steps, just a few ingredients and a little bit of mixing and rolling. The majority of the “preparation” is actually chilling time, which is hands-off. While you do need to factor in at least 30 minutes (ideally an hour) for chilling, this is passive time where the refrigerator does all the work. This makes them perfect for last-minute dessert cravings or when you need a quick and impressive treat without spending hours in the kitchen. Even with the chilling time, from start to finish, you can have a batch of delightful coconut snowballs ready in under 1.5 hours, making them a truly convenient and satisfying dessert option.
How to Serve Your No-Bake Coconut Snowballs
These versatile little snowballs are delightful in so many ways! Here are some serving suggestions to inspire you:
- Classic Dessert Platter: Arrange them on a beautiful platter as part of a dessert spread. They pair wonderfully with other holiday treats like cookies, brownies, and fudge. Their white color provides a lovely contrast to richer, darker desserts, making your platter visually appealing.
- Edible Gifts: Package them in decorative boxes or cellophane bags tied with ribbons for charming homemade gifts. They are perfect for holiday hostess gifts, teacher presents, or sweet tokens for friends and neighbors. The homemade touch makes them extra special.
- Party Favors: Individual snowballs can be wrapped in small parchment paper cups or placed in miniature gift bags as delightful party favors for winter-themed celebrations, Christmas parties, or even kids’ birthday parties.
- With Hot Beverages: Serve them alongside a steaming mug of hot chocolate, coffee, or tea. The creamy sweetness of the snowballs complements the warmth of the drinks perfectly, creating a cozy and comforting treat, especially on a cold day.
- Dessert Board Centerpiece: Use them as a centerpiece on a dessert charcuterie board. Surround them with fresh fruits, nuts, chocolate shavings, and other dippable treats for a fun and interactive dessert experience.
- Kid-Friendly Snack: They are a perfect kid-friendly snack or after-school treat. Their simple ingredients and delightful taste make them a healthier alternative to many processed snacks, and kids love their fun snowball shape.
- Ice Cream Topping: Crumble a coconut snowball over a scoop of vanilla ice cream for an extra layer of coconut flavor and texture. The cold ice cream and the slightly chewy coconut create a delightful contrast.
- Elegant Dessert Wine Pairing: For a more sophisticated touch, pair them with a sweet dessert wine like Moscato or a late-harvest Riesling. The sweetness of the wine complements the coconut and creamy notes of the snowballs beautifully, creating a refined dessert experience.
Additional Tips for Perfect No-Bake Coconut Snowballs
To ensure your No-Bake Coconut Snowballs are a resounding success, here are some helpful tips and tricks:
- Use Good Quality Coconut: Opt for finely desiccated coconut for the best texture. Avoid coarsely shredded coconut as it can make the snowballs less smooth and more fibrous. Good quality coconut will have a fresher flavor and a more delicate texture.
- Don’t Overmix: Once you’ve added the coconut, mix just until everything is combined. Overmixing can make the mixture tough. Gentle mixing will result in tender and melt-in-your-mouth snowballs.
- Chill Time is Key: Don’t rush the chilling process! Chilling the mixture for at least 30 minutes, or even an hour, is crucial for easy shaping and preventing sticky snowballs. Proper chilling allows the mixture to firm up, making rolling a breeze.
- Adjust Sweetness (If Needed): While sweetened condensed milk provides ample sweetness, if you prefer a less sweet treat, you can use slightly less sweetened condensed milk or add a tablespoon of unsweetened coconut cream to balance it out. Taste the mixture after combining the ingredients and adjust to your liking.
- Flavor Variations: Get creative with flavor additions! Try adding a teaspoon of almond extract instead of vanilla, or incorporate a tablespoon of cocoa powder for chocolate coconut snowballs. You can also add a pinch of cinnamon or nutmeg for a warm, spiced flavor.
- Decorative Rolling Options: Instead of just rolling in desiccated coconut, try rolling the snowballs in powdered sugar for a different snowy look, or finely chopped nuts (like almonds or pistachios) for added flavor and crunch. You could also use colorful sprinkles for a festive touch, especially for kids’ parties.
- Make Them Ahead: These snowballs are perfect for making ahead of time! Prepare them a day or two in advance and store them in an airtight container in the refrigerator. They actually taste even better after the flavors have had time to meld together.
- Handling Sticky Mixture: If you find the mixture too sticky to handle even after chilling, lightly dampen your hands with cold water or a tiny bit of coconut oil before rolling. This will prevent the mixture from sticking to your hands and make rolling much easier.
Frequently Asked Questions (FAQ) About No-Bake Coconut Snowballs
Q1: Can I use sweetened coconut instead of unsweetened?
A: It’s best to use unsweetened desiccated coconut because sweetened condensed milk is already very sweet. Using sweetened coconut might make the snowballs excessively sweet. If you only have sweetened coconut, you can reduce the amount of sweetened condensed milk slightly to compensate, but unsweetened is recommended for the best flavor balance.
Q2: How long do No-Bake Coconut Snowballs last?
A: Stored in an airtight container in the refrigerator, No-Bake Coconut Snowballs will last for up to 3-4 days. They are a great make-ahead dessert option for parties and gatherings.
Q3: Can I freeze these coconut snowballs?
A: Yes, you can freeze them! Place the finished snowballs in a single layer on a baking sheet and freeze until solid. Then, transfer them to an airtight freezer-safe container. They can be frozen for up to 2-3 months. Thaw them in the refrigerator for a few hours before serving.
Q4: Are these snowballs suitable for people with nut allergies?
A: Yes, as long as you are careful to use ingredients that are processed in nut-free facilities, these coconut snowballs are naturally nut-free. However, always double-check the labels of all ingredients to ensure they are safe for those with nut allergies, especially if you are serving them to someone with a severe allergy.
Q5: Can I make these vegan?
A: Unfortunately, the traditional recipe relies on sweetened condensed milk, which is dairy-based. While there are vegan sweetened condensed milk alternatives available now, they might alter the texture and flavor slightly. You would need to experiment with a vegan condensed milk substitute and potentially adjust the amount of coconut to achieve the right consistency.
Q6: My coconut mixture is too sticky, what can I do?
A: If your mixture is still too sticky after chilling, try chilling it for a longer period, even overnight. You can also add a little more desiccated coconut, about 1/4 cup at a time, until the mixture becomes easier to handle. Ensure you are using finely desiccated coconut as coarser coconut can sometimes lead to a stickier mixture.
Q7: Can I use flavored extracts other than vanilla?
A: Absolutely! Feel free to experiment with other extracts like almond extract, coconut extract (for an even stronger coconut flavor), or even peppermint extract for a festive holiday twist. A small amount of citrus zest, like lemon or lime, can also add a refreshing note.
Q8: Can I skip the chilling step if I’m short on time?
A: While technically you can skip the chilling step, it’s highly recommended to chill the mixture. Without chilling, the mixture will be very sticky and difficult to roll into neat snowballs. Chilling is crucial for firming up the mixture and making the shaping process much easier and less messy, resulting in better-looking and tasting snowballs.

No-Bake Coconut Snowballs
Ingredients
- Sweetened Condensed Milk: 1 (14-ounce) can. This is the magic binder that holds our snowballs together and adds a rich, creamy sweetness. It creates a luscious texture that is simply irresistible.
- Desiccated Coconut (Unsweetened): 4 cups, plus extra for rolling. We need a generous amount of desiccated coconut for both the inside and outside of our snowballs. Unsweetened is key here as the sweetened condensed milk provides ample sweetness. The coconut provides the signature flavor and delightful texture of these treats.
- Vanilla Extract: 1 teaspoon. A touch of vanilla extract enhances the overall flavor profile, adding warmth and depth to the coconut and sweet condensed milk. It elevates the simple ingredients to something truly special.
- Pinch of Salt: A tiny pinch, just a 1/8 teaspoon. Salt might seem counterintuitive in a sweet recipe, but it plays a crucial role in balancing the sweetness and enhancing the other flavors, making the coconut snowballs even more delicious.
Instructions
- Combine the Ingredients: In a large mixing bowl, pour in the entire can of sweetened condensed milk. This luscious, thick liquid will form the base of our snowballs, providing sweetness and binding power. Add the vanilla extract and the pinch of salt to the sweetened condensed milk. The vanilla will infuse a subtle warmth, while the salt will enhance the sweetness and balance the flavors beautifully. Stir these wet ingredients together until they are well combined, creating a smooth and fragrant base for our coconut snowballs.
- Incorporate the Coconut: Now, gradually add the desiccated coconut to the wet mixture. It’s important to add it in stages, about one cup at a time, mixing well after each addition. This ensures that the coconut is evenly distributed throughout the sweetened condensed milk and that no clumps form. As you mix, you’ll notice the mixture starting to thicken and come together. Continue adding coconut and mixing until you have incorporated all four cups. The mixture should be moist but firm enough to hold its shape when you scoop it. It should resemble a thick, sticky dough.
- Chill for Firmness: Once all the coconut is incorporated, cover the bowl with plastic wrap or a lid. Place the bowl in the refrigerator and chill for at least 30 minutes, or even better, for an hour. Chilling is a crucial step in this no-bake recipe. It allows the sweetened condensed milk to firm up and the coconut to absorb the moisture, making the mixture much easier to handle and shape into snowballs. Don’t skip this step! It will prevent your snowballs from being too sticky and falling apart.
- Shape into Snowballs: After chilling, remove the coconut mixture from the refrigerator. Prepare a plate or baking sheet lined with parchment paper. This will prevent the snowballs from sticking and make cleanup easier. Take a tablespoon or a small cookie scoop and scoop out portions of the coconut mixture. Roll each portion between your palms to form smooth, round balls, resembling miniature snowballs. Aim for roughly 1-inch to 1.5-inch diameter balls, but feel free to adjust the size to your preference. If the mixture is still a bit sticky, you can lightly dampen your hands with water to make rolling easier.
- Coat in Coconut: Pour the extra desiccated coconut into a shallow bowl or plate. Take each rolled snowball and gently roll it in the coconut, ensuring it’s fully coated on all sides. The extra coconut coating not only enhances the flavor but also gives the snowballs their signature snowy white appearance and a delightful textural contrast. The fine coconut flakes cling beautifully to the slightly sticky surface of the snowballs, creating a perfect finish.
- Set and Serve (or Store): Place the coconut-coated snowballs onto the prepared parchment-lined plate or baking sheet. If you want them to firm up even further, you can chill them in the refrigerator for another 15-20 minutes. However, they are ready to serve immediately! Arrange them on a platter and watch them disappear. If you are not serving them right away, store the No-Bake Coconut Snowballs in an airtight container in the refrigerator. They will keep well for up to 3-4 days, making them a perfect make-ahead treat for parties or holiday gatherings.
Nutrition
- Serving Size: one normal portion
- Calories: 150
- Fat: 10g
- Saturated Fat: 9g


