
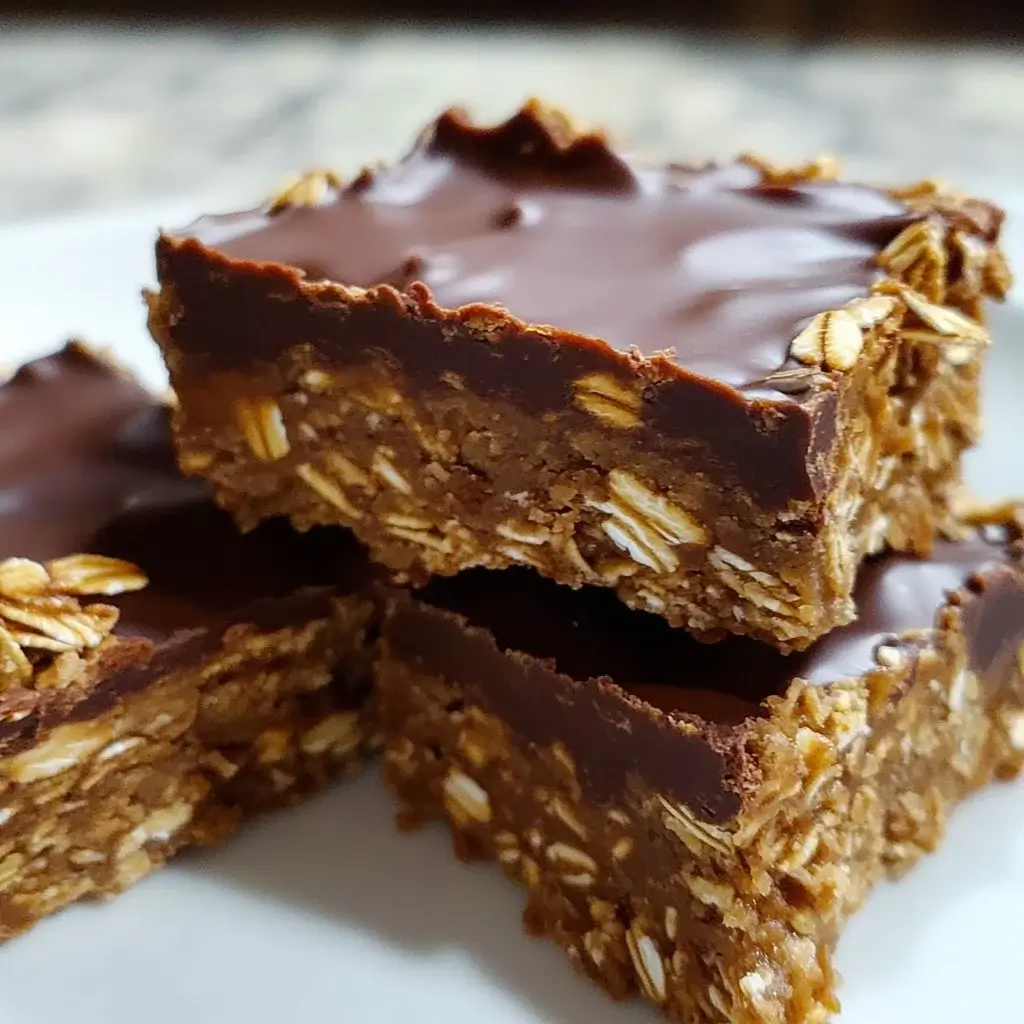

In our household, the kitchen is often the heart of the home, buzzing with activity and the irresistible aroma of freshly baked treats. But sometimes, the craving for something sweet hits without the desire to turn on the oven, especially during warmer months. That’s when these No-Bake Chocolate Oat Bars swooped in and saved the day – and honestly, our dessert game! From the first batch I whipped up, they were an instant hit. My kids, usually picky eaters, devoured them in minutes, their faces smeared with chocolatey goodness and happy smiles. My husband, a self-proclaimed dessert connoisseur, declared them “dangerously addictive” (and promptly asked for seconds). What I love most about these bars, besides their incredibly easy preparation and decadent taste, is their versatility. They are perfect for a quick after-school snack, a delightful dessert after dinner, or even a grab-and-go breakfast treat when you’re short on time. The chewy oats combined with rich chocolate and a hint of sweetness create a texture and flavor profile that’s simply irresistible. If you’re searching for a simple, satisfying, and utterly delicious dessert that requires absolutely no baking, look no further. These No-Bake Chocolate Oat Bars are about to become your new best friend in the kitchen. Get ready to experience pure chocolate bliss with minimal effort!
Ingredients: Simple Goodness in Every Bite
This recipe relies on a handful of pantry staples, making it a breeze to whip up whenever the chocolate craving strikes. Here’s what you’ll need:
- Rolled Oats: The heart of our bars, rolled oats provide a wonderful chewy texture and a wholesome base. They are different from instant oats and steel-cut oats, offering the perfect balance of chewiness and structure for no-bake recipes.
- Unsalted Butter: Butter adds richness, flavor, and helps bind the bars together. Unsalted butter allows you to control the overall saltiness of the recipe. You can substitute with coconut oil for a vegan option, though the flavor profile will be slightly different.
- Granulated Sugar: Provides sweetness and helps create the perfect texture. Granulated sugar dissolves smoothly and contributes to the overall structure and sweetness of the bars.
- Unsweetened Cocoa Powder: The star of the show, cocoa powder delivers that intense chocolate flavor we all crave. Unsweetened cocoa powder gives a deep, rich chocolate taste without added sweetness, allowing you to control the overall sweetness of the bars.
- Milk: Helps bring the mixture together and creates a smooth, creamy consistency. You can use dairy milk or a plant-based alternative like almond milk, soy milk, or oat milk, depending on your dietary preferences.
- Vanilla Extract: Enhances the chocolate flavor and adds a touch of warmth and complexity. Pure vanilla extract is recommended for the best flavor.
- Salt: A pinch of salt balances the sweetness and enhances all the other flavors in the bars, especially the chocolate.
- Chocolate Chips (Optional): For an extra dose of chocolate indulgence, chocolate chips are a fantastic addition. You can use semi-sweet, milk chocolate, dark chocolate, or even white chocolate chips depending on your preference. They add pockets of melty chocolate goodness throughout the bars.
Instructions: Your Easy Guide to Chocolate Oat Bar Perfection
These No-Bake Chocolate Oat Bars are incredibly simple to make, requiring just a few steps and minimal effort. Follow these instructions for foolproof results every time:
- Prepare Your Pan: Line an 8×8 inch square baking pan with parchment paper, leaving an overhang on the sides. This will make it easy to lift the bars out of the pan once they are set. The parchment paper prevents sticking and ensures clean removal, which is crucial for neat and presentable bars. Make sure the parchment paper is properly fitted to the pan for best results.
- Combine Wet Ingredients in a Saucepan: In a medium saucepan, melt the unsalted butter over medium heat. Melt the butter slowly and evenly to prevent burning. Once melted, add the granulated sugar, unsweetened cocoa powder, and milk to the saucepan. Whisk these ingredients together constantly until the sugar is dissolved and the mixture is smooth and well combined. Whisking is essential to prevent cocoa powder from clumping and to ensure a homogenous mixture. Continue to heat the mixture until it just begins to simmer around the edges, but do not boil. Simmering helps to thicken the mixture slightly and ensures the sugar is fully dissolved and integrated.
- Simmer and Thicken: Reduce the heat to low and let the mixture simmer gently for 1 minute, stirring constantly. This simmering step is crucial as it allows the mixture to thicken slightly, which will help the bars set properly. Stirring continuously prevents scorching and ensures even heating. The mixture should become slightly glossy and slightly thicker than it was initially.
- Remove from Heat and Add Flavor Enhancers: Remove the saucepan from the heat and stir in the vanilla extract and salt. Vanilla extract adds depth of flavor and complements the chocolate beautifully. Salt balances the sweetness and enhances all the flavors. Stir until these ingredients are fully incorporated into the chocolate mixture. The mixture should be fragrant and have a rich chocolate aroma at this stage.
- Incorporate the Oats: Add the rolled oats to the saucepan and stir until they are completely coated with the chocolate mixture. Ensure that all the oats are evenly coated and there are no dry patches. This step might require a bit of stirring to ensure all the oats are saturated with the chocolate mixture. The oats should absorb the chocolate mixture and become softened.
- Add Chocolate Chips (Optional): If using chocolate chips, gently fold them into the oat mixture. Distribute the chocolate chips evenly throughout the mixture. Folding them in gently prevents them from melting completely and keeps them distinct in the final bars, adding bursts of melty chocolate.
- Transfer to Prepared Pan: Pour the oat mixture into the prepared 8×8 inch baking pan. Spread the mixture evenly across the bottom of the pan using a spatula or the back of a spoon. Ensure the mixture is spread into all corners of the pan for uniform bars.
- Press Firmly and Evenly: Using the back of a spoon or a spatula, press the mixture firmly and evenly into the pan. This step is crucial for creating compact and sturdy bars that hold their shape. Pressing firmly also helps to eliminate air pockets and creates a smooth top surface.
- Chill to Set: Cover the pan with plastic wrap or foil and refrigerate for at least 2 hours, or preferably overnight, to allow the bars to set completely. Chilling allows the butter to solidify and the oats to absorb the moisture, resulting in firm and chewy bars. Overnight chilling is recommended for the best texture and to ensure the bars are fully set.
- Cut and Serve: Once the bars are fully set, lift them out of the pan using the parchment paper overhang. Place the bars on a cutting board and cut them into squares or rectangles using a sharp knife. For clean cuts, you can run the knife under warm water and wipe it clean between cuts. Cut into desired size and shape. Serve chilled or at room temperature.
Nutrition Facts: A Treat You Can Feel Good About
While these No-Bake Chocolate Oat Bars are undeniably a treat, they also offer some nutritional benefits, especially thanks to the rolled oats. Here’s an approximate nutritional breakdown per serving (serving size is estimated as one square from an 8×8 inch pan cut into 16 squares, and values are approximate and can vary based on specific ingredient brands and measurements):
- Servings: 16
- Calories: Approximately 180-220 kcal per serving
- Fat: 8-12g
Important Note: These values are estimates and can vary. The sugar content is primarily from the added granulated sugar and potentially from chocolate chips if used. The fiber content comes mainly from the rolled oats. These bars should be enjoyed as part of a balanced diet. While they contain oats and some fiber, they are still a dessert and should be consumed in moderation.
Preparation Time: Quick, Easy, and Ready in a Flash
The beauty of these No-Bake Chocolate Oat Bars lies in their incredibly quick and easy preparation. Here’s a breakdown of the time involved:
- Prep Time: 15-20 minutes (This includes gathering ingredients, melting butter, mixing ingredients in the saucepan, and incorporating oats and chocolate chips). The active time spent in the kitchen is minimal, making this a perfect recipe for busy days or when you need a dessert in a hurry.
- Chill Time: Minimum 2 hours (Ideally overnight for best results). This is hands-off time where the bars set in the refrigerator. While the chilling time is longer, it requires no active participation, and you can prepare the bars in advance and let them set while you attend to other tasks.
- Total Time: Approximately 2 hours 15 minutes (including chilling time). From start to finish, you can have delicious, ready-to-eat No-Bake Chocolate Oat Bars in just over two hours, most of which is inactive chilling time.
This recipe is perfect for those moments when you crave a sweet treat without spending hours in the kitchen or heating up your oven. The quick preparation and minimal cleanup make it a go-to dessert for any occasion.
How to Serve: Endless Ways to Enjoy Your Chocolate Oat Bars
These No-Bake Chocolate Oat Bars are incredibly versatile and can be enjoyed in numerous ways. Here are some serving suggestions:
- Classic Dessert: Serve them as they are, cut into squares or rectangles, for a satisfyingly sweet dessert after lunch or dinner. Their rich chocolate flavor and chewy texture make them a perfect standalone treat.
- Snack Time Savior: Keep a batch in the refrigerator for a quick and easy afternoon snack. They are much healthier than many processed snacks and provide a boost of energy and chocolate satisfaction.
- Party Pleaser: Cut them into smaller squares or bite-sized pieces for parties and gatherings. They are easy to transport and always a crowd-pleaser, appealing to both kids and adults.
- Lunchbox Treat: Pack a square or two in lunchboxes for a delightful midday treat. They are sturdy and travel well, making them a convenient addition to any lunch.
- Breakfast On-the-Go (Occasional Treat): While these are desserts, they can also serve as an occasional grab-and-go breakfast treat when you are in a rush. The oats provide some sustained energy, though they are still best enjoyed in moderation as a breakfast option.
- With a Glass of Milk: Pair them with a cold glass of milk (dairy or plant-based) for a classic and comforting combination. The milk complements the chocolate and enhances the overall experience.
- Alongside Coffee or Tea: Enjoy them with a cup of hot coffee or tea for a cozy afternoon treat or evening indulgence. The warmth of the beverage contrasts beautifully with the chilled bars.
- Topped with Ice Cream: Elevate them to a decadent dessert by serving them warm (slightly warmed in the microwave for a few seconds) with a scoop of vanilla ice cream or your favorite flavor. The warm bars and cold ice cream create a delightful contrast in temperature and texture.
- Drizzled with Chocolate Sauce or Caramel: For an extra touch of indulgence, drizzle them with chocolate sauce, caramel sauce, or even a sprinkle of sea salt. This adds another layer of flavor and visual appeal.
- With Fresh Fruit: Serve them alongside fresh berries like strawberries, raspberries, or blueberries to add a touch of freshness and balance the richness of the chocolate.
Additional Tips: Elevating Your No-Bake Chocolate Oat Bar Game
To ensure your No-Bake Chocolate Oat Bars are always perfect and to explore variations, here are some additional tips:
- Use Quality Cocoa Powder: For the best chocolate flavor, use high-quality unsweetened cocoa powder. Dutch-processed cocoa powder will give a smoother, less bitter chocolate flavor, while natural cocoa powder will have a more intense and slightly acidic taste. Choose based on your preference.
- Don’t Overcook the Chocolate Mixture: Avoid boiling the chocolate mixture for too long. Simmering for just 1 minute is sufficient to dissolve the sugar and slightly thicken the mixture. Overcooking can make the bars too dry or crumbly.
- Press Firmly for Best Texture: Pressing the oat mixture firmly into the pan is crucial for achieving a dense and chewy texture. Don’t be afraid to press down firmly and evenly to eliminate air pockets.
- Customize with Extracts: Experiment with different extracts to enhance the flavor profile. Peppermint extract for a chocolate mint version, almond extract for a nutty hint, or orange extract for chocolate orange bars are all delicious options.
- Add Nuts and Seeds: Incorporate chopped nuts like walnuts, pecans, almonds, or peanuts, or seeds like sunflower seeds or pumpkin seeds for added texture and flavor. Add them along with the chocolate chips or fold them in after adding the oats.
- Dried Fruit Delights: Dried fruits like raisins, cranberries, chopped apricots, or cherries can be added for a chewy and fruity twist. Soak dried fruits in warm water for a few minutes to soften them before adding to the mixture.
- Make it Vegan: Easily make this recipe vegan by substituting unsalted butter with coconut oil and using plant-based milk like almond milk, soy milk, or oat milk. Ensure your chocolate chips are also vegan if using them.
- Gluten-Free Option: Ensure you are using certified gluten-free rolled oats to make these bars gluten-free. Oats are naturally gluten-free, but cross-contamination can occur during processing, so look for certified gluten-free labels if needed.
FAQ: Your Burning Questions Answered
Here are some frequently asked questions about No-Bake Chocolate Oat Bars to help you master this recipe:
Q1: Can I use instant oats instead of rolled oats?
A: It’s not recommended to use instant oats. Rolled oats provide the best texture and chewiness for these bars. Instant oats are too finely processed and will result in a mushier texture. Steel-cut oats are also not suitable as they are too coarse and require cooking. Stick with rolled oats for the best results.
Q2: How do I store No-Bake Chocolate Oat Bars?
A: Store leftover No-Bake Chocolate Oat Bars in an airtight container in the refrigerator for up to 5-7 days. Keeping them refrigerated helps maintain their texture and freshness. You can also store them at room temperature for a shorter period, about 2-3 days, but they might become slightly softer.
Q3: Can I freeze No-Bake Chocolate Oat Bars?
A: Yes, these bars freeze very well. Cut them into squares or rectangles and wrap them individually in plastic wrap or foil. Place the wrapped bars in a freezer-safe bag or container and freeze for up to 2-3 months. Thaw them in the refrigerator overnight or at room temperature for about 30-60 minutes before serving.
Q4: Can I reduce the amount of sugar in this recipe?
A: You can reduce the granulated sugar slightly, but keep in mind that sugar contributes to the texture and structure of the bars. Reducing it too much might affect the binding and sweetness. Start by reducing it by 1/4 cup and see if you like the result. You can also use brown sugar for a slightly different flavor profile and a touch less sweetness.
Q5: My bars are too soft and not setting properly. What did I do wrong?
A: Several factors could contribute to soft bars. Ensure you simmered the chocolate mixture for the recommended 1 minute, as this helps thicken it. Also, make sure you chilled the bars for at least 2 hours, or preferably overnight, in the refrigerator. If the weather is very warm, they might need longer chilling time. Accurately measuring ingredients is also important; too much liquid can prevent proper setting.
Q6: Can I make these bars ahead of time?
A: Absolutely! These bars are perfect for making ahead of time. They can be made up to 3-4 days in advance and stored in the refrigerator. In fact, many people find they taste even better the next day after the flavors have had time to meld.
Q7: Can I add peanut butter to these bars?
A: Yes, peanut butter is a delicious addition. You can add about 1/2 cup of creamy peanut butter to the saucepan along with the butter and sugar. Stir it in until melted and smooth before adding the cocoa powder and milk. This will create delicious chocolate peanut butter oat bars.
Q8: My chocolate oat bars are too dry. What can I do to prevent this next time?
A: Make sure you are using the correct amount of milk and butter as specified in the recipe. Overcooking the chocolate mixture can also lead to dryness. Ensure you only simmer it for 1 minute. Also, pressing the mixture too firmly might squeeze out moisture. Press firmly but evenly, without excessive force. Using fresh, moist rolled oats is also important. If your oats are very old and dry, they might absorb too much moisture from the mixture.
These No-Bake Chocolate Oat Bars are a testament to the fact that delicious desserts don’t have to be complicated or time-consuming. They are a perfect blend of simplicity, flavor, and texture, making them a treat that everyone will love. So, gather your ingredients, follow these easy steps, and get ready to indulge in chocolatey, oaty goodness!
Print
No-Bake Chocolate Oat Bars
Ingredients
This recipe relies on a handful of pantry staples, making it a breeze to whip up whenever the chocolate craving strikes. Here’s what you’ll need:
- Rolled Oats: The heart of our bars, rolled oats provide a wonderful chewy texture and a wholesome base. They are different from instant oats and steel-cut oats, offering the perfect balance of chewiness and structure for no-bake recipes.
- Unsalted Butter: Butter adds richness, flavor, and helps bind the bars together. Unsalted butter allows you to control the overall saltiness of the recipe. You can substitute with coconut oil for a vegan option, though the flavor profile will be slightly different.
- Granulated Sugar: Provides sweetness and helps create the perfect texture. Granulated sugar dissolves smoothly and contributes to the overall structure and sweetness of the bars.
- Unsweetened Cocoa Powder: The star of the show, cocoa powder delivers that intense chocolate flavor we all crave. Unsweetened cocoa powder gives a deep, rich chocolate taste without added sweetness, allowing you to control the overall sweetness of the bars.
- Milk: Helps bring the mixture together and creates a smooth, creamy consistency. You can use dairy milk or a plant-based alternative like almond milk, soy milk, or oat milk, depending on your dietary preferences.
- Vanilla Extract: Enhances the chocolate flavor and adds a touch of warmth and complexity. Pure vanilla extract is recommended for the best flavor.
- Salt: A pinch of salt balances the sweetness and enhances all the other flavors in the bars, especially the chocolate.
- Chocolate Chips (Optional): For an extra dose of chocolate indulgence, chocolate chips are a fantastic addition. You can use semi-sweet, milk chocolate, dark chocolate, or even white chocolate chips depending on your preference. They add pockets of melty chocolate goodness throughout the bars.
Instructions
These No-Bake Chocolate Oat Bars are incredibly simple to make, requiring just a few steps and minimal effort. Follow these instructions for foolproof results every time:
- Prepare Your Pan: Line an 8×8 inch square baking pan with parchment paper, leaving an overhang on the sides. This will make it easy to lift the bars out of the pan once they are set. The parchment paper prevents sticking and ensures clean removal, which is crucial for neat and presentable bars. Make sure the parchment paper is properly fitted to the pan for best results.
- Combine Wet Ingredients in a Saucepan: In a medium saucepan, melt the unsalted butter over medium heat. Melt the butter slowly and evenly to prevent burning. Once melted, add the granulated sugar, unsweetened cocoa powder, and milk to the saucepan. Whisk these ingredients together constantly until the sugar is dissolved and the mixture is smooth and well combined. Whisking is essential to prevent cocoa powder from clumping and to ensure a homogenous mixture. Continue to heat the mixture until it just begins to simmer around the edges, but do not boil. Simmering helps to thicken the mixture slightly and ensures the sugar is fully dissolved and integrated.
- Simmer and Thicken: Reduce the heat to low and let the mixture simmer gently for 1 minute, stirring constantly. This simmering step is crucial as it allows the mixture to thicken slightly, which will help the bars set properly. Stirring continuously prevents scorching and ensures even heating. The mixture should become slightly glossy and slightly thicker than it was initially.
- Remove from Heat and Add Flavor Enhancers: Remove the saucepan from the heat and stir in the vanilla extract and salt. Vanilla extract adds depth of flavor and complements the chocolate beautifully. Salt balances the sweetness and enhances all the flavors. Stir until these ingredients are fully incorporated into the chocolate mixture. The mixture should be fragrant and have a rich chocolate aroma at this stage.
- Incorporate the Oats: Add the rolled oats to the saucepan and stir until they are completely coated with the chocolate mixture. Ensure that all the oats are evenly coated and there are no dry patches. This step might require a bit of stirring to ensure all the oats are saturated with the chocolate mixture. The oats should absorb the chocolate mixture and become softened.
- Add Chocolate Chips (Optional): If using chocolate chips, gently fold them into the oat mixture. Distribute the chocolate chips evenly throughout the mixture. Folding them in gently prevents them from melting completely and keeps them distinct in the final bars, adding bursts of melty chocolate.
- Transfer to Prepared Pan: Pour the oat mixture into the prepared 8×8 inch baking pan. Spread the mixture evenly across the bottom of the pan using a spatula or the back of a spoon. Ensure the mixture is spread into all corners of the pan for uniform bars.
- Press Firmly and Evenly: Using the back of a spoon or a spatula, press the mixture firmly and evenly into the pan. This step is crucial for creating compact and sturdy bars that hold their shape. Pressing firmly also helps to eliminate air pockets and creates a smooth top surface.
- Chill to Set: Cover the pan with plastic wrap or foil and refrigerate for at least 2 hours, or preferably overnight, to allow the bars to set completely. Chilling allows the butter to solidify and the oats to absorb the moisture, resulting in firm and chewy bars. Overnight chilling is recommended for the best texture and to ensure the bars are fully set.
- Cut and Serve: Once the bars are fully set, lift them out of the pan using the parchment paper overhang. Place the bars on a cutting board and cut them into squares or rectangles using a sharp knife. For clean cuts, you can run the knife under warm water and wipe it clean between cuts. Cut into desired size and shape. Serve chilled or at room temperature.
Nutrition
- Serving Size: one normal portion
- Calories: 220
- Fat: 12g


