

There are moments in life, often late at night or during a particularly trying afternoon, when a very specific, almost primal craving hits: the need for something deeply chocolatey, warm, and utterly indulgent. For my family and me, the solution to these urgent cocoa-driven desires has become the Molten Lava Mug Cake. I remember the first time I whipped one up; my teenager, usually engrossed in a screen, was lured to the kitchen by the rich aroma in under two minutes. The skeptical look on their face (“A cake… in a mug… in the microwave?”) quickly melted into one of pure delight upon the first spoonful. That gooey, molten chocolate center, erupting like a mini volcano, was an instant hit. It’s not just a dessert; it’s an experience, a quick escape, and a testament to the fact that sometimes, the most satisfying treats are the ones you can make in minutes with ingredients you likely already have. It has since become our go-to for a quick comfort fix, a celebratory mini-treat, or just a way to make an ordinary Tuesday feel a little more special. The beauty of this recipe lies in its simplicity, its speed, and its consistently spectacular results.
Ingredients
- ¼ cup (30g) All-Purpose Flour: This forms the basic structure of your cake, giving it body and texture.
- 2 Tablespoons Granulated Sugar: Provides sweetness to balance the cocoa; adjust slightly to your preference.
- 2 Tablespoons Unsweetened Cocoa Powder: The heart of the chocolate flavor; use good quality for the best taste.
- ¼ Teaspoon Baking Powder: The leavening agent that helps the cake rise and become fluffy.
- Pinch of Salt: Enhances all the other flavors, especially the chocolate and sweetness.
- ¼ cup (60ml) Milk: Adds moisture and helps bind the ingredients; any kind (dairy or non-dairy) works.
- 2 Tablespoons Vegetable Oil (or Melted Butter): Contributes to a moist and tender crumb. Oil often yields a slightly moister cake in microwaves.
- ¼ Teaspoon Vanilla Extract: Rounds out the chocolate flavor and adds a touch of aromatic warmth.
- 1-2 Tablespoons Chocolate Chips or 1-2 Small Squares of Good Quality Dark Chocolate (approx. 15-20g): This is the secret to the “molten lava” center. Using a piece of a chocolate bar often melts more predictably.
Instructions
- Choose Your Mug: Select a standard-sized microwave-safe mug (around 10-12 ounces is ideal). Ensure it’s large enough to prevent overflow as the cake rises during cooking. A wider mug can sometimes cook more evenly than a tall, narrow one.
- Combine Dry Ingredients: In the mug, add the all-purpose flour, granulated sugar, unsweetened cocoa powder, baking powder, and salt. Whisk these dry ingredients together thoroughly with a fork. This step is crucial to ensure there are no clumps of flour or cocoa and that the baking powder is evenly distributed for a consistent rise.
- Add Wet Ingredients: Pour in the milk, vegetable oil (or melted butter), and vanilla extract directly into the mug with the dry ingredients.
- Mix Batter: Stir everything together with the fork until just combined. Be careful not to overmix; a few small lumps are perfectly fine. Overmixing can lead to a tough cake. Scrape the sides and bottom of the mug to ensure all ingredients are incorporated. The batter should be relatively smooth and have a consistency similar to brownie batter.
- Create the Molten Center: Gently push the chocolate chips or the small squares of dark chocolate into the center of the batter. You don’t need to fully submerge them, but make sure they are nestled within the batter. This will create the gooey, lava-like core.
- Microwave: Place the mug in the center of your microwave. Cook on high power. The cooking time is the most variable part of this recipe and depends heavily on your microwave’s wattage:
- For a 1000-1200W microwave: Start with 60-70 seconds.
- For a 700-900W microwave: Start with 75-90 seconds.
- The cake is done when the edges are set and look cooked, but the very center still appears slightly wet or jiggly. It will continue to cook a bit as it rests. It’s better to slightly undercook than overcook to achieve that molten center.
- Check for Doneness: Carefully remove the mug from the microwave (it will be hot!). The surface should look mostly cooked, perhaps with a slight sheen in the middle. If you gently touch the edge, it should spring back. If it looks very liquidy all over, microwave for another 10-15 seconds and check again.
- Rest (Crucial!): Let the mug cake rest for 1-2 minutes before diving in. This allows the molten center to set slightly (so it’s lava, not soup) and the cake to cool down enough to avoid burning your mouth. The residual heat will also finish cooking the cake to perfection.
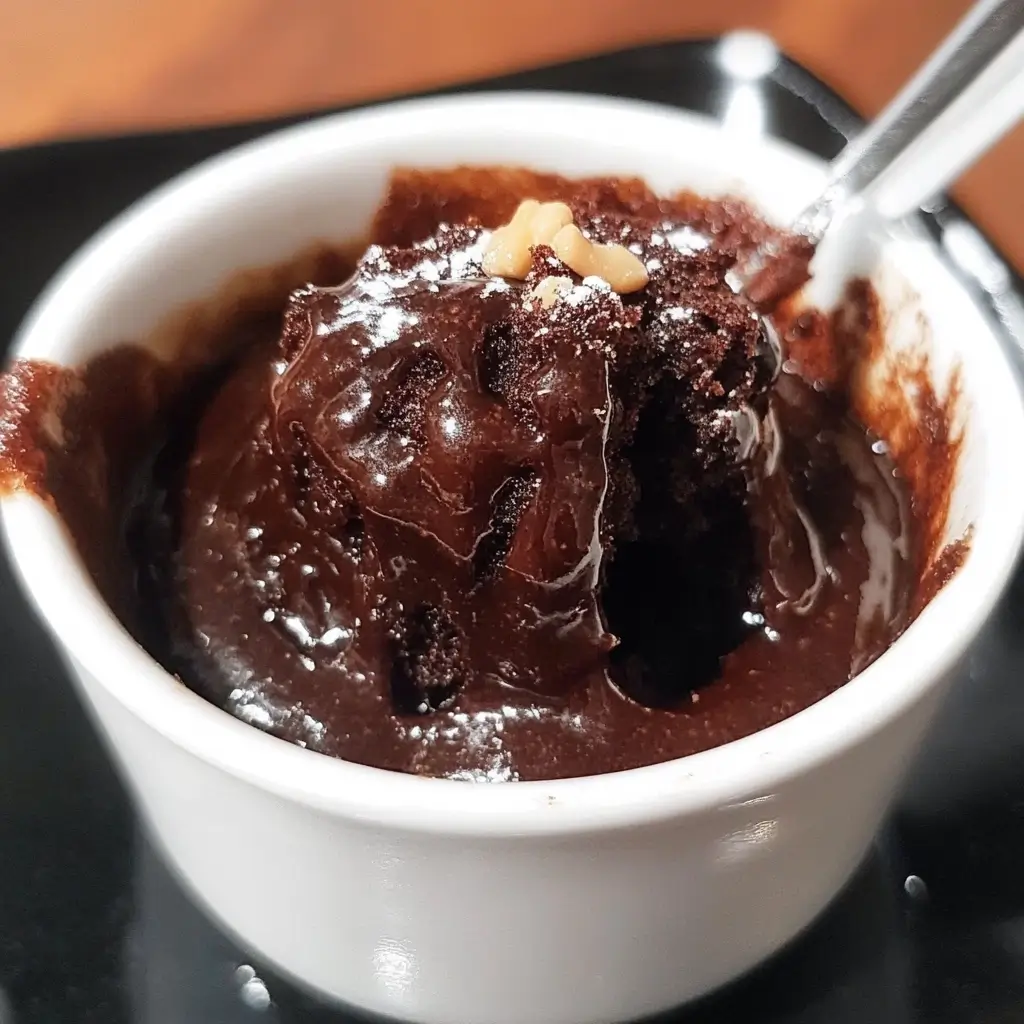
- Serve: Enjoy your molten lava mug cake straight from the mug! You can dust it with powdered sugar, add a dollop of whipped cream, or a small scoop of vanilla ice cream if desired.
Nutrition Facts
- Servings: 1 mug cake
- Calories per serving: Approximately 350-450 kcal (This is an estimate and can vary significantly based on the exact type and amount of chocolate used, whether oil or butter is chosen, and the type of milk.)
- Fat: Approximately 18-25g. The primary sources are the oil/butter and the chocolate. A portion of this will be saturated fat, especially if using butter and richer chocolate.
- Carbohydrates: Approximately 40-50g. Mainly from the flour and sugar, providing the energy and sweetness.
- Sugar: Approximately 20-30g. From the granulated sugar and the chocolate. This contributes significantly to the taste and indulgence factor.
- Protein: Approximately 4-6g. Derived primarily from the flour and milk.
(Disclaimer: These are approximate values. For precise nutritional information, it’s recommended to use a nutrition calculator with your specific ingredients and quantities.)
Preparation Time
- Mixing Time: 2-3 minutes. This involves gathering your ingredients and mixing them in the mug. It’s incredibly quick!
- Cooking Time: 60-90 seconds (depending on microwave wattage). The actual microwaving is very fast.
- Resting Time: 1-2 minutes. Essential for the lava to set and the cake to cool slightly.
- Total Time: Approximately 5-7 minutes from start to first delicious bite. This makes it one of the fastest homemade desserts you can possibly make, perfect for satisfying sudden cravings.
How to Serve
This Molten Lava Mug Cake is delightful on its own, but a few simple additions can elevate it from a quick treat to a truly decadent dessert experience. Here are some ideas:
- Straight From the Mug (The Classic):
- This is the simplest and most common way. Just grab a spoon and dive in after the resting period.
- The warmth of the mug adds to the cozy experience.
- With a Dusting of Sweetness:
- Powdered Sugar: A light sieve of powdered sugar over the top adds a touch of elegance and a slight extra sweetness.
- Cocoa Powder: For a more intense, less sweet chocolate hit, dust with a little extra unsweetened cocoa powder.
- Creamy Accompaniments (The Temperature Contrast Kings):
- Vanilla Ice Cream: A small scoop of cold vanilla ice cream melting into the warm, gooey cake is a classic and irresistible combination. The temperature and texture contrast is heavenly.
- Whipped Cream: A dollop of freshly whipped cream (or even canned) adds a light, airy counterpoint to the rich cake.
- Greek Yogurt or Crème Fraîche: For a tangier, less sweet option, a spoonful of plain Greek yogurt or crème fraîche can balance the richness beautifully.
- Fruity Companions:
- Fresh Berries: Raspberries, strawberries, or blueberries provide a tart, fresh contrast that cuts through the richness of the chocolate. Their vibrant colors also make the dessert more visually appealing.
- Berry Coulis: A simple raspberry or strawberry coulis drizzled over the top adds moisture and a concentrated fruit flavor.
- Saucy Additions:
- Chocolate Sauce: For the ultimate chocoholic, an extra drizzle of warm chocolate sauce can intensify the experience.
- Caramel Sauce: A swirl of salted caramel sauce adds a delightful sweet-salty dimension.
- Peanut Butter Drizzle: Warm a spoonful of peanut butter until runny and drizzle over the top for a classic chocolate-peanut butter pairing.
- Crunchy Toppings:
- Chopped Nuts: Toasted almonds, pecans, or walnuts can add a pleasant crunch and nutty flavor.
- Mini Chocolate Chips or Sprinkles: For a bit of fun and extra texture, especially if serving to kids.
- Inverting the Cake (The “Fancy” Mug Cake):
- If you’ve greased your mug well (or used a straight-sided mug), you might be able to carefully run a knife around the edge and invert the cake onto a small plate after it has rested for a minute.
- This presents more like a traditional lava cake and allows for more elaborate plating with sauces and garnishes around it. Be gentle, as it’s a delicate cake!
No matter how you choose to serve it, the key is to enjoy it while it’s warm and that chocolate center is perfectly molten!
Additional Tips
- Choose the Right Mug: A standard 10-12 ounce microwave-safe ceramic mug is best. Avoid mugs with metallic trim. Wider, shallower mugs tend to cook more evenly than tall, narrow ones, which can sometimes result in an overcooked top and undercooked bottom.
- Don’t Overmix the Batter: Mix the wet and dry ingredients until just combined. A few small lumps are perfectly fine. Overmixing develops the gluten in the flour, which can lead to a tough or rubbery cake instead of a tender one.
- Quality of Chocolate Matters: For the molten center, using a good quality chocolate bar (dark or semi-sweet, around 50-70% cacao) chopped into a small piece or two will yield a much richer, more genuinely “molten” lava than just chocolate chips, which often contain stabilizers to hold their shape.
- Know Your Microwave: Microwave wattages vary significantly, which is the biggest factor in cooking time. Start with the lower end of the recommended time for your microwave’s power range and add 10-15 second increments if needed. It’s better to undercook slightly (you can always pop it back in) than to overcook and lose the lava.
- The Importance of Resting: Don’t skip the 1-2 minute resting period after microwaving. The cake continues to cook from residual heat, and this allows the molten center to become perfectly gooey rather than watery hot. It also prevents a burnt tongue!
- Customize Your Flavors: Feel free to experiment!
- Add a tiny pinch of instant espresso powder to the dry ingredients to intensify the chocolate flavor.
- A dash of cinnamon or a tiny pinch of cayenne pepper can add warmth.
- Substitute some of the vanilla extract with peppermint extract for a mint-chocolate version, or almond extract for a different nutty note.
- Achieving the Perfect Molten Center: The key is twofold: using a solid piece of chocolate (or a generous amount of chips) that melts into a pool, and not overcooking the cake. The edges should be set, but the very center should still look slightly wet when it comes out of the microwave.
- Scaling (with Caution): This recipe is designed for a single serving. While you could technically double it in a larger bowl-like mug, microwave cooking can become uneven with larger volumes. It’s generally better and quicker to make individual mug cakes if serving more than one person.
FAQ Section
Q1: Why wasn’t my lava cake molten in the center?
A1: There are a couple of likely culprits. Firstly, you might have overcooked it. Microwaves cook very quickly, and even an extra 10-15 seconds can cook the center through. Secondly, you might not have used enough chocolate for the center, or the chocolate you used (like some brands of chocolate chips) might have stabilizers that prevent it from melting into a true “lava.” Try using a 1-inch square of a good quality chocolate bar next time and slightly reduce the cooking time.
Q2: My mug cake overflowed in the microwave! What went wrong?
A2: This usually happens if your mug is too small for the amount of batter, or if you used too much baking powder. The cake rises quite a bit during cooking. Ensure you’re using at least a 10-12 ounce mug and that it’s only about half to two-thirds full with batter before cooking. Also, double-check your baking powder measurement; a little goes a long way.
Q3: Can I make this molten lava mug cake vegan?
A3: Yes, absolutely! Use a plant-based milk (like almond, soy, or oat milk – unsweetened varieties work well). Ensure your chocolate for the center is dairy-free (most dark chocolates are). The vegetable oil is already vegan-friendly. The results are just as delicious.
Q4: Can I use butter instead of oil?
A4: Yes, you can use melted butter instead of oil. It will impart a slightly different, richer flavor. Use the same quantity (2 tablespoons of melted butter). Some find oil creates a slightly moister crumb in microwave cakes, but butter is a classic flavor.
Q5: Can I prepare the batter ahead of time?
A5: It’s best made fresh. The baking powder will start to react as soon as it’s mixed with wet ingredients, and its leavening power will diminish over time. If you want to save a few seconds, you can pre-mix the dry ingredients (flour, sugar, cocoa, baking powder, salt) and store them in an airtight container. Then, just add the wet ingredients when you’re ready to bake.
Q6: What kind of chocolate is best for the molten center?
A6: A good quality dark or semi-sweet chocolate bar (around 50-70% cacao) chopped into a small chunk (about 15-20g or a 1-inch square) generally yields the best molten effect. These chocolates melt beautifully into a rich, gooey lava. While chocolate chips can work, they often contain emulsifiers to help them hold their shape, so they might not become as fluidly molten.
Q7: My cake turned out rubbery. Why?
A7: Rubbery texture in mug cakes is usually due to one of two things: overmixing the batter (which develops too much gluten) or overcooking. Mix the ingredients only until they are just combined – a few lumps are okay. And be very mindful of the cooking time, erring on the side of slightly undercooking.
Q8: Can I make this recipe in a conventional oven instead of a microwave?
A8: Yes, you can, though it defeats the “instant gratification” purpose of a mug cake. To bake in an oven, preheat your oven to 350°F (175°C). Pour the batter into an oven-safe ramekin or mug. Bake for approximately 12-18 minutes, or until the edges are set but the center is still soft. Oven baking times will vary, so keep an eye on it. The texture might be slightly different from the microwaved version.

Molten Lava Mug Cake
Ingredients
- ¼ cup (30g) All-Purpose Flour: This forms the basic structure of your cake, giving it body and texture.
- 2 Tablespoons Granulated Sugar: Provides sweetness to balance the cocoa; adjust slightly to your preference.
- 2 Tablespoons Unsweetened Cocoa Powder: The heart of the chocolate flavor; use good quality for the best taste.
- ¼ Teaspoon Baking Powder: The leavening agent that helps the cake rise and become fluffy.
- Pinch of Salt: Enhances all the other flavors, especially the chocolate and sweetness.
- ¼ cup (60ml) Milk: Adds moisture and helps bind the ingredients; any kind (dairy or non-dairy) works.
- 2 Tablespoons Vegetable Oil (or Melted Butter): Contributes to a moist and tender crumb. Oil often yields a slightly moister cake in microwaves.
- ¼ Teaspoon Vanilla Extract: Rounds out the chocolate flavor and adds a touch of aromatic warmth.
- 1–2 Tablespoons Chocolate Chips or 1–2 Small Squares of Good Quality Dark Chocolate (approx. 15-20g): This is the secret to the “molten lava” center. Using a piece of a chocolate bar often melts more predictably.
Instructions
- Choose Your Mug: Select a standard-sized microwave-safe mug (around 10-12 ounces is ideal). Ensure it’s large enough to prevent overflow as the cake rises during cooking. A wider mug can sometimes cook more evenly than a tall, narrow one.
- Combine Dry Ingredients: In the mug, add the all-purpose flour, granulated sugar, unsweetened cocoa powder, baking powder, and salt. Whisk these dry ingredients together thoroughly with a fork. This step is crucial to ensure there are no clumps of flour or cocoa and that the baking powder is evenly distributed for a consistent rise.
- Add Wet Ingredients: Pour in the milk, vegetable oil (or melted butter), and vanilla extract directly into the mug with the dry ingredients.
- Mix Batter: Stir everything together with the fork until just combined. Be careful not to overmix; a few small lumps are perfectly fine. Overmixing can lead to a tough cake. Scrape the sides and bottom of the mug to ensure all ingredients are incorporated. The batter should be relatively smooth and have a consistency similar to brownie batter.
- Create the Molten Center: Gently push the chocolate chips or the small squares of dark chocolate into the center of the batter. You don’t need to fully submerge them, but make sure they are nestled within the batter. This will create the gooey, lava-like core.
- Microwave: Place the mug in the center of your microwave. Cook on high power. The cooking time is the most variable part of this recipe and depends heavily on your microwave’s wattage:
- For a 1000-1200W microwave: Start with 60-70 seconds.
- For a 700-900W microwave: Start with 75-90 seconds.
- The cake is done when the edges are set and look cooked, but the very center still appears slightly wet or jiggly. It will continue to cook a bit as it rests. It’s better to slightly undercook than overcook to achieve that molten center.
- Check for Doneness: Carefully remove the mug from the microwave (it will be hot!). The surface should look mostly cooked, perhaps with a slight sheen in the middle. If you gently touch the edge, it should spring back. If it looks very liquidy all over, microwave for another 10-15 seconds and check again.
- Rest (Crucial!): Let the mug cake rest for 1-2 minutes before diving in. This allows the molten center to set slightly (so it’s lava, not soup) and the cake to cool down enough to avoid burning your mouth. The residual heat will also finish cooking the cake to perfection.
- Serve: Enjoy your molten lava mug cake straight from the mug! You can dust it with powdered sugar, add a dollop of whipped cream, or a small scoop of vanilla ice cream if desired.
Nutrition
- Serving Size: one normal portion
- Calories: 450
- Sugar: 30g
- Fat: 25g
- Carbohydrates: 50g
- Protein: 6g


