
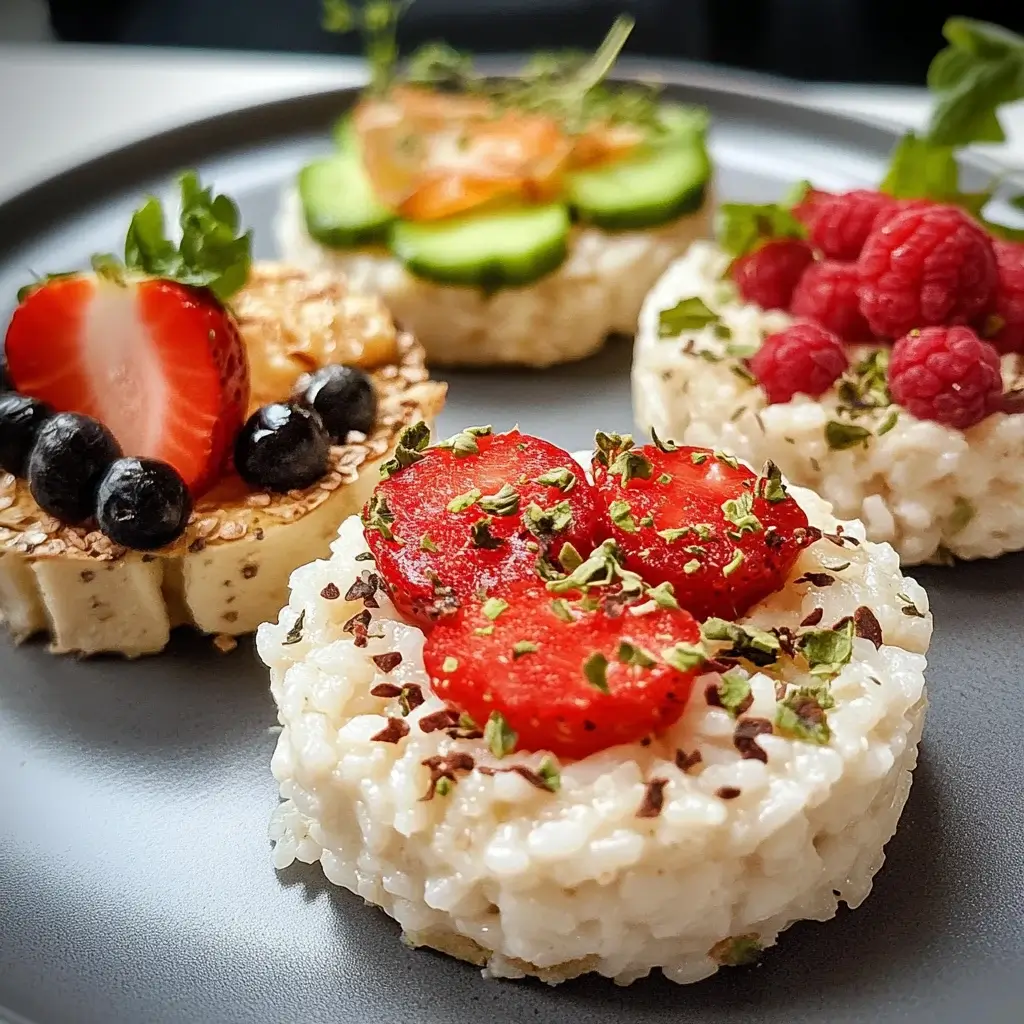

These Mini Rice Cakes with Toppings have become an absolute sensation in my household! Initially, I was just looking for a fun, interactive snack to make with the kids on a rainy afternoon. I remembered enjoying simple pan-fried rice cakes years ago and thought a miniature, customizable version would be a hit. Little did I know they’d become a regular request, not just from the kids, but from my husband and even guests! The beauty lies in their simplicity and incredible versatility. The base cakes themselves are delightfully chewy with slightly crisp edges when fresh from the pan, offering a satisfying texture that isn’t too heavy. But the real magic happens with the toppings. We’ve had evenings where we set up a ‘topping bar’ with little bowls of everything from sweet drizzles and fresh fruit to savory sauces and crunchy seeds. Watching everyone create their own unique combinations is half the fun. They’ve graced our table as quick after-school snacks, fun party appetizers that always disappear first, and even as a light, unconventional dessert. Their neutral base makes them a perfect canvas for almost any flavor profile you can dream up, making this recipe not just food, but an experience.
Ingredients
This recipe focuses on creating simple, chewy mini rice cakes that serve as a blank canvas for your favorite flavors. The ingredients are straightforward, emphasizing texture and adaptability.
For the Mini Rice Cakes (Base):
- 2 cups Sweet Rice Flour (Glutinous Rice Flour or Mochiko): This is the key ingredient and not the same as regular rice flour. Sweet rice flour provides the characteristic chewy, slightly sticky, and tender texture essential for authentic-tasting rice cakes. Using regular rice flour will result in a crumbly, hard texture. Look for it in Asian markets or the international aisle of larger supermarkets.
- ¾ cup Hot Water (Just off the boil): Using hot water helps to partially cook the starch in the flour, making the dough easier to handle, smoother, and contributing to the final chewy texture. The exact amount might vary slightly depending on the humidity and the specific brand of flour, so be prepared to adjust by a teaspoon or two.
- ½ teaspoon Salt: Enhances the subtle flavor of the rice flour and balances the sweetness or savoriness of the toppings.
- 1 tablespoon Neutral Oil (e.g., Vegetable, Canola, Grapeseed): For pan-frying the rice cakes. A neutral oil won’t impart a strong flavor and allows the rice cakes to crisp up nicely without burning too quickly. You’ll need enough to lightly coat the bottom of your frying pan.
For the Toppings (Ideas – Choose your favorites!):
- Sweet Topping Ideas:
- Honey or Maple Syrup Drizzle
- Brown Sugar Syrup (Combine brown sugar and a splash of water, heat gently)
- Sweetened Condensed Milk
- Chocolate Sauce or Melted Chocolate Chips
- Nutella or other Chocolate-Hazelnut Spread
- Fruit Jams or Preserves (Strawberry, Raspberry, Apricot)
- Fresh Berries (Sliced Strawberries, Blueberries, Raspberries)
- Sliced Banana or Mango
- Toasted Nuts (Chopped Almonds, Walnuts, Pecans)
- Toasted Seeds (Sesame Seeds, Sunflower Seeds)
- Shredded Coconut (Toasted or untoasted)
- A dusting of Powdered Sugar or Cinnamon Sugar
- Matcha Powder (mixed with powdered sugar)
- Savory Topping Ideas:
- Soy Sauce Glaze (Soy sauce, mirin/rice vinegar, a touch of sugar, optional garlic/ginger)
- Gochujang Sauce (Korean chili paste mixed with soy sauce, sesame oil, honey/sugar)
- Teriyaki Sauce
- Everything Bagel Seasoning
- Melted Cheese (Cheddar, Mozzarella, Jack)
- Crumbled Cooked Bacon or Pancetta
- Chopped Scallions or Chives
- Furikake (Japanese rice seasoning)
- Sriracha or other Hot Sauce
- Avocado (Mashed or Sliced) with a sprinkle of salt and pepper
- A small dollop of Kimchi (finely chopped)
- Fried Egg (Quail egg size works well for mini versions!)
- Seaweed Flakes (Nori)
Instructions
Follow these steps carefully to achieve perfectly chewy and delicious mini rice cakes ready for your creative topping combinations.
- Combine Dry Ingredients: In a medium-sized heatproof bowl, whisk together the 2 cups of sweet rice flour and ½ teaspoon of salt. Ensure they are well combined. This prevents clumps of salt in the final dough.
- Add Hot Water Gradually: Create a well in the center of the flour mixture. Carefully and slowly pour in the ¾ cup of hot water while stirring continuously with chopsticks or a sturdy spoon. The mixture will initially look shaggy and clumpy. Keep stirring until a rough dough starts to form and most of the flour is incorporated. Be cautious as the water is hot.
- Knead the Dough: Once the dough is cool enough to handle (it should still be quite warm, which helps with pliability), turn it out onto a clean, lightly floured surface (use a little extra sweet rice flour). Knead the dough for about 5-7 minutes. It should transform from shaggy to smooth, elastic, and pliable. If the dough feels too dry and crumbly, add hot water one teaspoon at a time. If it feels excessively sticky, add sweet rice flour one teaspoon at a time. The ideal consistency is soft and smooth, similar to play-dough, holding its shape without being overly sticky.
- Shape the Mini Rice Cakes: Divide the dough into small, equal portions. A good size is about 1 tablespoon of dough per cake, yielding roughly 20-24 mini cakes. Roll each portion between your palms into a smooth ball, then gently flatten it into a small disc, about ½ inch thick and 1.5 inches in diameter. Aim for uniform thickness so they cook evenly. Place the shaped cakes on a plate or baking sheet lined with parchment paper, ensuring they don’t touch (they can stick together).
- Cook the Rice Cakes: Heat the 1 tablespoon of neutral oil in a large non-stick skillet or frying pan over medium heat. Once the oil is shimmering slightly (but not smoking), carefully place the mini rice cakes in the pan in a single layer. Do not overcrowd the pan; cook in batches if necessary.
- Pan-Fry Until Golden and Chewy: Fry the rice cakes for about 3-4 minutes per side. The goal is to get a light golden-brown, slightly crispy exterior while the inside becomes fully cooked, soft, and chewy. Adjust the heat if they are browning too quickly. You might notice them puff up slightly as they cook.
- Drain and Serve: Once cooked, use a slotted spoon or spatula to remove the mini rice cakes from the pan and place them on a plate lined with paper towels to absorb any excess oil.
- Add Toppings: This is the fun part! Arrange the warm mini rice cakes on a serving platter. Immediately add your desired toppings while the cakes are still warm. Drizzle sauces, sprinkle seasonings, add fresh fruit, or spread your favorite sweet or savory concoctions. Serve promptly for the best texture (crispy outside, chewy inside).
Nutrition Facts
Please note: The following nutritional information is an estimate calculated only for the base mini rice cakes (made with sweet rice flour, water, salt, and a minimal amount of oil for frying) and does not include any toppings. The nutritional value will vary significantly based on the types and amounts of toppings used.
- Servings: Recipe yields approximately 20-24 mini rice cakes.
- Serving Size: 5 mini rice cakes (base only)
- Calories Per Serving (Base Only): Approximately 180-220 kcal (Highly dependent on exact size and oil absorption)
- Carbohydrates: Primarily from the sweet rice flour, providing the main source of energy. These are mostly complex carbohydrates. (Approx. 40-45g per serving)
- Protein: Sweet rice flour contains a small amount of protein. (Approx. 3-4g per serving)
- Fat: Minimal fat comes from the oil used for pan-frying. (Approx. 1-3g per serving, depending on oil absorption)
- Sodium: Primarily from the added salt, contributing to flavor balance. (Approx. 120-150mg per serving)
- Fiber: Sweet rice flour is generally low in dietary fiber. (Less than 1g per serving)
Remember to factor in the nutritional content of your chosen toppings for a more accurate overall assessment.
Preparation Time
- Preparation Time: 15-20 minutes (Mixing, kneading, and shaping the dough)
- Cooking Time: 15-20 minutes (Pan-frying in batches)
- Total Time: Approximately 30-40 minutes (excluding time for preparing toppings)
This timeframe is an estimate and can vary based on your experience with making dough, the efficiency of your shaping process, and the size of your frying pan (determining how many batches are needed). Preparing elaborate toppings will add extra time.
How to Serve
These mini rice cakes are incredibly versatile. Here are some fun and delicious ways to serve them:
- As an Appetizer:
- Arrange on a platter with a variety of savory toppings like a soy-ginger glaze, gochujang drizzle, chopped scallions, and sesame seeds.
- Offer small dipping bowls of different sauces (teriyaki, sweet chili, peanut sauce) alongside the plain or lightly seasoned cakes.
- Create a “DIY Topping Bar” for parties, letting guests customize their own savory or sweet bites.
- As a Snack:
- Enjoy a few warm cakes drizzled with honey or maple syrup for a quick, comforting snack.
- Top with peanut butter and sliced bananas for a more substantial, energy-boosting treat.
- Sprinkle with cinnamon sugar for a simple, churro-like vibe.
- As a Light Meal or Side Dish:
- Serve savory versions alongside soups or salads.
- Top with a fried egg, avocado, and a sprinkle of chili flakes for a satisfying mini-meal.
- Incorporate them into a stir-fry (add them near the end to prevent them from getting too soft).
- As a Dessert:
- Drizzle generously with chocolate sauce, sweetened condensed milk, and top with fresh berries and chopped nuts.
- Serve warm with a scoop of ice cream (vanilla, green tea, or black sesame work wonderfully).
- Pair sweet versions with a cup of tea or coffee.
- Serving Temperature:
- These mini rice cakes are best served immediately while they are warm. This is when their texture is optimal – slightly crispy on the outside and perfectly soft and chewy on the inside.
- While they can be eaten at room temperature, they will lose their crispy exterior and become denser as they cool.
Additional Tips
Make your mini rice cake experience even better with these helpful tips:
- Flour is Key: Do not substitute regular rice flour for sweet rice flour (glutinous rice flour/mochiko). The result will be completely different – hard and crumbly instead of chewy. Ensure your flour is fresh for the best texture.
- Water Temperature Matters: Using hot (not boiling, but recently boiled) water helps gelatinize the starches in the flour, creating a smoother, more pliable dough and contributing significantly to the final chewy texture.
- Achieving the Right Dough Consistency: The dough should be soft, smooth, and pliable, like earlobe texture or soft play-dough. If it’s too sticky to handle, add a tiny bit more sweet rice flour. If it’s too dry and cracking, add a tiny bit more hot water (a teaspoon at a time). Kneading well develops the texture.
- Prevent Sticking: When shaping, lightly flour your hands and work surface with sweet rice flour if needed. When placing shaped cakes before cooking, use parchment paper and ensure they aren’t touching. Don’t overcrowd the pan during frying, as this lowers the oil temperature and can cause sticking and steaming instead of frying.
- Control Cooking Temperature: Fry over medium heat. If the heat is too high, the outside will brown too quickly or burn before the inside is cooked and chewy. If the heat is too low, the cakes may absorb too much oil and won’t develop a nice crust. Adjust as needed.
- Make-Ahead (Partially): You can make the dough, shape the rice cakes, and store them uncooked in an airtight container, separated by layers of parchment paper, in the refrigerator for up to 24 hours. Fry them just before serving for the best texture. Cooked rice cakes tend to harden quickly upon cooling.
- Reheating: Leftover cooked rice cakes will harden as they cool. To refresh them, you can briefly pan-fry them again with a tiny bit of oil until heated through and softened. Microwaving can make them soft but often results in a less pleasant, sometimes overly gummy texture and loses the crisp exterior. Pan-frying is preferred.
- Get Creative with Shapes: While discs are standard, feel free to experiment! Roll the dough into small logs (like Korean tteokbokki), cut them into squares, or use small cookie cutters (though intricate shapes might be tricky with this dough). This can be especially fun for kids.
FAQ
Here are answers to some frequently asked questions about making Mini Rice Cakes with Toppings:
- Q: Are these mini rice cakes gluten-free?
- A: Yes, provided you use certified gluten-free sweet rice flour (mochiko/glutinous rice flour). Pure rice flour itself is naturally gluten-free. However, always check the packaging for potential cross-contamination warnings if serving to someone with celiac disease or severe gluten sensitivity. Also, ensure your toppings are gluten-free (e.g., use tamari instead of regular soy sauce).
- Q: Can I use regular rice flour instead of sweet rice flour?
- A: No, this is not recommended. Regular rice flour has a different starch composition and lacks the properties that create the signature chewy, slightly springy texture of these rice cakes. Using regular rice flour will result in a dense, hard, and likely crumbly product, not the desired soft chewiness. Always use sweet rice flour (labeled glutinous rice flour or Mochiko).
- Q: Why did my rice cakes turn out hard or tough?
- A: There could be several reasons:
- Incorrect Flour: Using regular rice flour instead of sweet rice flour is the most common culprit.
- Not Enough Water: The dough might have been too dry. Ensure it’s soft and pliable before shaping.
- Overcooking: Frying them for too long or at too low a temperature can dry them out.
- Cooling: These rice cakes naturally harden as they cool. They are best eaten warm. Reheating can help soften leftovers (see tips).
- A: There could be several reasons:
- Q: My dough is extremely sticky. What did I do wrong?
- A: You likely added slightly too much water, or your brand of flour absorbs less water. Don’t worry! Gradually knead in a little extra sweet rice flour, one teaspoon at a time, until the dough becomes smooth and manageable – pliable but not sticking excessively to your hands or the work surface.
- Q: Can I bake these instead of pan-frying?
- A: While you can bake them (perhaps at around 375°F/190°C until puffed and cooked through), the texture will be different. Baking tends to produce a drier, more bread-like result, lacking the delightful contrast of the slightly crispy pan-fried exterior and the super chewy interior that frying achieves. Pan-frying is the traditional and recommended method for this specific texture.
- Q: How should I store leftover mini rice cakes?
- A: Store leftover, untopped rice cakes in an airtight container at room temperature for up to 24 hours, or in the refrigerator for 2-3 days. Note that they will harden significantly when cooled, especially in the fridge. See the reheating tip above. Storing them with toppings already applied is generally not recommended as they can become soggy.
- Q: Can I freeze the mini rice cakes?
- A: You can freeze the uncooked, shaped rice cakes. Place them in a single layer on a parchment-lined baking sheet until frozen solid, then transfer them to a freezer bag or airtight container. Cook them directly from frozen (they will need a few extra minutes of cooking time). Freezing cooked rice cakes is possible, but the texture upon reheating might be slightly compromised (potentially gummier).
- Q: What’s the difference between sweet rice flour and glutinous rice flour?
- A: They are essentially the same thing! “Glutinous” refers to the sticky, glue-like (glutinous) texture the flour produces when cooked, not to the presence of gluten (which it doesn’t have). Sweet rice flour, glutinous rice flour, and Mochiko (a popular Japanese brand name) can generally be used interchangeably in recipes like this one that call for that specific chewy texture.
Mini Rice Cakes with Toppings
Ingredients
This recipe focuses on creating simple, chewy mini rice cakes that serve as a blank canvas for your favorite flavors. The ingredients are straightforward, emphasizing texture and adaptability.
For the Mini Rice Cakes (Base):
- 2 cups Sweet Rice Flour (Glutinous Rice Flour or Mochiko): This is the key ingredient and not the same as regular rice flour. Sweet rice flour provides the characteristic chewy, slightly sticky, and tender texture essential for authentic-tasting rice cakes. Using regular rice flour will result in a crumbly, hard texture. Look for it in Asian markets or the international aisle of larger supermarkets.
- ¾ cup Hot Water (Just off the boil): Using hot water helps to partially cook the starch in the flour, making the dough easier to handle, smoother, and contributing to the final chewy texture. The exact amount might vary slightly depending on the humidity and the specific brand of flour, so be prepared to adjust by a teaspoon or two.
- ½ teaspoon Salt: Enhances the subtle flavor of the rice flour and balances the sweetness or savoriness of the toppings.
- 1 tablespoon Neutral Oil (e.g., Vegetable, Canola, Grapeseed): For pan-frying the rice cakes. A neutral oil won’t impart a strong flavor and allows the rice cakes to crisp up nicely without burning too quickly. You’ll need enough to lightly coat the bottom of your frying pan.
For the Toppings (Ideas – Choose your favorites!):
- Sweet Topping Ideas:
- Honey or Maple Syrup Drizzle
- Brown Sugar Syrup (Combine brown sugar and a splash of water, heat gently)
- Sweetened Condensed Milk
- Chocolate Sauce or Melted Chocolate Chips
- Nutella or other Chocolate-Hazelnut Spread
- Fruit Jams or Preserves (Strawberry, Raspberry, Apricot)
- Fresh Berries (Sliced Strawberries, Blueberries, Raspberries)
- Sliced Banana or Mango
- Toasted Nuts (Chopped Almonds, Walnuts, Pecans)
- Toasted Seeds (Sesame Seeds, Sunflower Seeds)
- Shredded Coconut (Toasted or untoasted)
- A dusting of Powdered Sugar or Cinnamon Sugar
- Matcha Powder (mixed with powdered sugar)
- Savory Topping Ideas:
- Soy Sauce Glaze (Soy sauce, mirin/rice vinegar, a touch of sugar, optional garlic/ginger)
- Gochujang Sauce (Korean chili paste mixed with soy sauce, sesame oil, honey/sugar)
- Teriyaki Sauce
- Everything Bagel Seasoning
- Melted Cheese (Cheddar, Mozzarella, Jack)
- Crumbled Cooked Bacon or Pancetta
- Chopped Scallions or Chives
- Furikake (Japanese rice seasoning)
- Sriracha or other Hot Sauce
- Avocado (Mashed or Sliced) with a sprinkle of salt and pepper
- A small dollop of Kimchi (finely chopped)
- Fried Egg (Quail egg size works well for mini versions!)
- Seaweed Flakes (Nori)
Instructions
Follow these steps carefully to achieve perfectly chewy and delicious mini rice cakes ready for your creative topping combinations.
- Combine Dry Ingredients: In a medium-sized heatproof bowl, whisk together the 2 cups of sweet rice flour and ½ teaspoon of salt. Ensure they are well combined. This prevents clumps of salt in the final dough.
- Add Hot Water Gradually: Create a well in the center of the flour mixture. Carefully and slowly pour in the ¾ cup of hot water while stirring continuously with chopsticks or a sturdy spoon. The mixture will initially look shaggy and clumpy. Keep stirring until a rough dough starts to form and most of the flour is incorporated. Be cautious as the water is hot.
- Knead the Dough: Once the dough is cool enough to handle (it should still be quite warm, which helps with pliability), turn it out onto a clean, lightly floured surface (use a little extra sweet rice flour). Knead the dough for about 5-7 minutes. It should transform from shaggy to smooth, elastic, and pliable. If the dough feels too dry and crumbly, add hot water one teaspoon at a time. If it feels excessively sticky, add sweet rice flour one teaspoon at a time. The ideal consistency is soft and smooth, similar to play-dough, holding its shape without being overly sticky.
- Shape the Mini Rice Cakes: Divide the dough into small, equal portions. A good size is about 1 tablespoon of dough per cake, yielding roughly 20-24 mini cakes. Roll each portion between your palms into a smooth ball, then gently flatten it into a small disc, about ½ inch thick and 1.5 inches in diameter. Aim for uniform thickness so they cook evenly. Place the shaped cakes on a plate or baking sheet lined with parchment paper, ensuring they don’t touch (they can stick together).
- Cook the Rice Cakes: Heat the 1 tablespoon of neutral oil in a large non-stick skillet or frying pan over medium heat. Once the oil is shimmering slightly (but not smoking), carefully place the mini rice cakes in the pan in a single layer. Do not overcrowd the pan; cook in batches if necessary.
- Pan-Fry Until Golden and Chewy: Fry the rice cakes for about 3-4 minutes per side. The goal is to get a light golden-brown, slightly crispy exterior while the inside becomes fully cooked, soft, and chewy. Adjust the heat if they are browning too quickly. You might notice them puff up slightly as they cook.
- Drain and Serve: Once cooked, use a slotted spoon or spatula to remove the mini rice cakes from the pan and place them on a plate lined with paper towels to absorb any excess oil.
- Add Toppings: This is the fun part! Arrange the warm mini rice cakes on a serving platter. Immediately add your desired toppings while the cakes are still warm. Drizzle sauces, sprinkle seasonings, add fresh fruit, or spread your favorite sweet or savory concoctions. Serve promptly for the best texture (crispy outside, chewy inside).
Nutrition
- Serving Size: one normal portion
- Calories: 220
- Sodium: 150mg
- Fat: 3g
- Carbohydrates: 45g
- Fiber: 1g
- Protein: 4g


