

Of all the culinary challenges a busy parent faces, the weeknight dinner scramble might be the most daunting. It’s that familiar 5 PM panic, a frantic search for something quick, something healthy-ish, and most importantly, something the entire family will actually eat without complaint. In my house, this used to be a source of daily stress until I stumbled upon a recipe that changed the game entirely. I’m talking about these Mini Chicken Quesadilla Pockets. The first time I made them, I was skeptical. Would the kids turn up their noses? Would my husband find them satisfying enough? The answer was a resounding, enthusiastic “YES!” I watched in awe as my picky eater, who usually dissects every meal like a forensic scientist, devoured two pockets without a single question. My husband, a man of simple tastes, declared them “way better than regular quesadillas.” They are the perfect culinary trifecta: easy to make, endlessly customizable, and an absolute crowd-pleaser. These little golden-brown parcels of cheesy, savory goodness have become our go-to for busy weeknights, lazy weekend lunches, and even party appetizers. They are more than just a recipe; they are a solution—a delicious, stress-free answer to the perpetual question, “What’s for dinner?”
Ingredients
- 1 tbsp Olive Oil: Used for sautéing the vegetables, this adds a light, fruity base note to the filling.
- 1 small Yellow Onion, finely chopped: Provides a sweet, aromatic foundation that deepens the overall flavor profile.
- 1 Bell Pepper (any color), finely chopped: Adds a touch of sweetness, a vibrant splash of color, and a subtle crunch. Red, orange, or yellow peppers work best for a sweeter taste.
- 2 cloves Garlic, minced: A crucial aromatic that brings a pungent, savory depth to the chicken mixture.
- 2 cups Cooked Chicken, shredded or finely diced: The star of the show. Using a pre-cooked rotisserie chicken is a fantastic time-saving hack.
- 4 oz (1/2 block) Cream Cheese, softened: This is the secret weapon. It creates a creamy, rich texture and acts as a binder, ensuring the filling stays inside the pocket.
- 1/2 cup Salsa (your favorite kind): Introduces moisture, acidity, and a classic Tex-Mex flavor. Choose mild, medium, or hot depending on your preference.
- 1 cup Shredded Cheese Blend (Mexican, Cheddar, or Monterey Jack): The heart of any quesadilla. A blend provides a more complex flavor and a perfect “cheese pull.”
- 1 tsp Chili Powder: Adds a warm, earthy spice that is quintessentially Tex-Mex.
- 1/2 tsp Cumin: Provides a smoky, nutty flavor that pairs beautifully with the chicken and chili powder.
- 1/2 tsp Smoked Paprika: Lends a deep, smoky aroma and a rich red hue to the filling.
- Salt and Black Pepper to taste: Essential for enhancing all the other flavors.
- 8-10 Small (6-inch) Flour Tortillas: These are the “pockets.” Small, “fajita-size” tortillas are the perfect size for creating individual handheld portions.
- 2 tbsp Butter or additional Olive Oil for cooking: Used for pan-frying the pockets to achieve that irresistible crispy, golden-brown exterior.
Instructions
- Prepare the Filling Base: Heat 1 tablespoon of olive oil in a medium-sized skillet or pan over medium heat. Add the finely chopped yellow onion and bell pepper. Sauté for 5-7 minutes, stirring occasionally, until the vegetables have softened and the onion is translucent. Add the minced garlic and cook for another minute until fragrant, being careful not to let it burn.
- Combine the Filling Ingredients: In a large mixing bowl, add the shredded cooked chicken. To the bowl, add the softened cream cheese, your favorite salsa, the shredded cheese blend, chili powder, cumin, and smoked paprika.
- Mix Everything Together: Add the cooked onion and pepper mixture from the skillet directly into the bowl with the other filling ingredients. Stir everything together thoroughly until it is well combined. The cream cheese should be evenly distributed, creating a cohesive, creamy filling. Season with salt and black pepper to your liking. Give it a final mix.
- Assemble the Pockets: Lay a small flour tortilla flat on a clean work surface. Spoon approximately 1/3 to 1/2 cup of the chicken filling onto the center of the tortilla. Be careful not to overfill, as this can cause the pocket to burst during cooking.
- Fold the Pockets: This folding technique creates a secure square pocket. First, fold the bottom edge of the tortilla up over the filling. Next, fold in the left and right sides, similar to how you would fold a burrito. Finally, roll the pocket upwards, enclosing the filling completely and creating a neat, rectangular or square parcel. If the final flap doesn’t seem secure, you can dab a tiny bit of water or extra cream cheese to act as a “glue.” Repeat this process for all remaining tortillas and filling.
- Cook the Quesadilla Pockets (Pan-Frying Method): Melt 1 tablespoon of butter or heat olive oil in a large skillet over medium heat. Carefully place 2-3 quesadilla pockets in the pan, seam-side down. Cook for 3-4 minutes per side, until the tortilla is golden-brown, crispy, and the cheese inside is fully melted. You may need to adjust the heat to prevent the outside from burning before the inside is heated through.
- Cook the Quesadilla Pockets (Baking Method – for a larger batch): Preheat your oven to 400°F (200°C). Lightly grease a baking sheet or line it with parchment paper. Arrange the folded quesadilla pockets in a single layer on the baking sheet, seam-side down. For an extra-crispy finish, you can lightly brush the tops with melted butter or spray with cooking oil. Bake for 12-15 minutes, flipping them halfway through, until they are golden and crispy on all sides.
- Rest and Serve: Once cooked, transfer the mini quesadilla pockets to a cutting board and let them rest for a minute or two. This allows the melted cheese to set slightly, preventing the filling from spilling out when bitten into. Serve warm with your favorite dips and sides.
Nutrition Facts
- Servings: This recipe makes approximately 8-10 mini pockets.
- Calories Per Serving (1 Pocket): Approximately 250-300 kcal.
- Protein: Roughly 15g per pocket. The combination of chicken and cheese makes these a fantastic source of protein, which is essential for muscle repair and keeping you feeling full and satisfied.
- Carbohydrates: Roughly 20g per pocket. Primarily from the flour tortilla, providing the energy needed to power through your day.
- Fat: Roughly 12g per pocket. Sourced from the cheese, cream cheese, and the oil or butter used for cooking, contributing to the rich flavor and satisfying mouthfeel.
(Disclaimer: These nutrition facts are an estimate and can vary based on the specific ingredients used, such as the type of cheese, salsa, and tortillas.)
Preparation Time
This recipe is designed for efficiency and ease. The total time from start to finish is approximately 30-35 minutes. This can be broken down into 15-20 minutes of preparation time (chopping vegetables, mixing the filling, and folding the pockets) and 10-15 minutes of cook time, depending on whether you pan-fry in batches or bake them all at once. Using a pre-cooked rotisserie chicken significantly speeds up the prep process.
How to Serve
These versatile pockets can be dressed up or down for any occasion. Here’s how to serve them to make any meal special:
- The Ultimate Dipping Platter: Arrange the warm quesadilla pockets on a large board or platter and surround them with an array of dipping sauces.
- Classic Dips: Guacamole, sour cream (or plain Greek yogurt), and your favorite pico de gallo or restaurant-style salsa.
- Creamy Dips: A simple cilantro-lime crema (sour cream, lime juice, cilantro, salt) or a smoky chipotle aioli (mayonnaise, adobo sauce from a can of chipotles, lime juice).
- Cheesy Dips: A warm bowl of queso dip for the ultimate indulgence.
- As a Satisfying Main Course: Turn these pockets into a complete and balanced meal with some delicious sides.
- Serve 2-3 pockets per person.
- Pair with a side of Mexican-style rice or cilantro-lime rice.
- Add a bowl of seasoned black beans or refried beans.
- A fresh side salad with a zesty vinaigrette or a simple corn and avocado salad provides a refreshing contrast.
- For Parties and Gatherings: These are the perfect handheld appetizer that requires no utensils.
- Cut the pockets in half diagonally to create smaller, bite-sized triangles.
- Arrange them on a platter for easy grabbing.
- You can insert a decorative toothpick into each half to make them even easier to handle.
- In a Kid-Friendly Lunchbox: They are just as delicious at room temperature or reheated, making them perfect for school lunches.
- Pack a pocket or two in the main compartment of a bento box.
- Include a small container of a mild dip like sour cream or a not-so-spicy salsa.
- Add some fruit slices and vegetable sticks like carrots or cucumbers to round out the meal.
Additional Tips
- The Rotisserie Chicken Shortcut is Your Best Friend: Don’t have time to cook and shred chicken? A store-bought rotisserie chicken is the ultimate hack. The meat is already seasoned, tender, and moist. Simply pull the meat from the bones and shred it. You’ll need about half of a standard rotisserie chicken for this recipe.
- Don’t Overstuff the Pockets: It’s tempting to pack as much of that delicious filling in as possible, but resist the urge! Overstuffing is the number one cause of pockets bursting open during cooking. A modest 1/3 to 1/2 cup of filling is the sweet spot for a 6-inch tortilla.
- Achieve the Perfect Crispy Crust: For the crispiest, most flavorful exterior, use butter in your skillet. It has a lower smoke point than oil but provides an unparalleled golden-brown color and rich flavor. Keep the heat at a steady medium; too high and the tortilla will burn before the filling is hot, too low and it will absorb too much fat and become greasy.
- Get Creative with Your Fillings: This recipe is a fantastic base for experimentation. Swap out the cheese for pepper jack for a spicy kick, or smoked gouda for a deep, smoky flavor. Add a can of drained and rinsed black beans or corn to the filling for extra fiber and texture. You can also toss in some chopped spinach for a hidden veggie boost.
- Make-Ahead for an Even Quicker Meal: You can prepare the entire chicken filling up to 2-3 days in advance and store it in an airtight container in the refrigerator. When you’re ready to eat, all you have to do is assemble and cook the pockets, cutting your active cooking time down to just 10-15 minutes.
- Freezing for Future Meals: These quesadilla pockets freeze beautifully. After cooking and cooling them completely, place them on a baking sheet in a single layer and “flash freeze” for about an hour. Once solid, transfer them to a freezer-safe bag or container. This prevents them from sticking together. They can be stored in the freezer for up to 3 months.
- The Secret to a Perfect Seal: If you find your tortilla flaps aren’t staying put during the folding process, use a little “edible glue.” A tiny smear of the softened cream cheese or even a dab of water along the final edge of the tortilla will help it adhere securely as you roll it shut.
- Baking vs. Pan-Frying – Know When to Choose: Pan-frying is ideal for small batches and gives you that classic, slightly unevenly browned, buttery crust. Baking is the superior method when you’re cooking for a crowd. It’s more hands-off, allows you to cook all the pockets at once, and results in a more uniformly crispy and slightly drier exterior.
FAQ Section
1. Can I use corn tortillas instead of flour?
While you can, it’s a bit trickier. Corn tortillas are less pliable than flour and tend to crack and break when folded into this pocket shape. If you want to use them, you must warm them up significantly first (by steaming them in a damp paper towel in the microwave) to make them more flexible. Even then, they may be more prone to tearing. Flour tortillas are highly recommended for achieving the “pocket” style.
2. How do I keep my quesadilla pockets from getting soggy?
Sogginess usually comes from excess moisture in the filling. To prevent this, make sure your salsa isn’t overly watery; if it is, drain some of the liquid before adding it. Also, ensure your cooked vegetables (onions and peppers) have released most of their moisture in the pan before you add them to the filling mix. When reheating, using an oven, toaster oven, or air fryer is far better than a microwave for restoring crispness.
3. Can I make these vegetarian?
Absolutely! This recipe is incredibly adaptable. To make a vegetarian version, simply omit the chicken and replace it with a can of drained and rinsed black beans, pinto beans, or a cup of crumbled sauteed mushrooms. A mixture of roasted sweet potatoes and black beans also makes a phenomenal and hearty vegetarian filling.
4. What is the best way to reheat leftovers?
For the best results that rival a freshly cooked pocket, the oven or an air fryer is the way to go. Preheat your oven or toaster oven to 350°F (175°C) and heat the pockets for 8-10 minutes, or until warmed through and crispy. In an air fryer, 3-4 minutes at 375°F (190°C) should do the trick. A microwave will work in a pinch for speed, but the tortilla will be soft, not crispy.
5. Are these spicy? How can I adjust the heat level?
As written, this recipe is mild and kid-friendly. The heat level is entirely in your control. To increase the spice, you can: use a medium or hot salsa, add a finely diced jalapeño (with or without seeds) to the vegetable sauté, add a pinch of cayenne pepper, or use a spicy cheese like Pepper Jack. To keep it completely mild, ensure you use a mild salsa and double-check that your chili powder is a standard blend, not a hot variant.
6. Can I make these in an air fryer?
Yes, an air fryer is a fantastic tool for making these! It circulates hot air, making them wonderfully crispy with less oil. Assemble the pockets as directed. Preheat your air fryer to 375°F (190°C). Place the pockets in the basket in a single layer (don’t overcrowd) and cook for 6-8 minutes, flipping halfway through, until golden brown and crispy.
7. Why did my pockets fall apart when I was cooking them?
This usually happens for two main reasons: overstuffing or an insecure seal. If you put too much filling in, it will expand as it heats up and burst through the seams. Make sure to use a modest amount of filling. Secondly, ensure your final fold is placed seam-side down in the pan or on the baking sheet first. This helps to seal that final flap shut with the initial blast of heat.
8. What other kinds of meat can I use in these quesadilla pockets?
This pocket concept works well with various proteins. You could substitute the shredded chicken with leftover shredded beef (from a pot roast), ground turkey or beef (cooked and drained of fat), or even pulled pork. Just ensure the meat is cooked and either shredded or finely crumbled to blend well with the creamy filling.

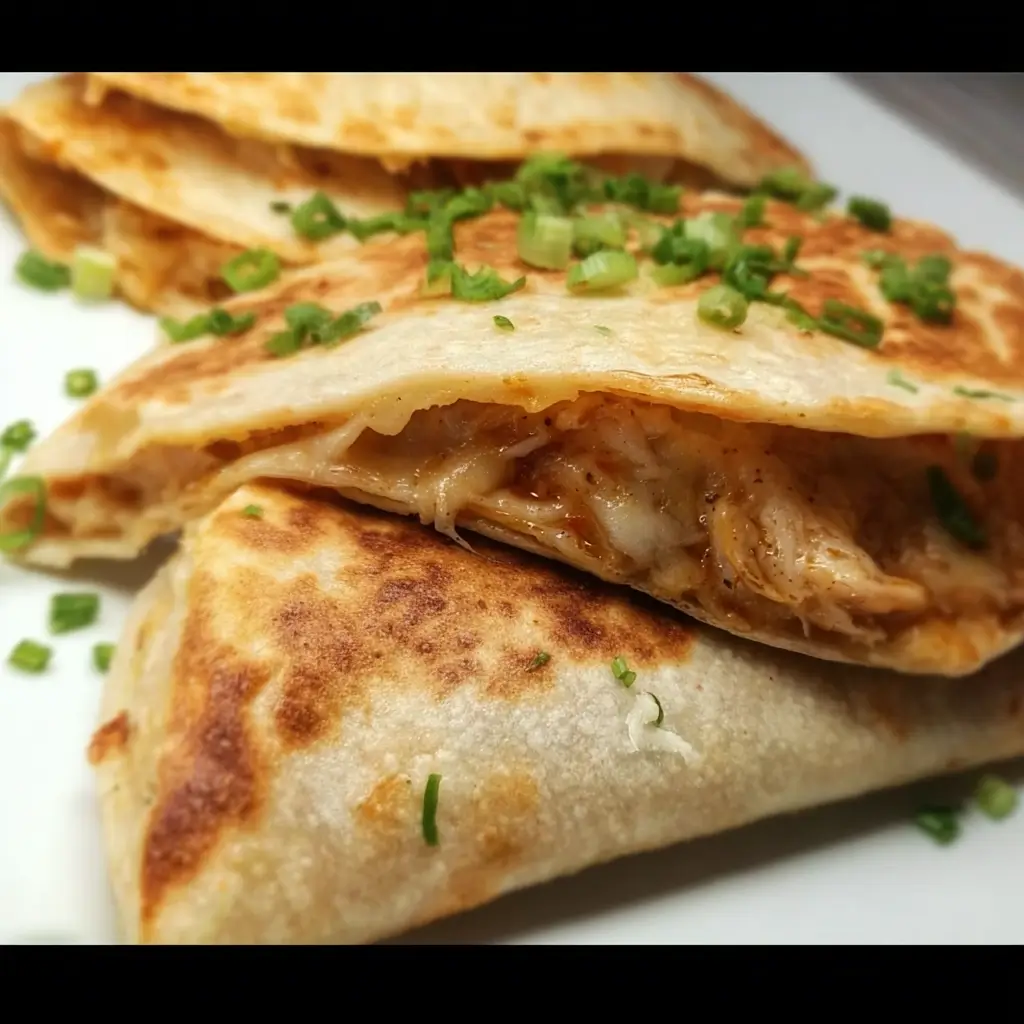
Mini Chicken Quesadilla Pockets
Ingredients
- 1 tbsp Olive Oil: Used for sautéing the vegetables, this adds a light, fruity base note to the filling.
- 1 small Yellow Onion, finely chopped: Provides a sweet, aromatic foundation that deepens the overall flavor profile.
- 1 Bell Pepper (any color), finely chopped: Adds a touch of sweetness, a vibrant splash of color, and a subtle crunch. Red, orange, or yellow peppers work best for a sweeter taste.
- 2 cloves Garlic, minced: A crucial aromatic that brings a pungent, savory depth to the chicken mixture.
- 2 cups Cooked Chicken, shredded or finely diced: The star of the show. Using a pre-cooked rotisserie chicken is a fantastic time-saving hack.
- 4 oz (1/2 block) Cream Cheese, softened: This is the secret weapon. It creates a creamy, rich texture and acts as a binder, ensuring the filling stays inside the pocket.
- 1/2 cup Salsa (your favorite kind): Introduces moisture, acidity, and a classic Tex-Mex flavor. Choose mild, medium, or hot depending on your preference.
- 1 cup Shredded Cheese Blend (Mexican, Cheddar, or Monterey Jack): The heart of any quesadilla. A blend provides a more complex flavor and a perfect “cheese pull.”
- 1 tsp Chili Powder: Adds a warm, earthy spice that is quintessentially Tex-Mex.
- 1/2 tsp Cumin: Provides a smoky, nutty flavor that pairs beautifully with the chicken and chili powder.
- 1/2 tsp Smoked Paprika: Lends a deep, smoky aroma and a rich red hue to the filling.
- Salt and Black Pepper to taste: Essential for enhancing all the other flavors.
- 8–10 Small (6-inch) Flour Tortillas: These are the “pockets.” Small, “fajita-size” tortillas are the perfect size for creating individual handheld portions.
- 2 tbsp Butter or additional Olive Oil for cooking: Used for pan-frying the pockets to achieve that irresistible crispy, golden-brown exterior.
Instructions
- Prepare the Filling Base: Heat 1 tablespoon of olive oil in a medium-sized skillet or pan over medium heat. Add the finely chopped yellow onion and bell pepper. Sauté for 5-7 minutes, stirring occasionally, until the vegetables have softened and the onion is translucent. Add the minced garlic and cook for another minute until fragrant, being careful not to let it burn.
- Combine the Filling Ingredients: In a large mixing bowl, add the shredded cooked chicken. To the bowl, add the softened cream cheese, your favorite salsa, the shredded cheese blend, chili powder, cumin, and smoked paprika.
- Mix Everything Together: Add the cooked onion and pepper mixture from the skillet directly into the bowl with the other filling ingredients. Stir everything together thoroughly until it is well combined. The cream cheese should be evenly distributed, creating a cohesive, creamy filling. Season with salt and black pepper to your liking. Give it a final mix.
- Assemble the Pockets: Lay a small flour tortilla flat on a clean work surface. Spoon approximately 1/3 to 1/2 cup of the chicken filling onto the center of the tortilla. Be careful not to overfill, as this can cause the pocket to burst during cooking.
- Fold the Pockets: This folding technique creates a secure square pocket. First, fold the bottom edge of the tortilla up over the filling. Next, fold in the left and right sides, similar to how you would fold a burrito. Finally, roll the pocket upwards, enclosing the filling completely and creating a neat, rectangular or square parcel. If the final flap doesn’t seem secure, you can dab a tiny bit of water or extra cream cheese to act as a “glue.” Repeat this process for all remaining tortillas and filling.
- Cook the Quesadilla Pockets (Pan-Frying Method): Melt 1 tablespoon of butter or heat olive oil in a large skillet over medium heat. Carefully place 2-3 quesadilla pockets in the pan, seam-side down. Cook for 3-4 minutes per side, until the tortilla is golden-brown, crispy, and the cheese inside is fully melted. You may need to adjust the heat to prevent the outside from burning before the inside is heated through.
- Cook the Quesadilla Pockets (Baking Method – for a larger batch): Preheat your oven to 400°F (200°C). Lightly grease a baking sheet or line it with parchment paper. Arrange the folded quesadilla pockets in a single layer on the baking sheet, seam-side down. For an extra-crispy finish, you can lightly brush the tops with melted butter or spray with cooking oil. Bake for 12-15 minutes, flipping them halfway through, until they are golden and crispy on all sides.
- Rest and Serve: Once cooked, transfer the mini quesadilla pockets to a cutting board and let them rest for a minute or two. This allows the melted cheese to set slightly, preventing the filling from spilling out when bitten into. Serve warm with your favorite dips and sides.
Nutrition
- Serving Size: one normal portion
- Calories: 300
- Fat: 12g
- Carbohydrates: 20g
- Protein: 15g


