


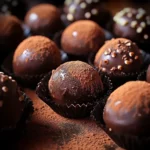
After a long week, nothing sounds more comforting than indulging in a truly decadent treat. And let me tell you, these Luxurious Dark Chocolate Truffles are the epitome of indulgence! I first made these for a small dinner party, and they were an absolute sensation. The rich, intense dark chocolate flavor, combined with the smooth, melt-in-your-mouth texture, had everyone raving. Even my notoriously picky brother, who usually shies away from dark chocolate, couldn’t stop at just one. They are surprisingly easy to make, yet they look and taste like they came straight from a high-end chocolatier. If you are looking to impress, or simply treat yourself to something truly special, look no further. These truffles are guaranteed to become your new favorite go-to dessert.
Ingredients
- High-Quality Dark Chocolate (at least 70% cacao): The star of the show! Choose a good quality dark chocolate bar or couverture chocolate for the best flavor and smooth texture. The percentage of cacao determines the intensity of the chocolate flavor.
- Heavy Cream: This adds richness and creates the signature smooth, melt-in-your-mouth texture of truffles. It emulsifies with the chocolate to form a luscious ganache.
- Unsalted Butter: Butter contributes to the silkiness and shine of the truffles and enhances the overall flavor profile. It also helps with the texture, making them easier to roll.
- Cocoa Powder (unsweetened): Used for coating the truffles, adding a slightly bitter counterpoint to the rich chocolate and creating a classic truffle look. It also prevents the truffles from being too sticky to handle.
- Vanilla Extract (optional): A touch of vanilla extract enhances the chocolate flavor and adds a subtle warmth. Use pure vanilla extract for the best taste.
- Pinch of Sea Salt (optional): A tiny pinch of sea salt can balance the sweetness and enhance the depth of the dark chocolate flavor.
Instructions
Making these Luxurious Dark Chocolate Truffles is a surprisingly straightforward process, even for beginner bakers. The key is to be patient and follow each step carefully to ensure the perfect texture and flavor. Let’s break down the process into easy-to-follow steps:
Step 1: Prepare the Chocolate
The first step is to finely chop the dark chocolate. This is crucial for ensuring that the chocolate melts evenly and smoothly when the warm cream is added. Larger chunks of chocolate will take longer to melt and may not fully incorporate into the cream, leading to a grainy texture. Use a sharp chef’s knife and carefully chop the chocolate into small, uniform pieces. Alternatively, you can use chocolate chips or couverture pistoles, but chopping from a bar often results in a smoother melt. Place the chopped chocolate in a heatproof bowl. Ensure the bowl is completely dry, as even a small amount of water can cause the chocolate to seize and become grainy. Set the bowl aside for now.
Step 2: Heat the Heavy Cream
Next, we need to heat the heavy cream. Pour the heavy cream into a small saucepan. Place the saucepan over medium heat. You want to heat the cream until it is just simmering. Watch it closely and do not let it boil. Boiling the cream can change its texture and potentially affect the final ganache. You’ll see small bubbles forming around the edges of the cream and steam rising. This is the perfect point to remove it from the heat. Overheating the cream is unnecessary and doesn’t improve the recipe. The goal is just to get it hot enough to melt the chocolate effectively.
Step 3: Make the Chocolate Ganache
Now for the magic – creating the chocolate ganache. Pour the hot heavy cream directly over the chopped chocolate in the heatproof bowl. Let it sit for about a minute. This allows the heat from the cream to begin melting the chocolate gently. Don’t stir it immediately. Giving it a minute to sit will soften the chocolate and make it easier to melt smoothly. After a minute, gently stir the mixture with a spatula or whisk, starting from the center and working your way outwards. Continue stirring until the chocolate is completely melted and the mixture is smooth and glossy. It’s important to stir gently but thoroughly to ensure all the chocolate is incorporated and there are no lumps. If you find that there are still small pieces of chocolate that haven’t melted, you can place the bowl over a double boiler or a saucepan of barely simmering water for a few seconds, stirring constantly, until the chocolate is fully melted and the ganache is silky smooth. Be careful not to overheat the ganache at this stage.
Step 4: Add Butter and Flavorings
Once the ganache is smooth and homogenous, add the unsalted butter, cut into small pieces, to the bowl. The warmth of the ganache will melt the butter. Stir gently until the butter is completely melted and incorporated into the ganache, making it even richer and shinier. If you are using vanilla extract and sea salt, add them now. A teaspoon of pure vanilla extract will enhance the chocolate flavor beautifully. A tiny pinch of sea salt, just a few flakes, will balance the sweetness and bring out the deeper notes of the dark chocolate. Stir well to ensure the vanilla extract and sea salt are evenly distributed throughout the ganache.
Step 5: Chill the Ganache
This is a crucial step for achieving the right truffle texture. Cover the bowl of ganache tightly with plastic wrap, pressing the wrap directly onto the surface of the ganache. This prevents a skin from forming on top as it chills. Place the bowl in the refrigerator and let it chill for at least 2-3 hours, or preferably overnight. Chilling the ganache allows it to firm up enough to be rolled into balls. The chilling time will depend on the temperature of your refrigerator and the consistency of your ganache. You’re looking for a firm but still pliable texture, similar to playdough. If you try to roll the truffles before the ganache is firm enough, they will be too sticky and difficult to shape.
Step 6: Shape the Truffles
Once the ganache is sufficiently chilled and firm, it’s time to shape the truffles. Line a baking sheet with parchment paper or wax paper. This will prevent the truffles from sticking to the sheet and make them easier to remove once they are rolled and coated. Scoop out small portions of the chilled ganache using a teaspoon or a small melon baller. Aim for roughly equal-sized portions for uniform truffles. Roll each portion of ganache between your palms to form a smooth ball. Don’t worry if they aren’t perfectly round at this stage; you can refine their shape after coating. If the ganache starts to become too soft and sticky while you are rolling, you can place the bowl of ganache and the baking sheet with rolled truffles back in the refrigerator for a short while to firm up again. Working in a cool environment can also help prevent the ganache from melting too quickly in your hands.
Step 7: Coat the Truffles
Now for the final touch – coating the truffles. Place the unsweetened cocoa powder in a shallow dish or bowl. Roll each truffle ball in the cocoa powder, ensuring it is completely coated. Gently shake off any excess cocoa powder. The cocoa powder not only adds a beautiful visual finish and a slight bitterness that complements the dark chocolate, but it also makes the truffles less sticky to handle and eat. If you prefer a different coating, you could use finely chopped nuts, powdered sugar, or even melted chocolate. However, cocoa powder is the classic and most traditional coating for dark chocolate truffles.
Step 8: Chill Again (Optional but Recommended)
For the best texture and to allow the cocoa powder coating to set, it is recommended to chill the finished truffles in the refrigerator for another 15-20 minutes before serving. This final chilling step will firm them up slightly and make them even more enjoyable to eat. Chilling also helps prevent the cocoa powder from smudging too easily.
Step 9: Enjoy!
Your Luxurious Dark Chocolate Truffles are now ready to be enjoyed! These truffles are best served at slightly cooler than room temperature, as they will melt in your mouth beautifully. Store any leftover truffles in an airtight container in the refrigerator to maintain their freshness and texture. They can be stored for up to a week in the refrigerator, although they are unlikely to last that long once you and your loved ones taste them! These truffles are perfect for special occasions, as gifts, or simply as a decadent treat to satisfy your chocolate cravings.
Nutrition Facts
Servings: Approximately 24 truffles
Calories per serving (1 truffle): Approximately 150-180 calories (This is an estimate and can vary based on the specific dark chocolate and cream used, as well as truffle size)
Approximate Nutrition Facts per Truffle (estimated):
- Fat: 12-15g
- Saturated Fat: 8-10g
- Cholesterol: 30-40mg
Note: These are approximate values and can vary. For precise nutritional information, use a nutrition calculator with the specific brands and quantities of ingredients used. Dark chocolate truffles are a rich and decadent treat and should be enjoyed in moderation as part of a balanced diet.
Preparation Time
- Prep Time: 20-25 minutes (chopping chocolate, heating cream, making ganache)
- Chill Time: Minimum 2-3 hours (or overnight)
- Rolling & Coating Time: 30-40 minutes
- Total Time: Approximately 3-4 hours (excluding overnight chilling)
How to Serve
These Luxurious Dark Chocolate Truffles are incredibly versatile and can be served in a variety of elegant and delightful ways. Here are some ideas to elevate your truffle presentation and enjoyment:
- Classic Dessert Platter: Arrange the truffles on a beautiful dessert platter. You can alternate them with other small desserts like macarons, mini fruit tarts, or chocolate-dipped strawberries for a visually stunning and varied dessert spread.
- Individual Truffle Boxes: Package a few truffles in small, elegant truffle boxes or cellophane bags tied with ribbon. This makes them perfect for gifts or party favors. You can find these boxes at craft stores or online.
- Coffee or Tea Accompaniment: Serve a truffle alongside a cup of freshly brewed coffee, espresso, or a fragrant herbal tea. The rich chocolate flavor pairs wonderfully with the warmth and slight bitterness of coffee and tea.
- After-Dinner Indulgence: Present truffles as a sophisticated after-dinner treat. A small plate with 2-3 truffles per person is a perfect way to end a meal on a sweet and luxurious note.
- Dessert Buffet Highlight: Incorporate truffles into a dessert buffet. Place them on a tiered stand or in a decorative bowl to make them a focal point of the buffet.
- Garnish with a Dusting: Before serving, you can lightly dust the truffles with a bit more cocoa powder or a touch of powdered sugar for an extra elegant finish. You can also use a stencil to create a decorative pattern with the cocoa powder.
- Pair with Wine: For a truly sophisticated experience, pair dark chocolate truffles with a dessert wine like Port, Sherry, or a late-harvest Zinfandel. The rich flavors of the wine complement the intensity of the dark chocolate beautifully.
- Simple and Elegant: Sometimes, the simplest presentation is the best. Just place a few truffles on a small, pretty plate for each guest. Their rich, dark appearance is inherently elegant.
Additional Tips for Perfect Truffles
Making perfect dark chocolate truffles is achievable with a few key techniques and considerations. Here are some additional tips to help you create truly luxurious and flawless truffles every time:
- Use High-Quality Chocolate: The quality of your chocolate directly impacts the taste of your truffles. Invest in good quality dark chocolate, preferably couverture chocolate or a high-end chocolate bar with a cacao percentage of at least 70%. The better the chocolate, the richer and more flavorful your truffles will be. Avoid using chocolate chips for the ganache as they often contain stabilizers that can affect the smoothness and meltability.
- Don’t Overheat the Cream: When heating the heavy cream, be careful not to let it boil. Boiling can alter the texture and potentially scald the cream, affecting the final ganache. Heat it just until it is simmering, with small bubbles forming around the edges. This is sufficient to melt the chocolate effectively.
- Properly Chill the Ganache: Patience is key when chilling the ganache. Allow it to chill for at least 2-3 hours, or preferably overnight, in the refrigerator. This is essential for the ganache to firm up enough to be rolled into balls. If the ganache is not chilled sufficiently, it will be too soft and sticky to handle. If you are short on time, you can try chilling it in the freezer for a shorter period, but be careful not to freeze it solid.
- Work Quickly When Rolling: Once the ganache is chilled, work relatively quickly when rolling the truffles. The warmth of your hands will start to soften the ganache. If it becomes too soft and sticky while rolling, simply place the ganache and the baking sheet with rolled truffles back in the refrigerator for a few minutes to firm up again. Working in a cool kitchen can also help.
- Experiment with Coatings: While cocoa powder is the classic coating, feel free to experiment with other coatings to customize your truffles. Consider rolling them in finely chopped nuts (like almonds, hazelnuts, or pistachios), shredded coconut, powdered sugar, sprinkles, or even dipping them in melted and tempered chocolate for an extra glossy finish. You can also use different types of cocoa powder, such as Dutch-processed cocoa, for a slightly different flavor profile.
- Infuse the Cream for Flavor Variations: For a unique twist, you can infuse the heavy cream with different flavors before making the ganache. Try steeping spices like cinnamon, cardamom, or star anise in the hot cream for a spiced truffle. You could also infuse it with citrus zest (orange, lemon, or lime), coffee beans, or even herbs like mint or rosemary. Simply heat the cream with your chosen flavorings, let it steep for about 30 minutes, strain the cream to remove the solids, and then proceed with the recipe as usual. This adds a layer of complexity and allows for endless flavor combinations.
FAQ Section
Q1: Can I use milk chocolate or white chocolate instead of dark chocolate?
A: While this recipe is specifically for dark chocolate truffles, you can certainly adapt it for milk or white chocolate. However, be aware that milk and white chocolate are sweeter and softer than dark chocolate. You may need to adjust the amount of heavy cream used. Start by using slightly less cream and check the consistency of the ganache after it has chilled. You might also want to consider adding a pinch of salt even if using milk or white chocolate to balance the sweetness. The flavor profile will be significantly different, resulting in sweeter, less intense truffles.
Q2: How long do homemade dark chocolate truffles last?
A: Homemade dark chocolate truffles, when stored properly in an airtight container in the refrigerator, will typically last for up to a week. Due to the fresh cream and butter content, it’s best to consume them within this timeframe for optimal freshness and flavor. Freezing is also an option for longer storage (see Q3). Always store them in the refrigerator to prevent them from becoming too soft and to maintain food safety.
Q3: Can I freeze dark chocolate truffles?
A: Yes, you can freeze dark chocolate truffles. For best results, freeze them before coating them in cocoa powder. Place the rolled, uncoated truffles on a baking sheet lined with parchment paper and freeze until solid. Once frozen solid, transfer them to an airtight container or freezer bag. They can be frozen for up to 2-3 months. When ready to serve, thaw them in the refrigerator overnight. Once thawed, roll them in cocoa powder or your desired coating. Freezing might slightly alter the texture, making them slightly less smooth, but they will still be delicious.
Q4: My ganache is too soft and not firming up in the fridge. What did I do wrong?
A: There are a few reasons why your ganache might be too soft. The most common reason is using too much heavy cream relative to the chocolate. Ensure you are using the correct ratio of chocolate to cream as specified in the recipe. Another possibility is that your refrigerator is not cold enough, or it may take longer than expected for the ganache to firm up depending on your fridge temperature and the humidity. If your ganache is still too soft after several hours of chilling, you can try adding a bit more melted and cooled dark chocolate to the ganache and chilling it again. In the future, ensure you are using the correct measurements and chilling for a sufficient amount of time.
Q5: Can I make these truffles without butter?
A: While butter contributes to the rich flavor, smooth texture, and shine of the truffles, you can technically make them without butter. However, the texture will be slightly different – they might be a bit less silky and melt-in-your-mouth. If you omit the butter, the truffles will still be delicious, but they will have a slightly firmer and less luxurious texture. For the best truffle experience, butter is highly recommended.
Q6: What are some alternative coatings to cocoa powder?
A: There are many delicious alternative coatings for dark chocolate truffles beyond cocoa powder. Some popular options include:
- Finely chopped nuts: Almonds, hazelnuts, pistachios, pecans, walnuts, etc. Toast the nuts lightly for enhanced flavor.
- Powdered sugar: Provides a sweet and snowy white coating.
- Shredded coconut: Toasted or untoasted, adds a tropical flavor and texture.
- Sprinkles: For a fun and festive look, especially for holidays or celebrations.
- Melted and tempered chocolate: For a glossy, professional-looking chocolate coating. You can use dark, milk, or white chocolate.
- Crushed freeze-dried fruit: Raspberry, strawberry, or other berries add color and a tangy flavor.
- Espresso powder: For a coffee-flavored truffle.
- Sea salt flakes: For a salty-sweet contrast.
Luxurious Dark Chocolate Truffles
Ingredients
- High-Quality Dark Chocolate (at least 70% cacao): The star of the show! Choose a good quality dark chocolate bar or couverture chocolate for the best flavor and smooth texture. The percentage of cacao determines the intensity of the chocolate flavor.
- Heavy Cream: This adds richness and creates the signature smooth, melt-in-your-mouth texture of truffles. It emulsifies with the chocolate to form a luscious ganache.
- Unsalted Butter: Butter contributes to the silkiness and shine of the truffles and enhances the overall flavor profile. It also helps with the texture, making them easier to roll.
- Cocoa Powder (unsweetened): Used for coating the truffles, adding a slightly bitter counterpoint to the rich chocolate and creating a classic truffle look. It also prevents the truffles from being too sticky to handle.
- Vanilla Extract (optional): A touch of vanilla extract enhances the chocolate flavor and adds a subtle warmth. Use pure vanilla extract for the best taste.
- Pinch of Sea Salt (optional): A tiny pinch of sea salt can balance the sweetness and enhance the depth of the dark chocolate flavor.
Instructions
Making these Luxurious Dark Chocolate Truffles is a surprisingly straightforward process, even for beginner bakers. The key is to be patient and follow each step carefully to ensure the perfect texture and flavor. Let’s break down the process into easy-to-follow steps:
Step 1: Prepare the Chocolate
The first step is to finely chop the dark chocolate. This is crucial for ensuring that the chocolate melts evenly and smoothly when the warm cream is added. Larger chunks of chocolate will take longer to melt and may not fully incorporate into the cream, leading to a grainy texture. Use a sharp chef’s knife and carefully chop the chocolate into small, uniform pieces. Alternatively, you can use chocolate chips or couverture pistoles, but chopping from a bar often results in a smoother melt. Place the chopped chocolate in a heatproof bowl. Ensure the bowl is completely dry, as even a small amount of water can cause the chocolate to seize and become grainy. Set the bowl aside for now.
Step 2: Heat the Heavy Cream
Next, we need to heat the heavy cream. Pour the heavy cream into a small saucepan. Place the saucepan over medium heat. You want to heat the cream until it is just simmering. Watch it closely and do not let it boil. Boiling the cream can change its texture and potentially affect the final ganache. You’ll see small bubbles forming around the edges of the cream and steam rising. This is the perfect point to remove it from the heat. Overheating the cream is unnecessary and doesn’t improve the recipe. The goal is just to get it hot enough to melt the chocolate effectively.
Step 3: Make the Chocolate Ganache
Now for the magic – creating the chocolate ganache. Pour the hot heavy cream directly over the chopped chocolate in the heatproof bowl. Let it sit for about a minute. This allows the heat from the cream to begin melting the chocolate gently. Don’t stir it immediately. Giving it a minute to sit will soften the chocolate and make it easier to melt smoothly. After a minute, gently stir the mixture with a spatula or whisk, starting from the center and working your way outwards. Continue stirring until the chocolate is completely melted and the mixture is smooth and glossy. It’s important to stir gently but thoroughly to ensure all the chocolate is incorporated and there are no lumps. If you find that there are still small pieces of chocolate that haven’t melted, you can place the bowl over a double boiler or a saucepan of barely simmering water for a few seconds, stirring constantly, until the chocolate is fully melted and the ganache is silky smooth. Be careful not to overheat the ganache at this stage.
Step 4: Add Butter and Flavorings
Once the ganache is smooth and homogenous, add the unsalted butter, cut into small pieces, to the bowl. The warmth of the ganache will melt the butter. Stir gently until the butter is completely melted and incorporated into the ganache, making it even richer and shinier. If you are using vanilla extract and sea salt, add them now. A teaspoon of pure vanilla extract will enhance the chocolate flavor beautifully. A tiny pinch of sea salt, just a few flakes, will balance the sweetness and bring out the deeper notes of the dark chocolate. Stir well to ensure the vanilla extract and sea salt are evenly distributed throughout the ganache.
Step 5: Chill the Ganache
This is a crucial step for achieving the right truffle texture. Cover the bowl of ganache tightly with plastic wrap, pressing the wrap directly onto the surface of the ganache. This prevents a skin from forming on top as it chills. Place the bowl in the refrigerator and let it chill for at least 2-3 hours, or preferably overnight. Chilling the ganache allows it to firm up enough to be rolled into balls. The chilling time will depend on the temperature of your refrigerator and the consistency of your ganache. You’re looking for a firm but still pliable texture, similar to playdough. If you try to roll the truffles before the ganache is firm enough, they will be too sticky and difficult to shape.
Step 6: Shape the Truffles
Once the ganache is sufficiently chilled and firm, it’s time to shape the truffles. Line a baking sheet with parchment paper or wax paper. This will prevent the truffles from sticking to the sheet and make them easier to remove once they are rolled and coated. Scoop out small portions of the chilled ganache using a teaspoon or a small melon baller. Aim for roughly equal-sized portions for uniform truffles. Roll each portion of ganache between your palms to form a smooth ball. Don’t worry if they aren’t perfectly round at this stage; you can refine their shape after coating. If the ganache starts to become too soft and sticky while you are rolling, you can place the bowl of ganache and the baking sheet with rolled truffles back in the refrigerator for a short while to firm up again. Working in a cool environment can also help prevent the ganache from melting too quickly in your hands.
Step 7: Coat the Truffles
Now for the final touch – coating the truffles. Place the unsweetened cocoa powder in a shallow dish or bowl. Roll each truffle ball in the cocoa powder, ensuring it is completely coated. Gently shake off any excess cocoa powder. The cocoa powder not only adds a beautiful visual finish and a slight bitterness that complements the dark chocolate, but it also makes the truffles less sticky to handle and eat. If you prefer a different coating, you could use finely chopped nuts, powdered sugar, or even melted chocolate. However, cocoa powder is the classic and most traditional coating for dark chocolate truffles.
Step 8: Chill Again (Optional but Recommended)
For the best texture and to allow the cocoa powder coating to set, it is recommended to chill the finished truffles in the refrigerator for another 15-20 minutes before serving. This final chilling step will firm them up slightly and make them even more enjoyable to eat. Chilling also helps prevent the cocoa powder from smudging too easily.
Step 9: Enjoy!
Your Luxurious Dark Chocolate Truffles are now ready to be enjoyed! These truffles are best served at slightly cooler than room temperature, as they will melt in your mouth beautifully. Store any leftover truffles in an airtight container in the refrigerator to maintain their freshness and texture. They can be stored for up to a week in the refrigerator, although they are unlikely to last that long once you and your loved ones taste them! These truffles are perfect for special occasions, as gifts, or simply as a decadent treat to satisfy your chocolate cravings.
Nutrition
- Serving Size: one normal portion
- Calories: 180
- Fat: 15g
- Saturated Fat: 10g
- Cholesterol: 40mg


