

Of all the recipes I’ve developed over the years, some just have that special spark. They’re the ones my family requests for every potluck, the ones my friends text me for after a party, and the ones that disappear from the platter within minutes. These Lemon Garlic Chickpea Dip Cups fall firmly into that magical category. I first whipped them up on a whim for a summer barbecue, needing a quick, no-fuss appetizer that was both refreshing and satisfying. I watched as person after person took a bite, their eyes widening in surprise and delight. The combination of the crispy, golden phyllo shell, the impossibly creamy and zesty chickpea dip, and the fresh, vibrant toppings was an absolute home run. My kids, who can be notoriously picky about anything “healthy,” were popping them like candy. It’s that perfect, elegant bite: sophisticated enough for a dinner party but simple enough for a casual family snack. This recipe is more than just an appetizer; it’s a guaranteed crowd-pleaser, a conversation starter, and your new secret weapon for effortless entertaining. The bright, sunny flavor of lemon paired with the mellow, savory punch of garlic creates a dip that is truly unforgettable, and serving it in these adorable, crunchy cups elevates it from a simple dip to a culinary masterpiece.
Ingredients
Here is everything you will need to create these delightful and flavorful appetizer cups. Each ingredient is chosen to contribute a specific layer of flavor and texture, resulting in a perfectly balanced bite.
- Canned Chickpeas (Garbanzo Beans): 1 can (15 ounces), rinsed and drained. This is the hearty, protein-packed foundation of our dip. Rinsing them removes excess sodium and the “canned” taste.
- Fresh Lemon Juice: ¼ cup (from about 1-2 large lemons). The star of the show! Freshly squeezed juice provides a bright, zesty acidity that is far superior to bottled varieties.
- Aquafaba (or Ice Water): 3 tablespoons. This is the liquid from the can of chickpeas. It’s a magical ingredient that helps to create an incredibly light and creamy texture. Ice water is a great alternative.
- Extra Virgin Olive Oil: 3 tablespoons. Use a good quality olive oil for a rich, fruity flavor that complements the other ingredients beautifully.
- Fresh Garlic Cloves: 2-3 cloves, peeled and roughly chopped. This provides the savory, pungent kick. Adjust the amount based on your love for garlic!
- Ground Cumin: 1 teaspoon. Adds a warm, earthy, and slightly smoky depth of flavor that is essential in many chickpea-based dishes.
- Salt: ¾ teaspoon (or to taste). Crucial for enhancing all the other flavors in the dip.
- Black Pepper: ¼ teaspoon, freshly ground (or to taste). Adds a subtle touch of spice and complexity.
- Pre-baked Mini Phyllo Shells: 2 packages (15 shells per package, 30 total). These are your edible cups! They are wonderfully light, crispy, and a huge time-saver. You can typically find them in the freezer aisle near the puff pastry.
- For Garnish (Optional but Recommended):
- Fresh Dill or Parsley: Chopped, for a fresh, herbaceous note.
- Smoked Paprika or Sumac: A light dusting for color and a smoky or tangy flavor.
- Toasted Pine Nuts or Sesame Seeds: For a nutty flavor and an extra layer of crunch.
- A Drizzle of Olive Oil: For a final touch of richness and shine.
Instructions
Follow these simple, step-by-step instructions to create the perfect Lemon Garlic Chickpea Dip and assemble your stunning appetizer cups. The process is broken down into two main parts for clarity.
Part 1: Crafting the Creamy Lemon Garlic Chickpea Dip
- Prepare the Garlic: Begin by adding the peeled and roughly chopped garlic cloves to the bowl of a food processor. Secure the lid and pulse several times until the garlic is finely minced. This initial step ensures you don’t end up with large, overpowering chunks of raw garlic in your finished dip.
- Add the Core Ingredients: To the food processor with the minced garlic, add the rinsed and drained chickpeas, the fresh lemon juice, the ground cumin, salt, and black pepper.
- Begin Blending: Place the lid back on the food processor and turn it on. Let it run for about 1 minute. The mixture will be thick and coarse at this stage. Stop the processor and use a spatula to scrape down the sides of the bowl, pushing everything back towards the blades.
- Achieve Creaminess: With the food processor running on low speed, slowly stream in the extra virgin olive oil and the aquafaba (or ice water) through the feed tube. This gradual addition is the key to emulsifying the dip, making it incredibly smooth and creamy.
- The Final Blend: Once all the liquid has been added, increase the speed of the food processor to high. Let it blend continuously for another 2-3 minutes. This may seem like a long time, but this is the secret to a whipped, airy, and velvety texture. The dip should be pale, light, and perfectly smooth.
- Taste and Adjust: Stop the processor and give the dip a final taste. This is your chance to perfect it. Does it need more salt? A little more lemon juice for brightness? An extra pinch of cumin for warmth? Adjust the seasonings as needed and give it one last quick pulse to combine.
Part 2: Assembling the Dip Cups
- Prepare Your Workstation: Arrange the pre-baked mini phyllo shells on a large platter or baking sheet. This makes the filling process clean and efficient.
- Fill the Cups: You have two options for filling the phyllo shells.
- The Simple Spoon Method: Use a small spoon to carefully scoop the lemon garlic chickpea dip into each phyllo shell, filling it to the brim.
- The Elegant Piping Method: For a more professional and clean look, transfer the chickpea dip to a piping bag fitted with a star tip (or simply snip the end off the bag). Pipe a beautiful swirl of dip into each cup.
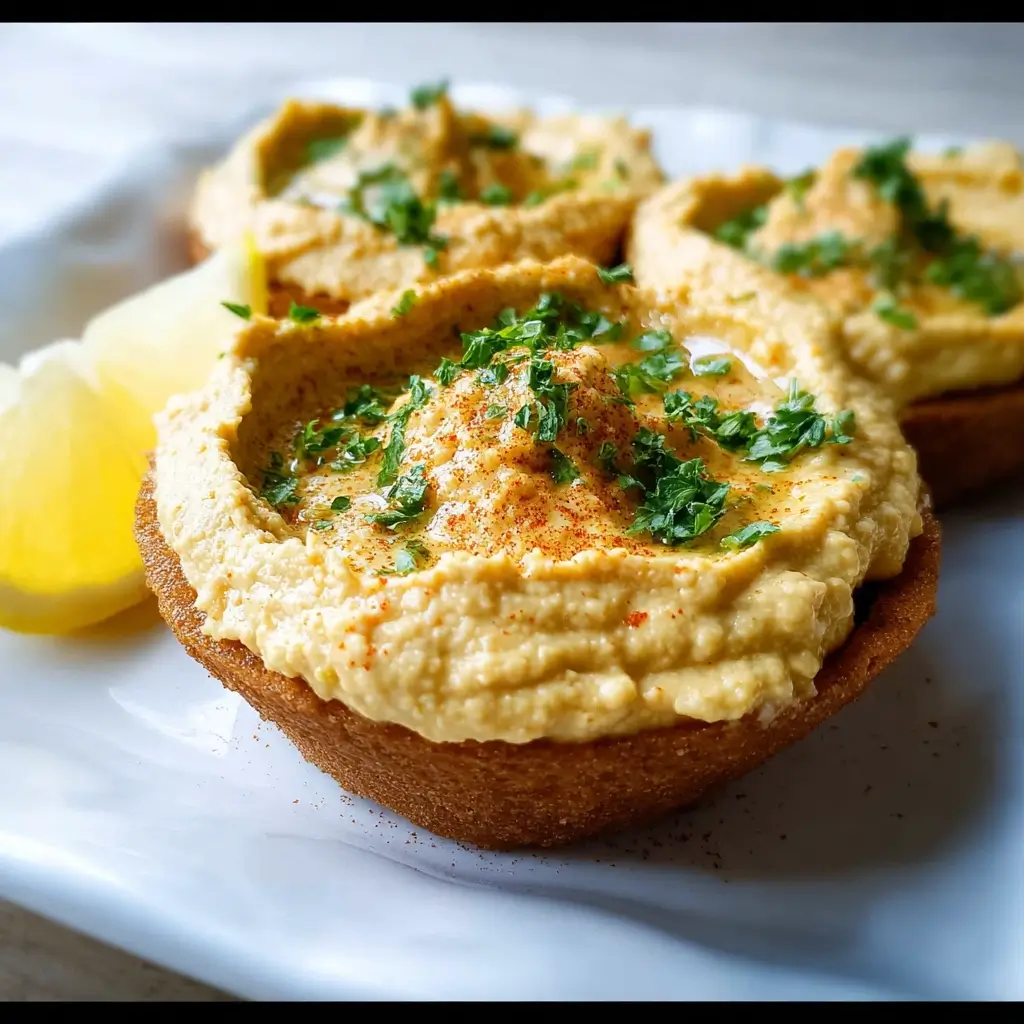
- Garnish and Beautify: This is where you bring the cups to life! Immediately after filling, sprinkle your chosen garnishes over the top. A light dusting of smoked paprika, a sprinkle of chopped fresh dill, and a few toasted pine nuts create a stunning visual and textural contrast.
- Final Flourish: For an extra touch of elegance, finish with a very light drizzle of high-quality extra virgin olive oil over the assembled cups just before serving.
Nutrition Facts
This recipe is designed to be as wholesome as it is delicious, offering a balanced and satisfying nutritional profile.
- Servings: This recipe yields approximately 30 individual dip cups.
- Calories Per Serving: Approximately 45-55 calories per cup.
Key Nutritional Highlights:
- Plant-Based Protein: Each cup provides a good dose of protein from the chickpeas, which helps in keeping you feeling full and satisfied, making it a smarter choice than many empty-calorie appetizers.
- Dietary Fiber: Chickpeas are an excellent source of fiber, which is crucial for digestive health, stabilizing blood sugar levels, and promoting a feeling of satiety.
- Healthy Fats: The use of extra virgin olive oil provides monounsaturated fats, which are known to be heart-healthy and can help reduce bad cholesterol levels.
- Rich in Micronutrients: This dip is a source of essential minerals like iron and manganese from the chickpeas and cumin, contributing to overall energy and wellness.
- Vitamin C Boost: Thanks to the generous amount of fresh lemon juice, these cups offer a significant boost of Vitamin C, a powerful antioxidant that supports the immune system.
Preparation Time
This appetizer is celebrated for its speed and simplicity, making it perfect for last-minute entertaining.
- Preparation Time: 15 minutes. This includes rinsing the chickpeas, juicing the lemon, and measuring out the spices.
- Cook Time: 0 minutes (if using pre-baked phyllo shells).
- Assembly Time: 5-10 minutes.
- Total Time: Approximately 20-25 minutes from start to finish. It’s a truly high-impact, low-effort recipe that delivers impressive results in under 30 minutes.
How to Serve
The beauty of these Lemon Garlic Chickpea Dip Cups lies in their versatility. They can be dressed up or down for any occasion. Here are some inspiring ways to serve them:
- As the Star Party Appetizer:
- Arrange the finished cups artfully on a large white platter or a rustic wooden board to make the colors pop.
- Serve them alongside other finger foods like olives, cherry tomatoes, and cheese cubes to create a beautiful and varied appetizer spread.
- They are the perfect pre-dinner bite to serve with a glass of crisp white wine or a sparkling beverage.
- For a Light Lunch or Healthy Snack:
- Enjoy 4-5 cups alongside a simple green salad dressed with a lemon vinaigrette for a complete and satisfying light meal.
- Pack them in a container (un-garnished, with garnishes on the side) for a delightful and healthy work lunch that will be the envy of your colleagues.
- Garnish Extravaganza – Mix and Match Ideas:
- Herbaceous: Freshly chopped dill, parsley, chives, or mint.
- Spicy: A sprinkle of red pepper flakes or a dusting of cayenne pepper.
- Savory: A tiny crumble of feta cheese or a finely chopped Kalamata olive on top of each cup.
- Crunchy: Toasted pine nuts, sesame seeds, sunflower seeds, or even crispy fried onions.
- Tangy: A sprinkle of sumac for a lemony-tart flavor that beautifully complements the dip.
- Perfect Drink Pairings:
- Wine: A crisp, dry white wine like a Sauvignon Blanc, Pinot Grigio, or an unoaked Chardonnay cuts through the richness of the dip perfectly. A dry Rosé is also an excellent choice.
- Non-Alcoholic: Serve with sparkling water infused with lemon and mint, a freshly brewed iced tea, or a light and bubbly kombucha.
Additional Tips
Take your Lemon Garlic Chickpea Dip Cups from great to absolutely sensational with these eight expert tips.
1. The Secret to Ultra-Creamy Dip: Don’t discard all the liquid from your can of chickpeas! That liquid, known as aquafaba, is the key to a light, whipped texture. If you accidentally discard it, a few tablespoons of ice-cold water will also work wonders to create a smooth, emulsified dip.
2. Phyllo Cup Perfection: While the recipe calls for pre-baked shells for convenience, you can re-crisp them in an oven or air fryer at 350°F (175°C) for 2-3 minutes before filling. This ensures they are maximally crunchy and warm, creating a delightful contrast with the cool, creamy dip.
3. Master the Make-Ahead Strategy: This is the ultimate make-ahead appetizer. You can prepare the chickpea dip up to 3 days in advance and store it in an airtight container in the refrigerator. For the best results, fill the phyllo cups just before serving to prevent them from becoming soggy.
4. Customize the Flavor Profile: This recipe is a fantastic canvas for your creativity. Love a smoky flavor? Add ½ teaspoon of smoked paprika directly into the dip. Want more herbaceous notes? Blend in a handful of fresh parsley or cilantro. Feel free to experiment with different spices like coriander or a pinch of turmeric.
5. Getting the Garlic Just Right: If you find raw garlic too sharp or pungent, try using roasted garlic instead. Roasting mellows the flavor, making it sweet, nutty, and deeply savory. Simply roast a whole head of garlic and squeeze out 2-3 cloves into the food processor.
6. Don’t Have Phyllo Cups? No Problem! This delicious dip is incredibly versatile. Serve it in a bowl surrounded by pita bread, tortilla chips, or a colorful array of fresh vegetables like cucumber slices, bell pepper strips, and carrot sticks. You can even use hollowed-out mini bell peppers or cucumber cups as edible, gluten-free vessels.
7. Presentation is Everything: To make your dip cups look like they came from a high-end caterer, use a piping bag with a decorative tip (like a large star tip). It takes only an extra minute but creates a beautiful, professional-looking swirl of dip in each cup that is sure to impress your guests.
8. Let the Dip Rest: After blending, let the dip sit in the refrigerator for at least 30 minutes if you have the time. This allows the flavors to meld and deepen, resulting in a more cohesive and delicious final product. The garlic will mellow slightly, and the lemon will become more pronounced.
Frequently Asked Questions (FAQ)
Here are answers to some common questions you might have about making these delightful Lemon Garlic Chickpea Dip Cups.
1. Can I make this dip without a food processor?
Absolutely! While a food processor gives the smoothest results, you can use a high-powered blender. You may need to stop and scrape down the sides more frequently. An immersion (stick) blender will also work well in a deep cup. If you have neither, you can mash the chickpeas thoroughly with a potato masher or fork and then vigorously whisk in the remaining ingredients. The texture will be more rustic, but still delicious.
2. Are these Lemon Garlic Chickpea Dip Cups gluten-free?
The chickpea dip itself is naturally gluten-free. However, the traditional mini phyllo shells are made with wheat flour and are not gluten-free. To make this recipe completely gluten-free, serve the dip with gluten-free crackers, in hollowed-out cucumber cups, on endive leaves, or with an assortment of fresh vegetable sticks.
3. How long can I store the assembled dip cups?
Once assembled, the dip cups are best enjoyed within 1-2 hours. After that, the moisture from the dip will start to soften the crispy phyllo shell. If you need to prepare them slightly ahead of a party, assemble them no more than an hour beforehand and keep them uncovered in the refrigerator.
4. Can I freeze the lemon garlic chickpea dip?
Yes, the dip freezes surprisingly well! Place the dip in a freezer-safe, airtight container. It can be frozen for up to 3 months. To use, let it thaw overnight in the refrigerator. After thawing, you’ll need to give it a vigorous stir (or a quick pulse in the food processor) to bring back its creamy texture, and you may want to add a fresh squeeze of lemon juice to brighten it up. Do not freeze the assembled cups.
5. My dip is too thick/thin. How can I fix it?
This is an easy fix! If your dip is too thick, simply blend in more aquafaba or cold water, one tablespoon at a time, until you reach your desired consistency. If your dip is too thin, you can thicken it by adding a few more chickpeas or even a tablespoon of tahini (sesame paste), which will also add a nutty flavor.
6. What is the difference between this dip and traditional hummus?
This is a great question! While they share a base of chickpeas, garlic, and lemon, the key difference is that traditional hummus almost always contains tahini (sesame paste). This recipe omits tahini, which allows the bright, zesty flavors of the lemon and fresh garlic to be the prominent stars. The result is a lighter, fresher-tasting dip, which is why we call it a “chickpea dip” rather than hummus.
7. Can I use other types of beans for this recipe?
Yes, you can definitely experiment with other beans. Canned cannellini beans or Great Northern beans are excellent substitutes. They have a similarly creamy texture and a mild flavor that will work beautifully with the lemon and garlic. The color of the dip may be slightly paler.
8. Are these dip cups healthy for kids?
They are a fantastic and healthy option for kids! They are packed with protein and fiber, and the bite-sized format makes them fun to eat. For younger children or those sensitive to strong flavors, you might consider reducing the amount of raw garlic slightly. They are a wonderful way to introduce kids to new, healthy flavors in an approachable and delicious package.

Lemon Garlic Chickpea Dip Cups
Ingredients
Here is everything you will need to create these delightful and flavorful appetizer cups. Each ingredient is chosen to contribute a specific layer of flavor and texture, resulting in a perfectly balanced bite.
- Canned Chickpeas (Garbanzo Beans): 1 can (15 ounces), rinsed and drained. This is the hearty, protein-packed foundation of our dip. Rinsing them removes excess sodium and the “canned” taste.
- Fresh Lemon Juice: ¼ cup (from about 1-2 large lemons). The star of the show! Freshly squeezed juice provides a bright, zesty acidity that is far superior to bottled varieties.
- Aquafaba (or Ice Water): 3 tablespoons. This is the liquid from the can of chickpeas. It’s a magical ingredient that helps to create an incredibly light and creamy texture. Ice water is a great alternative.
- Extra Virgin Olive Oil: 3 tablespoons. Use a good quality olive oil for a rich, fruity flavor that complements the other ingredients beautifully.
- Fresh Garlic Cloves: 2-3 cloves, peeled and roughly chopped. This provides the savory, pungent kick. Adjust the amount based on your love for garlic!
- Ground Cumin: 1 teaspoon. Adds a warm, earthy, and slightly smoky depth of flavor that is essential in many chickpea-based dishes.
- Salt: ¾ teaspoon (or to taste). Crucial for enhancing all the other flavors in the dip.
- Black Pepper: ¼ teaspoon, freshly ground (or to taste). Adds a subtle touch of spice and complexity.
- Pre-baked Mini Phyllo Shells: 2 packages (15 shells per package, 30 total). These are your edible cups! They are wonderfully light, crispy, and a huge time-saver. You can typically find them in the freezer aisle near the puff pastry.
- For Garnish (Optional but Recommended):
- Fresh Dill or Parsley: Chopped, for a fresh, herbaceous note.
- Smoked Paprika or Sumac: A light dusting for color and a smoky or tangy flavor.
- Toasted Pine Nuts or Sesame Seeds: For a nutty flavor and an extra layer of crunch.
- A Drizzle of Olive Oil: For a final touch of richness and shine.
Instructions
Follow these simple, step-by-step instructions to create the perfect Lemon Garlic Chickpea Dip and assemble your stunning appetizer cups. The process is broken down into two main parts for clarity.
Part 1: Crafting the Creamy Lemon Garlic Chickpea Dip
- Prepare the Garlic: Begin by adding the peeled and roughly chopped garlic cloves to the bowl of a food processor. Secure the lid and pulse several times until the garlic is finely minced. This initial step ensures you don’t end up with large, overpowering chunks of raw garlic in your finished dip.
- Add the Core Ingredients: To the food processor with the minced garlic, add the rinsed and drained chickpeas, the fresh lemon juice, the ground cumin, salt, and black pepper.
- Begin Blending: Place the lid back on the food processor and turn it on. Let it run for about 1 minute. The mixture will be thick and coarse at this stage. Stop the processor and use a spatula to scrape down the sides of the bowl, pushing everything back towards the blades.
- Achieve Creaminess: With the food processor running on low speed, slowly stream in the extra virgin olive oil and the aquafaba (or ice water) through the feed tube. This gradual addition is the key to emulsifying the dip, making it incredibly smooth and creamy.
- The Final Blend: Once all the liquid has been added, increase the speed of the food processor to high. Let it blend continuously for another 2-3 minutes. This may seem like a long time, but this is the secret to a whipped, airy, and velvety texture. The dip should be pale, light, and perfectly smooth.
- Taste and Adjust: Stop the processor and give the dip a final taste. This is your chance to perfect it. Does it need more salt? A little more lemon juice for brightness? An extra pinch of cumin for warmth? Adjust the seasonings as needed and give it one last quick pulse to combine.
Part 2: Assembling the Dip Cups
- Prepare Your Workstation: Arrange the pre-baked mini phyllo shells on a large platter or baking sheet. This makes the filling process clean and efficient.
- Fill the Cups: You have two options for filling the phyllo shells.
- The Simple Spoon Method: Use a small spoon to carefully scoop the lemon garlic chickpea dip into each phyllo shell, filling it to the brim.
- The Elegant Piping Method: For a more professional and clean look, transfer the chickpea dip to a piping bag fitted with a star tip (or simply snip the end off the bag). Pipe a beautiful swirl of dip into each cup.
- Garnish and Beautify: This is where you bring the cups to life! Immediately after filling, sprinkle your chosen garnishes over the top. A light dusting of smoked paprika, a sprinkle of chopped fresh dill, and a few toasted pine nuts create a stunning visual and textural contrast.
- Final Flourish: For an extra touch of elegance, finish with a very light drizzle of high-quality extra virgin olive oil over the assembled cups just before serving.
Nutrition
- Serving Size: one normal portion
- Calories: 55


