
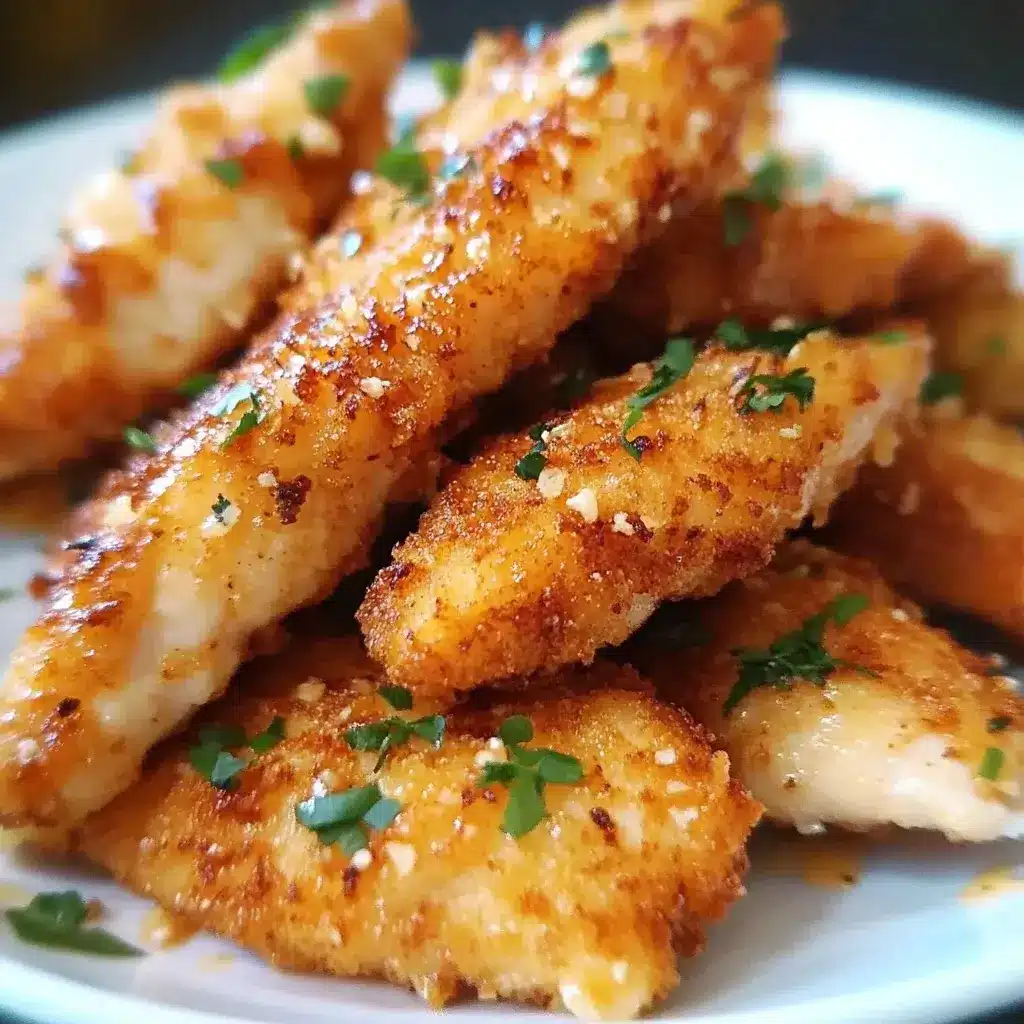

Let me tell you, these Garlic Butter Chicken Tenders have become an absolute sensation in my household. From the moment the aroma of garlic and butter begins to waft through the kitchen, everyone starts to gather, anticipating the delicious meal to come. I first whipped these up on a busy weeknight, looking for something quick, easy, but still packed with flavor, and boy, did they deliver! Even my pickiest eater, who usually turns their nose up at anything new, devoured their portion and asked for seconds. The chicken comes out incredibly tender and juicy, coated in a luscious, savory garlic butter sauce that is simply irresistible. It’s the kind of recipe that feels a little bit fancy, like something you’d order at a restaurant, but is secretly so simple to make at home. We’ve since made it for casual family dinners, quick lunches, and even when we’ve had friends over, and it’s a guaranteed crowd-pleaser every single time. The golden-brown crust on the chicken, combined with that rich, garlicky butter, is a match made in heaven. Honestly, if you’re looking for a new go-to chicken recipe that will have everyone raving, this is it. It’s simple, uses pantry staples, and the end result is pure comfort food bliss.
Ingredients
- 1.5 lbs Boneless, Skinless Chicken Tenders: These are the star of the show, chosen for their quick cooking time and inherent tenderness. You can also use chicken breasts cut into strips.
- 1/2 cup All-Purpose Flour: Used for dredging the chicken, creating a light coating that helps the butter sauce adhere and gives a lovely golden-brown crust.
- 1 teaspoon Salt: Essential for seasoning the chicken and enhancing all the other flavors.
- 1/2 teaspoon Black Pepper: Adds a mild, pungent kick to complement the salt and garlic.
- 1/2 teaspoon Paprika: Provides a subtle sweetness, a hint of smokiness, and a beautiful reddish hue to the chicken. Smoked paprika can also be used for a deeper flavor.
- 1/4 teaspoon Garlic Powder: Adds an initial layer of garlic flavor directly to the chicken coating.
- 4 tablespoons Unsalted Butter: The heart of the sauce, providing richness, flavor, and a luscious texture. Using unsalted allows you to control the overall saltiness.
- 4-6 cloves Garlic, Minced: Freshly minced garlic is key for that signature aromatic and pungent garlic punch in the sauce. Adjust to your garlic preference!
- 1 tablespoon Olive Oil: Helps prevent the butter from burning too quickly when searing the chicken and adds its own subtle fruity note.
- 1/4 cup Chicken Broth: Adds moisture to the sauce, helps to deglaze the pan, and brings a savory depth. Low-sodium is a good choice.
- 1 tablespoon Lemon Juice, Freshly Squeezed: Brightens up the rich butter sauce with a touch of acidity, cutting through the richness.
- 2 tablespoons Fresh Parsley, Chopped: Adds a burst of freshness, color, and a clean, herbaceous note to finish the dish.
Instructions
- Prepare the Chicken: Pat the chicken tenders thoroughly dry with paper towels. This step is crucial as it helps the flour coating adhere better and ensures a crispier exterior when cooked. If your chicken tenders are particularly large, you can cut them in half for more manageable pieces and quicker cooking.
- Season the Flour: In a shallow dish or a large resealable plastic bag, combine the all-purpose flour, salt, black pepper, paprika, and garlic powder. Whisk them together until well blended. This seasoned flour will create a flavorful crust on the chicken.
- Dredge the Chicken: Working with one tender at a time, dredge each piece in the seasoned flour mixture, ensuring it’s evenly coated on all sides. Shake off any excess flour; you want a light, even coating, not a thick, pasty one. Set the coated chicken tenders aside on a clean plate or baking sheet.
- Heat the Pan: Place a large skillet (cast iron works wonderfully here for even heat distribution and a great sear, but a non-stick skillet will also do) over medium-high heat. Add the olive oil and 2 tablespoons of the unsalted butter to the skillet. Allow the butter to melt and bubble slightly. The oil will help increase the smoke point of the butter, preventing it from browning too quickly.
- Cook the Chicken: Carefully place the flour-coated chicken tenders in the hot skillet in a single layer. Be sure not to overcrowd the pan; cook in batches if necessary. Overcrowding will lower the pan’s temperature, resulting in steamed rather than seared chicken. Cook for about 3-4 minutes per side, or until golden brown and cooked through. The internal temperature should reach 165°F (74°C) when checked with a meat thermometer. Once cooked, remove the chicken from the skillet and set aside on a clean plate. Tent loosely with foil to keep warm.
- Make the Garlic Butter Sauce: Reduce the heat under the skillet to medium-low. If there’s excessive browned flour or burnt bits, carefully wipe the skillet clean with a paper towel (use tongs to avoid burns) before proceeding. Add the remaining 2 tablespoons of unsalted butter to the skillet. Once melted, add the minced garlic. Sauté for about 1-2 minutes, stirring constantly, until the garlic is fragrant and lightly golden. Be very careful not to burn the garlic, as it will become bitter.
- Deglaze and Simmer: Pour in the chicken broth and fresh lemon juice. Scrape up any browned bits (fond) from the bottom of the pan with a wooden spoon or spatula – these bits are packed with flavor! Bring the sauce to a gentle simmer and let it cook for 2-3 minutes, allowing it to reduce slightly and the flavors to meld together. The sauce will thicken a bit as it reduces.
- Combine and Garnish: Return the cooked chicken tenders to the skillet with the garlic butter sauce. Toss them gently to ensure each tender is coated in the luscious sauce. Let them warm through for another minute or two, allowing the chicken to absorb some of the sauce.
- Serve: Remove the skillet from the heat. Sprinkle the freshly chopped parsley over the chicken tenders for a touch of color and freshness. Serve immediately and enjoy the deliciousness!
Nutrition Facts
- Servings: Approximately 4 servings
- Calories per serving: Approximately 380-450 kcal (This is an estimate and can vary based on exact ingredient brands, portion sizes, and any modifications.)
- Protein: High in protein, essential for muscle repair and growth, primarily from the chicken.
- Fat: Contains fats from butter and olive oil, providing energy and aiding in nutrient absorption. The type of fat will depend on the specific oils and butter used.
- Carbohydrates: Moderate carbohydrates, mainly from the flour coating.
- Sodium: Content will vary based on the salt added and the sodium in the chicken broth used. Using low-sodium broth can help manage this.
- Saturated Fat: Primarily from the butter. While delicious, it’s good to be mindful of intake as part of a balanced diet.
(Disclaimer: Nutrition facts are estimates and can vary based on specific ingredients and portion sizes.)
Preparation Time
- Preparation: Approximately 15 minutes (includes drying chicken, mixing flour, dredging)
- Cooking: Approximately 20-25 minutes (includes searing chicken, making the sauce)
- Total Time: Approximately 35-40 minutes
This Garlic Butter Chicken Tenders recipe is designed to be a quick and efficient meal, perfect for busy weeknights when you want something delicious without spending hours in the kitchen. The active preparation is minimal, and the cooking process is straightforward, making it accessible even for beginner cooks.
How to Serve
These Garlic Butter Chicken Tenders are incredibly versatile and pair beautifully with a wide array of side dishes. Here are some serving suggestions to create a complete and satisfying meal:
- With Starches:
- Creamy Mashed Potatoes: The ultimate comfort food pairing. The fluffy potatoes are perfect for soaking up that extra garlic butter sauce.
- Steamed Rice: Simple white or brown rice provides a neutral base that allows the chicken to shine. Jasmine or basmati rice would also be lovely.
- Pasta: Serve over a bed of your favorite pasta, like linguine, fettuccine, or even orzo. The garlic butter sauce will coat the pasta beautifully.
- Crusty Bread: Slices of warm, crusty bread (like a baguette or sourdough) are essential for mopping up every last bit of the delicious sauce. Garlic bread would be even more thematic!
- Roasted Potatoes: Diced potatoes roasted with herbs until crispy offer a delightful textural contrast.
- Quinoa or Couscous: For a healthier, whole-grain option, these are excellent choices.
- With Vegetables:
- Steamed or Roasted Asparagus: The slight bitterness of asparagus cuts through the richness of the butter sauce wonderfully.
- Green Beans: Steamed, sautéed, or blanched green beans (perhaps with some toasted almonds) add a fresh, crisp element.
- Broccoli Florets: Steamed or roasted broccoli is a classic and nutritious side.
- Sautéed Spinach or Kale: Wilted greens with a touch of garlic offer a healthy and flavorful accompaniment.
- A Medley of Roasted Vegetables: Think bell peppers, zucchini, onions, and cherry tomatoes roasted until tender-sweet.
- With Salads:
- Simple Green Salad: A light, crisp salad with a vinaigrette dressing can balance the richness of the chicken.
- Caesar Salad: The creamy, tangy dressing and crunchy croutons of a Caesar salad complement the garlic butter flavors well.
- Caprese Salad: Fresh mozzarella, tomatoes, and basil provide a refreshing contrast.
- As Part of Other Dishes:
- Chicken Tender Sliders: Serve them in small slider buns with a little lettuce and a dollop of aioli.
- In a Wrap or Pita: Slice the tenders and stuff them into a warm wrap or pita with fresh veggies and your favorite sauce.
- On Top of a Grain Bowl: Create a hearty grain bowl with a base of quinoa or farro, topped with the chicken tenders, roasted vegetables, and a light dressing.
- For Different Occasions:
- Weeknight Dinner: Their speed and simplicity make them ideal for busy evenings.
- Family Gatherings: A crowd-pleasing dish that appeals to both adults and children.
- Casual Entertaining: Impressive enough for guests but easy enough not to stress the cook.
- Meal Prep: Cook a batch and use them for lunches throughout the week.
No matter how you choose to serve them, these Garlic Butter Chicken Tenders are sure to be a hit!
Additional Tips
To ensure your Garlic Butter Chicken Tenders turn out perfectly every time, consider these additional tips:
- Don’t Overcrowd the Pan: This is a golden rule for searing any meat. Adding too many chicken tenders at once will lower the temperature of the skillet, causing the chicken to steam rather than brown. Cook in batches if necessary for that beautiful golden crust and even cooking.
- Use Fresh Garlic (and lots of it!): While garlic powder is used in the flour coating, fresh minced garlic is non-negotiable for the sauce. The aroma and flavor it imparts are far superior. Adjust the amount to your personal preference – if you’re a garlic lover, don’t be shy!
- Pat Chicken Dry Thoroughly: Moisture is the enemy of a crispy crust. Use paper towels to pat the chicken tenders as dry as possible before dredging them in flour. This helps the flour stick better and promotes browning.
- Don’t Overcook the Chicken: Chicken tenders cook relatively quickly. Overcooking will result in dry, tough meat. Use a meat thermometer to ensure they reach an internal temperature of 165°F (74°C). Remember that chicken will continue to cook slightly even after being removed from the heat.
- Quality of Butter Matters: Since butter is a key component of the sauce, using good quality unsalted butter can make a noticeable difference in flavor. Unsalted butter also allows you to control the saltiness of the final dish more precisely.
- Deglaze for Flavor: Don’t skip scraping up the browned bits (fond) from the bottom of the pan when you add the chicken broth. These little caramelized pieces are packed with concentrated flavor that will enrich your sauce significantly.
- Fresh Herbs for Finishing: While dried herbs have their place, fresh parsley (or even a bit of chives or thyme) sprinkled on at the end adds a vibrant burst of color and freshness that elevates the dish. Add it just before serving for the best impact.
- Adjust Sauce Consistency: If your sauce seems too thick, you can add a little more chicken broth, a tablespoon at a time, until it reaches your desired consistency. If it’s too thin, let it simmer for a few extra minutes to reduce and thicken slightly.
FAQ Section
Here are answers to some frequently asked questions about making Garlic Butter Chicken Tenders:
- Q: Can I use chicken breasts instead of tenders?
A: Absolutely! If using chicken breasts, slice them into 1/2-inch to 3/4-inch thick strips, similar in size to tenders. You may need to pound them to an even thickness for consistent cooking. Cooking time might vary slightly depending on the thickness. - Q: Can I make this recipe gluten-free?
A: Yes, you can. Substitute the all-purpose flour with a good quality gluten-free all-purpose flour blend or even almond flour for dredging. Ensure your chicken broth is also certified gluten-free. - Q: What if I don’t have fresh lemon juice?
A: Freshly squeezed lemon juice offers the best flavor, but in a pinch, you can use bottled lemon juice. Start with a slightly smaller amount and adjust to taste, as bottled juice can sometimes be more tart. A splash of white wine vinegar could also add acidity, though the flavor profile will be different. - Q: How do I store and reheat leftovers?
A: Store leftover chicken tenders in an airtight container in the refrigerator for up to 3-4 days. To reheat, you can gently warm them in a skillet over low heat with a splash of chicken broth or water to prevent drying out. Alternatively, reheat in the microwave in short intervals, or in an oven at 350°F (175°C) until warmed through. - Q: Can I freeze these chicken tenders?
A: Yes, you can freeze them. For best results, freeze the cooked chicken tenders and the sauce separately, if possible, or freeze them together once cooled completely. Store in freezer-safe containers or bags for up to 2-3 months. Thaw overnight in the refrigerator before reheating. The texture of the sauce might change slightly upon thawing but should still be delicious. - Q: My garlic burned! What did I do wrong?
A: Garlic burns very easily, especially when minced. Ensure your heat is at medium-low when you add the garlic to the melted butter. Stir it constantly and cook only until fragrant and lightly golden (usually 1-2 minutes). If it starts to brown too quickly or smells acrid, it’s best to discard it and start that step again, as burnt garlic will make the entire sauce bitter. - Q: Can I add other herbs or spices?
A: Definitely! This recipe is a great base for customization. Consider adding a pinch of red pepper flakes to the sauce for some heat, a dash of onion powder to the flour mixture, or other fresh herbs like thyme or rosemary to the sauce along with the garlic. Smoked paprika in the flour dredge also adds a lovely depth. - Q: What’s the best type of skillet to use?
A: A heavy-bottomed skillet, such as cast iron, is ideal because it distributes heat evenly and retains it well, which helps in achieving a beautiful sear on the chicken. However, a good quality stainless steel or non-stick skillet will also work perfectly well for this recipe. Ensure it’s large enough to avoid overcrowding.

Garlic Butter Chicken Tenders
Ingredients
- 1.5 lbs Boneless, Skinless Chicken Tenders: These are the star of the show, chosen for their quick cooking time and inherent tenderness. You can also use chicken breasts cut into strips.
- 1/2 cup All-Purpose Flour: Used for dredging the chicken, creating a light coating that helps the butter sauce adhere and gives a lovely golden-brown crust.
- 1 teaspoon Salt: Essential for seasoning the chicken and enhancing all the other flavors.
- 1/2 teaspoon Black Pepper: Adds a mild, pungent kick to complement the salt and garlic.
- 1/2 teaspoon Paprika: Provides a subtle sweetness, a hint of smokiness, and a beautiful reddish hue to the chicken. Smoked paprika can also be used for a deeper flavor.
- 1/4 teaspoon Garlic Powder: Adds an initial layer of garlic flavor directly to the chicken coating.
- 4 tablespoons Unsalted Butter: The heart of the sauce, providing richness, flavor, and a luscious texture. Using unsalted allows you to control the overall saltiness.
- 4–6 cloves Garlic, Minced: Freshly minced garlic is key for that signature aromatic and pungent garlic punch in the sauce. Adjust to your garlic preference!
- 1 tablespoon Olive Oil: Helps prevent the butter from burning too quickly when searing the chicken and adds its own subtle fruity note.
- 1/4 cup Chicken Broth: Adds moisture to the sauce, helps to deglaze the pan, and brings a savory depth. Low-sodium is a good choice.
- 1 tablespoon Lemon Juice, Freshly Squeezed: Brightens up the rich butter sauce with a touch of acidity, cutting through the richness.
- 2 tablespoons Fresh Parsley, Chopped: Adds a burst of freshness, color, and a clean, herbaceous note to finish the dish.
Instructions
- Prepare the Chicken: Pat the chicken tenders thoroughly dry with paper towels. This step is crucial as it helps the flour coating adhere better and ensures a crispier exterior when cooked. If your chicken tenders are particularly large, you can cut them in half for more manageable pieces and quicker cooking.
- Season the Flour: In a shallow dish or a large resealable plastic bag, combine the all-purpose flour, salt, black pepper, paprika, and garlic powder. Whisk them together until well blended. This seasoned flour will create a flavorful crust on the chicken.
- Dredge the Chicken: Working with one tender at a time, dredge each piece in the seasoned flour mixture, ensuring it’s evenly coated on all sides. Shake off any excess flour; you want a light, even coating, not a thick, pasty one. Set the coated chicken tenders aside on a clean plate or baking sheet.
- Heat the Pan: Place a large skillet (cast iron works wonderfully here for even heat distribution and a great sear, but a non-stick skillet will also do) over medium-high heat. Add the olive oil and 2 tablespoons of the unsalted butter to the skillet. Allow the butter to melt and bubble slightly. The oil will help increase the smoke point of the butter, preventing it from browning too quickly.
- Cook the Chicken: Carefully place the flour-coated chicken tenders in the hot skillet in a single layer. Be sure not to overcrowd the pan; cook in batches if necessary. Overcrowding will lower the pan’s temperature, resulting in steamed rather than seared chicken. Cook for about 3-4 minutes per side, or until golden brown and cooked through. The internal temperature should reach 165°F (74°C) when checked with a meat thermometer. Once cooked, remove the chicken from the skillet and set aside on a clean plate. Tent loosely with foil to keep warm.
- Make the Garlic Butter Sauce: Reduce the heat under the skillet to medium-low. If there’s excessive browned flour or burnt bits, carefully wipe the skillet clean with a paper towel (use tongs to avoid burns) before proceeding. Add the remaining 2 tablespoons of unsalted butter to the skillet. Once melted, add the minced garlic. Sauté for about 1-2 minutes, stirring constantly, until the garlic is fragrant and lightly golden. Be very careful not to burn the garlic, as it will become bitter.
- Deglaze and Simmer: Pour in the chicken broth and fresh lemon juice. Scrape up any browned bits (fond) from the bottom of the pan with a wooden spoon or spatula – these bits are packed with flavor! Bring the sauce to a gentle simmer and let it cook for 2-3 minutes, allowing it to reduce slightly and the flavors to meld together. The sauce will thicken a bit as it reduces.
- Combine and Garnish: Return the cooked chicken tenders to the skillet with the garlic butter sauce. Toss them gently to ensure each tender is coated in the luscious sauce. Let them warm through for another minute or two, allowing the chicken to absorb some of the sauce.
- Serve: Remove the skillet from the heat. Sprinkle the freshly chopped parsley over the chicken tenders for a touch of color and freshness. Serve immediately and enjoy the deliciousness!
Nutrition
- Serving Size: one normal portion
- Calories: 450


