

Fresh Bell Pepper Hummus Cups have become an absolute staple in our household, and for good reason! From impromptu weeknight snacks to elegant party appetizers, these vibrant little cups are always a hit. My kids, who can be surprisingly picky eaters, devour them with gusto, and I love knowing they’re getting a healthy dose of veggies and plant-based protein. The combination of the crisp, sweet bell pepper and the creamy, savory hummus is simply irresistible. Plus, they are incredibly easy to whip up, making them perfect for busy weeknights or when you need a crowd-pleasing dish in a flash. Honestly, if you’re looking for a recipe that’s healthy, delicious, visually appealing, and incredibly versatile, look no further than these Fresh Bell Pepper Hummus Cups. They are a guaranteed crowd-pleaser and have earned a permanent spot in my recipe repertoire.
Ingredients for Fresh Bell Pepper Hummus Cups
- Bell Peppers: Choose vibrant, firm bell peppers in various colors like red, yellow, orange, and green for visual appeal and a slightly different flavor profile.
- Chickpeas (Garbanzo Beans): Canned chickpeas, drained and rinsed, form the base of the hummus, providing a creamy texture and nutty flavor.
- Tahini: Sesame seed paste, essential for authentic hummus flavor and adds richness and depth.
- Lemon Juice: Freshly squeezed lemon juice brightens the hummus and adds a tangy zest.
- Garlic: Fresh garlic cloves, minced, provide a pungent and savory kick to the hummus.
- Olive Oil: Extra virgin olive oil adds richness, flavor, and smoothness to the hummus, and is also used for drizzling.
- Water: Cold water helps to achieve the perfect creamy consistency for the hummus.
- Salt: Sea salt or kosher salt to enhance the flavors of all the ingredients.
- Optional Garnishes: Paprika, chopped fresh parsley, sesame seeds, pine nuts, or a drizzle of extra olive oil for visual appeal and added flavor.
Instructions for Making Fresh Bell Pepper Hummus Cups
- Prepare the Chickpeas: Begin by draining and rinsing the canned chickpeas thoroughly under cold water. Rinsing removes excess sodium and any canning liquid, ensuring a cleaner flavor for your hummus. Place the rinsed chickpeas in a colander to drain while you prepare the other ingredients. This step is crucial for achieving the best texture in your hummus.
- Mince the Garlic: Peel and mince the garlic cloves. For a milder garlic flavor, you can use just one clove, or for a more pronounced garlicky taste, use two. Mincing the garlic releases its flavor compounds, ensuring it evenly distributes throughout the hummus. If you prefer a less intense garlic flavor, you can roast the garlic cloves before adding them to the hummus.
- Combine Hummus Ingredients: In a food processor, combine the drained and rinsed chickpeas, tahini, minced garlic, lemon juice, and salt. Ensure all ingredients are readily accessible to make the process seamless. Using a food processor is key to achieving the smooth and creamy texture characteristic of hummus.
- Process Until Smooth: Secure the lid on the food processor and process the mixture until it is completely smooth and creamy. This may take a minute or two. Stop occasionally to scrape down the sides of the bowl with a spatula to ensure all ingredients are evenly incorporated and processed. The consistency should be thick but easily spreadable. If the mixture seems too thick, you can add a tablespoon of cold water to help achieve the desired consistency.
- Add Olive Oil and Water (if needed): With the food processor running, slowly drizzle in the olive oil. Continue processing until the olive oil is fully incorporated and the hummus is even creamier. If you find the hummus is still too thick, add cold water, one tablespoon at a time, while processing, until you reach your preferred consistency. Cold water helps to lighten the hummus and make it extra smooth.
- Taste and Adjust Seasoning: Once the hummus is perfectly smooth, stop the food processor and taste the hummus. Adjust the seasoning to your liking. You may want to add more lemon juice for tanginess, salt for flavor, or garlic for more pungency. Remember that flavors will meld and develop further as the hummus sits.
- Prepare the Bell Peppers: While the hummus is chilling or ready, prepare the bell peppers. Wash the bell peppers thoroughly under cold water and pat them dry. Choose bell peppers that are firm and stand upright well for easy filling and serving.
- Cut Bell Peppers into Cups: Carefully slice off the top portion of each bell pepper, about an inch from the stem, creating a bowl or “cup” shape. Remove the seeds and membranes from inside the bell peppers. Ensure all seeds are removed for a clean and pleasant eating experience. You can use a small spoon or your fingers to scrape out the seeds and membranes.
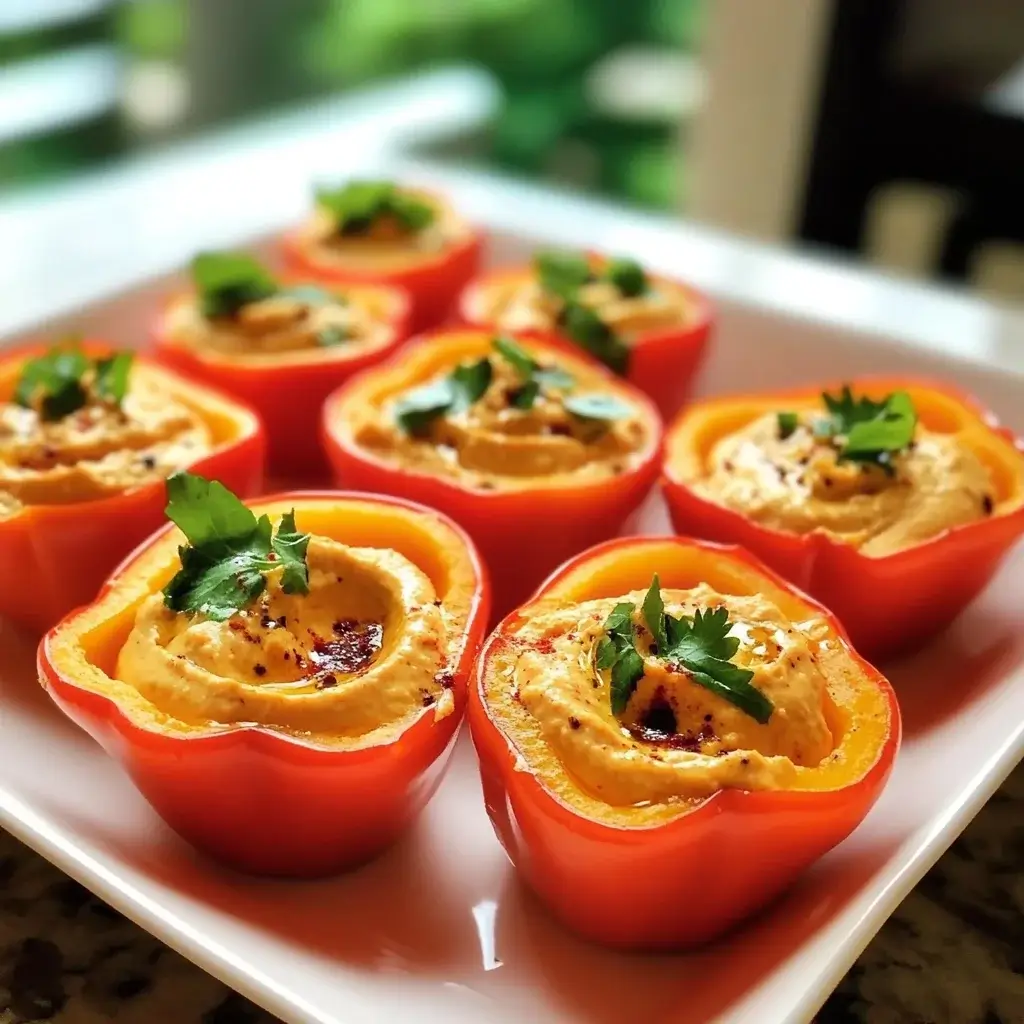
- Fill Bell Pepper Cups with Hummus: Spoon the freshly made hummus into each bell pepper cup, filling them generously. You can use a spoon or a piping bag for a neater presentation. If using a piping bag, fit it with a large star tip for a decorative swirl of hummus.
- Garnish (Optional): Garnish the hummus-filled bell pepper cups as desired. A sprinkle of paprika adds a touch of color and mild spice. Chopped fresh parsley provides a fresh, herbaceous note. Sesame seeds or pine nuts add a nutty crunch and visual appeal. A final drizzle of extra virgin olive oil enhances the flavor and adds a glossy finish.
- Chill and Serve: For best flavor and texture, chill the filled bell pepper cups in the refrigerator for at least 30 minutes before serving. Chilling allows the flavors to meld and the hummus to firm up slightly, making them easier to handle and enjoy. Serve chilled and enjoy!
Nutrition Facts for Fresh Bell Pepper Hummus Cups
Serving Size: 1 Bell Pepper Cup (approximately)
Servings Per Recipe: 12 (depending on bell pepper size)
- Calories: Approximately 120 kcal
- Total Fat: 8g
(Note: Nutrition facts are estimates and can vary based on specific ingredients and portion sizes. These values are based on a standard hummus recipe using olive oil and canned chickpeas, and a medium-sized bell pepper.)
Preparation Time for Fresh Bell Pepper Hummus Cups
Prep Time: 20 minutes
Chill Time: 30 minutes (optional, but recommended)
Total Time: 50 minutes
Description: These Fresh Bell Pepper Hummus Cups are incredibly quick and easy to prepare. The majority of the time is spent making the homemade hummus, which is a simple process using a food processor. Preparing the bell peppers and filling them with hummus takes just a few minutes. While chilling is optional, it is recommended to allow the flavors to meld and the hummus to firm up, enhancing both taste and texture. This recipe is perfect for a quick snack, appetizer, or light meal, especially when you need something healthy and delicious in under an hour.
How to Serve Fresh Bell Pepper Hummus Cups
- Appetizers: Arrange the bell pepper hummus cups on a platter for a vibrant and healthy appetizer at parties, gatherings, or potlucks. Their bright colors and delicious flavors make them an instant crowd-pleaser.
- Snacks: Enjoy them as a satisfying and nutritious afternoon snack. They are perfect for curbing hunger pangs and providing a boost of energy.
- Lunch Boxes: Pack them in lunch boxes for a healthy and fun lunch option for both kids and adults. The bell pepper cups are easy to eat and transport.
- Party Platters: Incorporate them into larger party platters alongside other dips, vegetables, crackers, and cheeses for a diverse and appealing spread.
- Vegetable Trays: Add them to vegetable trays as a flavorful and substantial dip option. They elevate a simple vegetable tray into something more exciting and satisfying.
- Light Meal: Serve a few bell pepper hummus cups alongside a salad or soup for a light and healthy lunch or dinner.
- Picnics: Pack them for picnics as they are portable and require no utensils to eat. Their freshness and vibrant colors make them perfect for outdoor dining.
- Game Day: Offer them as a healthier alternative to traditional game day snacks. They are a guilt-free and delicious option for watching sports with friends.
Additional Tips for Perfect Fresh Bell Pepper Hummus Cups
- Roast the Garlic for a Milder Flavor: If you prefer a less pungent garlic flavor, roast the garlic cloves before adding them to the hummus. Roasting mellows the garlic and brings out its sweetness. Simply wrap the garlic cloves in foil with a drizzle of olive oil and roast in a 400°F (200°C) oven for about 20-25 minutes, or until soft and fragrant. Let them cool slightly before peeling and adding to the food processor.
- Customize Your Hummus Flavors: Get creative with your hummus! Add roasted red peppers, sun-dried tomatoes, spinach, or olives to the food processor along with the other ingredients for a flavored hummus variation. Experiment with different herbs and spices like cumin, coriander, or smoked paprika to tailor the flavor to your preference.
- Use High-Quality Tahini: The quality of tahini significantly impacts the flavor of your hummus. Look for tahini that is smooth, creamy, and has a slightly nutty aroma. Avoid tahini that is bitter or has separated oil, as this can affect the taste and texture of your hummus.
- Adjust Lemon Juice to Taste: Lemon juice is essential for brightening the hummus, but the amount needed can vary depending on the lemons and personal preference. Start with the recommended amount and add more, a teaspoon at a time, until you achieve the desired level of tanginess.
- Make Hummus Ahead of Time: Hummus can be made up to 3-4 days in advance and stored in an airtight container in the refrigerator. In fact, the flavors often meld and improve over time. This makes it a great make-ahead component for parties or meal prep.
- Choose Firm Bell Peppers: Select firm bell peppers that stand upright well to create stable cups for filling. Avoid peppers that are bruised, soft, or have blemishes. The sturdier the pepper, the easier they will be to fill and serve.
- Get Creative with Garnishes: Garnishes add visual appeal and enhance the flavor. Consider using a variety of garnishes like toasted pine nuts, chopped walnuts, crumbled feta cheese (for non-vegan variations), za’atar spice blend, or a drizzle of balsamic glaze for added complexity.
- Spice it Up: If you like a little heat, add a pinch of cayenne pepper or a dash of hot sauce to the hummus for a spicy kick. You can also garnish with a sprinkle of red pepper flakes or finely chopped jalapeño for those who prefer extra spice.
Frequently Asked Questions (FAQ) About Fresh Bell Pepper Hummus Cups
Q1: Can I use pre-made hummus for this recipe?
A: Yes, you can definitely use pre-made hummus to save time. Choose a high-quality store-bought hummus that you enjoy. However, homemade hummus is fresher, often tastes better, and allows you to control the ingredients and flavors. If using pre-made hummus, consider adding a squeeze of fresh lemon juice and a drizzle of olive oil to brighten it up before filling the bell peppers.
Q2: How long do Fresh Bell Pepper Hummus Cups last?
A: Filled bell pepper hummus cups are best enjoyed within 1-2 days when stored in an airtight container in the refrigerator. The bell peppers may start to soften slightly after a couple of days, but they will still be safe to eat. For the best texture, it’s recommended to consume them sooner rather than later. Hummus itself, stored separately, will last for up to 3-4 days in the fridge.
Q3: Can I freeze hummus?
A: Yes, hummus can be frozen, although the texture may change slightly upon thawing. Freeze hummus in an airtight container for up to 3 months. When thawing, it may become a bit grainy or watery. To restore its creamy texture, stir it vigorously or briefly blend it again with a little olive oil or lemon juice. It’s generally best to freeze hummus on its own and fill the bell peppers fresh for optimal texture.
Q4: Can I use different types of peppers?
A: Absolutely! While bell peppers are classic and provide a good cup shape, you can experiment with other types of peppers. Mini sweet peppers are a great option for smaller, bite-sized cups. You could also use poblano peppers for a slightly spicier kick, or even jalapeños if you want a significant amount of heat (though these will be smaller and spicier). Consider the size and shape of the pepper when choosing alternatives.
Q5: Are Fresh Bell Pepper Hummus Cups vegan and gluten-free?
A: Yes, this recipe as written is naturally vegan and gluten-free. Hummus is typically made with chickpeas, tahini, lemon juice, garlic, and olive oil, all of which are vegan and gluten-free ingredients. Bell peppers are also naturally vegan and gluten-free. Always double-check the ingredient list of your tahini and any store-bought hummus to ensure they are certified gluten-free if needed.
Q6: Can I make the hummus without tahini?
A: While tahini is a key ingredient in traditional hummus, you can make hummus without it. The flavor will be slightly different and less nutty, but it can still be delicious. To replace tahini, you can try using sunflower seed butter or almond butter for a similar creamy texture and nutty flavor. You can also simply omit it and adjust the other seasonings to taste, perhaps adding a bit more olive oil for richness.
Q7: Can I bake or roast the bell pepper cups before filling them?
A: Yes, you can roast the bell pepper cups briefly before filling them if you prefer a softer bell pepper. Roasting will bring out the sweetness of the peppers and soften their texture. To roast, drizzle the bell pepper cups with a little olive oil and roast at 400°F (200°C) for about 10-15 minutes, or until slightly softened. Let them cool slightly before filling with hummus.
Q8: What are some other filling ideas besides hummus?
A: While hummus is a classic and delicious filling, you can explore many other options! Consider filling the bell pepper cups with guacamole, black bean salsa, white bean dip, baba ghanoush (eggplant dip), quinoa salad, or even a lentil salad. Get creative and experiment with different dips and salads to find your favorite combinations. These bell pepper cups are incredibly versatile and can be adapted to suit various tastes and dietary preferences.

Fresh Bell Pepper Hummus Cups
Ingredients
- Bell Peppers: Choose vibrant, firm bell peppers in various colors like red, yellow, orange, and green for visual appeal and a slightly different flavor profile.
- Chickpeas (Garbanzo Beans): Canned chickpeas, drained and rinsed, form the base of the hummus, providing a creamy texture and nutty flavor.
- Tahini: Sesame seed paste, essential for authentic hummus flavor and adds richness and depth.
- Lemon Juice: Freshly squeezed lemon juice brightens the hummus and adds a tangy zest.
- Garlic: Fresh garlic cloves, minced, provide a pungent and savory kick to the hummus.
- Olive Oil: Extra virgin olive oil adds richness, flavor, and smoothness to the hummus, and is also used for drizzling.
- Water: Cold water helps to achieve the perfect creamy consistency for the hummus.
- Salt: Sea salt or kosher salt to enhance the flavors of all the ingredients.
- Optional Garnishes: Paprika, chopped fresh parsley, sesame seeds, pine nuts, or a drizzle of extra olive oil for visual appeal and added flavor.
Instructions
- Prepare the Chickpeas: Begin by draining and rinsing the canned chickpeas thoroughly under cold water. Rinsing removes excess sodium and any canning liquid, ensuring a cleaner flavor for your hummus. Place the rinsed chickpeas in a colander to drain while you prepare the other ingredients. This step is crucial for achieving the best texture in your hummus.
- Mince the Garlic: Peel and mince the garlic cloves. For a milder garlic flavor, you can use just one clove, or for a more pronounced garlicky taste, use two. Mincing the garlic releases its flavor compounds, ensuring it evenly distributes throughout the hummus. If you prefer a less intense garlic flavor, you can roast the garlic cloves before adding them to the hummus.
- Combine Hummus Ingredients: In a food processor, combine the drained and rinsed chickpeas, tahini, minced garlic, lemon juice, and salt. Ensure all ingredients are readily accessible to make the process seamless. Using a food processor is key to achieving the smooth and creamy texture characteristic of hummus.
- Process Until Smooth: Secure the lid on the food processor and process the mixture until it is completely smooth and creamy. This may take a minute or two. Stop occasionally to scrape down the sides of the bowl with a spatula to ensure all ingredients are evenly incorporated and processed. The consistency should be thick but easily spreadable. If the mixture seems too thick, you can add a tablespoon of cold water to help achieve the desired consistency.
- Add Olive Oil and Water (if needed): With the food processor running, slowly drizzle in the olive oil. Continue processing until the olive oil is fully incorporated and the hummus is even creamier. If you find the hummus is still too thick, add cold water, one tablespoon at a time, while processing, until you reach your preferred consistency. Cold water helps to lighten the hummus and make it extra smooth.
- Taste and Adjust Seasoning: Once the hummus is perfectly smooth, stop the food processor and taste the hummus. Adjust the seasoning to your liking. You may want to add more lemon juice for tanginess, salt for flavor, or garlic for more pungency. Remember that flavors will meld and develop further as the hummus sits.
- Prepare the Bell Peppers: While the hummus is chilling or ready, prepare the bell peppers. Wash the bell peppers thoroughly under cold water and pat them dry. Choose bell peppers that are firm and stand upright well for easy filling and serving.
- Cut Bell Peppers into Cups: Carefully slice off the top portion of each bell pepper, about an inch from the stem, creating a bowl or “cup” shape. Remove the seeds and membranes from inside the bell peppers. Ensure all seeds are removed for a clean and pleasant eating experience. You can use a small spoon or your fingers to scrape out the seeds and membranes.
- Fill Bell Pepper Cups with Hummus: Spoon the freshly made hummus into each bell pepper cup, filling them generously. You can use a spoon or a piping bag for a neater presentation. If using a piping bag, fit it with a large star tip for a decorative swirl of hummus.
- Garnish (Optional): Garnish the hummus-filled bell pepper cups as desired. A sprinkle of paprika adds a touch of color and mild spice. Chopped fresh parsley provides a fresh, herbaceous note. Sesame seeds or pine nuts add a nutty crunch and visual appeal. A final drizzle of extra virgin olive oil enhances the flavor and adds a glossy finish.
- Chill and Serve: For best flavor and texture, chill the filled bell pepper cups in the refrigerator for at least 30 minutes before serving. Chilling allows the flavors to meld and the hummus to firm up slightly, making them easier to handle and enjoy. Serve chilled and enjoy!
Nutrition
- Serving Size: one normal portion
- Calories: 120
- Fat: 8g


