

I still remember the first time I tried making baked zucchini chips. My garden was overflowing, and frankly, the family was getting a little tired of grilled zucchini and zucchini bread. I stumbled upon a recipe for baked chips and was skeptical – could baked zucchini really satisfy a chip craving? Could it actually get crispy? The answer, much to my delight and surprise, was a resounding YES! These Fast Baked Zucchini Chips have become an absolute staple in our house. They disappear almost as quickly as I can pull them off the baking sheet, loved by adults and even the pickiest little eaters. They’re that perfect combination of satisfyingly crunchy, lightly savory, and wonderfully guilt-free. It’s my go-to solution for using up summer squash and providing a healthier alternative to greasy potato chips, perfect for movie nights, afternoon snacks, or even as a fun side dish. The speed at which they come together is just the icing on the cake – or perhaps, the salt on the chip!
Ingredients
- 2 Medium Zucchini (about 1 lb total): Fresh, firm zucchini work best. Choose ones that are relatively straight and uniform in thickness for easier slicing. Their mild flavor is the perfect canvas for seasonings.
- 2 Tablespoons Extra Virgin Olive Oil: Provides healthy fats, helps the zucchini crisp up, and adds a subtle, fruity flavor. You can also use avocado oil or another high-heat oil.
- 1/2 Teaspoon Sea Salt (or to taste): Essential for flavor. Use flaky sea salt or regular table salt. Adjust according to your preference and dietary needs.
- 1/4 Teaspoon Black Pepper (freshly ground preferred): Adds a touch of warmth and spice. Freshly ground pepper offers a more robust flavor.
- Optional Seasonings (choose one or a combination, about 1/2 tsp total):
- Garlic Powder: For a savory, aromatic kick.
- Onion Powder: Adds a subtle, sweet, savory undertone.
- Smoked Paprika: Provides a lovely smoky flavor and beautiful reddish hue.
- Italian Seasoning: A blend of herbs like oregano, basil, and thyme for a Mediterranean flair.
- Nutritional Yeast (1-2 Tablespoons): For a cheesy, umami flavor without dairy (great vegan option).
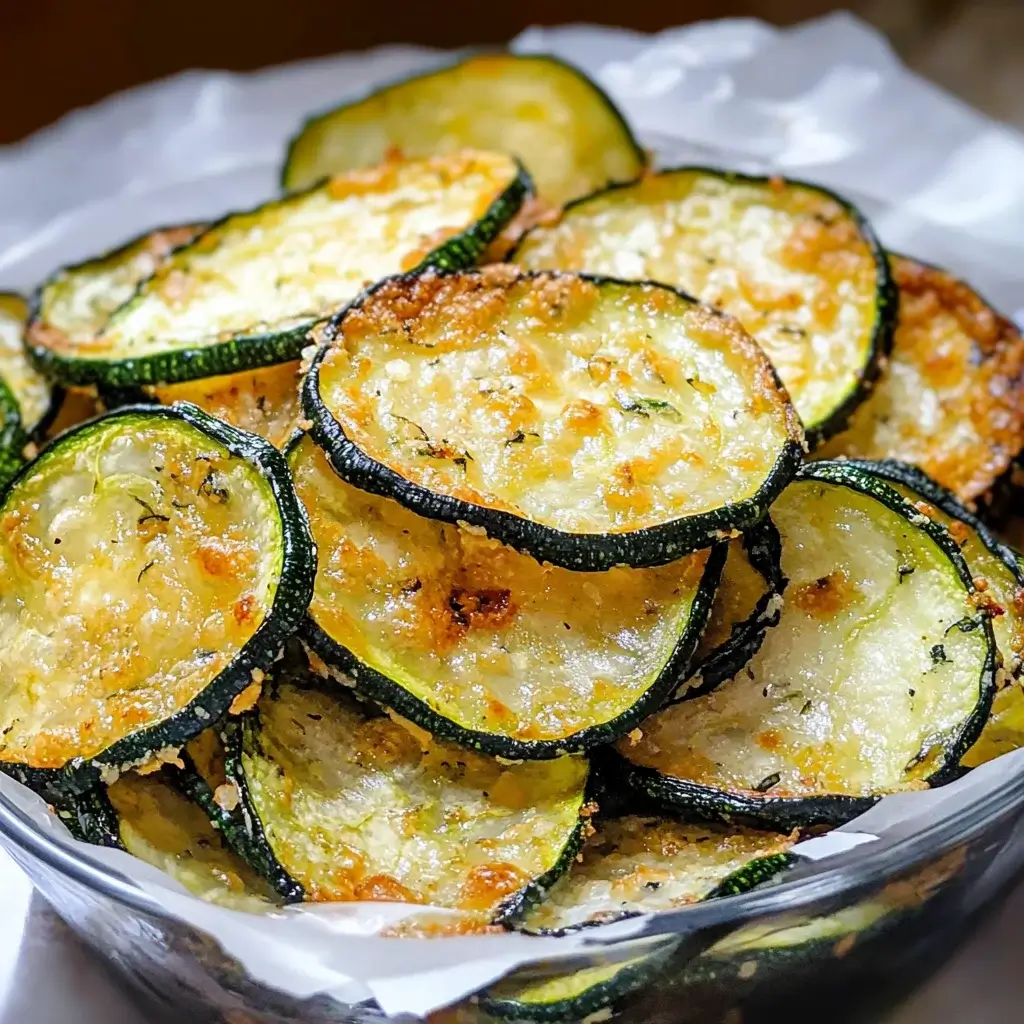
- Grated Parmesan Cheese (2-3 Tablespoons): Adds a salty, cheesy crust (add during the last 5-10 minutes of baking to prevent burning).
Instructions
- Preheat Oven & Prepare Baking Sheets: Preheat your oven to 425°F (220°C). Line two large baking sheets with parchment paper or silicone baking mats. This prevents sticking and makes cleanup much easier. Ensure your oven racks are positioned in the upper and lower thirds of the oven if baking two sheets simultaneously, or use the middle rack if baking one sheet at a time.
- Wash and Thoroughly Dry Zucchini: Rinse the zucchini under cold water and pat them completely dry with paper towels or a clean kitchen towel. Removing excess surface moisture is the first crucial step towards achieving crispy chips. Any lingering water will turn to steam in the oven, hindering the crisping process.
- Slice the Zucchini Thinly: This is the most critical step for texture. Aim for slices that are about 1/8-inch (approx 3mm) thick. A mandoline slicer is highly recommended for achieving uniform thinness quickly and easily. If using a knife, use your sharpest knife and take your time to keep the slices as consistent as possible. Uniform slices ensure even baking; if some are thick and others thin, the thin ones will burn before the thick ones get crispy. Discard the very ends of the zucchini.
- Pat Zucchini Slices Dry (Again!): Lay the zucchini slices in a single layer on paper towels or clean kitchen towels. Place another layer of towels on top and gently press down to absorb as much moisture as possible. Zucchini has high water content, and removing this excess water is key to avoiding soggy chips. Don’t skip this step! You might be surprised how much liquid comes out.
- Toss with Oil and Seasonings: Place the dried zucchini slices in a large bowl. Drizzle the olive oil over the slices. Gently toss with your hands or a spatula until all slices are lightly and evenly coated. You don’t want them swimming in oil, just lightly glistening. Sprinkle the salt, pepper, and any optional seasonings you’re using over the oiled zucchini. Toss again gently to distribute the seasonings evenly. If using Parmesan cheese, wait to add it until later in the baking process.
- Arrange on Baking Sheets: Carefully arrange the seasoned zucchini slices in a single layer on the prepared baking sheets. Make sure the slices are not overlapping. Overlapping traps steam and prevents the edges from crisping up properly. Work in batches or use multiple baking sheets if necessary to avoid crowding the pan. Proper spacing allows hot air to circulate around each chip.
- Bake: Place the baking sheets in the preheated oven. Bake for 15 minutes. If using two sheets, rotate them (top to bottom, front to back) halfway through this initial time for even baking.
- Flip and Continue Baking: After the initial 15 minutes, carefully flip the zucchini slices using tongs or a thin spatula. This helps both sides get crispy. If adding Parmesan cheese, sprinkle it over the chips now.
- Bake Until Crispy: Continue baking for another 10-15 minutes, watching very closely. The exact time will depend on the thickness of your slices and your specific oven. The chips are ready when they are golden brown around the edges and appear slightly shrunken and dry. Some may brown faster than others, so feel free to remove individual chips as they become perfectly crispy to prevent burning. They should feel slightly crisp in the oven but will crisp up significantly more as they cool. Be vigilant during these last few minutes, as they can go from perfectly crisp to burnt very quickly!
- Cool Completely: Using a spatula, immediately transfer the baked zucchini chips from the hot baking sheets to a wire cooling rack. Spreading them out on the rack allows air to circulate underneath, preventing them from steaming and becoming soggy. Let them cool completely on the rack – this is when they achieve their maximum crispiness. Resist the urge to snack straight from the pan (though a few warm ones are hard to resist!).
Nutrition Facts
- Serving Size: Approximately 1/4 of the recipe (about 1/2 medium zucchini worth of chips)
- Calories: Approximately 80-100 kcal per serving (will vary based on zucchini size and oil amount)
- Total Fat: Approximately 7g (Primarily healthy monounsaturated fats from olive oil)
- Sodium: Approximately 300mg (Highly dependent on the amount of salt added; can be adjusted)
Disclaimer: Nutritional information is an estimate only and may vary depending on ingredients used, precise measurements, and portion sizes.
Preparation Time
- Active Preparation Time: Approximately 15-20 minutes (Includes washing, slicing, drying, and seasoning the zucchini). Using a mandoline can significantly speed up the slicing process.
- Baking Time: Approximately 25-30 minutes (Depending on slice thickness, oven variations, and desired crispiness).
- Total Time: Approximately 40-50 minutes from start to finish, making it a relatively “fast” recipe for homemade chips, especially considering the healthy payoff!
How to Serve
These Fast Baked Zucchini Chips are wonderfully versatile! Here are some delicious ways to enjoy them:
- Standalone Snack:
- Serve them warm or at room temperature straight from the cooling rack for a satisfyingly crunchy, guilt-free snack anytime.
- Pack them (carefully) in lunchboxes as a healthier alternative to potato chips (note: they may soften slightly over time).
- With Dips: Dipping elevates these chips to another level! Try them with:
- Cool & Creamy: Classic Ranch dip, creamy Tzatziki sauce, French Onion dip, or a simple Greek yogurt dip with herbs.
- Savory & Flavorful: Hummus (any flavor!), Baba Ganoush, Guacamole, Salsa, or a zesty Garlic Aioli.
- Warm & Cheesy: Warm marinara sauce for a pizza-like vibe, or a light cheese sauce.
- Spicy: Sriracha mayo, chipotle dip, or a spicy salsa.
- As a Side Dish:
- Serve alongside burgers, sandwiches, wraps, or paninis instead of fries or traditional chips.
- Pair them with grilled chicken, fish, or steak for a light and healthy accompaniment.
- As a Topping:
- Crumble slightly cooled chips over salads for a crunchy, flavorful texture contrast.
- Use them as a garnish for creamy soups like tomato soup or potato leek soup.
- Party Appetizer:
- Arrange them attractively on a platter with various dips for an easy and crowd-pleasing appetizer.
- Include them on a charcuterie or cheese board for a pop of color and a healthy, gluten-free option.
Additional Tips for Perfect Baked Zucchini Chips
- Master the Mandoline (Safely!): While a sharp knife works, a mandoline slicer is the secret weapon for ultra-thin, perfectly uniform slices. Consistency is key for even baking and crisping. Always use the safety guard that comes with your mandoline to protect your fingers. If you don’t have one, focus on slicing as thinly and evenly as possible with your knife.
- Embrace the Dry-Off: Don’t underestimate the power of patting the zucchini slices dry, both after washing and especially after slicing. Zucchini holds a lot of water. Removing as much moisture as possible before oiling and baking is crucial to prevent steaming and achieve that coveted crispiness. Some recipes suggest salting the slices and letting them sit to draw out water, but for a “fast” version, thorough patting works well.
- Give Them Space: Never overcrowd your baking sheets! Arrange the slices in a single layer with space between them. This allows the hot oven air to circulate freely around each slice, promoting even browning and crisping. If your slices are too close or overlapping, they will steam each other and become soggy. Use multiple baking sheets or bake in batches if necessary.
- Go Easy on the Oil: You need just enough olive oil to lightly coat each slice. Too much oil can make the chips greasy and prevent them from crisping properly. A light, even coating helps with browning and flavor. Using an oil mister can help apply a very fine, even layer.
- Experiment with Seasonings: While salt and pepper are classic, don’t be afraid to get creative! Smoked paprika adds depth, garlic and onion powder provide savory notes, nutritional yeast gives a cheesy flavor (great for dairy-free!), and chili powder adds a kick. Try different combinations to find your favorite. Apply seasonings after oiling so they stick well.
- The Oven Watch: Ovens vary, and zucchini chip thickness can differ slightly. Start checking the chips around the 20-minute mark, especially after flipping. They can go from perfectly golden to burnt in just a minute or two at high heat. Keep a close eye during the final stages of baking, removing any chips that are browning faster.
- Cooling Rack is Crucial: Don’t let the chips cool on the hot baking sheet. Transfer them immediately to a wire cooling rack. This allows air to circulate all around the chips, preventing the bottoms from getting soggy due to trapped steam and ensuring they reach their maximum crisp potential as they cool down.
- Best Enjoyed Fresh: Baked Zucchini Chips are undeniably at their crispiest and best shortly after cooling. While they can be stored, they tend to lose some crunch over time due to residual moisture. If you do have leftovers, store them loosely covered or in a container with the lid slightly ajar at room temperature for up to a day, and try crisping them up again in a toaster oven, air fryer, or regular oven at low heat for a few minutes before serving. Avoid the microwave, as it will make them soft.
Frequently Asked Questions (FAQ)
- Q: My zucchini chips came out soggy, not crispy. What went wrong?
- A: Several factors could be at play. The most common culprits are: slicing the zucchini too thick (aim for 1/8-inch), not drying the slices thoroughly enough before baking (pat them really dry!), overcrowding the baking sheet (give them space!), or not baking them long enough or at a high enough temperature. Also, ensure you cool them completely on a wire rack, as they crisp up significantly during cooling.
- Q: Can I make these baked zucchini chips in an air fryer?
- A: Absolutely! Air fryers work wonderfully for making crispy zucchini chips, often even faster than an oven. Follow the same prep steps (slice thin, pat dry, oil, season). Arrange in a single layer in the air fryer basket (you’ll likely need to work in batches). Air fry at around 375°F (190°C) for 10-15 minutes, shaking the basket or flipping the chips halfway through, until golden and crispy. Keep a close eye as air fryer times can vary.
- Q: How thin should I slice the zucchini for the best results?
- A: The ideal thickness is approximately 1/8-inch (about 3mm). Thinner slices will crisp up faster and more effectively, resembling traditional chips. Slices thicker than 1/4-inch will likely remain soft in the center. Using a mandoline slicer is the easiest way to achieve consistently thin slices.
- Q: What are the best seasonings to use besides salt and pepper?
- A: This depends on your preference! Popular choices include garlic powder, onion powder, smoked paprika (for smokiness), chili powder (for heat), Italian seasoning blends, dried oregano or basil, or nutritional yeast (for a cheesy, savory flavor without dairy). You could even try Cajun seasoning or everything bagel spice! Feel free to experiment.
- Q: Can I make these zucchini chips ahead of time?
- A: While technically possible, baked zucchini chips are significantly better enjoyed fresh, ideally within a few hours of baking, for maximum crispness. They tend to absorb moisture from the air and soften over time. If you need to make them slightly ahead, store them loosely covered at room temperature and try reheating briefly in a low oven (around 300°F/150°C) or air fryer for a few minutes to restore some crispness just before serving.
- Q: Are baked zucchini chips actually healthy?
- A: Yes, compared to deep-fried potato chips, baked zucchini chips are a much healthier alternative. Zucchini is low in calories and carbohydrates, and provides vitamins (like Vitamin A and C) and fiber. Baking uses significantly less oil than frying. The main considerations for health are the amount of added salt and oil, which you can control. They make for a great nutrient-dense, low-carb snack.
- Q: Can I use yellow summer squash instead of zucchini?
- A: Yes, yellow summer squash works just as well! It has a very similar texture and moisture content to zucchini. You can follow the exact same recipe and instructions. Using a mix of green zucchini and yellow squash can also make for a visually appealing batch of chips.
- Q: How should I store leftover zucchini chips?
- A: Storing is tricky as they lose crispness quickly. If you have leftovers, the best bet is to let them cool completely and store them in an airtight container with the lid slightly ajar or in a paper bag (to allow some air circulation and prevent moisture buildup) at room temperature for maybe up to 24 hours. Avoid refrigerating them, as the moisture will make them soggy. Reheat gently in an oven, toaster oven, or air fryer to try and revive some crunch before eating (do not microwave). Honestly, they are best eaten the day they are made!


