
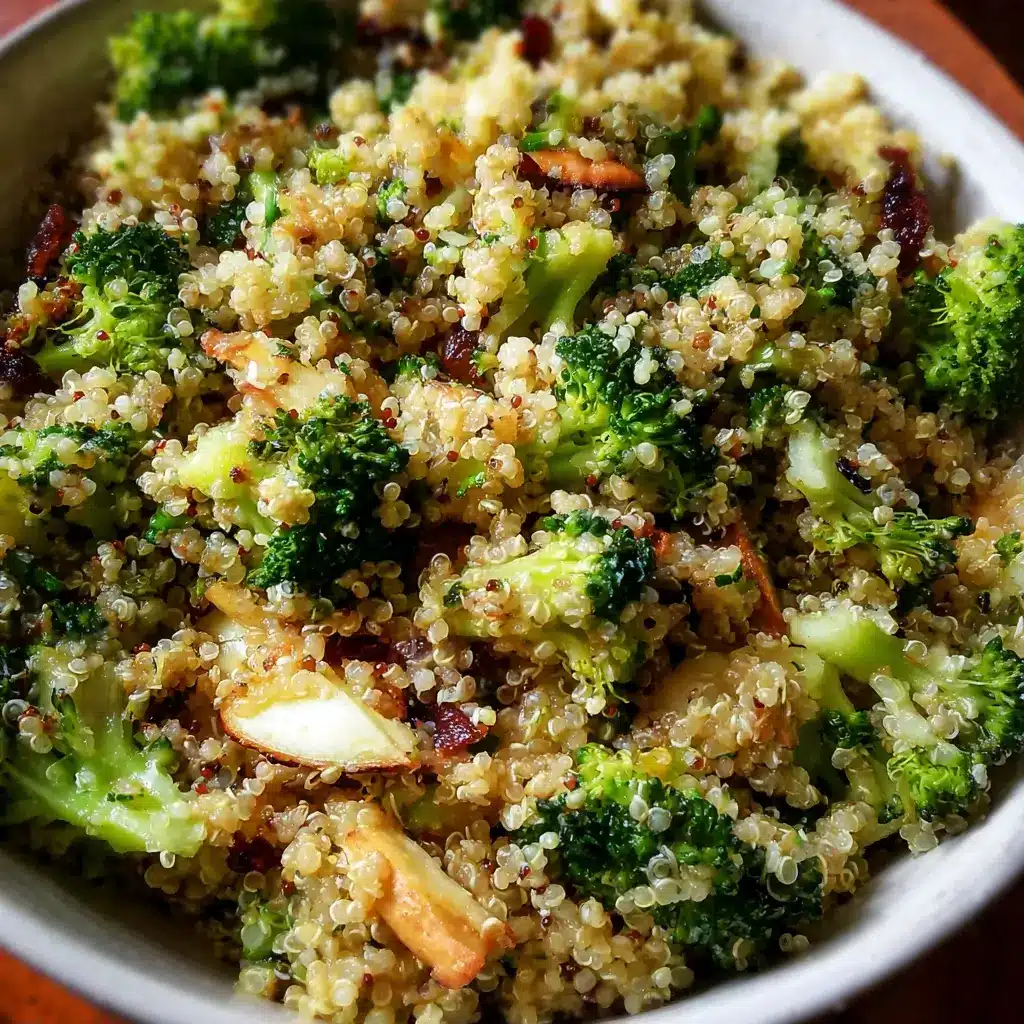

Of all the recipes that have graced my kitchen over the years, there are a select few that I call “lifesavers.” These are the dishes that are not only ridiculously delicious but also come together with minimal fuss, use pantry-staple ingredients, and satisfy everyone at the table, from the pickiest toddler to the hungriest adult. This Easy Broccoli Cheddar Quinoa is, without a doubt, the reigning champion of that lifesaver category in our home. I first threw it together on a hectic weeknight, armed with a bag of quinoa, a head of broccoli on the verge of turning, and a block of sharp cheddar. I had low expectations; I was just trying to create a healthy-ish, cheesy side dish. What emerged from the pot, however, was nothing short of magical. It was a one-pan wonder that tasted like the love child of a gourmet mac and cheese and a hearty, healthy grain bowl. The quinoa was perfectly fluffy, each grain distinct and coated in a creamy, savory cheese sauce. The broccoli was tender but not mushy, providing a fresh, green bite that cut through the richness. My kids, who usually inspect anything green with suspicion, devoured it without a single complaint. My husband went back for seconds, then thirds. It has since become a weekly staple, serving as a satisfying vegetarian main course, a perfect sidekick to grilled chicken or fish, and the ultimate meal-prep lunch. It’s the kind of comfort food that nourishes you from the inside out, proving that wholesome and indulgent are not mutually exclusive.
Ingredients
- 1 tablespoon Olive Oil: The foundation for sautéing our aromatics. A good quality extra-virgin olive oil will add a subtle, fruity note, but any standard olive oil works perfectly.
- 1 medium Yellow Onion, finely diced: This is the first layer of flavor. Dicing it finely ensures it melts into the dish, providing a sweet, aromatic base without a chunky texture.
- 2 cloves Garlic, minced: Essential for its pungent, savory depth. Mince it fresh for the best flavor, as pre-minced jarred garlic can sometimes have a slightly bitter aftertaste.
- 1 cup Uncooked Quinoa, rinsed: The star of our dish. Rinsing the quinoa thoroughly in a fine-mesh sieve is a crucial step to remove its natural coating, called saponin, which can taste bitter or soapy. White quinoa is classic for this recipe, but tri-color or red quinoa also work beautifully.
- 2 cups Vegetable Broth: Using broth instead of water is a non-negotiable secret to a flavorful dish. It infuses every grain of quinoa with savory, umami notes right from the start. Use a low-sodium version to better control the final saltiness.
- 3 cups Broccoli Florets, cut into small, bite-sized pieces: This adds vibrant color, essential nutrients, and a wonderful texture. Cutting the florets small ensures they cook quickly and evenly and that you get a bit of broccoli in every cheesy bite.
- ½ cup Milk or Heavy Cream: This is the key to the ultra-creamy sauce. For a richer, more decadent result reminiscent of classic mac and cheese, use heavy cream. For a lighter, yet still creamy version, whole milk is an excellent choice.
- 2 cups Sharp Cheddar Cheese, freshly shredded: The heart and soul of the flavor profile. Sharp cheddar provides a tangy, cheesy punch that stands up to the other ingredients. Shredding your own cheese from a block is highly recommended, as pre-shredded cheese contains anti-caking agents that can make the sauce grainy.
- ½ teaspoon Paprika: Adds a subtle warmth and a beautiful rosy hue to the final dish. Smoked paprika can also be used for a smokier, deeper flavor.
- Salt and Black Pepper, to taste: To season and enhance all the other flavors. Be mindful of the saltiness of your broth and cheese when seasoning.
Instructions
- Prepare the Quinoa: Begin by placing the uncooked quinoa into a fine-mesh strainer. Rinse it thoroughly under cold running water for at least 30-60 seconds, using your fingers to move the grains around. This step is vital for removing the natural saponin coating and ensuring a clean, nutty flavor. Drain it well and set it aside.
- Sauté the Aromatics: In a medium-sized pot or a large saucepan with a lid, heat the olive oil over medium heat. Once shimmering, add the finely diced yellow onion. Sauté for 4-5 minutes, stirring occasionally, until the onion becomes soft, translucent, and fragrant. Add the minced garlic and cook for another minute until you can smell its aroma. Be careful not to let the garlic burn, as it will become bitter.
- Toast the Quinoa: Add the rinsed and drained quinoa to the pot with the onions and garlic. Stir continuously for about 1-2 minutes. This step toasts the grains, drying them out and enhancing their natural nutty flavor, which adds a wonderful depth to the finished dish. You’ll know it’s ready when the quinoa becomes fragrant.
- Cook the Quinoa: Pour the vegetable broth into the pot. Season with the paprika, a pinch of salt, and a few grinds of black pepper. Stir everything together and bring the liquid to a rolling boil.
- Simmer and Steam: Once boiling, immediately reduce the heat to the lowest possible setting. Place the bite-sized broccoli florets directly on top of the quinoa—do not stir them in. They will steam perfectly on top as the quinoa cooks. Cover the pot with a tight-fitting lid and let it simmer for 15 minutes. It is crucial that you do not lift the lid or stir during this time, as this will disrupt the steaming process and can lead to unevenly cooked quinoa.
- Rest the Quinoa: After 15 minutes, remove the pot from the heat completely but leave the lid on. Let it stand, undisturbed, for another 5-10 minutes. This resting period allows the quinoa to absorb any remaining moisture and to fluff up, resulting in a perfect texture where the grains are separate and not mushy.
- Create the Cheesy Sauce: Remove the lid. You should see that the quinoa has absorbed all the liquid and the broccoli is bright green and tender-crisp. Use a fork to gently fluff the quinoa and mix in the broccoli.
- Melt and Serve: Pour in the milk or heavy cream and add about 1 ½ cups of the shredded cheddar cheese (reserving the remaining ½ cup for topping, if desired). Stir gently over low heat until the cheese is completely melted and has formed a luscious, creamy sauce that coats every grain of quinoa and every floret of broccoli. Taste and adjust seasoning with more salt and pepper if needed. Serve immediately, garnished with the remaining cheese.
Nutrition Facts
- Servings: 6 side-dish servings or 4 main-course servings
- Calories per Serving: Approximately 380-450 kcal (will vary based on use of milk vs. cream and specific cheese)
- Protein (Approx. 18g): Quinoa is a complete protein, meaning it contains all nine essential amino acids. Combined with the protein from the cheese and milk, this dish is incredibly satisfying and helps with muscle repair and satiety.
- Fiber (Approx. 6g): The combination of fiber-rich quinoa and broccoli is excellent for digestive health, helping to promote regularity and keep you feeling full and satisfied for longer.
- Vitamin C (High): Broccoli is a powerhouse of Vitamin C, a crucial antioxidant that supports immune function, skin health, and the absorption of iron.
- Calcium (Approx. 30% DV): Thanks to the generous amount of cheddar cheese and milk, this dish is a fantastic source of calcium, which is essential for strong bones and teeth.
- Iron (Approx. 15% DV): Quinoa provides a good plant-based source of iron, a mineral vital for carrying oxygen in the blood and preventing fatigue.
Preparation Time
This recipe is designed for efficiency and ease, making it a perfect choice for any night of the week. The total time from start to finish is approximately 35-40 minutes.
- Prep Time (10 minutes): This includes rinsing the quinoa, dicing the onion, mincing the garlic, and cutting the broccoli into florets.
- Cook Time (25-30 minutes): This accounts for sautéing the aromatics, toasting and cooking the quinoa, and melting in the cheese at the end. The majority of this time is hands-off while the quinoa simmers.
How to Serve
This Broccoli Cheddar Quinoa is incredibly versatile. It can shine as a standalone star or play a supporting role to a variety of main courses. Here are some of our favorite ways to serve it:
- As a Hearty Vegetarian Main Course:
- Serve it warm in a bowl, just as it is.
- Top with a dollop of sour cream or plain Greek yogurt for extra creaminess and a tangy contrast.
- Garnish with freshly chopped chives or green onions for a mild, fresh oniony bite.
- For a bit of crunch, sprinkle with toasted panko breadcrumbs or crushed tortilla chips just before serving.
- As a Delicious and Healthy Side Dish:
- It pairs beautifully with simple, lean proteins. Serve it alongside:
- Grilled or roasted chicken breast
- Pan-seared salmon or cod
- A perfectly cooked steak
- Juicy pork chops
- Roasted tofu or tempeh for a fully plant-based meal
- It pairs beautifully with simple, lean proteins. Serve it alongside:
- For Meal Prep Lunches:
- Portion the cooled quinoa into individual airtight containers.
- When ready to eat, it reheats beautifully in the microwave.
- It’s a fantastic, nutrient-dense lunch that will keep you energized through the afternoon.
Additional Tips
- Don’t Underestimate the Rinse: It might seem like a small, skippable step, but rinsing your quinoa is the single most important thing you can do for flavor. Saponin, the natural coating on quinoa, is bitter. A thorough rinse washes it away completely, leaving you with the pure, nutty taste of the grain.
- Shred Your Own Cheese, Always: Pre-shredded cheese is coated with powders like potato starch or cellulose to prevent clumping. These additives can create a gritty, separated texture when melted. For the smoothest, creamiest, and most luxurious cheese sauce, always buy a block of cheese and shred it yourself. It only takes a minute and the difference is monumental.
- Master the Quinoa-to-Liquid Ratio: The key to fluffy, not mushy, quinoa is a 1:2 ratio of grain to liquid (one cup of quinoa to two cups of broth). Resisting the urge to add more liquid or to peek while it’s simmering is crucial for perfect results. The final 5-10 minute rest off the heat is where the magic happens, allowing the grains to fully absorb steam and separate.
- Vegetable Variations: Don’t be afraid to experiment! This recipe is a fantastic base for other vegetables. You can add finely diced carrots along with the onion, or stir in a handful of fresh spinach or kale at the very end with the cheese until it wilts. Roasted cauliflower or sautéed mushrooms would also be delicious additions.
- Protein Power-Up: To make this an even more substantial main course, consider stirring in a can of drained and rinsed chickpeas or white beans along with the cheese. You could also fold in shredded rotisserie chicken for a quick and easy protein boost.
- Turn It Into a Bake: For an extra-special presentation, transfer the finished quinoa to a greased casserole or baking dish. Top with the reserved ½ cup of cheddar and an optional ¼ cup of panko breadcrumbs tossed with a little melted butter. Broil for 2-4 minutes until the top is golden brown and bubbly.
- Customize Your Spices: While paprika adds a lovely warmth, you can easily customize the flavor profile. Try adding a ¼ teaspoon of onion powder and garlic powder for a deeper savory flavor, a pinch of cayenne pepper for a little kick of heat, or a dash of mustard powder to enhance the cheesiness.
- Meal Prep Perfection: This recipe is a meal prepper’s dream. It holds up exceptionally well in the refrigerator for up to 4 days. When reheating, you may want to add a splash of milk or water to loosen it up and restore its original creaminess, as the quinoa will continue to absorb moisture as it sits.
Frequently Asked Questions (FAQ)
1. Can I use frozen broccoli instead of fresh?
Absolutely! Frozen broccoli is a great time-saver. You don’t even need to thaw it. Simply add the frozen florets on top of the quinoa at the same step you would add fresh ones. They will steam perfectly as the quinoa cooks. You may need to let the quinoa rest for the full 10 minutes to ensure they are heated through.
2. Is this recipe gluten-free?
Yes, this recipe is naturally gluten-free. Quinoa is a gluten-free seed, and all other ingredients (vegetables, cheese, milk) are also gluten-free. The only thing to double-check is your vegetable broth, as some brands can contain hidden gluten. Be sure to use a broth that is certified gluten-free to be safe.
3. How do I store and reheat leftovers?
Store any leftovers in an airtight container in the refrigerator for up to 4 days. To reheat, you can use the microwave, heating in 60-second intervals and stirring in between until warm. Alternatively, you can reheat it in a small pot on the stovetop over low heat. Add a splash of milk or broth to help loosen the sauce and restore its creamy texture.
4. Can I freeze this broccoli cheddar quinoa?
You can, but with a slight caution. While it freezes okay, dairy-based sauces can sometimes separate or become a bit grainy upon thawing and reheating. The texture of the quinoa and broccoli may also become slightly softer. If you do freeze it, let it thaw in the refrigerator overnight before reheating gently on the stovetop, stirring frequently.
5. What other types of cheese work well in this recipe?
While sharp cheddar is classic, this recipe is a great canvas for other cheeses. For a nuttier, more complex flavor, try Gruyère. For a milder, extra-melty version, Monterey Jack or a mild white cheddar would be excellent. A blend of cheddar and Colby Jack is also a crowd-pleaser.
6. My quinoa turned out mushy. What did I do wrong?
Mushy quinoa is usually caused by one of three things: too much liquid, overcooking, or skipping the resting period. First, ensure you’re using a precise 1:2 ratio of quinoa to liquid. Second, make sure your stove’s “low” setting is truly low to maintain a gentle simmer, not a boil. Finally, do not skip the 5-10 minute rest off the heat with the lid on—this is when the quinoa firms up and becomes fluffy.
7. How can I make this recipe vegan?
It’s easy to adapt this recipe for a vegan diet! Use a full-fat, unsweetened plant-based milk (like oat milk or cashew milk) instead of dairy milk. For the cheese, substitute with 1 ½ cups of your favorite dairy-free cheddar shreds and add 3-4 tablespoons of nutritional yeast to replicate that savory, cheesy flavor. Ensure your vegetable broth is vegan-friendly.
8. You mentioned toasting the quinoa. Is that step really necessary?
While not strictly necessary for the recipe to work, toasting the quinoa is a simple step that significantly elevates the final dish. It takes only an extra minute or two, but it deepens the quinoa’s natural flavor from just “plain” to wonderfully “nutty” and complex. It adds a layer of flavor that makes the dish taste more gourmet and intentional. We highly recommend not skipping it
Easy Broccoli Cheddar Quinoa
Ingredients
- 1 tablespoon Olive Oil: The foundation for sautéing our aromatics. A good quality extra-virgin olive oil will add a subtle, fruity note, but any standard olive oil works perfectly.
- 1 medium Yellow Onion, finely diced: This is the first layer of flavor. Dicing it finely ensures it melts into the dish, providing a sweet, aromatic base without a chunky texture.
- 2 cloves Garlic, minced: Essential for its pungent, savory depth. Mince it fresh for the best flavor, as pre-minced jarred garlic can sometimes have a slightly bitter aftertaste.
- 1 cup Uncooked Quinoa, rinsed: The star of our dish. Rinsing the quinoa thoroughly in a fine-mesh sieve is a crucial step to remove its natural coating, called saponin, which can taste bitter or soapy. White quinoa is classic for this recipe, but tri-color or red quinoa also work beautifully.
- 2 cups Vegetable Broth: Using broth instead of water is a non-negotiable secret to a flavorful dish. It infuses every grain of quinoa with savory, umami notes right from the start. Use a low-sodium version to better control the final saltiness.
- 3 cups Broccoli Florets, cut into small, bite-sized pieces: This adds vibrant color, essential nutrients, and a wonderful texture. Cutting the florets small ensures they cook quickly and evenly and that you get a bit of broccoli in every cheesy bite.
- ½ cup Milk or Heavy Cream: This is the key to the ultra-creamy sauce. For a richer, more decadent result reminiscent of classic mac and cheese, use heavy cream. For a lighter, yet still creamy version, whole milk is an excellent choice.
- 2 cups Sharp Cheddar Cheese, freshly shredded: The heart and soul of the flavor profile. Sharp cheddar provides a tangy, cheesy punch that stands up to the other ingredients. Shredding your own cheese from a block is highly recommended, as pre-shredded cheese contains anti-caking agents that can make the sauce grainy.
- ½ teaspoon Paprika: Adds a subtle warmth and a beautiful rosy hue to the final dish. Smoked paprika can also be used for a smokier, deeper flavor.
- Salt and Black Pepper, to taste: To season and enhance all the other flavors. Be mindful of the saltiness of your broth and cheese when seasoning.
Instructions
- Prepare the Quinoa: Begin by placing the uncooked quinoa into a fine-mesh strainer. Rinse it thoroughly under cold running water for at least 30-60 seconds, using your fingers to move the grains around. This step is vital for removing the natural saponin coating and ensuring a clean, nutty flavor. Drain it well and set it aside.
- Sauté the Aromatics: In a medium-sized pot or a large saucepan with a lid, heat the olive oil over medium heat. Once shimmering, add the finely diced yellow onion. Sauté for 4-5 minutes, stirring occasionally, until the onion becomes soft, translucent, and fragrant. Add the minced garlic and cook for another minute until you can smell its aroma. Be careful not to let the garlic burn, as it will become bitter.
- Toast the Quinoa: Add the rinsed and drained quinoa to the pot with the onions and garlic. Stir continuously for about 1-2 minutes. This step toasts the grains, drying them out and enhancing their natural nutty flavor, which adds a wonderful depth to the finished dish. You’ll know it’s ready when the quinoa becomes fragrant.
- Cook the Quinoa: Pour the vegetable broth into the pot. Season with the paprika, a pinch of salt, and a few grinds of black pepper. Stir everything together and bring the liquid to a rolling boil.
- Simmer and Steam: Once boiling, immediately reduce the heat to the lowest possible setting. Place the bite-sized broccoli florets directly on top of the quinoa—do not stir them in. They will steam perfectly on top as the quinoa cooks. Cover the pot with a tight-fitting lid and let it simmer for 15 minutes. It is crucial that you do not lift the lid or stir during this time, as this will disrupt the steaming process and can lead to unevenly cooked quinoa.
- Rest the Quinoa: After 15 minutes, remove the pot from the heat completely but leave the lid on. Let it stand, undisturbed, for another 5-10 minutes. This resting period allows the quinoa to absorb any remaining moisture and to fluff up, resulting in a perfect texture where the grains are separate and not mushy.
- Create the Cheesy Sauce: Remove the lid. You should see that the quinoa has absorbed all the liquid and the broccoli is bright green and tender-crisp. Use a fork to gently fluff the quinoa and mix in the broccoli.
- Melt and Serve: Pour in the milk or heavy cream and add about 1 ½ cups of the shredded cheddar cheese (reserving the remaining ½ cup for topping, if desired). Stir gently over low heat until the cheese is completely melted and has formed a luscious, creamy sauce that coats every grain of quinoa and every floret of broccoli. Taste and adjust seasoning with more salt and pepper if needed. Serve immediately, garnished with the remaining cheese.
Nutrition
- Serving Size: one normal portion
- Calories: 450
- Fiber: 6g
- Protein: 18g


