

It’s Easter morning, and the scent of warm, sweet pancakes is wafting through the house, mingling with the excited whispers of children eager to start their egg hunt. This year, we decided to make Easter breakfast extra special, moving beyond the usual scrambled eggs and toast to something fun, festive, and utterly delicious: Easter Bunny Banana Pancakes. Let me tell you, these weren’t just a hit; they were a home run! From the moment my little ones saw the adorable bunny shapes emerge from the pan, their faces lit up brighter than any Easter egg. The soft, fluffy banana pancakes were subtly sweet and incredibly satisfying, and the best part? They were surprisingly easy to make. Even amidst the Easter morning chaos, I managed to whip up a batch in no time, creating a breakfast memory that we’ll cherish for years to come. If you’re looking for a way to add a touch of magic to your Easter brunch and create a breakfast that’s both fun and flavorful, look no further than these delightful Easter Bunny Banana Pancakes – they are guaranteed to hop their way into your family’s heart!
Ingredients
- Ripe Bananas (2 medium): The star of the show, ripe bananas provide natural sweetness, moisture, and that signature banana flavor. The riper the banana, the sweeter and more flavorful your pancakes will be. Look for bananas with brown spots for the best results.
- All-Purpose Flour (1 ½ cups): The foundation of our pancakes, all-purpose flour provides structure. You can also use whole wheat flour for a slightly nuttier flavor and added fiber, or a gluten-free blend for those with dietary restrictions.
- Milk (1 ¼ cups): Adds moisture and helps create a smooth batter. You can use dairy milk or non-dairy alternatives like almond milk, soy milk, or oat milk depending on your preference and dietary needs. Each type of milk will impart a slightly different flavor and texture to the pancakes.
- Egg (1 large): Acts as a binder and adds richness and structure to the pancakes. For a vegan option, you can use a flax egg (1 tablespoon flaxseed meal mixed with 3 tablespoons water and left to sit for 5 minutes).
- Baking Powder (2 teaspoons): The leavening agent that makes our pancakes light and fluffy. Ensure your baking powder is fresh for the best rise.
- Sugar (2 tablespoons): Adds a touch of sweetness to complement the banana flavor. You can use granulated sugar, brown sugar, or even maple syrup for a different flavor profile.
- Salt (¼ teaspoon): Enhances the flavors and balances the sweetness. A pinch of salt is crucial in baked goods to prevent them from tasting flat.
- Vanilla Extract (1 teaspoon): Adds a warm, aromatic flavor that complements the banana and other ingredients. Pure vanilla extract is recommended for the best flavor.
- Butter or Oil (for cooking): Used to grease the griddle or pan and prevent the pancakes from sticking. Butter adds a richer flavor, while oil (like canola or coconut oil) is a good neutral option.
- Optional Decorations: Chocolate chips, blueberries, sliced strawberries, whipped cream, maple syrup, sprinkles, edible bunny decorations – for making the bunny faces and adding extra fun.
Instructions
- Prepare the Bananas: Start by peeling the ripe bananas and placing them in a medium-sized bowl. Mash them thoroughly using a fork until you achieve a smooth, slightly chunky consistency. Some small lumps are okay, but you want to avoid large chunks for an even pancake batter. Mashing the bananas well ensures they incorporate smoothly into the batter and release their natural sweetness and moisture.
- Combine Wet Ingredients: To the mashed bananas, add the milk, egg, sugar, and vanilla extract. Whisk these wet ingredients together until they are well combined. Ensure the egg is fully incorporated and the sugar is mostly dissolved. This step creates the liquid base for our pancake batter and infuses it with flavor and richness.
- Incorporate Dry Ingredients: In a separate large bowl, whisk together the all-purpose flour, baking powder, and salt. Whisking the dry ingredients separately helps to evenly distribute the baking powder and salt throughout the flour, preventing clumps and ensuring consistent rising and flavor in the pancakes.
- Combine Wet and Dry Ingredients: Gradually add the dry ingredients to the wet ingredients, mixing gently with a spatula or whisk until just combined. Be careful not to overmix the batter. Overmixing develops the gluten in the flour, which can result in tough pancakes. A few lumps in the batter are perfectly fine; they will disappear during cooking. The key is to stop mixing as soon as the dry ingredients are mostly incorporated.
- Heat the Griddle or Pan: Place a griddle or large non-stick frying pan over medium heat. Allow it to heat up completely before adding any butter or oil. You’ll know the griddle is ready when a drop of water sizzles and evaporates quickly. Properly heating the griddle is crucial for preventing sticking and ensuring even cooking.
- Grease the Cooking Surface: Once the griddle is hot, lightly grease it with butter or oil. Use just enough to prevent sticking; too much grease can make the pancakes greasy. You can use a paper towel to spread the butter or oil evenly across the surface.
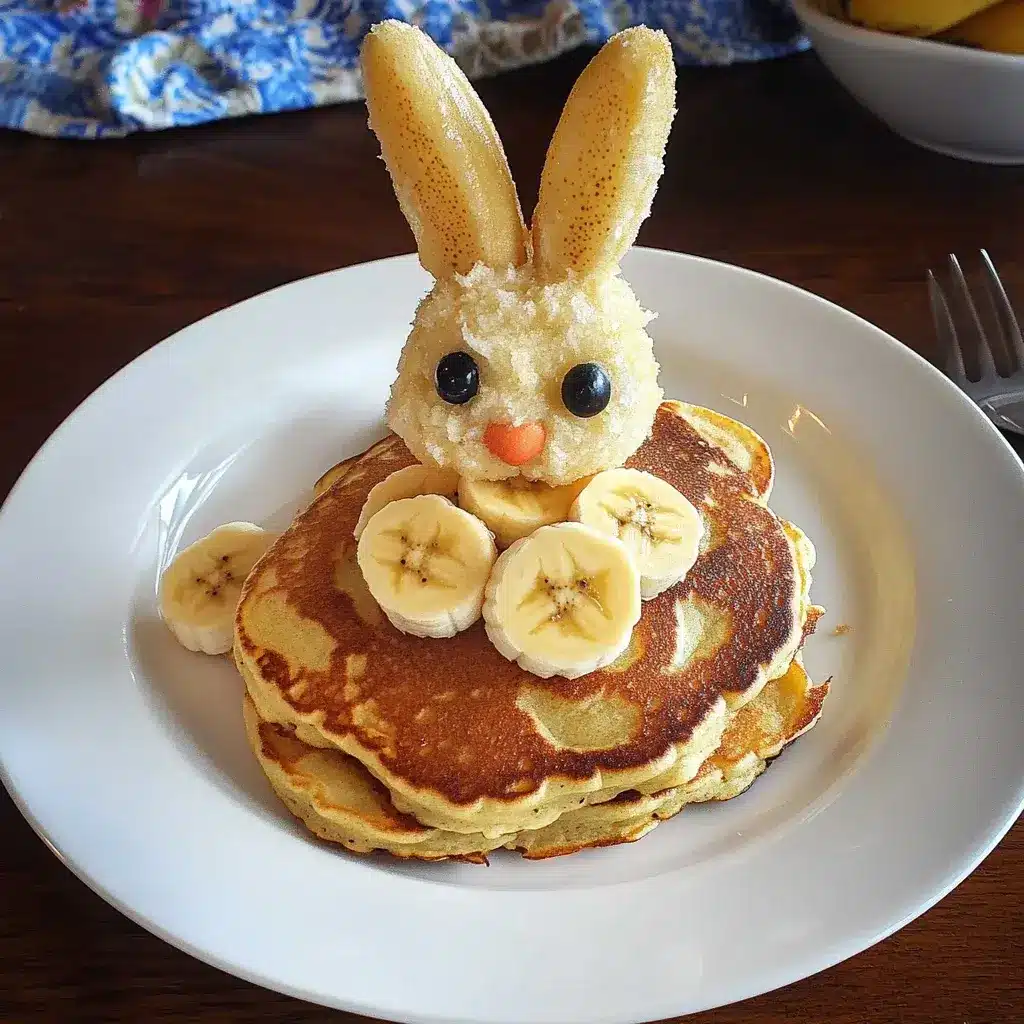
- Pour and Shape the Pancakes: For each pancake, pour about ¼ cup of batter onto the hot, greased griddle. To create the Easter bunny shapes, use a spoon to gently shape the batter into a round head and two slightly elongated ears at the top. You can make them as bunny-like as you wish! Don’t overcrowd the griddle; leave enough space between each pancake for easy flipping.
- Cook the Pancakes: Cook the pancakes for about 2-3 minutes per side, or until golden brown and cooked through. You’ll know it’s time to flip when bubbles start to appear on the surface of the pancake and the edges look set. Use a spatula to carefully flip each pancake. Avoid pressing down on the pancakes while they cook, as this can flatten them and make them less fluffy.
- Keep Pancakes Warm (Optional): If you’re making a large batch, you can keep the cooked pancakes warm while you finish the rest. Place them on a baking sheet in a preheated oven at 200°F (95°C). This will prevent them from getting cold and soggy while you prepare the rest of breakfast or wait for everyone to be ready to eat.
- Decorate and Serve: Once all the pancakes are cooked, it’s time for the fun part – decorating! Get creative with your toppings. You can use chocolate chips or blueberries to make eyes and noses for the bunnies. Sliced strawberries can be used for ears or bows. Whipped cream, maple syrup, and sprinkles are also fantastic additions. Serve immediately and enjoy your adorable and delicious Easter Bunny Banana Pancakes!
Nutrition Facts
(Per serving, approximately 2 pancakes – Note: Nutritional values are estimates and can vary based on specific ingredients and serving size.)
- Servings: 4-6
- Calories: 250-300 kcal
- Total Fat: 8-10g
Preparation Time
- Prep Time: 15 minutes – This includes the time to gather ingredients, mash bananas, and mix the batter. The batter comes together quickly, making this a great recipe for busy mornings.
- Cook Time: 20 minutes – This is the time spent cooking the pancakes on the griddle. Cooking time may vary slightly depending on the size of your pancakes and the heat of your griddle.
- Total Time: 35 minutes – From start to finish, you can have a batch of delicious and festive Easter Bunny Banana Pancakes ready in just about half an hour. Perfect for a special Easter breakfast or brunch!
How to Serve
- Classic Maple Syrup: A timeless pancake topping! Warm maple syrup drizzled generously over the bunny pancakes enhances their sweetness and adds a comforting touch.
- Whipped Cream and Berries: Create a delightful dessert-like presentation. Top with a dollop of freshly whipped cream and a medley of fresh berries like strawberries, blueberries, and raspberries for a burst of flavor and color.
- Chocolate Chips and Hazelnut Spread: Indulge your sweet tooth! Sprinkle mini chocolate chips on the pancakes while they are still warm so they melt slightly, and add a drizzle of hazelnut spread for a decadent treat.
- Sliced Bananas and Honey: Keep it simple and wholesome. Top with extra slices of fresh banana and a drizzle of honey for a naturally sweet and fruity flavor combination that highlights the banana pancake base.
- Fruit Compote: Elevate your brunch with a homemade fruit compote. A warm berry compote or apple compote adds a sophisticated touch and complements the banana pancakes beautifully.
- Powdered Sugar and Lemon Zest: For a lighter, more elegant serving option, dust the bunny pancakes with powdered sugar and sprinkle with fresh lemon zest. The subtle citrus notes brighten the banana flavor.
- Savory Side Dish: Balance the sweetness with a savory side. Serve alongside crispy bacon, sausage, or scrambled eggs for a complete and satisfying Easter brunch spread.
- Fun Decorations for Kids: Let kids get involved! Provide a variety of toppings like sprinkles, edible eyes, colored icing, and small candies to let them decorate their own bunny pancakes and make them extra special.
Additional Tips for Perfect Easter Bunny Banana Pancakes
- Use Ripe Bananas: Overripe bananas are key for the best flavor and texture. They are sweeter and mash more easily, resulting in moister and more flavorful pancakes. Bananas with brown spots are ideal.
- Don’t Overmix the Batter: Overmixing develops gluten, leading to tough pancakes. Mix the batter just until the dry ingredients are incorporated. A few lumps are perfectly acceptable and will disappear during cooking.
- Let the Batter Rest: Allowing the batter to rest for 5-10 minutes before cooking can improve the texture of the pancakes. This gives the gluten time to relax and the baking powder to activate, resulting in fluffier pancakes.
- Control the Heat: Cook pancakes over medium heat. If the heat is too high, the pancakes will burn on the outside before they are cooked through on the inside. If the heat is too low, they will be pale and potentially dry.
- Test the Griddle Temperature: Before pouring the batter, test if the griddle is hot enough by sprinkling a few drops of water on it. If the water sizzles and evaporates quickly, the griddle is ready.
- Use a Spatula for Shaping: For more defined bunny ear shapes, use the back of a spoon or a small spatula to gently shape the batter on the griddle immediately after pouring. This is easier to do while the batter is still wet.
- Flip at the Right Time: Wait until bubbles appear on the surface of the pancakes and the edges look set before flipping. This usually takes about 2-3 minutes per side. Flipping too early can cause the pancakes to tear.
- Keep Pancakes Warm Properly: If you need to keep pancakes warm, preheat your oven to a low temperature (around 200°F or 95°C) and place the cooked pancakes on a wire rack set over a baking sheet. This helps prevent them from getting soggy. Avoid stacking them directly on a plate in the oven.
FAQ – Frequently Asked Questions about Easter Bunny Banana Pancakes
Q1: Can I make these pancakes ahead of time?
A: While pancakes are best enjoyed fresh, you can make the batter ahead of time and store it in the refrigerator for up to 24 hours. Stir gently before cooking. Cooked pancakes can also be stored in the refrigerator for a day or two and reheated in a toaster or microwave, but they will be best when freshly made.
Q2: Can I use frozen bananas for this recipe?
A: Yes, you can use frozen bananas. Just make sure to thaw them completely and drain any excess liquid before mashing them. Frozen bananas tend to be sweeter and softer when thawed, which can actually enhance the banana flavor of the pancakes.
Q3: What can I substitute for milk in the recipe?
A: You can easily substitute dairy milk with non-dairy alternatives like almond milk, soy milk, oat milk, or coconut milk. These will all work well and may add a slightly different flavor note to the pancakes.
Q4: Can I make these pancakes gluten-free?
A: Yes! Simply substitute the all-purpose flour with a gluten-free all-purpose flour blend. Make sure the blend is designed for baking and contains xanthan gum or guar gum for structure. Check the packaging to ensure it’s a 1:1 replacement for regular flour.
Q5: How do I make the bunny shapes more defined?
A: Use a spoon or small spatula to gently shape the batter into bunny heads and ears immediately after pouring it onto the griddle. You can also use cookie cutters to cut out bunny shapes after the pancakes are cooked, though this will create some batter waste.
Q6: My pancakes are sticking to the griddle, what am I doing wrong?
A: Make sure your griddle is properly preheated before adding the batter. Also, ensure you are greasing the griddle adequately with butter or oil before each batch of pancakes. If using a non-stick pan, make sure it’s in good condition. Sometimes, even non-stick pans require a little grease for best results.
Q7: Can I add other ingredients to the batter?
A: Absolutely! Feel free to get creative. You can add spices like cinnamon or nutmeg, chopped nuts, chocolate chips directly into the batter, or even a swirl of peanut butter for extra flavor and texture.
Q8: Are these pancakes suitable for babies or toddlers?
A: Yes, these pancakes can be a great option for babies and toddlers, especially because they are naturally sweetened with banana. Just be mindful of any potential allergies and ensure the pancakes are cooked through and cut into age-appropriate pieces to prevent choking hazards. You can also reduce the added sugar or omit it entirely for babies.

Easter Bunny Banana Pancakes
Ingredients
- Ripe Bananas (2 medium): The star of the show, ripe bananas provide natural sweetness, moisture, and that signature banana flavor. The riper the banana, the sweeter and more flavorful your pancakes will be. Look for bananas with brown spots for the best results.
- All-Purpose Flour (1 ½ cups): The foundation of our pancakes, all-purpose flour provides structure. You can also use whole wheat flour for a slightly nuttier flavor and added fiber, or a gluten-free blend for those with dietary restrictions.
- Milk (1 ¼ cups): Adds moisture and helps create a smooth batter. You can use dairy milk or non-dairy alternatives like almond milk, soy milk, or oat milk depending on your preference and dietary needs. Each type of milk will impart a slightly different flavor and texture to the pancakes.
- Egg (1 large): Acts as a binder and adds richness and structure to the pancakes. For a vegan option, you can use a flax egg (1 tablespoon flaxseed meal mixed with 3 tablespoons water and left to sit for 5 minutes).
- Baking Powder (2 teaspoons): The leavening agent that makes our pancakes light and fluffy. Ensure your baking powder is fresh for the best rise.
- Sugar (2 tablespoons): Adds a touch of sweetness to complement the banana flavor. You can use granulated sugar, brown sugar, or even maple syrup for a different flavor profile.
- Salt (¼ teaspoon): Enhances the flavors and balances the sweetness. A pinch of salt is crucial in baked goods to prevent them from tasting flat.
- Vanilla Extract (1 teaspoon): Adds a warm, aromatic flavor that complements the banana and other ingredients. Pure vanilla extract is recommended for the best flavor.
- Butter or Oil (for cooking): Used to grease the griddle or pan and prevent the pancakes from sticking. Butter adds a richer flavor, while oil (like canola or coconut oil) is a good neutral option.
- Optional Decorations: Chocolate chips, blueberries, sliced strawberries, whipped cream, maple syrup, sprinkles, edible bunny decorations – for making the bunny faces and adding extra fun.
Instructions
- Prepare the Bananas: Start by peeling the ripe bananas and placing them in a medium-sized bowl. Mash them thoroughly using a fork until you achieve a smooth, slightly chunky consistency. Some small lumps are okay, but you want to avoid large chunks for an even pancake batter. Mashing the bananas well ensures they incorporate smoothly into the batter and release their natural sweetness and moisture.
- Combine Wet Ingredients: To the mashed bananas, add the milk, egg, sugar, and vanilla extract. Whisk these wet ingredients together until they are well combined. Ensure the egg is fully incorporated and the sugar is mostly dissolved. This step creates the liquid base for our pancake batter and infuses it with flavor and richness.
- Incorporate Dry Ingredients: In a separate large bowl, whisk together the all-purpose flour, baking powder, and salt. Whisking the dry ingredients separately helps to evenly distribute the baking powder and salt throughout the flour, preventing clumps and ensuring consistent rising and flavor in the pancakes.
- Combine Wet and Dry Ingredients: Gradually add the dry ingredients to the wet ingredients, mixing gently with a spatula or whisk until just combined. Be careful not to overmix the batter. Overmixing develops the gluten in the flour, which can result in tough pancakes. A few lumps in the batter are perfectly fine; they will disappear during cooking. The key is to stop mixing as soon as the dry ingredients are mostly incorporated.
- Heat the Griddle or Pan: Place a griddle or large non-stick frying pan over medium heat. Allow it to heat up completely before adding any butter or oil. You’ll know the griddle is ready when a drop of water sizzles and evaporates quickly. Properly heating the griddle is crucial for preventing sticking and ensuring even cooking.
- Grease the Cooking Surface: Once the griddle is hot, lightly grease it with butter or oil. Use just enough to prevent sticking; too much grease can make the pancakes greasy. You can use a paper towel to spread the butter or oil evenly across the surface.
- Pour and Shape the Pancakes: For each pancake, pour about ¼ cup of batter onto the hot, greased griddle. To create the Easter bunny shapes, use a spoon to gently shape the batter into a round head and two slightly elongated ears at the top. You can make them as bunny-like as you wish! Don’t overcrowd the griddle; leave enough space between each pancake for easy flipping.
- Cook the Pancakes: Cook the pancakes for about 2-3 minutes per side, or until golden brown and cooked through. You’ll know it’s time to flip when bubbles start to appear on the surface of the pancake and the edges look set. Use a spatula to carefully flip each pancake. Avoid pressing down on the pancakes while they cook, as this can flatten them and make them less fluffy.
- Keep Pancakes Warm (Optional): If you’re making a large batch, you can keep the cooked pancakes warm while you finish the rest. Place them on a baking sheet in a preheated oven at 200°F (95°C). This will prevent them from getting cold and soggy while you prepare the rest of breakfast or wait for everyone to be ready to eat.
- Decorate and Serve: Once all the pancakes are cooked, it’s time for the fun part – decorating! Get creative with your toppings. You can use chocolate chips or blueberries to make eyes and noses for the bunnies. Sliced strawberries can be used for ears or bows. Whipped cream, maple syrup, and sprinkles are also fantastic additions. Serve immediately and enjoy your adorable and delicious Easter Bunny Banana Pancakes!
Nutrition
- Serving Size: one normal portion
- Calories: 300
- Fat: 10g


