
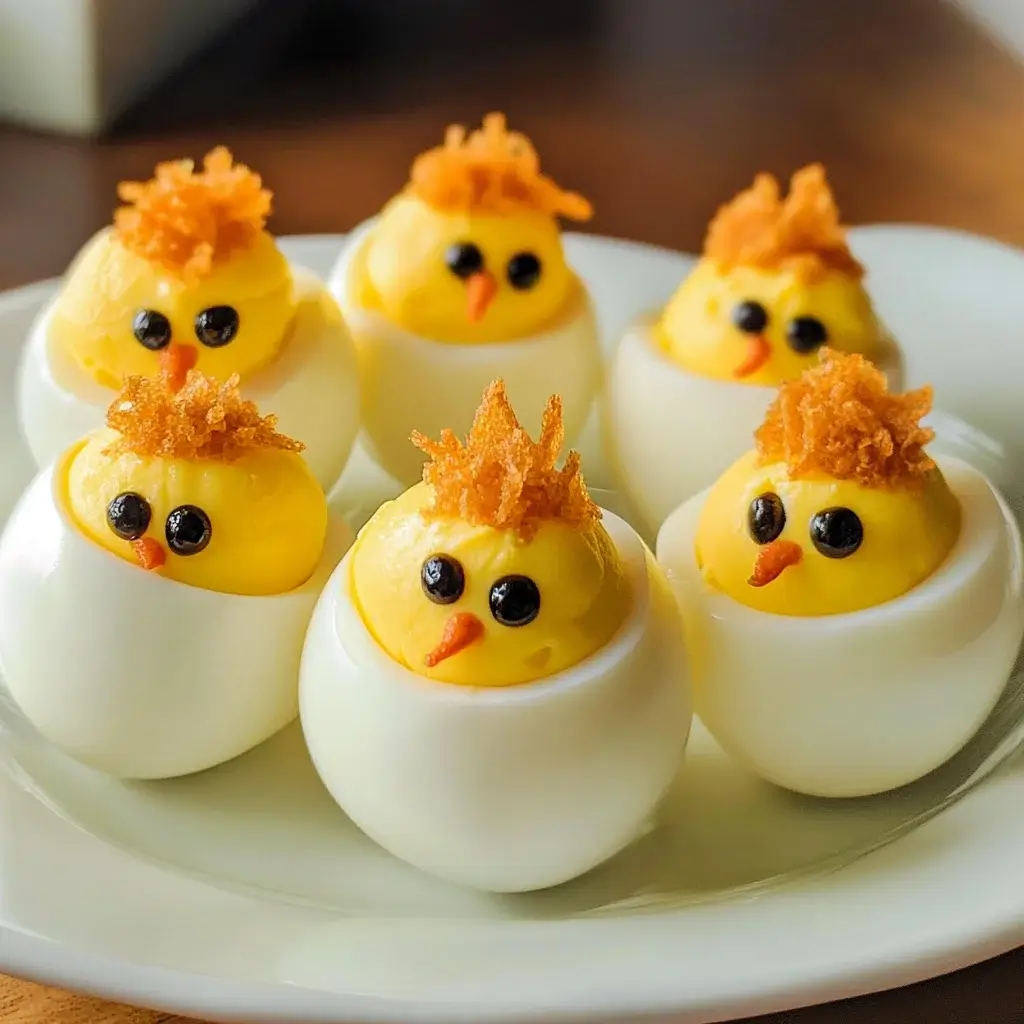

Every Easter, our family table is a vibrant tapestry of colors and flavors, but one dish consistently steals the show – Deviled Egg Chicks. These aren’t just your average deviled eggs; they are adorable, bite-sized delights that bring smiles to faces of all ages. From the moment I first presented these little chick-shaped appetizers, they were an instant hit. The kids were absolutely captivated by their charming appearance, and even the adults couldn’t resist their playful appeal. Beyond their undeniable cuteness, these Deviled Egg Chicks are incredibly delicious. The creamy, tangy filling perfectly complements the mild egg white, and the subtle sweetness from the pickle relish adds a delightful touch. They are surprisingly easy to make, making them a perfect recipe to involve little helpers in the kitchen. Whether you’re hosting an Easter brunch, a spring gathering, or simply looking for a fun and healthy snack, these Deviled Egg Chicks are guaranteed to be a crowd-pleaser. They bring a touch of whimsy and joy to any occasion and are a testament to how simple ingredients can be transformed into something truly special and memorable. This recipe has become a cherished tradition in our home, and I’m excited to share the joy and deliciousness of Deviled Egg Chicks with you. Get ready to transform a classic appetizer into an Easter masterpiece that’s both visually stunning and utterly scrumptious!
Ingredients for Adorable Deviled Egg Chicks
To create these delightful Deviled Egg Chicks, you’ll need a handful of simple, readily available ingredients. Each component plays a crucial role in both the flavor and the charming appearance of these festive appetizers. Here’s a breakdown of what you’ll need:
- Large Eggs: The star of the show! You’ll need large eggs, preferably fresh, as they are easier to peel after boiling. Eggs provide the base for our chicks and are packed with protein and essential nutrients. For this recipe, we recommend using a dozen eggs to create 12 adorable chick halves, perfect for a family gathering or a small party.
- Mayonnaise: The creamy binder that brings the filling together. Use a good quality mayonnaise for the best flavor. Full-fat mayonnaise will give you the richest and most flavorful result, but you can also use light mayonnaise if you prefer to reduce the fat content. Mayonnaise adds moisture and a tangy richness that is essential to classic deviled eggs. About half a cup to three-quarters of a cup should suffice, depending on your desired consistency.
- Dijon Mustard: A touch of Dijon mustard adds a subtle depth of flavor and a pleasant tang that cuts through the richness of the mayonnaise and egg yolks. Dijon mustard is preferred for its smooth texture and sophisticated flavor, but you can also use yellow mustard if that’s what you have on hand, though the flavor will be slightly different. Start with about a teaspoon and adjust to taste.
- Sweet Pickle Relish: Sweet pickle relish provides a delightful sweetness and a bit of crunch to the filling. The sweetness balances the savory flavors and adds a textural element that elevates the deviled eggs. If you don’t have sweet pickle relish, you can finely chop sweet pickles or use a combination of sweet and dill pickle relish for a more complex flavor profile. About two to three tablespoons should be enough to provide the perfect level of sweetness.
- Salt and Black Pepper: Essential seasonings to enhance all the flavors. Salt brings out the natural flavors of the eggs and other ingredients, while black pepper adds a subtle warmth and a hint of spice. Season to taste, starting with about half a teaspoon of salt and a quarter teaspoon of black pepper, and adjusting as needed.
- Carrot: For crafting those adorable little beaks! You’ll need a medium-sized carrot, peeled and ready to be cut into tiny triangles. The vibrant orange of the carrot adds a pop of color and is perfect for creating the characteristic chick beaks.
- Black Olives (Pitted): To create the cute, beady eyes of our chick friends. Pitted black olives are easy to work with and provide a contrasting dark color that makes the eyes stand out. You’ll need about 6-8 olives, depending on the size, to create enough eyes for all your chick halves.
- Fresh Dill or Parsley (Optional): For a fresh, herbaceous garnish that adds a touch of green and visual appeal. Fresh dill or parsley, finely chopped, can be sprinkled over the finished Deviled Egg Chicks to enhance their presentation and add a subtle fresh flavor. This is optional but recommended for a more polished and flavorful final product.
Step-by-Step Instructions for Creating Deviled Egg Chick Masterpieces
Making Deviled Egg Chicks is a fun and straightforward process, perfect for getting creative in the kitchen. Follow these detailed instructions to transform simple ingredients into charming and delicious appetizers:
- Boiling the Eggs to Perfection: Begin by gently placing the eggs in a saucepan and covering them with cold water, ensuring the water level is about an inch above the eggs. Bring the water to a rolling boil over medium-high heat. Once boiling, reduce the heat to low, cover the pan, and let the eggs simmer gently for 12-15 minutes. This ensures the yolks are fully cooked and the eggs are easier to peel. After simmering, immediately transfer the eggs to an ice bath (a bowl filled with ice water). This rapid cooling stops the cooking process and makes peeling much simpler. Let the eggs cool completely in the ice bath for at least 15-20 minutes.
- Peeling the Eggs with Ease: Once the eggs are thoroughly cooled, gently tap each egg all over on a hard surface to create cracks in the shell. Start peeling under cold running water, working your way around the egg. The water helps to separate the shell from the egg white. If you find it difficult to peel, try starting from the wider end of the egg where there is often an air pocket. Perfectly peeled eggs are essential for a smooth and visually appealing final product.
- Preparing the Egg Halves: Carefully slice each peeled egg lengthwise using a sharp knife. Gently separate the egg halves and scoop out the yolks into a medium-sized mixing bowl. Arrange the egg white halves on a serving platter or a plate.
- Creating the Creamy Yolk Filling: In the bowl with the egg yolks, add the mayonnaise, Dijon mustard, sweet pickle relish, salt, and black pepper. Use a fork or a potato masher to mash the yolks and combine them with the other ingredients until you achieve a smooth and creamy mixture. Taste the filling and adjust seasonings as needed. You might want to add a little more mustard for tanginess, relish for sweetness, or salt and pepper to enhance the overall flavor. For an extra smooth filling, you can use a hand mixer or immersion blender to blend the mixture until perfectly creamy.
- Filling the Egg Whites: Now it’s time to fill the egg white halves with the delicious yolk mixture. You can use a spoon to scoop the filling and generously mound it into each egg white cavity. For a more elegant and professional look, you can transfer the yolk mixture to a piping bag fitted with a star tip. Pipe the filling into the egg whites, creating a decorative swirl. This adds a touch of sophistication to your Deviled Egg Chicks.
- Crafting Carrot Beaks: Peel a medium-sized carrot and cut a thin slice. From this slice, cut out small triangles to resemble chick beaks. You’ll need two small triangles for each Deviled Egg Chick. The smaller and more uniform the triangles, the cuter your chicks will look. You can use a small paring knife to carefully shape the beaks.
- Creating Olive Eyes: Cut pitted black olives into thin slices. Then, cut each slice in half to create small semi-circles for the chick eyes. For smaller, more delicate eyes, you can finely chop the olives into tiny pieces. Alternatively, you can use whole small black olive pieces if you prefer larger eyes.
- Assembling the Deviled Egg Chicks: Now comes the fun part – assembling your adorable chicks! For each filled egg half, gently insert two small carrot triangles into the yolk filling to create the beak. Place them close together in the center of the yolk mound, pointing outwards. Then, place two small pieces of black olive above the beak to create the eyes. Position them symmetrically to give your chicks a charming, wide-eyed expression.
- Garnishing (Optional): If desired, garnish your Deviled Egg Chicks with fresh dill or parsley. Finely chop the herbs and sprinkle them lightly over the platter or directly onto the chicks. This adds a fresh, green touch and enhances the visual appeal of your finished creation.
- Chilling and Serving: Once assembled, cover the platter of Deviled Egg Chicks loosely with plastic wrap and refrigerate them for at least 30 minutes before serving. Chilling allows the flavors to meld together and helps the chicks hold their shape. Serve chilled and enjoy the delighted reactions of your guests!
Nutritional Facts for Deviled Egg Chicks (Per Serving – 2 Chick Halves)
Understanding the nutritional content of your recipes is helpful for making informed dietary choices. Here’s an approximate nutritional breakdown for a serving of two Deviled Egg Chick halves (made with the ingredients and quantities mentioned above). Please note that these values are estimates and can vary based on specific ingredient brands and portion sizes.
- Serving Size: 2 Chick Halves (1 Deviled Egg)
- Calories: Approximately 150-180 kcal
- Fat: 12-15g
These nutritional facts highlight that Deviled Egg Chicks are a relatively moderate-calorie appetizer with a good source of protein and some fat. They are also moderately high in cholesterol, which is inherent in egg yolks. Individuals monitoring their sodium or sugar intake should be mindful of portion sizes.
Preparation Time: Quick and Easy Festive Fun
Deviled Egg Chicks are surprisingly quick and easy to prepare, making them an ideal appetizer for busy hosts or a fun cooking project with children.
- Total Preparation Time: Approximately 30-40 minutes
- Active Preparation Time: 20-25 minutes (including boiling and peeling eggs, preparing filling and decorations)
- Cooking Time: 12-15 minutes (for boiling eggs)
- Chilling Time: Minimum 30 minutes (recommended for flavor melding and firmness)
The majority of the time is spent boiling and cooling the eggs. Once the eggs are cooked and peeled, the rest of the preparation is quite rapid and enjoyable. You can even expedite the cooling process by using an ice bath. The assembly of the chicks is a fun and creative step that can be done in just a few minutes per egg. Overall, Deviled Egg Chicks are a wonderfully efficient and rewarding recipe for creating a visually impressive and delicious appetizer in under an hour.
How to Serve Deviled Egg Chicks: Festive and Fun Presentation Ideas
Deviled Egg Chicks are incredibly versatile and can be served in a variety of ways to enhance their visual appeal and complement different occasions. Here are some serving suggestions to make your Deviled Egg Chicks stand out:
- Easter Brunch Centerpiece: Arrange the Deviled Egg Chicks on a large platter in the center of your Easter brunch table. Surround them with fresh spring greens, colorful flowers, or pastel-colored candies to create a festive and eye-catching centerpiece.
- Spring Party Appetizer Platter: Incorporate Deviled Egg Chicks into a larger appetizer platter with other spring-themed treats like cucumber sandwiches, mini quiches, fruit skewers, and vegetable crudités. The chicks will add a playful and thematic element to your spread.
- Kids’ Birthday Party Snack: Deviled Egg Chicks are a fantastic and healthy snack option for kids’ birthday parties. Their cute appearance will definitely appeal to children, and they are easy for little hands to manage. Serve them alongside other kid-friendly snacks like mini pizzas, fruit salad, and veggie sticks.
- Picnic Basket Delight: Pack Deviled Egg Chicks in a chilled container for a delightful addition to your picnic basket. They are portable and hold up well, making them a perfect appetizer to enjoy outdoors. Ensure they are kept cool during transport, ideally in a cooler with ice packs.
- Individual Appetizer Spoons: For a more elegant presentation, serve individual Deviled Egg Chicks on appetizer spoons or small ceramic dishes. This elevates their presentation and makes them easy for guests to pick up and enjoy during a cocktail party or more formal gathering.
- Nested in Lettuce Cups: Place each Deviled Egg Chick in a crisp lettuce cup (like butter lettuce or romaine lettuce). This adds a refreshing element and makes them easier to eat without utensils. The green lettuce provides a nice contrast to the yellow and orange of the chicks.
- Garnished with Paprika or Smoked Paprika: For a subtle smoky flavor and a touch of color, lightly sprinkle the finished Deviled Egg Chicks with paprika or smoked paprika before serving. This adds a visually appealing red dusting and enhances the savory notes of the appetizer.
- Served on a Bed of Fresh Herbs: Arrange a bed of fresh herbs like dill, parsley, or chives on your serving platter and place the Deviled Egg Chicks on top. This adds a fresh aroma and visual appeal, making the chicks look even more inviting.
Additional Tips for Perfect Deviled Egg Chicks Every Time
To ensure your Deviled Egg Chicks are a resounding success, here are some valuable tips and tricks to keep in mind:
- Start with Cold Eggs for Boiling: Begin boiling your eggs with cold water, not hot. Starting with cold water helps prevent the shells from cracking as the eggs heat up and allows for more even cooking.
- Don’t Overcook the Eggs: Overcooked eggs will have dry, crumbly yolks and may develop a green ring around the yolk, which is unappealing. Follow the recommended boiling time of 12-15 minutes for perfectly cooked yolks that are creamy and vibrant yellow.
- Ice Bath is Crucial for Easy Peeling: Immediately transferring the boiled eggs to an ice bath is essential for easy peeling. The cold water shock helps to contract the egg white, making it separate more easily from the shell membrane.
- Peel Eggs Under Running Water: Peeling eggs under cold running water can further assist in removing the shell smoothly and cleanly. The water lubricates between the shell and the egg white, making the process less messy and more efficient.
- Make the Yolk Filling Ahead of Time: You can prepare the yolk filling a day in advance and store it in an airtight container in the refrigerator. This can save you time on the day you plan to serve the Deviled Egg Chicks. Just fill the egg whites and decorate them shortly before serving.
- Use a Piping Bag for Neater Filling: For a more polished and professional look, use a piping bag fitted with a star tip to fill the egg whites with the yolk mixture. This creates a decorative swirl and ensures even and neat filling.
- Get Creative with Decorations: While carrot beaks and olive eyes are classic, feel free to get creative with your decorations! Use small pieces of red bell pepper for chick combs, chives for whiskers, or even tiny edible flowers for added whimsy.
- Store Assembled Chicks Properly: If you need to assemble the Deviled Egg Chicks ahead of time, store them covered in the refrigerator for up to 24 hours. To prevent them from drying out, lightly dampen a paper towel and place it in the container with the chicks. However, for the freshest taste and appearance, it’s best to assemble them closer to serving time.
Frequently Asked Questions About Deviled Egg Chicks (FAQ)
Here are some common questions people ask about making and serving Deviled Egg Chicks:
Q1: Can I make Deviled Egg Chicks ahead of time?
A1: Yes, you can prepare the yolk filling up to a day ahead and store it in the refrigerator. You can also boil and peel the eggs a day in advance. However, it’s best to assemble the chicks and decorate them closer to serving time (within a few hours) for optimal freshness and appearance.
Q2: How long do Deviled Egg Chicks last in the refrigerator?
A2: Deviled Egg Chicks are best consumed within 2-3 days when stored properly in an airtight container in the refrigerator. After this time, the quality and texture may start to decline.
Q3: Can I freeze Deviled Egg Chicks?
A3: Freezing Deviled Egg Chicks is not recommended. The mayonnaise in the filling can separate and become watery upon thawing, and the egg whites can become rubbery and lose their texture. It’s best to enjoy them fresh or within a few days of making them.
Q4: Can I use a different type of mustard besides Dijon?
A4: Yes, you can substitute yellow mustard for Dijon mustard if you prefer. However, Dijon mustard offers a smoother texture and a more sophisticated flavor profile that complements the other ingredients beautifully. Yellow mustard will provide a tangier, more classic mustard flavor.
Q5: Can I skip the sweet pickle relish if I don’t like it?
A5: While sweet pickle relish adds a delightful sweetness and texture, you can adjust or omit it based on your preference. If you don’t like sweet relish, you can use dill pickle relish for a tangier flavor, or finely chopped celery for added crunch without sweetness. You can also experiment with other finely chopped vegetables like red onion or bell pepper for different flavor profiles.
Q6: Can I make vegan Deviled Egg Chicks?
A6: Classic Deviled Eggs are not vegan due to the eggs and mayonnaise. However, there are vegan deviled egg alternatives that use ingredients like tofu or white beans as a base and vegan mayonnaise substitutes. While you can adapt the chick decoration concept to these vegan versions, they will naturally have a different flavor and texture than traditional Deviled Egg Chicks.
Q7: Are Deviled Egg Chicks suitable for kids?
A7: Absolutely! Deviled Egg Chicks are a fantastic and kid-friendly appetizer. Their cute appearance makes them appealing to children, and they are a relatively healthy and protein-rich snack option. Just be mindful of any allergies, especially to eggs.
Q8: Can I add other seasonings to the yolk filling?
A8: Yes, feel free to experiment with other seasonings to customize the flavor of your yolk filling! Consider adding a pinch of paprika, smoked paprika, garlic powder, onion powder, hot sauce, or fresh herbs like dill or chives to create your own signature Deviled Egg Chick recipe. A dash of Worcestershire sauce can also add depth of flavor.
By following these tips and exploring variations, you can create Deviled Egg Chicks that are not only adorable and festive but also perfectly delicious and tailored to your taste! Enjoy creating these charming appetizers and bringing smiles to everyone at your table.
Print
Deviled Egg Chicks Recipe
Ingredients
To create these delightful Deviled Egg Chicks, you’ll need a handful of simple, readily available ingredients. Each component plays a crucial role in both the flavor and the charming appearance of these festive appetizers. Here’s a breakdown of what you’ll need:
- Large Eggs: The star of the show! You’ll need large eggs, preferably fresh, as they are easier to peel after boiling. Eggs provide the base for our chicks and are packed with protein and essential nutrients. For this recipe, we recommend using a dozen eggs to create 12 adorable chick halves, perfect for a family gathering or a small party.
- Mayonnaise: The creamy binder that brings the filling together. Use a good quality mayonnaise for the best flavor. Full-fat mayonnaise will give you the richest and most flavorful result, but you can also use light mayonnaise if you prefer to reduce the fat content. Mayonnaise adds moisture and a tangy richness that is essential to classic deviled eggs. About half a cup to three-quarters of a cup should suffice, depending on your desired consistency.
- Dijon Mustard: A touch of Dijon mustard adds a subtle depth of flavor and a pleasant tang that cuts through the richness of the mayonnaise and egg yolks. Dijon mustard is preferred for its smooth texture and sophisticated flavor, but you can also use yellow mustard if that’s what you have on hand, though the flavor will be slightly different. Start with about a teaspoon and adjust to taste.
- Sweet Pickle Relish: Sweet pickle relish provides a delightful sweetness and a bit of crunch to the filling. The sweetness balances the savory flavors and adds a textural element that elevates the deviled eggs. If you don’t have sweet pickle relish, you can finely chop sweet pickles or use a combination of sweet and dill pickle relish for a more complex flavor profile. About two to three tablespoons should be enough to provide the perfect level of sweetness.
- Salt and Black Pepper: Essential seasonings to enhance all the flavors. Salt brings out the natural flavors of the eggs and other ingredients, while black pepper adds a subtle warmth and a hint of spice. Season to taste, starting with about half a teaspoon of salt and a quarter teaspoon of black pepper, and adjusting as needed.
- Carrot: For crafting those adorable little beaks! You’ll need a medium-sized carrot, peeled and ready to be cut into tiny triangles. The vibrant orange of the carrot adds a pop of color and is perfect for creating the characteristic chick beaks.
- Black Olives (Pitted): To create the cute, beady eyes of our chick friends. Pitted black olives are easy to work with and provide a contrasting dark color that makes the eyes stand out. You’ll need about 6-8 olives, depending on the size, to create enough eyes for all your chick halves.
- Fresh Dill or Parsley (Optional): For a fresh, herbaceous garnish that adds a touch of green and visual appeal. Fresh dill or parsley, finely chopped, can be sprinkled over the finished Deviled Egg Chicks to enhance their presentation and add a subtle fresh flavor. This is optional but recommended for a more polished and flavorful final product.
Instructions
Making Deviled Egg Chicks is a fun and straightforward process, perfect for getting creative in the kitchen. Follow these detailed instructions to transform simple ingredients into charming and delicious appetizers:
- Boiling the Eggs to Perfection: Begin by gently placing the eggs in a saucepan and covering them with cold water, ensuring the water level is about an inch above the eggs. Bring the water to a rolling boil over medium-high heat. Once boiling, reduce the heat to low, cover the pan, and let the eggs simmer gently for 12-15 minutes. This ensures the yolks are fully cooked and the eggs are easier to peel. After simmering, immediately transfer the eggs to an ice bath (a bowl filled with ice water). This rapid cooling stops the cooking process and makes peeling much simpler. Let the eggs cool completely in the ice bath for at least 15-20 minutes.
- Peeling the Eggs with Ease: Once the eggs are thoroughly cooled, gently tap each egg all over on a hard surface to create cracks in the shell. Start peeling under cold running water, working your way around the egg. The water helps to separate the shell from the egg white. If you find it difficult to peel, try starting from the wider end of the egg where there is often an air pocket. Perfectly peeled eggs are essential for a smooth and visually appealing final product.
- Preparing the Egg Halves: Carefully slice each peeled egg lengthwise using a sharp knife. Gently separate the egg halves and scoop out the yolks into a medium-sized mixing bowl. Arrange the egg white halves on a serving platter or a plate.
- Creating the Creamy Yolk Filling: In the bowl with the egg yolks, add the mayonnaise, Dijon mustard, sweet pickle relish, salt, and black pepper. Use a fork or a potato masher to mash the yolks and combine them with the other ingredients until you achieve a smooth and creamy mixture. Taste the filling and adjust seasonings as needed. You might want to add a little more mustard for tanginess, relish for sweetness, or salt and pepper to enhance the overall flavor. For an extra smooth filling, you can use a hand mixer or immersion blender to blend the mixture until perfectly creamy.
- Filling the Egg Whites: Now it’s time to fill the egg white halves with the delicious yolk mixture. You can use a spoon to scoop the filling and generously mound it into each egg white cavity. For a more elegant and professional look, you can transfer the yolk mixture to a piping bag fitted with a star tip. Pipe the filling into the egg whites, creating a decorative swirl. This adds a touch of sophistication to your Deviled Egg Chicks.
- Crafting Carrot Beaks: Peel a medium-sized carrot and cut a thin slice. From this slice, cut out small triangles to resemble chick beaks. You’ll need two small triangles for each Deviled Egg Chick. The smaller and more uniform the triangles, the cuter your chicks will look. You can use a small paring knife to carefully shape the beaks.
- Creating Olive Eyes: Cut pitted black olives into thin slices. Then, cut each slice in half to create small semi-circles for the chick eyes. For smaller, more delicate eyes, you can finely chop the olives into tiny pieces. Alternatively, you can use whole small black olive pieces if you prefer larger eyes.
- Assembling the Deviled Egg Chicks: Now comes the fun part – assembling your adorable chicks! For each filled egg half, gently insert two small carrot triangles into the yolk filling to create the beak. Place them close together in the center of the yolk mound, pointing outwards. Then, place two small pieces of black olive above the beak to create the eyes. Position them symmetrically to give your chicks a charming, wide-eyed expression.
- Garnishing (Optional): If desired, garnish your Deviled Egg Chicks with fresh dill or parsley. Finely chop the herbs and sprinkle them lightly over the platter or directly onto the chicks. This adds a fresh, green touch and enhances the visual appeal of your finished creation.
- Chilling and Serving: Once assembled, cover the platter of Deviled Egg Chicks loosely with plastic wrap and refrigerate them for at least 30 minutes before serving. Chilling allows the flavors to meld together and helps the chicks hold their shape. Serve chilled and enjoy the delighted reactions of your guests!
Nutrition
- Serving Size: one normal portion
- Calories: 180
- Fat: 15g


