


After numerous attempts to find the perfect dessert that could impress without demanding hours in the kitchen, I stumbled upon this decadent chocolate lava cake recipe. Let me tell you, it was a game-changer! From the moment the warm, gooey center oozed out onto the plate, it was clear this wasn’t just any dessert—it was an experience. My family, usually quite reserved with their praises, devoured every last bite, their eyes widening with each spoonful of rich, molten chocolate. The simplicity of the recipe belies its sophistication; it’s surprisingly easy to whip up, yet delivers a restaurant-quality dessert that’s perfect for special occasions or simply to elevate a weeknight dinner. If you’re looking for a guaranteed crowd-pleaser that will have everyone asking for seconds (and the recipe!), look no further. This chocolate lava cake is pure indulgence, and trust me, you deserve it.
Ingredients
- Unsalted Butter: 1 cup (2 sticks), provides richness and moisture to the cake.
- Semi-Sweet Chocolate Chips: 12 ounces, high-quality chocolate is key for that intense chocolate flavor.
- Granulated Sugar: ½ cup, adds sweetness and structure to the cake.
- Large Eggs: 2 whole eggs, bind the ingredients together and contribute to the cake’s texture.
- Egg Yolks: 2 large egg yolks, add richness and help create that fudgy, molten center.
- All-Purpose Flour: ½ cup, provides structure, use sparingly to maintain the lava-like consistency.
- Pinch of Salt: Enhances the sweetness and balances the flavors.
- Vanilla Extract: 1 teaspoon, enhances the chocolate flavor and adds depth.
- Powdered Sugar: For dusting, optional, adds a touch of elegance and sweetness on top.
- Cocoa Powder: For dusting ramekins, prevents sticking and adds a subtle chocolate note.
Instructions
- Prepare the Ramekins: Preheat your oven to 425°F (220°C). Grease four 6-ounce ramekins generously with butter. Dust the inside of each ramekin with cocoa powder, ensuring you coat the bottom and sides evenly. Tap out any excess cocoa powder. This step is crucial to prevent the cakes from sticking and to add a subtle chocolate hint to the edges. Setting the oven to preheat early ensures it reaches the correct temperature by the time the batter is ready, which is important for the lava cakes to bake properly and develop their molten center.
- Melt Butter and Chocolate: In a heatproof bowl set over a saucepan of simmering water (or using a double boiler), combine the unsalted butter and semi-sweet chocolate chips. Ensure the bottom of the bowl does not touch the water. Stir constantly until both the butter and chocolate are completely melted and smooth. The gentle heat from the simmering water prevents the chocolate from burning or seizing, ensuring a silky smooth mixture. Stirring consistently helps distribute the heat evenly and promotes even melting.
- Incorporate Sugar: Once the chocolate and butter are melted and smooth, remove the bowl from the heat. Stir in the granulated sugar into the warm chocolate mixture. Mix well until the sugar is fully incorporated and the mixture is glossy and slightly cooled. Allowing the chocolate mixture to cool slightly before adding eggs is important to prevent the eggs from cooking and scrambling.
- Whisk in Eggs and Egg Yolks: In a separate bowl, lightly whisk the whole eggs and egg yolks together until they are just combined. Gradually add the whisked eggs to the slightly cooled chocolate mixture, whisking constantly to ensure they are fully incorporated and the batter remains smooth. Whisking constantly is key to emulsifying the eggs into the chocolate mixture and preventing lumps from forming. The egg yolks are essential for the rich, fudgy texture and molten center of the lava cake.
- Add Vanilla and Salt: Stir in the vanilla extract and a pinch of salt to the chocolate batter. Mix until just combined. Vanilla extract enhances the overall flavor profile of the chocolate, while salt balances the sweetness and intensifies the chocolate notes. Be sure to mix gently at this stage to avoid overmixing the batter.
- Fold in Flour: Sift the all-purpose flour over the wet ingredients to prevent lumps. Gently fold the flour into the chocolate batter using a spatula or large spoon until just combined. Be careful not to overmix the batter. Overmixing can develop gluten, leading to a tougher cake rather than the desired tender, lava-like texture. Fold until the flour disappears into the batter and the mixture is homogenous.
- Divide Batter into Ramekins: Divide the chocolate batter evenly among the prepared ramekins. Each ramekin should be about ¾ full. Evenly distributing the batter ensures consistent baking and lava centers in all cakes. You can use a kitchen scale to ensure precision if desired, but visual estimation is usually sufficient.
- Bake to Perfection: Place the ramekins on a baking sheet for easier handling. Bake in the preheated oven at 425°F (220°C) for 12-15 minutes. Baking time is crucial for achieving the perfect lava center. The edges of the cakes should be set, but the center should still be soft and slightly jiggly. The exact baking time may vary slightly depending on your oven and ramekin size, so it’s important to monitor them closely.
- Check for Doneness: To check if the lava cakes are done, gently insert a toothpick into the edge of one cake. It should come out clean, while the center should remain soft and gooey. The tops of the cakes should look set but not dry. The key is to underbake slightly to maintain that molten center.
- Cool Slightly and Invert (Optional): Let the lava cakes cool in the ramekins for about 1-2 minutes after removing them from the oven. This brief cooling period makes them slightly easier to handle. If desired, you can carefully invert the lava cakes onto serving plates. To invert, run a thin knife or spatula around the edges of each cake to loosen it from the ramekin. Place a serving plate upside down over the ramekin and quickly flip them over. Gently tap the ramekin to release the cake. Inverting is optional; they can also be served directly from the ramekins.
- Dust and Serve Immediately: Dust the warm lava cakes with powdered sugar, if desired, for an elegant finish. Serve immediately while they are warm and the center is still molten and gooey. Lava cakes are best enjoyed fresh and hot, as the molten center will solidify as they cool. Serve them with your favorite accompaniments for an even more decadent dessert experience.
Nutrition Facts
Servings: 4
Calories per Serving: Approximately 650-750 (estimated, may vary based on ingredient brands and specific measurements)
- Calories: 650-750 kcal
- Total Fat: 45-55g
- Saturated Fat: 25-35g
(Note: Nutrition facts are estimates and can vary based on specific ingredients and portion sizes. This information is for general guidance only.)
Preparation Time
Prep time: 20 minutes
Cook time: 12-15 minutes
Total time: 32-35 minutes
This decadent chocolate lava cake recipe is surprisingly quick and easy to prepare. From gathering your ingredients to pulling these molten wonders out of the oven, you’re looking at just over half an hour. The active preparation, involving melting chocolate and mixing batter, takes around 20 minutes, making it perfect for when you need an impressive dessert without spending hours in the kitchen. The baking time is a mere 12-15 minutes, ensuring a warm, gooey treat is ready in no time. This recipe is ideal for both spontaneous cravings and planned dinner parties, offering a luxurious dessert experience with minimal effort.
How to Serve
Serving chocolate lava cake is all about enhancing the rich, warm flavors and textures. Here are some delightful ways to serve this decadent dessert:
- Classic Ice Cream:
- Vanilla Bean Ice Cream: The cool, creamy vanilla ice cream provides a perfect contrast to the warm, gooey chocolate cake. The simplicity of vanilla allows the chocolate flavor to shine while adding a refreshing element.
- Chocolate Ice Cream: For the ultimate chocolate lover, pair it with chocolate ice cream to amplify the richness and intensity of the dessert.
- Mint Chocolate Chip Ice Cream: The minty coolness cuts through the richness of the chocolate and adds a refreshing twist.
- Fresh Berries:
- Raspberries: Their tartness and slight acidity beautifully complement the sweetness and richness of the chocolate. The vibrant red color also adds a visual appeal.
- Strawberries: Sliced strawberries offer a sweet and slightly tangy counterpoint to the dark chocolate, creating a balanced flavor profile.
- Blueberries: Their subtle sweetness and juicy texture work well with the molten chocolate, adding a burst of freshness.
- Whipped Cream or Crème Fraîche:
- Lightly Sweetened Whipped Cream: A dollop of freshly whipped cream adds a light, airy texture and a touch of sweetness that complements the warm cake without overpowering it.
- Crème Fraîche: Its slightly tangy and rich flavor provides a sophisticated contrast to the sweet chocolate, adding depth and complexity.
- Sauces and Syrups:
- Raspberry Sauce: A tart raspberry sauce drizzled over the cake enhances the berry pairing and adds a vibrant, fruity dimension.
- Caramel Sauce: The buttery sweetness of caramel sauce complements the dark chocolate beautifully, creating a rich and indulgent flavor combination.
- Chocolate Sauce: For an extra layer of chocolate intensity, drizzle a warm chocolate sauce over the lava cake for an even more decadent experience.
- Garnishes for Elegance:
- Powdered Sugar: A simple dusting of powdered sugar adds a touch of elegance and visual appeal.
- Cocoa Powder: A light dusting of cocoa powder enhances the chocolate theme and adds a slightly bitter note.
- Fresh Mint Sprig: A sprig of fresh mint adds a pop of green color and a refreshing aroma, elevating the presentation.
- Chocolate Shavings: Shavings of dark or white chocolate add texture and visual interest, emphasizing the chocolate theme.
- Warm Beverage Pairing:
- Coffee: A strong cup of coffee or espresso pairs wonderfully with the richness of the chocolate lava cake, cutting through the sweetness and enhancing the flavors.
- Hot Chocolate: For a truly indulgent experience, serve with a rich hot chocolate, creating a double dose of comforting warmth and chocolatey goodness.
- Tea: A black tea like Earl Grey or English Breakfast can complement the dessert without being overly sweet.
- Serving Occasions:
- Romantic Dinner: Lava cakes are the perfect romantic dessert, offering an intimate and indulgent treat for two.
- Special Celebrations: Birthdays, anniversaries, or holidays are elevated with this impressive and crowd-pleasing dessert.
- Elegant Dessert Course: Lava cakes make a sophisticated and memorable finale to any dinner party, leaving a lasting impression on your guests.
- Comforting Weeknight Treat: While decadent, lava cakes are quick enough to make for a special weeknight treat to brighten up any day.
By considering these serving suggestions, you can transform your chocolate lava cake into a truly memorable and delightful dessert experience tailored to any occasion and personal preference.
Additional Tips for Perfect Lava Cakes
- Use High-Quality Chocolate: The star of this recipe is undoubtedly the chocolate, so opting for high-quality semi-sweet chocolate chips or a good quality chocolate bar is crucial. Better chocolate will result in a richer, more intense chocolate flavor and a smoother, more decadent molten center. Avoid using overly sweet or low-quality chocolate, as it can compromise the overall taste and texture of the lava cake. Experiment with different percentages of dark chocolate to find your preferred level of bitterness and richness.
- Don’t Overbake: The most critical tip for achieving the perfect lava center is to avoid overbaking. Lava cakes are intentionally underbaked to create that molten, gooey interior. Bake for the recommended time of 12-15 minutes, and start checking for doneness around the 12-minute mark. The edges should be set and firm, but the center should still be slightly soft and jiggly. Overbaking will result in a fully cooked cake without the desired lava effect. It’s better to slightly underbake than overbake.
- Room Temperature Ingredients are Key: Ensure that your eggs and butter are at room temperature before starting the recipe. Room temperature ingredients emulsify more easily and create a smoother batter, leading to a better texture in the final cake. Room temperature butter will melt more evenly with the chocolate, and room temperature eggs will incorporate more smoothly into the batter, preventing lumps and ensuring a consistent mixture.
- Measure Flour Accurately: Accurate measurement of flour is important in baking, especially for lava cakes where a delicate balance of ingredients is crucial for the texture. Too much flour can make the cakes dry and less molten, while too little might make them too runny. Use the spoon and level method for measuring flour: lightly spoon flour into your measuring cup and level it off with a straight edge. Avoid scooping flour directly from the bag, as this can compact it and lead to using too much flour.
- Chill the Batter (Optional for Firmer Cakes): If you prefer a slightly firmer lava cake with a more defined molten center, you can chill the batter for 15-20 minutes before baking. Chilling the batter helps to solidify the butter and fat, which can slow down the melting process in the oven and result in a slightly less runny center. However, for a truly gooey and flowing lava center, baking the batter immediately after mixing is recommended.
- Use the Right Ramekin Size: Using the correct size ramekins is essential for proper baking and achieving the desired lava cake texture. This recipe is designed for 6-ounce ramekins. If you use smaller ramekins, the baking time may need to be reduced, and the cakes might be too small. If you use larger ramekins, the baking time will need to be increased, and you might not achieve the molten center as effectively. Ensure your ramekins are oven-safe and properly greased and dusted.
- Serve Immediately: Lava cakes are best enjoyed immediately after baking while they are still warm and the center is molten. As they cool, the molten center will begin to solidify, and the texture will change. For the ultimate lava cake experience, serve them within minutes of taking them out of the oven. Prepare any accompaniments, such as ice cream or berries, beforehand so you can serve everything promptly while the cakes are at their peak.
- Experiment with Flavors (Variations): Once you master the basic chocolate lava cake recipe, feel free to experiment with different flavors and variations. You can add a pinch of espresso powder to enhance the chocolate flavor, incorporate a hint of orange zest for a chocolate-orange lava cake, or add a swirl of Nutella or peanut butter to the center before baking for a delightful surprise. You can also try using different types of chocolate, such as milk chocolate or dark chocolate, to alter the flavor profile.
By following these additional tips, you can consistently create perfect, decadent chocolate lava cakes with molten centers that are sure to impress every time.
Frequently Asked Questions (FAQ)
Q1: Can I prepare the lava cake batter ahead of time?
A: Yes, you can prepare the lava cake batter ahead of time. The batter can be made up to 24 hours in advance and stored in an airtight container in the refrigerator. When you’re ready to bake, simply portion the batter into the prepared ramekins and bake as directed. You might need to add a minute or two to the baking time if the batter is very cold. However, for the best lava center, it’s generally recommended to bake the batter soon after mixing, as the texture might slightly change upon refrigeration.
Q2: Can I make these lava cakes gluten-free?
A: Yes, you can easily make gluten-free lava cakes. Simply substitute the all-purpose flour with a gluten-free all-purpose flour blend. Ensure that the blend you choose is designed for baking and is a 1:1 replacement for regular flour. Gluten-free flours can sometimes absorb more moisture, so you might want to add a tablespoon or two of extra liquid (like milk or melted butter) if the batter seems too thick. Always check the labels of your ingredients to ensure they are certified gluten-free if you are catering to someone with celiac disease or gluten sensitivity.
Q3: Can I use different types of chocolate for this recipe?
A: Absolutely! While semi-sweet chocolate is recommended for a classic lava cake, you can definitely experiment with different types of chocolate to customize the flavor. Dark chocolate (70% cacao or higher) will result in a richer, more intense, and slightly less sweet lava cake. Milk chocolate will create a sweeter and milder flavor profile. You can even use white chocolate for a completely different twist. For best results, use good quality chocolate bars or chips.
Q4: How do I know when the lava cakes are perfectly baked?
A: Knowing when to take lava cakes out of the oven is crucial for achieving the molten center. The edges of the cakes should be set and firm to the touch, and you’ll notice them pulling away slightly from the sides of the ramekins. The center should still look slightly soft and jiggly. If you gently insert a toothpick into the edge of a cake, it should come out clean, while the center will remain gooey. If the toothpick comes out clean from the center, it’s likely overbaked and won’t have a molten center. Err on the side of underbaking rather than overbaking.
Q5: Can I reheat lava cakes if they cool down?
A: While lava cakes are best enjoyed fresh and hot, you can reheat them, but it’s tricky to perfectly restore the molten center. To reheat, you can gently warm them in a preheated oven at 300°F (150°C) for about 5-7 minutes. Be careful not to overheat them, as they can become dry. Microwaving is not recommended as it can easily overcook the cake and make the texture rubbery. Reheating might slightly alter the texture, and the molten center may not be as perfectly flowing as when freshly baked, but it’s still better than discarding them.
Q6: What if I don’t have ramekins? Can I use muffin tins?
A: While ramekins are ideal for individual lava cakes, you can use muffin tins as an alternative if you don’t have ramekins. Use standard-size muffin tins and grease and cocoa powder-dust them just like ramekins. The baking time might be slightly shorter due to the shallower depth of muffin tins, so start checking for doneness a couple of minutes earlier. Lava cakes baked in muffin tins might be a bit smaller and slightly less dramatic in presentation but will still be delicious.
Q7: Can I add nuts or other mix-ins to the batter?
A: Yes, you can certainly add nuts or other mix-ins to personalize your lava cakes. Chopped nuts like walnuts, pecans, or almonds can add a nice textural element and flavor contrast. You can also incorporate chocolate chunks, toffee bits, or even a swirl of caramel or Nutella into the batter before baking. Be mindful not to add too many mix-ins, as it can affect the baking time and texture of the cakes. A small handful of mix-ins per ramekin is usually sufficient.
Q8: Why did my lava cakes not have a molten center?
A: The most common reason for lava cakes not having a molten center is overbaking. Baking them for too long will cook the center completely, eliminating the desired lava effect. Ensure you are baking them for the recommended time (12-15 minutes) and checking for doneness as described earlier. Oven temperatures can vary, so it’s important to monitor them closely and adjust baking time if needed. Other possible reasons could be using too much flour in the batter or not using enough egg yolks, which contribute to the fudgy, molten texture. Always double-check your measurements and baking time for the best results.
Print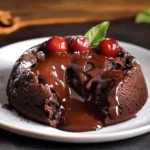
Decadent Chocolate Lava Cake Recipe
Ingredients
- Unsalted Butter: 1 cup (2 sticks), provides richness and moisture to the cake.
- Semi-Sweet Chocolate Chips: 12 ounces, high-quality chocolate is key for that intense chocolate flavor.
- Granulated Sugar: ½ cup, adds sweetness and structure to the cake.
- Large Eggs: 2 whole eggs, bind the ingredients together and contribute to the cake’s texture.
- Egg Yolks: 2 large egg yolks, add richness and help create that fudgy, molten center.
- All-Purpose Flour: ½ cup, provides structure, use sparingly to maintain the lava-like consistency.
- Pinch of Salt: Enhances the sweetness and balances the flavors.
- Vanilla Extract: 1 teaspoon, enhances the chocolate flavor and adds depth.
- Powdered Sugar: For dusting, optional, adds a touch of elegance and sweetness on top.
- Cocoa Powder: For dusting ramekins, prevents sticking and adds a subtle chocolate note.
Instructions
- Prepare the Ramekins: Preheat your oven to 425°F (220°C). Grease four 6-ounce ramekins generously with butter. Dust the inside of each ramekin with cocoa powder, ensuring you coat the bottom and sides evenly. Tap out any excess cocoa powder. This step is crucial to prevent the cakes from sticking and to add a subtle chocolate hint to the edges. Setting the oven to preheat early ensures it reaches the correct temperature by the time the batter is ready, which is important for the lava cakes to bake properly and develop their molten center.
- Melt Butter and Chocolate: In a heatproof bowl set over a saucepan of simmering water (or using a double boiler), combine the unsalted butter and semi-sweet chocolate chips. Ensure the bottom of the bowl does not touch the water. Stir constantly until both the butter and chocolate are completely melted and smooth. The gentle heat from the simmering water prevents the chocolate from burning or seizing, ensuring a silky smooth mixture. Stirring consistently helps distribute the heat evenly and promotes even melting.
- Incorporate Sugar: Once the chocolate and butter are melted and smooth, remove the bowl from the heat. Stir in the granulated sugar into the warm chocolate mixture. Mix well until the sugar is fully incorporated and the mixture is glossy and slightly cooled. Allowing the chocolate mixture to cool slightly before adding eggs is important to prevent the eggs from cooking and scrambling.
- Whisk in Eggs and Egg Yolks: In a separate bowl, lightly whisk the whole eggs and egg yolks together until they are just combined. Gradually add the whisked eggs to the slightly cooled chocolate mixture, whisking constantly to ensure they are fully incorporated and the batter remains smooth. Whisking constantly is key to emulsifying the eggs into the chocolate mixture and preventing lumps from forming. The egg yolks are essential for the rich, fudgy texture and molten center of the lava cake.
- Add Vanilla and Salt: Stir in the vanilla extract and a pinch of salt to the chocolate batter. Mix until just combined. Vanilla extract enhances the overall flavor profile of the chocolate, while salt balances the sweetness and intensifies the chocolate notes. Be sure to mix gently at this stage to avoid overmixing the batter.
- Fold in Flour: Sift the all-purpose flour over the wet ingredients to prevent lumps. Gently fold the flour into the chocolate batter using a spatula or large spoon until just combined. Be careful not to overmix the batter. Overmixing can develop gluten, leading to a tougher cake rather than the desired tender, lava-like texture. Fold until the flour disappears into the batter and the mixture is homogenous.
- Divide Batter into Ramekins: Divide the chocolate batter evenly among the prepared ramekins. Each ramekin should be about ¾ full. Evenly distributing the batter ensures consistent baking and lava centers in all cakes. You can use a kitchen scale to ensure precision if desired, but visual estimation is usually sufficient.
- Bake to Perfection: Place the ramekins on a baking sheet for easier handling. Bake in the preheated oven at 425°F (220°C) for 12-15 minutes. Baking time is crucial for achieving the perfect lava center. The edges of the cakes should be set, but the center should still be soft and slightly jiggly. The exact baking time may vary slightly depending on your oven and ramekin size, so it’s important to monitor them closely.
- Check for Doneness: To check if the lava cakes are done, gently insert a toothpick into the edge of one cake. It should come out clean, while the center should remain soft and gooey. The tops of the cakes should look set but not dry. The key is to underbake slightly to maintain that molten center.
- Cool Slightly and Invert (Optional): Let the lava cakes cool in the ramekins for about 1-2 minutes after removing them from the oven. This brief cooling period makes them slightly easier to handle. If desired, you can carefully invert the lava cakes onto serving plates. To invert, run a thin knife or spatula around the edges of each cake to loosen it from the ramekin. Place a serving plate upside down over the ramekin and quickly flip them over. Gently tap the ramekin to release the cake. Inverting is optional; they can also be served directly from the ramekins.
- Dust and Serve Immediately: Dust the warm lava cakes with powdered sugar, if desired, for an elegant finish. Serve immediately while they are warm and the center is still molten and gooey. Lava cakes are best enjoyed fresh and hot, as the molten center will solidify as they cool. Serve them with your favorite accompaniments for an even more decadent dessert experience.
Nutrition
- Serving Size: one normal portion
- Calories: 750
- Fat: 55g
- Saturated Fat: 35g


