

I still remember the first time I encountered those viral crispy rice cake videos – that perfect crunch, the vibrant toppings, it was love at first sight. I was a little intimidated, thinking it was a complicated restaurant-only treat. But oh, how wrong I was! The first batch I made was a revelation. My family, initially skeptical (“Aren’t rice cakes…bland?”), were converted with the first bite. The kids loved customizing their own, piling on avocado and a sprinkle of furikake, while my partner went all-in on the spicy tuna. It quickly became our go-to for a fun weekend appetizer, a light lunch, or even when we just wanted something special to snack on. The beauty of this recipe is its simplicity at heart, coupled with the endless possibilities for toppings. It’s that perfect blend of comforting texture and exciting flavors that makes it an absolute winner in our household, and I’m thrilled to share how you can bring this magic into your kitchen too. Get ready to impress yourself and anyone lucky enough to share these with you!
Ingredients
Here’s what you’ll need to create the perfect crispy rice cakes and some classic, delicious toppings:
For the Crispy Rice Cakes:
- 2 cups uncooked Japanese short-grain rice (sushi rice): This type of rice is crucial for its sticky texture, which helps the cakes hold together and achieve that signature crisp.
- 2 ½ cups water (or as per your rice cooker instructions): For cooking the rice perfectly.
- ¼ cup seasoned rice vinegar: Adds a subtle tang and authentic sushi rice flavor.
- 1 tablespoon granulated sugar: Balances the vinegar and enhances flavor.
- 1 teaspoon salt: Essential for seasoning the rice base.
- Neutral cooking oil (e.g., canola, vegetable, grapeseed): For frying, about ½ to 1 inch deep in your pan.
For the Classic Spicy Tuna Topping:
- 1 can (5-6 oz) high-quality tuna, drained well (packed in oil or water): The star of this popular topping.
- ¼ cup Japanese mayonnaise (like Kewpie): Creamier and richer than regular mayo, with a distinct umami flavor.
- 1-2 tablespoons sriracha (or to taste): For that signature spicy kick.
- 1 teaspoon soy sauce (low sodium recommended): Adds depth and umami.
- ½ teaspoon toasted sesame oil: For a nutty aroma and flavor.
- Optional: 1 teaspoon finely chopped green onion (scallion), white and light green parts: For a mild, fresh oniony bite.
For the Creamy Avocado Topping:
- 1 large ripe avocado, mashed or diced: Provides a creamy, cooling contrast.
- 1 tablespoon lime juice (freshly squeezed): Adds brightness and prevents browning.
- Pinch of salt: To taste.
- Optional: 1 tablespoon finely chopped cilantro: For a fresh, herbaceous note.
Optional Garnishes & Extra Toppings:
- Toasted sesame seeds (black and/or white): For texture and nutty flavor.
- Thinly sliced jalapeño or serrano peppers: For an extra spicy kick and fresh crunch.
- Furikake seasoning: A Japanese blend of dried fish, seaweed, sesame seeds, and spices, adding immense flavor.
- Microgreens or chopped chives: For a fresh, elegant finish.
- Smoked salmon, thinly sliced: For a luxurious alternative.
- Teriyaki glazed eel (unagi): A rich and savory option.
- Pickled ginger (gari): As a palate cleanser between bites.
Instructions
Follow these steps carefully to achieve perfectly crispy rice cakes every time:
Phase 1: Preparing the Rice Base
- Rinse the Rice: Place the short-grain rice in a fine-mesh sieve and rinse under cold running water until the water runs mostly clear. This removes excess starch and prevents overly gummy rice. Drain well.
- Cook the Rice: Transfer the rinsed rice to your rice cooker or a medium saucepan. Add the 2 ½ cups of water (or the amount specified by your rice cooker). If using a saucepan, bring to a boil, then reduce heat to the lowest setting, cover, and simmer for 15-20 minutes, or until all water is absorbed. Do not lift the lid during this time. Once cooked, let it stand, covered, for another 10 minutes to steam.
- Season the Rice: While the rice is resting, combine the seasoned rice vinegar, sugar, and salt in a small bowl. Whisk until the sugar and salt are completely dissolved. You can gently warm this mixture for a few seconds in the microwave to help it dissolve faster.
- Combine Rice and Seasoning: Fluff the cooked rice gently with a rice paddle or spatula. Transfer the hot rice to a large, non-metallic bowl. Gradually pour the vinegar mixture over the rice while using a cutting and folding motion with the paddle to incorporate it evenly. Be careful not to mash the rice grains. Fan the rice (traditionally with a Japanese fan, but a piece of cardboard works) as you mix to help cool it down slightly and give it a nice sheen.
- Press the Rice: Line an 8×8 inch square baking pan (or a similar sized rectangular container) with plastic wrap, leaving some overhang on the sides. This will make it easier to remove the rice later. Lightly dampen your hands or the rice paddle with water to prevent sticking, then transfer the seasoned rice into the prepared pan. Spread it out evenly and press down firmly and uniformly to create a compact layer about ½ to ¾ inch thick. You want it dense so it holds its shape. You can use the bottom of a flat glass or another smaller pan to press it down.
- Chill the Rice: Cover the pan tightly with more plastic wrap, pressing it directly onto the surface of the rice to prevent a skin from forming. Refrigerate for at least 4 hours, or preferably overnight. This chilling step is crucial – it allows the rice to firm up completely, making it easy to cut and ensuring it doesn’t fall apart during frying.
Phase 2: Frying the Rice Cakes
- Cut the Rice: Once thoroughly chilled, use the plastic wrap overhang to lift the block of rice out of the pan and onto a clean cutting board. Remove the plastic wrap. Using a sharp, slightly dampened knife, cut the rice block into desired shapes. Squares (about 1.5 to 2 inches), rectangles, or even circles (using a cookie cutter) work well. Dampen the knife between cuts if it starts to stick.
- Prepare for Frying: Place a wire rack over a baking sheet lined with paper towels. This will be for draining the fried rice cakes.
- Heat the Oil: Pour about ½ to 1 inch of neutral cooking oil into a heavy-bottomed skillet or Dutch oven. Heat the oil over medium-high heat until it reaches 350-375°F (175-190°C). If you don’t have a thermometer, you can test the oil by dropping a small piece of rice into it; if it sizzles vigorously and turns golden brown in about 30-60 seconds, the oil is ready.
- Fry the Rice Cakes: Carefully place a few rice cakes into the hot oil, being sure not to overcrowd the pan. Overcrowding will lower the oil temperature and result in soggy, greasy rice cakes. Fry for about 2-4 minutes per side, or until they are beautifully golden brown and crispy. The exact time will depend on the thickness of your cakes and the oil temperature.
- Drain Excess Oil: Using a slotted spoon or spider, carefully remove the golden rice cakes from the oil and transfer them to the prepared wire rack to drain. The paper towels underneath will catch any drips. If desired, you can lightly sprinkle them with a tiny pinch of salt immediately after removing them from the oil.
- Repeat: Continue frying the remaining rice cakes in batches, ensuring the oil temperature returns to the optimal range between batches.
Phase 3: Preparing the Toppings & Assembly
- Prepare Spicy Tuna: In a medium bowl, flake the well-drained tuna with a fork. Add the Japanese mayonnaise, sriracha, soy sauce, toasted sesame oil, and optional chopped green onion. Mix gently until just combined. Be careful not to overmix, as this can make the tuna mushy. Taste and adjust seasoning if needed (more sriracha for heat, a touch more mayo for creaminess).
- Prepare Creamy Avocado: In another small bowl, gently mash or dice the avocado. Add the fresh lime juice, a pinch of salt, and optional cilantro. Mix gently. Taste and adjust seasoning.
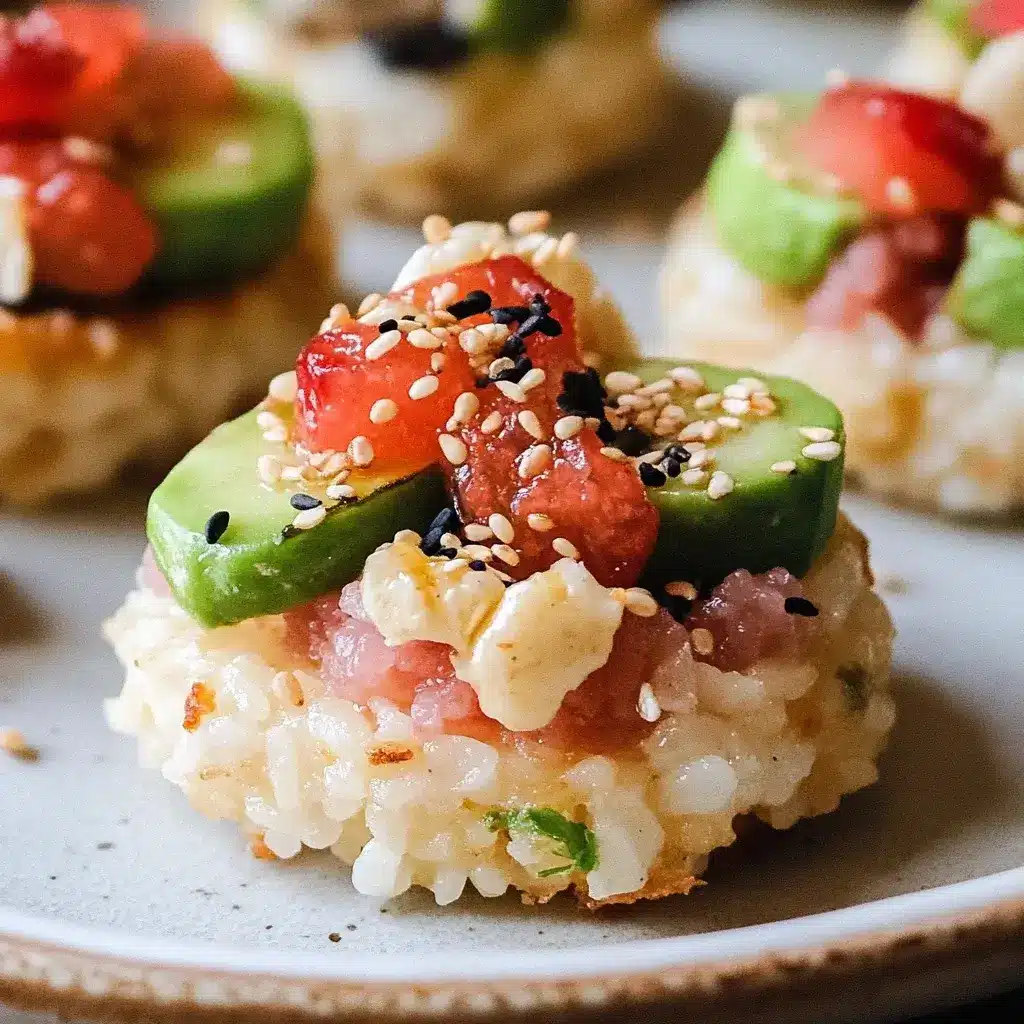
- Assemble: Once the rice cakes have cooled slightly (they are best served warm, not piping hot from the fryer, to allow the toppings to sit well), it’s time to assemble!
- Generously spoon or pipe your chosen toppings onto each crispy rice cake.
- Garnish with toasted sesame seeds, thinly sliced jalapeños, furikake, microgreens, or any of your preferred garnishes.
- Serve Immediately: Crispy rice cakes are best enjoyed fresh while the rice is still warm and crispy, and the toppings are cool and vibrant.
Nutrition Facts
- Servings: This recipe makes approximately 16-20 (1.5-2 inch) rice cakes. Serving size: 2-3 rice cakes with toppings.
- Calories per serving (approximate, for 2 rice cakes with spicy tuna): 350-450 kcal. This can vary significantly based on the size of the rice cakes, the amount of oil absorbed, and the specific toppings used.
- Note: The following nutritional information is an estimate for the base rice cakes and the specified toppings. Actual values will vary.
- Carbohydrates: Primarily from the rice, providing energy. The seasoning adds a small amount of sugar.
- Protein: Mainly from the tuna or other protein-based toppings. Rice itself contains some protein.
- Fats: Comes from the frying oil, mayonnaise in the spicy tuna, and avocado. Choosing high-quality tuna packed in oil or using avocado will contribute healthy unsaturated fats.
- Sodium: From salt in the rice seasoning, soy sauce, and potentially canned tuna. Using low-sodium soy sauce can help manage intake.
- Fiber: Avocado and some garnishes like seaweed (in furikake) can contribute dietary fiber.
Preparation Time
- Active Preparation Time: Approximately 45-60 minutes (includes cooking rice, seasoning, preparing toppings, and frying).
- Inactive Chilling Time: Minimum 4 hours, preferably 8 hours or overnight (for the rice to firm up).
- Total Time (excluding chilling): About 1 hour to 1 hour 15 minutes.
- Total Time (including minimum chilling): About 5 hours.
This breakdown helps plan your cooking. The rice can be prepared a day in advance, making assembly quicker on the day of serving.
How to Serve
Crispy Rice Cakes with Toppings are incredibly versatile. Here are some fantastic ways to serve them:
- As an Elegant Appetizer:
- Arrange them artfully on a platter for parties or gatherings.
- Offer a variety of toppings so guests can choose their favorites.
- Consider smaller, bite-sized rice cakes for easier mingling.
- For a Light Lunch or Dinner:
- Serve 3-4 rice cakes per person alongside a simple side salad with a ginger dressing.
- Pair with a bowl of miso soup for a complete Japanese-inspired meal.
- At a DIY Topping Bar:
- Fry up a big batch of crispy rice cakes.
- Set out bowls of various toppings (spicy tuna, avocado, smoked salmon, crab salad, teriyaki chicken, sautéed mushrooms, edamame).
- Include different sauces (soy sauce, spicy mayo, eel sauce, wasabi) and garnishes (sesame seeds, scallions, jalapeños, furikake).
- This is a fun and interactive way for everyone to customize their own creations.
- As a Sophisticated Snack:
- Enjoy a couple of rice cakes with your favorite topping when you’re craving something savory and satisfying.
- Presentation Pointers:
- Use contrasting colors for visual appeal (e.g., green avocado, red tuna, black sesame seeds).
- A drizzle of sriracha mayo or eel sauce can add a professional touch.
- Sprinkle fresh herbs like cilantro or chives just before serving.
- Consider serving on a Japanese-style plate or a sleek, modern platter.
- Drink Pairings:
- Sake: A classic pairing that complements the umami flavors.
- Japanese Beer: Light and crisp lagers work wonderfully.
- Chilled Green Tea: A refreshing non-alcoholic option.
- Crisp White Wine: Sauvignon Blanc or Pinot Grigio can cut through the richness.
Additional Tips
Maximize your crispy rice cake success with these expert tips:
- Rice is Key: Always use Japanese short-grain (sushi) rice. Its high starch content and stickiness are essential for the cakes holding their shape and achieving that perfect crispy exterior when fried. Long-grain rice like Basmati or Jasmine will not work as well.
- Press Firmly and Evenly: When pressing the seasoned rice into the pan, ensure you apply even pressure across the entire surface. This compaction is vital for creating dense cakes that won’t crumble during cutting or frying.
- Don’t Skip the Chill: Chilling the pressed rice for at least 4 hours (preferably overnight) is non-negotiable. This solidifies the rice block, making it significantly easier to cut into clean shapes and preventing it from disintegrating in the hot oil.
- Oil Temperature Mastery: Maintaining the correct oil temperature (350-375°F or 175-190°C) is crucial. Too low, and the rice cakes will absorb excess oil and become greasy. Too high, and the exterior will burn before the inside gets warm and the desired level of crispiness is achieved. Use a thermometer if possible.
- Avoid Overcrowding the Pan: Fry the rice cakes in small batches. Adding too many at once will significantly drop the oil temperature, leading to soggy results rather than crispy perfection. Allow the oil to return to the target temperature between batches.
- Drain Well: Immediately transfer the fried rice cakes to a wire rack set over paper towels. This allows air to circulate around them, maintaining crispiness, and lets excess oil drip away. Don’t place them directly onto paper towels, as the bottoms can become steamy and less crisp.
- Make-Ahead Strategy: You can prepare components in advance. The seasoned rice can be cooked, pressed, and chilled up to 2 days ahead. Toppings like spicy tuna can often be made a few hours ahead and kept refrigerated. Fry the rice cakes just before serving for maximum crispiness.
- Get Creative with Leftover Rice: While fresh sushi rice is ideal, you can experiment with leftover plain cooked short-grain rice. You might need to moisten it slightly and season it well before pressing and chilling. It’s a great way to reduce food waste!
FAQ Section
Q1: Can I use brown rice instead of white sushi rice?
A1: While you can try, it’s not ideal. Brown short-grain rice is less starchy and sticky than white sushi rice, so the cakes may not hold together as well and might not achieve the same level of crispiness. If you do try, ensure it’s very well cooked and consider adding a bit more binder if needed, though results will vary.
Q2: Can I make these crispy rice cakes in an air fryer?
A2: Yes, you can! After chilling and cutting the rice cakes, lightly spray or brush them with oil. Air fry at around 380-400°F (190-200°C) for 10-15 minutes, flipping halfway, until golden brown and crispy. They might not be as deeply crispy as deep-fried versions but are a great lighter alternative.
Q3: How do I store leftover crispy rice cakes?
A3: It’s best to store leftover plain fried rice cakes (without toppings) in an airtight container at room temperature for up to a day, or in the refrigerator for 2-3 days. Reheat them in an oven, toaster oven, or air fryer at around 350°F (175°C) until warmed through and re-crisped. Avoid microwaving, as it will make them soft. Topped rice cakes are best eaten immediately and don’t store well.
Q4: Can I freeze the rice cakes?
A4: Yes, you can freeze the unfried pressed and cut rice cakes. Arrange them in a single layer on a baking sheet and freeze until solid. Then, transfer them to a freezer-safe bag or container for up to a month. Fry them directly from frozen, adding a few extra minutes to the cooking time. You can also freeze fried, plain rice cakes and reheat as mentioned above.
Q5: Are these crispy rice cakes gluten-free?
A5: The rice cakes themselves (rice, vinegar, sugar, salt) are naturally gluten-free. However, you must ensure your toppings and garnishes are also gluten-free. For example, use tamari instead of regular soy sauce (which often contains wheat) and check labels on mayonnaise or other processed ingredients.
Q6: What are some good vegan topping options?
A6: There are many! Mashed avocado with lime and cilantro is a classic. Sautéed shiitake mushrooms with teriyaki sauce, spicy edamame mash, marinated tofu crumbles, seaweed salad (wakame), or even a simple drizzle of vegan spicy mayo with sesame seeds and scallions would be delicious.
Q7: Why aren’t my rice cakes getting crispy?
A7: Several factors could be at play:
* Oil not hot enough: The most common culprit. Ensure your oil is at 350-375°F (175-190°C).
* Overcrowding the pan: This lowers the oil temperature. Fry in batches.
* Rice not chilled enough: If the rice is too soft, it might absorb more oil or not crisp up properly.
* Wrong type of rice: Long-grain rice won’t work as well.
* Not draining properly: Draining on a wire rack is key.
Q8: What’s the best oil for frying the rice cakes?
A8: A neutral oil with a high smoke point is best. Good options include canola oil, vegetable oil, grapeseed oil, peanut oil, or corn oil. Avoid oils with strong flavors like olive oil (especially extra virgin) for this application, as they can overpower the delicate rice flavor and have lower smoke points.

Crispy Rice Cakes with Toppings
Ingredients
Here’s what you’ll need to create the perfect crispy rice cakes and some classic, delicious toppings:
For the Crispy Rice Cakes:
- 2 cups uncooked Japanese short-grain rice (sushi rice): This type of rice is crucial for its sticky texture, which helps the cakes hold together and achieve that signature crisp.
- 2 ½ cups water (or as per your rice cooker instructions): For cooking the rice perfectly.
- ¼ cup seasoned rice vinegar: Adds a subtle tang and authentic sushi rice flavor.
- 1 tablespoon granulated sugar: Balances the vinegar and enhances flavor.
- 1 teaspoon salt: Essential for seasoning the rice base.
- Neutral cooking oil (e.g., canola, vegetable, grapeseed): For frying, about ½ to 1 inch deep in your pan.
For the Classic Spicy Tuna Topping:
- 1 can (5-6 oz) high-quality tuna, drained well (packed in oil or water): The star of this popular topping.
- ¼ cup Japanese mayonnaise (like Kewpie): Creamier and richer than regular mayo, with a distinct umami flavor.
- 1–2 tablespoons sriracha (or to taste): For that signature spicy kick.
- 1 teaspoon soy sauce (low sodium recommended): Adds depth and umami.
- ½ teaspoon toasted sesame oil: For a nutty aroma and flavor.
- Optional: 1 teaspoon finely chopped green onion (scallion), white and light green parts: For a mild, fresh oniony bite.
For the Creamy Avocado Topping:
- 1 large ripe avocado, mashed or diced: Provides a creamy, cooling contrast.
- 1 tablespoon lime juice (freshly squeezed): Adds brightness and prevents browning.
- Pinch of salt: To taste.
- Optional: 1 tablespoon finely chopped cilantro: For a fresh, herbaceous note.
Optional Garnishes & Extra Toppings:
- Toasted sesame seeds (black and/or white): For texture and nutty flavor.
- Thinly sliced jalapeño or serrano peppers: For an extra spicy kick and fresh crunch.
- Furikake seasoning: A Japanese blend of dried fish, seaweed, sesame seeds, and spices, adding immense flavor.
- Microgreens or chopped chives: For a fresh, elegant finish.
- Smoked salmon, thinly sliced: For a luxurious alternative.
- Teriyaki glazed eel (unagi): A rich and savory option.
- Pickled ginger (gari): As a palate cleanser between bites.
Instructions
Follow these steps carefully to achieve perfectly crispy rice cakes every time:
Phase 1: Preparing the Rice Base
- Rinse the Rice: Place the short-grain rice in a fine-mesh sieve and rinse under cold running water until the water runs mostly clear. This removes excess starch and prevents overly gummy rice. Drain well.
- Cook the Rice: Transfer the rinsed rice to your rice cooker or a medium saucepan. Add the 2 ½ cups of water (or the amount specified by your rice cooker). If using a saucepan, bring to a boil, then reduce heat to the lowest setting, cover, and simmer for 15-20 minutes, or until all water is absorbed. Do not lift the lid during this time. Once cooked, let it stand, covered, for another 10 minutes to steam.
- Season the Rice: While the rice is resting, combine the seasoned rice vinegar, sugar, and salt in a small bowl. Whisk until the sugar and salt are completely dissolved. You can gently warm this mixture for a few seconds in the microwave to help it dissolve faster.
- Combine Rice and Seasoning: Fluff the cooked rice gently with a rice paddle or spatula. Transfer the hot rice to a large, non-metallic bowl. Gradually pour the vinegar mixture over the rice while using a cutting and folding motion with the paddle to incorporate it evenly. Be careful not to mash the rice grains. Fan the rice (traditionally with a Japanese fan, but a piece of cardboard works) as you mix to help cool it down slightly and give it a nice sheen.
- Press the Rice: Line an 8×8 inch square baking pan (or a similar sized rectangular container) with plastic wrap, leaving some overhang on the sides. This will make it easier to remove the rice later. Lightly dampen your hands or the rice paddle with water to prevent sticking, then transfer the seasoned rice into the prepared pan. Spread it out evenly and press down firmly and uniformly to create a compact layer about ½ to ¾ inch thick. You want it dense so it holds its shape. You can use the bottom of a flat glass or another smaller pan to press it down.
- Chill the Rice: Cover the pan tightly with more plastic wrap, pressing it directly onto the surface of the rice to prevent a skin from forming. Refrigerate for at least 4 hours, or preferably overnight. This chilling step is crucial – it allows the rice to firm up completely, making it easy to cut and ensuring it doesn’t fall apart during frying.
Phase 2: Frying the Rice Cakes
- Cut the Rice: Once thoroughly chilled, use the plastic wrap overhang to lift the block of rice out of the pan and onto a clean cutting board. Remove the plastic wrap. Using a sharp, slightly dampened knife, cut the rice block into desired shapes. Squares (about 1.5 to 2 inches), rectangles, or even circles (using a cookie cutter) work well. Dampen the knife between cuts if it starts to stick.
- Prepare for Frying: Place a wire rack over a baking sheet lined with paper towels. This will be for draining the fried rice cakes.
- Heat the Oil: Pour about ½ to 1 inch of neutral cooking oil into a heavy-bottomed skillet or Dutch oven. Heat the oil over medium-high heat until it reaches 350-375°F (175-190°C). If you don’t have a thermometer, you can test the oil by dropping a small piece of rice into it; if it sizzles vigorously and turns golden brown in about 30-60 seconds, the oil is ready.
- Fry the Rice Cakes: Carefully place a few rice cakes into the hot oil, being sure not to overcrowd the pan. Overcrowding will lower the oil temperature and result in soggy, greasy rice cakes. Fry for about 2-4 minutes per side, or until they are beautifully golden brown and crispy. The exact time will depend on the thickness of your cakes and the oil temperature.
- Drain Excess Oil: Using a slotted spoon or spider, carefully remove the golden rice cakes from the oil and transfer them to the prepared wire rack to drain. The paper towels underneath will catch any drips. If desired, you can lightly sprinkle them with a tiny pinch of salt immediately after removing them from the oil.
- Repeat: Continue frying the remaining rice cakes in batches, ensuring the oil temperature returns to the optimal range between batches.
Phase 3: Preparing the Toppings & Assembly
- Prepare Spicy Tuna: In a medium bowl, flake the well-drained tuna with a fork. Add the Japanese mayonnaise, sriracha, soy sauce, toasted sesame oil, and optional chopped green onion. Mix gently until just combined. Be careful not to overmix, as this can make the tuna mushy. Taste and adjust seasoning if needed (more sriracha for heat, a touch more mayo for creaminess).
- Prepare Creamy Avocado: In another small bowl, gently mash or dice the avocado. Add the fresh lime juice, a pinch of salt, and optional cilantro. Mix gently. Taste and adjust seasoning.
- Assemble: Once the rice cakes have cooled slightly (they are best served warm, not piping hot from the fryer, to allow the toppings to sit well), it’s time to assemble!
- Generously spoon or pipe your chosen toppings onto each crispy rice cake.
- Garnish with toasted sesame seeds, thinly sliced jalapeños, furikake, microgreens, or any of your preferred garnishes.
- Serve Immediately: Crispy rice cakes are best enjoyed fresh while the rice is still warm and crispy, and the toppings are cool and vibrant.
Nutrition
- Serving Size: one normal portion
- Calories: 450


