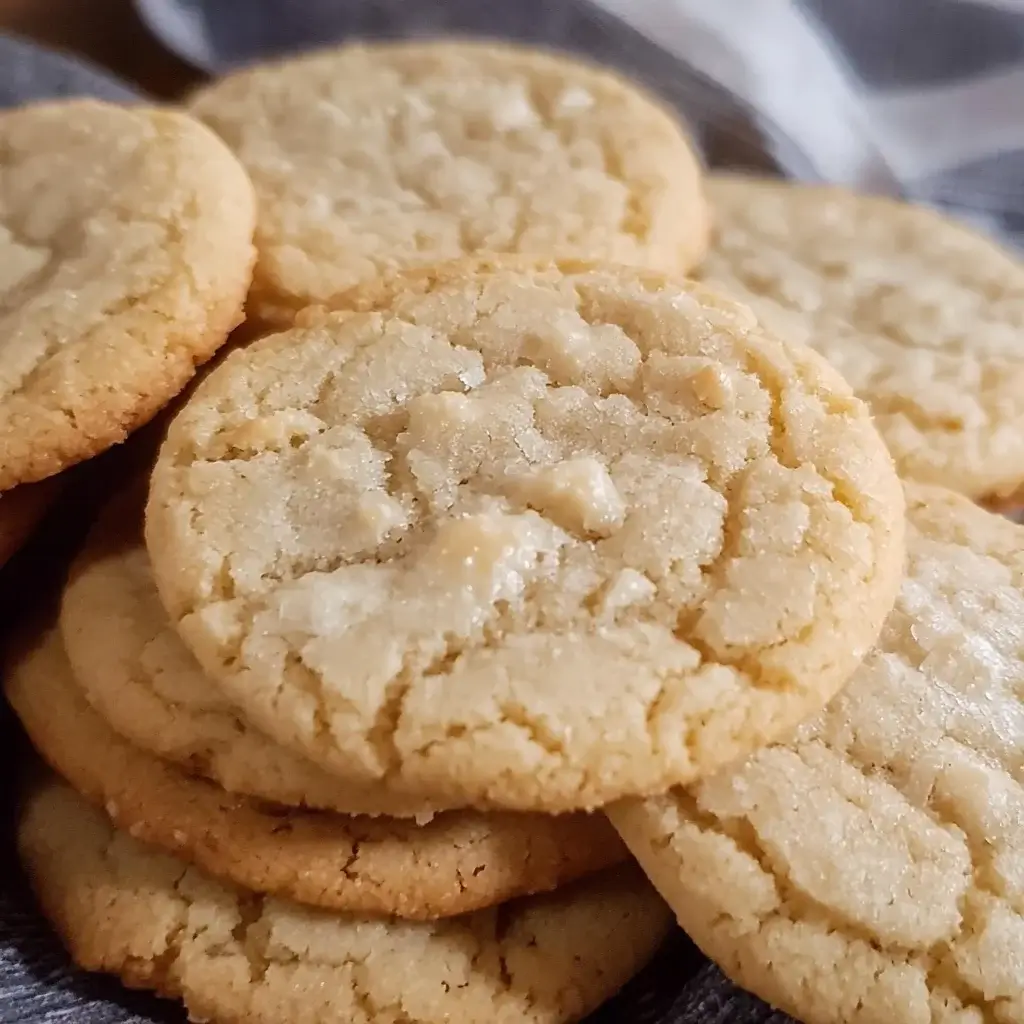

There’s something truly magical about the aroma of freshly baked cookies wafting through the house, isn’t there? For me, that scent is often synonymous with pure, unadulterated joy, especially when it’s the unmistakable fragrance of these utterly delightful condensed milk cookies. Honestly, these aren’t just cookies; they are little pockets of happiness that have become a staple in our family. From impromptu after-school treats to celebratory weekend baking sessions, these cookies have consistently stolen hearts (and taste buds!). My kids adore their soft, slightly chewy texture and the gentle sweetness that isn’t overpowering, while my husband, a self-proclaimed cookie connoisseur, often declares them “surprisingly addictive.” What I love most is their simplicity. With just a handful of ingredients and minimal effort, you can whip up a batch of these golden delights that are guaranteed to vanish in minutes. If you’re looking for a recipe that’s both foolproof and undeniably delicious, look no further. These condensed milk cookies are about to become your new baking best friend.
Ingredients
Here’s what you’ll need to create these melt-in-your-mouth condensed milk cookies. Each ingredient plays a crucial role in achieving the perfect texture and flavor:
- All-Purpose Flour: The foundation of our cookies, providing structure and that classic cookie chewiness. Ensure it’s measured correctly for the best results.
- Unsalted Butter: Softened butter is key for creating tender cookies. It adds richness, flavor, and helps in achieving that perfect golden-brown edge.
- Granulated Sugar: For sweetness, of course! Granulated sugar also helps in creating a slightly crisp exterior and a soft interior.
- Sweetened Condensed Milk: The star ingredient! This adds a unique sweetness and a wonderfully chewy texture that differentiates these cookies from regular sugar cookies.
- Egg: Acts as a binder, holding all the ingredients together and adding moisture and richness to the cookie dough. Use a large egg for consistency.
- Vanilla Extract: A touch of vanilla enhances the overall flavor profile, adding warmth and depth to the sweetness. Pure vanilla extract is recommended for the best taste.
- Baking Powder: The leavening agent that gives the cookies a slight lift and a soft, airy texture. Ensure it’s fresh for optimal results.
- Pinch of Salt: Balances the sweetness and enhances all the other flavors in the recipe. Don’t skip this seemingly small but essential ingredient!
Instructions
Follow these simple step-by-step instructions to bake a batch of perfect condensed milk cookies every time:
- Preheat Your Oven & Prep Baking Sheets: Preheat your oven to 350°F (175°C). Line baking sheets with parchment paper. This prevents sticking and makes for easy cleanup.
- Cream Butter and Sugar: In a large mixing bowl, cream together the softened unsalted butter and granulated sugar until light and fluffy. This step is crucial for incorporating air into the dough, resulting in lighter cookies. You can use an electric mixer or do this by hand with a whisk or spatula.
- Incorporate Egg and Vanilla: Beat in the egg and vanilla extract until well combined. Ensure the egg is fully incorporated into the butter and sugar mixture for a smooth batter.
- Add Condensed Milk: Pour in the sweetened condensed milk and mix until just combined. Be careful not to overmix at this stage. Overmixing can lead to tougher cookies.
- Combine Dry Ingredients: In a separate bowl, whisk together the all-purpose flour, baking powder, and salt. Whisking ensures the baking powder and salt are evenly distributed throughout the flour.
- Gradually Add Dry Ingredients to Wet Ingredients: Gradually add the dry ingredients to the wet ingredients, mixing on low speed or by hand until just combined. Mix until you no longer see streaks of flour. Again, avoid overmixing.
- Scoop Cookie Dough: Drop rounded tablespoons of cookie dough onto the prepared baking sheets, leaving about 2 inches of space between each cookie to allow for spreading. You can use a cookie scoop for uniform cookies.
- Bake to Golden Perfection: Bake for 10-12 minutes, or until the edges are lightly golden brown and the centers are just set. Baking time may vary slightly depending on your oven, so keep an eye on them.
- Cool on Baking Sheets: Let the cookies cool on the baking sheets for a few minutes before transferring them to a wire rack to cool completely. This allows them to firm up a bit and prevents them from breaking when you move them.
- Enjoy!: Once cooled, these delightful condensed milk cookies are ready to be enjoyed! They are perfect on their own, with a glass of milk, or alongside your favorite hot beverage.
Nutrition Facts
(Per Serving – 1 Cookie, Based on approximately 24 cookies per batch. Nutritional values are estimates and may vary based on specific ingredients and portion sizes.)
- Serving Size: 1 Cookie
- Calories: Approximately 120 kcal
- Total Fat: 6g
- Saturated Fat: 4g
Preparation Time
These condensed milk cookies are a dream for anyone short on time but craving homemade goodness. Here’s a breakdown of the preparation time:
- Prep Time: 15 minutes (This includes gathering ingredients, softening butter, and making the dough.)
- Bake Time: 10-12 minutes per batch (Depending on your oven and batch size, you might bake in multiple batches.)
- Cooling Time: 15-20 minutes (Allowing cookies to cool on baking sheets and then fully on a wire rack.)
- Total Time: Approximately 40-45 minutes. From start to finish, you can have warm, delicious cookies in under an hour! This makes them perfect for a quick treat or last-minute dessert.
How to Serve
These versatile condensed milk cookies can be enjoyed in countless ways! Here are some delightful serving suggestions:
- Classic Pairing: Serve them simply with a cold glass of milk or a warm cup of tea or coffee. The cookies are a perfect complement to both hot and cold beverages.
- Dessert Platter Star: Include them on a dessert platter alongside other treats like brownies, fruit slices, and mini pastries for a crowd-pleasing spread.
- Ice Cream Sandwich Delight: Use two cookies to sandwich a scoop of your favorite ice cream for a delightful and easy ice cream sandwich. Vanilla, chocolate, or even caramel ice cream would pair wonderfully.
- Cookie Crumbles: Crumble them over yogurt, ice cream, or pudding for added texture and sweetness. They make a fantastic topping for creamy desserts.
- Gift Giving: Package them in a pretty box or cellophane bag tied with a ribbon for a thoughtful homemade gift. They’re perfect for holidays, birthdays, or just because.
- Lunchbox Treat: Pack a couple of cookies in lunchboxes as a special and satisfying sweet treat for kids and adults alike.
- Party Favor: Individually wrap cookies as party favors for birthdays, gatherings, or events.
- Elevated Dessert: Serve them with a dollop of whipped cream and fresh berries for a slightly more elegant dessert presentation.
Additional Tips for Perfect Condensed Milk Cookies
Want to take your condensed milk cookies to the next level? Here are eight helpful tips for baking success that will not only enhance the flavor and texture of your cookies but also ensure a delightful baking experience.
1. Room Temperature Butter is Key
One of the most critical steps in cookie baking is using butter at the right temperature. Ensure your butter is softened to room temperature before you begin creaming it with sugar. Room temperature butter should yield slightly to pressure when pressed with a finger but still hold its shape. This temperature allows for the perfect incorporation of air into the butter, resulting in a light and fluffy dough. If the butter is too cold, it won’t cream properly, leading to dense cookies. Conversely, if it’s too melted, the dough can become overly greasy, causing the cookies to spread too much during baking. To soften butter quickly, you can cut it into small pieces and let it sit at room temperature for about 15-20 minutes, or microwave it on low power in 5-second bursts, turning it frequently until softened but not melted.
2. Don’t Overmix the Dough
When it comes to mixing your cookie dough, less is often more. Overmixing can develop the gluten in the flour, resulting in tougher, denser cookies instead of the tender, melt-in-your-mouth treats you desire. Once you add the flour to the creamed butter and sugar, mix only until the ingredients are just combined. A few flour streaks are perfectly fine, as they will incorporate during the scooping and baking process. This gentle mixing technique helps maintain the delicate texture of the cookies.
3. Chill the Dough (Optional)
While it may seem like an extra step, chilling the dough can significantly impact the final product. By chilling your cookie dough for 30 minutes to an hour before baking, you allow the fats in the dough to solidify, which results in slightly thicker cookies that spread less during baking. This technique also enhances the flavor as the chilling time allows the ingredients to meld together. If you plan to make multiple batches, consider dividing the dough into portions and chilling them separately, making it easier to bake fresh cookies at different times.
4. Use Parchment Paper
Lining your baking sheets with parchment paper is a small but crucial step in the cookie-making process. This simple addition prevents cookies from sticking to the pan, ensuring they release easily without breaking apart. Furthermore, parchment paper promotes even baking, as it provides a non-stick surface that allows heat to circulate around the cookies. Cleanup becomes effortless as well; once you’re done, you can simply toss the parchment paper, leaving your baking sheets clean and ready for the next batch.
5. Uniform Cookie Size
Achieving uniform cookie sizes not only enhances the visual appeal of your finished product but also ensures even baking. Using a cookie scoop is an excellent way to accomplish this. A cookie scoop allows you to portion out the dough consistently, resulting in cookies that are the same size and shape. This uniformity means that all cookies will bake at the same rate, preventing any from becoming overbaked or underbaked. If you don’t have a cookie scoop, you can also use a tablespoon or a measuring cup to portion out the dough.
6. Don’t Overbake
One of the most common pitfalls in cookie baking is overbaking. Cookies should be removed from the oven when the edges are lightly golden brown, and the centers still appear slightly soft. They will continue to set as they cool on the baking sheet, so err on the side of caution. If you’re unsure, you can conduct the “toothpick test”—insert a toothpick into the center of one cookie; if it comes out with a few moist crumbs, they’re perfectly baked. Overbaking can lead to dry, hard cookies that lack the soft, chewy texture we all love.
7. Customize with Add-Ins
Take your condensed milk cookies to new heights by getting creative with add-ins. Consider incorporating chocolate chips, chopped nuts, dried fruit, or even a hint of citrus zest for a burst of flavor. Each addition can bring its unique texture and taste, allowing you to tailor the cookies to your preferences. For instance, a sprinkle of sea salt on top of chocolate chip cookies can enhance the sweetness and provide a delightful contrast. Don’t be afraid to experiment with different combinations to find your perfect cookie!
8. Store Properly for Freshness
To keep your cookies fresh and delicious, proper storage is essential. Once your cookies have cooled completely, place them in an airtight container at room temperature. They should remain fresh for up to 5 days. For longer storage, consider freezing your cookies in an airtight container or freezer bag. They can last for up to 2 months in the freezer. When you’re ready to enjoy them, simply thaw them at room temperature for a few hours or microwave them for a few seconds to revive their soft texture. Labeling your containers with the date can help you keep track of freshness.
By following these comprehensive tips, you’ll elevate your condensed milk cookies from ordinary to extraordinary. Happy baking!
FAQ Section: Your Condensed Milk Cookie Questions Answered
Got questions about making condensed milk cookies? We’ve got answers! Here are 8 frequently asked questions to help you bake with confidence:
Q1: Can I use salted butter instead of unsalted butter?
A: Yes, you can. If you use salted butter, reduce the amount of salt you add to the dry ingredients to just a pinch or omit it altogether.
Q2: Can I substitute brown sugar for granulated sugar?
A: While granulated sugar is recommended for this recipe for its crispness, you can substitute light brown sugar for a chewier cookie with a slightly molasses-like flavor. The texture and spread might be slightly different.
Q3: My cookies spread too thin. What did I do wrong?
A: Several factors can cause cookies to spread too thin:
* Butter too warm: Ensure your butter is softened but not melted.
* Overmixing: Overmixing incorporates too much air and gluten, leading to spreading.
* Oven temperature: Ensure your oven is at the correct temperature. If it’s too low, cookies may spread before setting.
* Too much sugar: While unlikely in this recipe, excessive sugar can cause spreading.
* Try chilling the dough before baking to minimize spreading in future batches.
Q4: Can I make these cookies without vanilla extract?
A: Yes, you can omit vanilla extract if you don’t have it on hand. The cookies will still be delicious, but vanilla enhances the overall flavor. You could consider substituting with another extract like almond or lemon for a different flavor profile.
Q5: Can I make these cookies ahead of time?
A: Absolutely! You can make the cookie dough ahead of time and store it in the refrigerator for up to 2 days. Just bring it to room temperature for about 15-20 minutes before scooping and baking. You can also bake the cookies ahead of time and store them in an airtight container.
Q6: Can I freeze the cookie dough?
A: Yes, you can freeze the cookie dough. Scoop the dough into balls, place them on a baking sheet lined with parchment paper, and freeze until solid. Then, transfer the frozen dough balls to a freezer-safe bag or container. Bake directly from frozen, adding a few extra minutes to the baking time.
Q7: Are these cookies suitable for vegans or those with dairy allergies?
A: As written, this recipe is not vegan or dairy-free due to the butter, egg, and condensed milk. However, you might be able to adapt it using vegan butter substitutes, an egg replacer, and vegan condensed milk alternatives, though the texture and flavor may vary.
Q8: How do I know when the cookies are done baking?
A: The cookies are done when the edges are lightly golden brown and the centers are just set. They should still be slightly soft in the center when you take them out of the oven. They will continue to firm up as they cool. Avoid overbaking for the best texture.
These condensed milk cookies are more than just a recipe; they are a gateway to simple baking joy. Easy to make, delightful to eat, and endlessly adaptable, they are sure to become a beloved treat in your home, just as they have in mine. Happy baking!
Print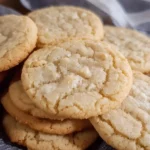
Condensed Milk Cookies Recipe
Ingredients
Here’s what you’ll need to create these melt-in-your-mouth condensed milk cookies. Each ingredient plays a crucial role in achieving the perfect texture and flavor:
- All-Purpose Flour: The foundation of our cookies, providing structure and that classic cookie chewiness. Ensure it’s measured correctly for the best results.
- Unsalted Butter: Softened butter is key for creating tender cookies. It adds richness, flavor, and helps in achieving that perfect golden-brown edge.
- Granulated Sugar: For sweetness, of course! Granulated sugar also helps in creating a slightly crisp exterior and a soft interior.
- Sweetened Condensed Milk: The star ingredient! This adds a unique sweetness and a wonderfully chewy texture that differentiates these cookies from regular sugar cookies.
- Egg: Acts as a binder, holding all the ingredients together and adding moisture and richness to the cookie dough. Use a large egg for consistency.
- Vanilla Extract: A touch of vanilla enhances the overall flavor profile, adding warmth and depth to the sweetness. Pure vanilla extract is recommended for the best taste.
- Baking Powder: The leavening agent that gives the cookies a slight lift and a soft, airy texture. Ensure it’s fresh for optimal results.
- Pinch of Salt: Balances the sweetness and enhances all the other flavors in the recipe. Don’t skip this seemingly small but essential ingredient!
Instructions
Follow these simple step-by-step instructions to bake a batch of perfect condensed milk cookies every time:
- Preheat Your Oven & Prep Baking Sheets: Preheat your oven to 350°F (175°C). Line baking sheets with parchment paper. This prevents sticking and makes for easy cleanup.
- Cream Butter and Sugar: In a large mixing bowl, cream together the softened unsalted butter and granulated sugar until light and fluffy. This step is crucial for incorporating air into the dough, resulting in lighter cookies. You can use an electric mixer or do this by hand with a whisk or spatula.
- Incorporate Egg and Vanilla: Beat in the egg and vanilla extract until well combined. Ensure the egg is fully incorporated into the butter and sugar mixture for a smooth batter.
- Add Condensed Milk: Pour in the sweetened condensed milk and mix until just combined. Be careful not to overmix at this stage. Overmixing can lead to tougher cookies.
- Combine Dry Ingredients: In a separate bowl, whisk together the all-purpose flour, baking powder, and salt. Whisking ensures the baking powder and salt are evenly distributed throughout the flour.
- Gradually Add Dry Ingredients to Wet Ingredients: Gradually add the dry ingredients to the wet ingredients, mixing on low speed or by hand until just combined. Mix until you no longer see streaks of flour. Again, avoid overmixing.
- Scoop Cookie Dough: Drop rounded tablespoons of cookie dough onto the prepared baking sheets, leaving about 2 inches of space between each cookie to allow for spreading. You can use a cookie scoop for uniform cookies.
- Bake to Golden Perfection: Bake for 10-12 minutes, or until the edges are lightly golden brown and the centers are just set. Baking time may vary slightly depending on your oven, so keep an eye on them.
- Cool on Baking Sheets: Let the cookies cool on the baking sheets for a few minutes before transferring them to a wire rack to cool completely. This allows them to firm up a bit and prevents them from breaking when you move them.
- Enjoy!: Once cooled, these delightful condensed milk cookies are ready to be enjoyed! They are perfect on their own, with a glass of milk, or alongside your favorite hot beverage.
Nutrition
- Serving Size: one normal portion
- Calories: 120
- Fat: 6g
- Saturated Fat: 4g