
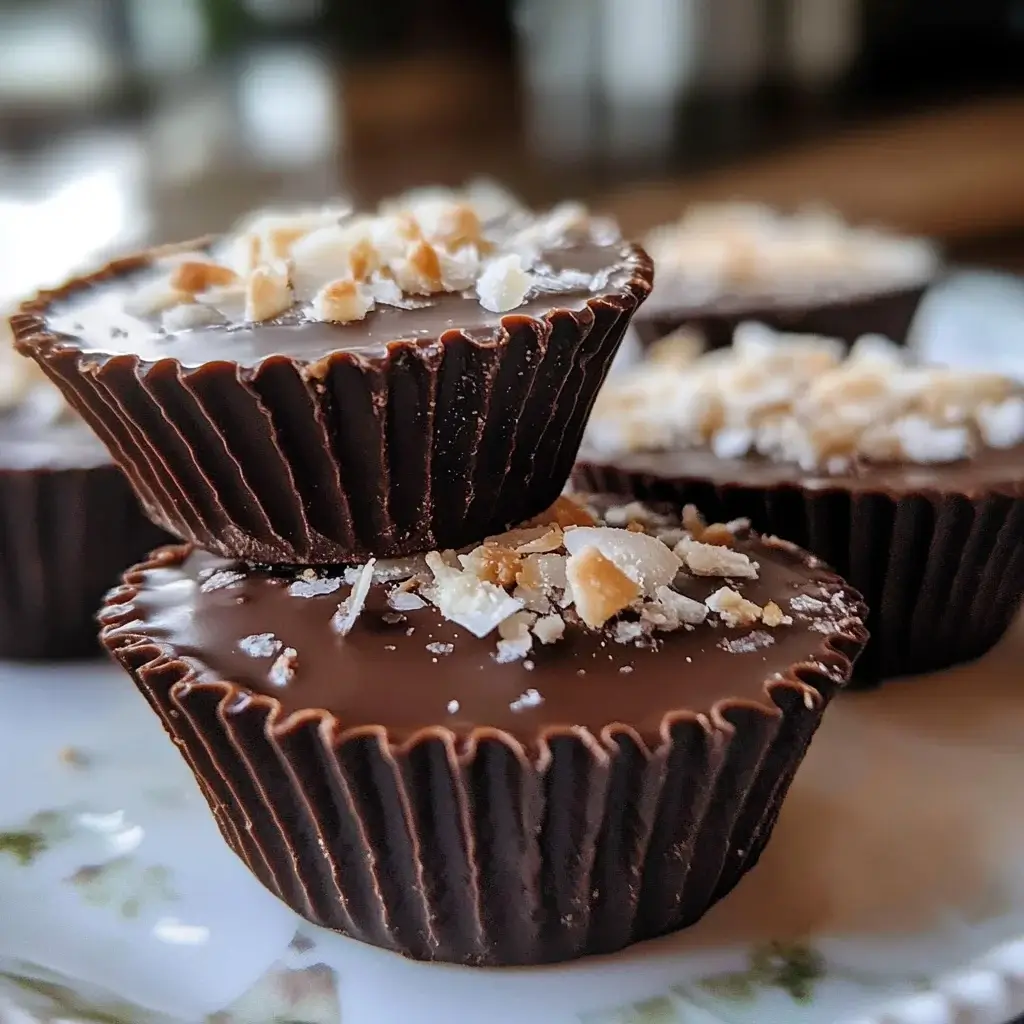

These Coconut Chocolate Cups have become an absolute staple in our household, a go-to treat that disappears almost as quickly as I can make them! The first time I whipped up a batch, I was simply looking for a healthier, homemade alternative to store-bought coconut candies. I wasn’t prepared for the rave reviews. My kids, usually picky eaters when it comes to anything remotely “healthy,” devoured them, asking when I could make more. My husband, a self-proclaimed chocoholic, declared them better than most fancy chocolates he’s tried. There’s something incredibly satisfying about the combination of rich, dark chocolate shells cracking open to reveal a soft, sweet, and chewy coconut filling. They strike that perfect balance between indulgent and wholesome, tasting decadent while being surprisingly simple to prepare with ingredients I often already have on hand. They’ve become our signature treat for movie nights, potlucks, and even simple afternoon pick-me-ups. Sharing this recipe feels like sharing a little bit of our family’s joy, and I’m confident these delightful cups will become a favorite in your home too. They offer the perfect bite-sized escape, a moment of pure chocolate-coconut bliss.
Ingredients for Heavenly Coconut Chocolate Cups
Creating these delightful treats requires surprisingly few ingredients, focusing on quality for the best flavour and texture. Here’s what you’ll need:
- 1 ½ cups (300g) High-Quality Dark Chocolate Chips or Chopped Bar (at least 60-70% cacao): The star of the outer shell. Using good quality dark chocolate provides a rich, intense flavour that beautifully contrasts the sweet coconut filling. Higher cacao content often means less sugar and a deeper chocolate taste. You can use semi-sweet if you prefer a slightly sweeter shell.
- 2 tablespoons Virgin Coconut Oil (divided): This is essential for creating a smooth, glossy chocolate shell that sets well but isn’t brittle. It also adds a subtle coconut aroma. We’ll use one tablespoon for the chocolate and one for the filling. Ensure it’s virgin or unrefined for the best coconut flavour.
- 1 ½ cups (150g) Unsweetened Shredded Coconut (fine or medium shred): The heart of the filling. Unsweetened allows you to control the sweetness level, and a finer shred often creates a smoother, more cohesive filling texture. Avoid desiccated coconut that’s too powdery.
- ¼ cup (60ml) Pure Maple Syrup or Honey: The primary sweetener for the coconut filling. Maple syrup offers a lovely caramel note and keeps the recipe vegan (if using maple syrup), while honey provides a classic sweetness. Adjust slightly based on your preference.
- 1 teaspoon Pure Vanilla Extract: Enhances both the chocolate and coconut flavours, adding warmth and depth to the filling. Always opt for pure vanilla extract over imitation for the best taste.
- Pinch of Fine Sea Salt: A small amount balances the sweetness in the filling and subtly intensifies the chocolate flavour. Don’t skip this – it makes a difference!
Step-by-Step Instructions for Perfect Cups
Follow these simple steps to create your own batch of irresistible Coconut Chocolate Cups. Patience during the chilling phases is key!
- Prepare Your Liners: Arrange 12 standard-sized paper or silicone cupcake liners in a muffin tin. Using a muffin tin helps the cups maintain their shape as they set. Silicone liners are great for easy removal, but paper works perfectly fine.
- Melt the Chocolate (Base Layer): In a microwave-safe bowl, combine 1 cup (200g) of the dark chocolate chips/chunks and 1 tablespoon of the coconut oil. Microwave in 30-second intervals, stirring well after each interval, until the chocolate is almost completely melted and smooth. Be careful not to overheat or scorch the chocolate. Alternatively, use a double boiler: place the bowl over a saucepan of gently simmering water (ensure the bottom of the bowl doesn’t touch the water) and stir until melted and smooth.
- Create the Chocolate Base: Spoon approximately 1 to 1.5 tablespoons of the melted chocolate mixture into the bottom of each cupcake liner. Use the back of the spoon or gently swirl the muffin tin to spread the chocolate evenly across the base. Aim for a layer thick enough to hold the filling but not overly thick.
- Chill the Base: Place the muffin tin in the freezer for about 10-15 minutes, or in the refrigerator for 20-30 minutes, until the chocolate base is firm to the touch. This prevents the filling from mixing with the base layer.
- Prepare the Coconut Filling: While the chocolate bases are chilling, prepare the filling. In a medium bowl, combine the 1 ½ cups (150g) unsweetened shredded coconut, ¼ cup (60ml) maple syrup or honey, the remaining 1 tablespoon of coconut oil (melt it if it’s solid), 1 teaspoon pure vanilla extract, and the pinch of fine sea salt. Stir everything together thoroughly until the coconut is evenly coated and the mixture clumps together slightly. Taste and adjust sweetness if desired (add a touch more syrup/honey if needed).
- Add the Filling: Once the chocolate bases are firm, remove the muffin tin from the freezer/refrigerator. Spoon the coconut filling evenly among the 12 cups, placing it directly onto the set chocolate base. Gently press the filling down with the back of a spoon or your fingers to create a relatively flat, compact layer. Ensure you leave a small space around the edge for the top chocolate layer to seal the cup.
- Melt the Remaining Chocolate (Top Layer): Melt the remaining ½ cup (100g) of dark chocolate using the same method as in step 2 (microwave or double boiler). If the chocolate seems too thick, you can add another teaspoon of coconut oil, but it’s often not necessary for the top layer.
- Top the Cups: Carefully spoon the remaining melted chocolate over the coconut filling in each cup. Use the back of the spoon to spread it evenly, ensuring it reaches the edges of the liner to completely encase the coconut filling and seal the cup. Gently tap the muffin tin on the counter a few times to smooth out the tops.
- Optional Decoration: If desired, while the top chocolate layer is still wet, you can sprinkle a little extra shredded coconut, sea salt flakes, or even some cacao nibs on top for decoration and texture.
- Final Chill: Place the completed Coconut Chocolate Cups back into the refrigerator (preferred for final setting) for at least 30-60 minutes, or into the freezer for 15-20 minutes, until the chocolate is completely firm. The refrigerator helps prevent the chocolate from becoming overly hard or cracking compared to freezing for extended periods.
- Serve or Store: Once fully set, gently peel away the paper liners (if used) or pop the cups out of the silicone liners. Your homemade Coconut Chocolate Cups are ready to be enjoyed! Store leftovers as recommended in the tips section.
Nutrition Facts (Approximate)
Please note that these nutritional values are estimates per cup (assuming the batch makes 12 cups) and can vary based on the specific brands of ingredients used, the exact amount of sweetener, and the cacao percentage of the chocolate.
- Servings: 12 Cups
- Calories per serving: Approximately 250-300 kcal. Primarily derived from the fats in coconut oil and chocolate, and carbohydrates from the sweetener and chocolate.
- Fat: Approximately 18-22g. Contains saturated fats from coconut oil and chocolate (some sources consider MCTs in coconut oil beneficial) and some unsaturated fats.
- Carbohydrates: Approximately 20-25g. Includes natural sugars from maple syrup/honey and chocolate, plus fibre from the coconut.
- Protein: Approximately 2-4g. Small amounts contributed by the chocolate and coconut.
- Sugar: Approximately 12-18g. Varies significantly depending on the sweetener used (maple syrup vs. honey) and the cacao percentage/sugar content of your chosen dark chocolate.
Preparation Time
Making these Coconut Chocolate Cups is relatively quick, with most of the time dedicated to chilling.
- Active Preparation Time: Approximately 20-25 minutes (includes melting chocolate, mixing filling, and assembling the cups).
- Chilling Time: Approximately 45-75 minutes total (includes time for the base layer to set and the final cups to firm up completely in the refrigerator).
- Total Time: Approximately 1 hour 5 minutes to 1 hour 40 minutes.
Delicious Ways to Serve Your Coconut Chocolate Cups
These versatile treats can be enjoyed in numerous ways. Here are some serving suggestions:
- Classic Dessert: Serve them chilled, straight from the refrigerator, as a simple yet elegant dessert after dinner. They are satisfyingly rich on their own.
- With Coffee or Tea: The combination of rich chocolate and sweet coconut pairs wonderfully with a hot cup of coffee, espresso, or your favourite tea for an afternoon indulgence.
- On a Dessert Platter: Include them on a platter with other small treats like mini cheesecakes, fruit tarts, cookies, or fresh berries for parties or gatherings. Their neat, portion-controlled size makes them ideal.
- Holiday Treat Trays: Their festive appearance makes them a perfect addition to Christmas, Easter, or any holiday cookie and candy assortment.
- Homemade Gifts: Package them nicely in a small box or cellophane bag tied with a ribbon. They make thoughtful and delicious homemade gifts for friends, neighbours, teachers, or hosts.
- Slightly Softened: For a slightly softer texture, let them sit at room temperature for 5-10 minutes before serving. The chocolate will soften slightly, and the coconut filling will be creamier.
- Crumble Over Ice Cream: For an extra decadent treat, chop or crumble a cup and sprinkle it over vanilla, chocolate, or coconut ice cream.
Pro Tips for Elevating Your Coconut Chocolate Cups
Take your homemade cups from great to absolutely exceptional with these handy tips:
- Use High-Quality Chocolate: This is arguably the most crucial tip. The flavour of the chocolate significantly impacts the final product. Choose a dark chocolate (60-77% cacao) or semi-sweet chocolate that you enjoy eating on its own. A good quality chocolate melts better and has a richer, more complex flavour.
- Toast the Coconut (Optional): For a deeper, nuttier flavour dimension, lightly toast the shredded coconut before mixing it into the filling. Spread the coconut on a baking sheet and toast at 325°F (160°C) for 5-8 minutes, watching carefully and stirring occasionally until fragrant and lightly golden. Let it cool completely before using.
- Don’t Skip the Salt: That tiny pinch of salt in the filling does wonders. It balances the sweetness of the syrup/honey and enhances the overall flavour profile, making the chocolate taste richer and the coconut more pronounced. Use fine sea salt for best results.
- Control the Sweetness: Taste the coconut filling mixture before adding it to the cups. If you prefer it sweeter, add a little more maple syrup or honey. If you like it less sweet, you can slightly reduce the amount. Remember the chocolate shell also adds sweetness.
- Achieve the Right Filling Texture: If your filling seems too dry, add another teaspoon of melted coconut oil or maple syrup. If it seems too wet, add a tablespoon or two more shredded coconut. You want it moist enough to hold together when pressed, but not soggy.
- Ensure a Good Seal: When adding the top layer of chocolate, make sure it flows down the sides slightly to meet the base layer, completely encasing the coconut filling. This prevents the filling from drying out and creates a more professional look. Gently tapping the muffin tin helps settle the chocolate.
- Perfect Storage: Store the finished Coconut Chocolate Cups in an airtight container in the refrigerator. This keeps the chocolate firm and the coconut filling fresh. They will typically last for 1-2 weeks when stored properly. Avoid storing them at room temperature for extended periods, especially in warm climates, as the coconut oil can cause them to soften significantly.
- Easy Liner Removal: If using paper liners and they are sticking, chilling the cups thoroughly usually helps. Silicone liners generally release very easily. If paper liners are consistently troublesome, try lightly greasing them with coconut oil before adding the chocolate base, although this is often unnecessary.
Frequently Asked Questions (FAQ)
Here are answers to some common questions about making Coconut Chocolate Cups:
- Can I make these vegan?
Yes, absolutely! To ensure they are vegan, use high-quality dairy-free dark chocolate chips or a vegan chocolate bar. Use pure maple syrup as the sweetener instead of honey. All other standard ingredients (coconut, coconut oil, vanilla, salt) are typically vegan, but always double-check labels if you have strict requirements. - Can I use sweetened shredded coconut instead of unsweetened?
You can, but you’ll need to adjust or potentially omit the added sweetener (maple syrup/honey) in the filling. Sweetened shredded coconut already contains sugar. Taste the mixture before adding any extra sweetener; you might find it sweet enough on its own with just the coconut oil, vanilla, and salt. Using unsweetened gives you more control over the final sweetness and flavour. - My chocolate seized or became thick while melting. What went wrong?
Chocolate seizing (becoming thick, grainy, or lumpy) usually happens if it comes into contact with even a tiny drop of water or if it’s overheated. Ensure your bowl and utensils are perfectly dry. When using the microwave, heat in short bursts and stir frequently. If using a double boiler, don’t let the water boil vigorously, and ensure no steam or water gets into the chocolate. Adding the coconut oil helps prevent this and promotes smooth melting. If it seizes slightly, sometimes stirring in a tiny bit more coconut oil (about ½ teaspoon at a time) can help smooth it out, but severe seizing is difficult to reverse. - Can I use milk chocolate or white chocolate instead of dark chocolate?
Yes, you can substitute milk chocolate or white chocolate, although the flavour profile will be different (sweeter and less intense). Milk chocolate and white chocolate are often softer and melt at lower temperatures, so they might require slightly longer chilling times to set firmly. Ensure you use good quality versions for best results. The sweetness contrast might be less pronounced than with dark chocolate. - How long do these Coconut Chocolate Cups last?
When stored properly in an airtight container in the refrigerator, they should stay fresh and delicious for 1 to 2 weeks. The cool temperature keeps the chocolate firm and prevents the coconut oil in the filling from making them too soft or spoiling. - Can I freeze Coconut Chocolate Cups?
Yes, they freeze well! Place the set cups in a freezer-safe airtight container, perhaps with layers separated by parchment paper to prevent sticking. They can be frozen for up to 2-3 months. To serve, thaw them in the refrigerator for a few hours or let them sit at room temperature for about 15-20 minutes before enjoying. Freezing might slightly alter the texture of the chocolate (potential for slight blooming, though usually minimal), but the taste should remain great. - My coconut filling seems too crumbly or too wet. How can I fix it?
If the filling is too dry and crumbly, it likely needs a bit more binder. Add melted coconut oil or your chosen liquid sweetener (maple syrup/honey) teaspoon by teaspoon, mixing well after each addition, until it holds together better when pressed. If the filling seems too wet or oily, add more unsweetened shredded coconut, one tablespoon at a time, until it reaches a firmer, packable consistency. The temperature of your coconut oil (melted vs. solid) can also affect this initially. - Can I make mini Coconut Chocolate Cups?
Definitely! Use a mini muffin tin and mini cupcake liners. You’ll need less chocolate per layer (maybe ½ tablespoon for the base and ½ – 1 teaspoon for the top) and less filling per cup. Adjust chilling times accordingly, as they will set faster. This recipe would likely yield 24-36 mini cups, making them perfect bite-sized treats for parties or portion control.
Coconut Chocolate Cups Recipe
Ingredients
Creating these delightful treats requires surprisingly few ingredients, focusing on quality for the best flavour and texture. Here’s what you’ll need:
- 1 ½ cups (300g) High-Quality Dark Chocolate Chips or Chopped Bar (at least 60-70% cacao): The star of the outer shell. Using good quality dark chocolate provides a rich, intense flavour that beautifully contrasts the sweet coconut filling. Higher cacao content often means less sugar and a deeper chocolate taste. You can use semi-sweet if you prefer a slightly sweeter shell.
- 2 tablespoons Virgin Coconut Oil (divided): This is essential for creating a smooth, glossy chocolate shell that sets well but isn’t brittle. It also adds a subtle coconut aroma. We’ll use one tablespoon for the chocolate and one for the filling. Ensure it’s virgin or unrefined for the best coconut flavour.
- 1 ½ cups (150g) Unsweetened Shredded Coconut (fine or medium shred): The heart of the filling. Unsweetened allows you to control the sweetness level, and a finer shred often creates a smoother, more cohesive filling texture. Avoid desiccated coconut that’s too powdery.
- ¼ cup (60ml) Pure Maple Syrup or Honey: The primary sweetener for the coconut filling. Maple syrup offers a lovely caramel note and keeps the recipe vegan (if using maple syrup), while honey provides a classic sweetness. Adjust slightly based on your preference.
- 1 teaspoon Pure Vanilla Extract: Enhances both the chocolate and coconut flavours, adding warmth and depth to the filling. Always opt for pure vanilla extract over imitation for the best taste.
- Pinch of Fine Sea Salt: A small amount balances the sweetness in the filling and subtly intensifies the chocolate flavour. Don’t skip this – it makes a difference!
Instructions
Follow these simple steps to create your own batch of irresistible Coconut Chocolate Cups. Patience during the chilling phases is key!
- Prepare Your Liners: Arrange 12 standard-sized paper or silicone cupcake liners in a muffin tin. Using a muffin tin helps the cups maintain their shape as they set. Silicone liners are great for easy removal, but paper works perfectly fine.
- Melt the Chocolate (Base Layer): In a microwave-safe bowl, combine 1 cup (200g) of the dark chocolate chips/chunks and 1 tablespoon of the coconut oil. Microwave in 30-second intervals, stirring well after each interval, until the chocolate is almost completely melted and smooth. Be careful not to overheat or scorch the chocolate. Alternatively, use a double boiler: place the bowl over a saucepan of gently simmering water (ensure the bottom of the bowl doesn’t touch the water) and stir until melted and smooth.
- Create the Chocolate Base: Spoon approximately 1 to 1.5 tablespoons of the melted chocolate mixture into the bottom of each cupcake liner. Use the back of the spoon or gently swirl the muffin tin to spread the chocolate evenly across the base. Aim for a layer thick enough to hold the filling but not overly thick.
- Chill the Base: Place the muffin tin in the freezer for about 10-15 minutes, or in the refrigerator for 20-30 minutes, until the chocolate base is firm to the touch. This prevents the filling from mixing with the base layer.
- Prepare the Coconut Filling: While the chocolate bases are chilling, prepare the filling. In a medium bowl, combine the 1 ½ cups (150g) unsweetened shredded coconut, ¼ cup (60ml) maple syrup or honey, the remaining 1 tablespoon of coconut oil (melt it if it’s solid), 1 teaspoon pure vanilla extract, and the pinch of fine sea salt. Stir everything together thoroughly until the coconut is evenly coated and the mixture clumps together slightly. Taste and adjust sweetness if desired (add a touch more syrup/honey if needed).
- Add the Filling: Once the chocolate bases are firm, remove the muffin tin from the freezer/refrigerator. Spoon the coconut filling evenly among the 12 cups, placing it directly onto the set chocolate base. Gently press the filling down with the back of a spoon or your fingers to create a relatively flat, compact layer. Ensure you leave a small space around the edge for the top chocolate layer to seal the cup.
- Melt the Remaining Chocolate (Top Layer): Melt the remaining ½ cup (100g) of dark chocolate using the same method as in step 2 (microwave or double boiler). If the chocolate seems too thick, you can add another teaspoon of coconut oil, but it’s often not necessary for the top layer.
- Top the Cups: Carefully spoon the remaining melted chocolate over the coconut filling in each cup. Use the back of the spoon to spread it evenly, ensuring it reaches the edges of the liner to completely encase the coconut filling and seal the cup. Gently tap the muffin tin on the counter a few times to smooth out the tops.
- Optional Decoration: If desired, while the top chocolate layer is still wet, you can sprinkle a little extra shredded coconut, sea salt flakes, or even some cacao nibs on top for decoration and texture.
- Final Chill: Place the completed Coconut Chocolate Cups back into the refrigerator (preferred for final setting) for at least 30-60 minutes, or into the freezer for 15-20 minutes, until the chocolate is completely firm. The refrigerator helps prevent the chocolate from becoming overly hard or cracking compared to freezing for extended periods.
- Serve or Store: Once fully set, gently peel away the paper liners (if used) or pop the cups out of the silicone liners. Your homemade Coconut Chocolate Cups are ready to be enjoyed! Store leftovers as recommended in the tips section.
Nutrition
- Serving Size: one normal portion
- Calories: 300
- Sugar: 18g
- Fat: 22g
- Carbohydrates: 25g
- Protein: 4g


