
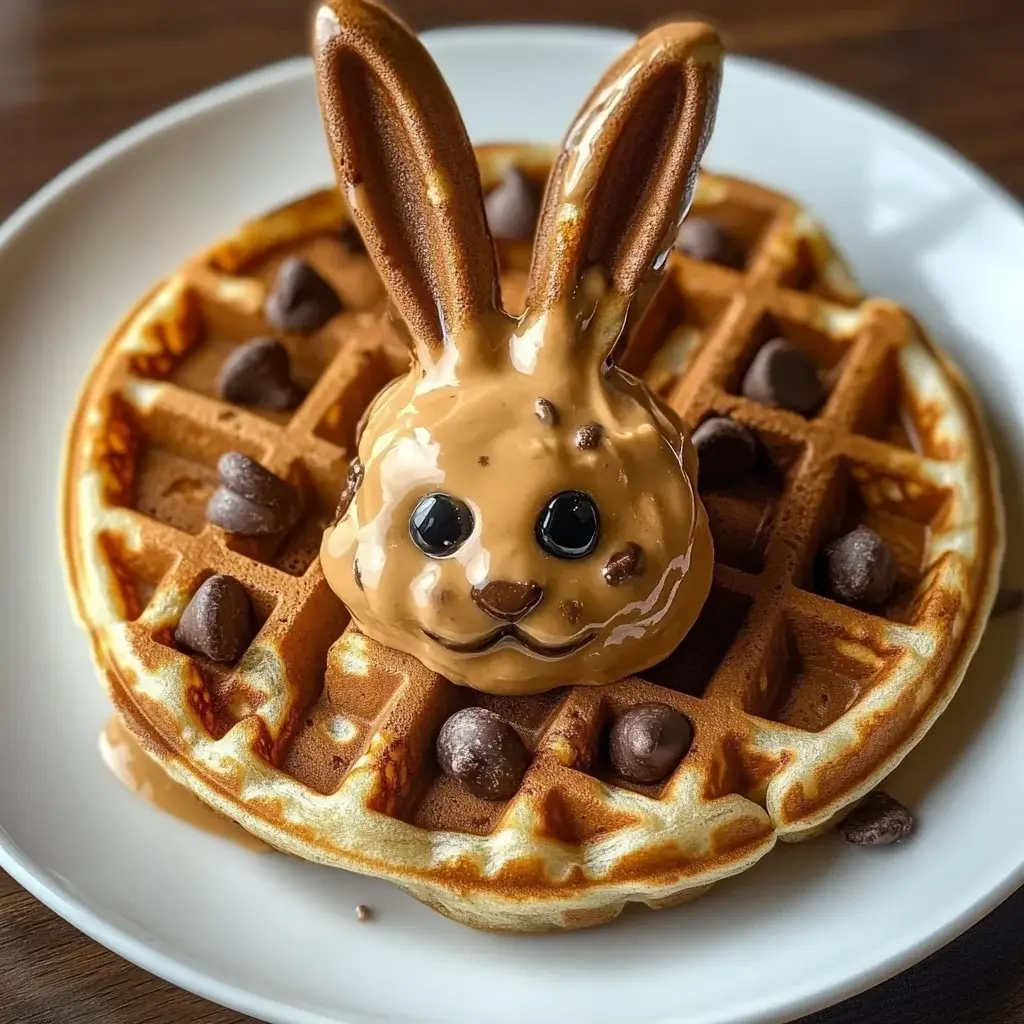

Chocolate Chip Bunny Waffles have become a weekend staple in our home, especially when the calendar hints at spring or Easter. There’s something undeniably delightful about watching my kids’ faces light up when they see these adorable bunny-shaped waffles, studded with chocolate chips, ready for breakfast. The aroma of warm waffles mingled with melting chocolate fills the kitchen, setting a joyful tone for the day. Honestly, these aren’t just waffles; they’re little bundles of happiness. They are surprisingly easy to make, and even on a busy morning, whipping up a batch feels completely manageable. The slight crispness of the edges, the fluffy interior, and the bursts of sweet chocolate chips in every bite – it’s a combination that’s hard to resist. Even my usually picky eater devours these without a fuss. If you’re looking for a recipe that’s guaranteed to bring smiles and make breakfast feel special, look no further. These Chocolate Chip Bunny Waffles are a winner in our book, and I’m excited to share the recipe and all my tips for making them perfect every time.
Ingredients for Chocolate Chip Bunny Waffles
- All-Purpose Flour: 3 cups. The foundation of our waffles, all-purpose flour provides the necessary structure. It’s what gives the waffles their body and substance, ensuring they aren’t too flimsy and hold their shape well. Using the correct amount is crucial for achieving the right texture—fluffy yet slightly dense enough to hold toppings.
- Granulated Sugar: 1/4 cup. Sugar not only adds sweetness but also aids in browning and contributes to the waffle’s tender texture. It balances the flavors and creates a slightly caramelized exterior when cooked in the waffle maker. The amount is carefully measured to provide sweetness without overpowering the other flavors.
- Baking Powder: 4 teaspoons. This is the magic ingredient that makes our waffles light and airy. Baking powder is a leavening agent that releases carbon dioxide when mixed with liquid and heated, creating those delightful air pockets inside the waffles. It’s essential for achieving that signature fluffy waffle texture, preventing them from being dense or flat.
- Salt: 1/2 teaspoon. A pinch of salt might seem insignificant, but it plays a vital role in enhancing the flavors of all the other ingredients. It balances the sweetness of the sugar and brings out the richness of the butter and vanilla. Salt is crucial for a well-rounded flavor profile in baked goods, and waffles are no exception.
- Large Eggs: 3. Eggs serve multiple purposes in this recipe. They act as a binder, holding the ingredients together and providing structure. They also add richness, moisture, and a subtle flavor to the waffles. The yolks contribute to the tender texture and golden color, while the whites add to the lightness. Using large eggs ensures the right ratio of liquid and fat in the batter.
- Milk: 2 1/2 cups. Milk is the primary liquid component, providing moisture to the batter and helping to create a smooth consistency. It hydrates the flour and activates the baking powder. Milk also contributes to the soft interior of the waffles and helps in achieving a good batter consistency that pours and cooks evenly. You can use whole milk for richer waffles or lower-fat milk for a lighter version.
- Melted Unsalted Butter: 1/2 cup. Melted butter adds a rich, buttery flavor and tenderness to the waffles. The fat in butter contributes to a moist and flavorful crumb. Using unsalted butter allows you to control the salt content in the recipe. Melted butter also helps in achieving crispy edges on the waffles as it cooks in the waffle maker. Make sure the butter is melted and slightly cooled before adding to the batter to avoid cooking the eggs.
- Vanilla Extract: 2 teaspoons. Vanilla extract enhances the overall flavor profile of the waffles, adding a warm, aromatic note that complements the chocolate and buttery flavors. It elevates the taste from simple waffles to something truly special and inviting. Good quality vanilla extract makes a noticeable difference in the final taste.
- Chocolate Chips: 1 cup. The star of the show! Chocolate chips add bursts of sweet, chocolatey goodness to every bite. You can use semi-sweet, milk chocolate, or even dark chocolate chips depending on your preference. Mini chocolate chips distribute more evenly throughout the waffles, while regular-sized chips create pockets of melted chocolate. Feel free to experiment with different types and amounts of chocolate chips to customize your waffles.
- Bunny-Shaped Waffle Maker (Optional): While not strictly an ingredient, a bunny-shaped waffle maker is key to achieving the adorable bunny shape. If you don’t have one, a regular waffle maker will work just as well, and you can still enjoy delicious chocolate chip waffles. The bunny shape just adds a fun, festive touch, especially for kids and spring-themed breakfasts.
Instructions
Step 1: Prepare the Dry Ingredients
In a large mixing bowl, whisk together the all-purpose flour, granulated sugar, baking powder, and salt. Whisking is crucial here – it not only combines the ingredients evenly but also helps to aerate the flour, which contributes to lighter waffles. Make sure there are no clumps of baking powder or salt, as this will ensure even distribution throughout the batter and consistent leavening and flavor in every waffle. Set this bowl aside. Preparing the dry ingredients first allows you to quickly combine them with the wet ingredients later, minimizing overmixing.
Step 2: Combine the Wet Ingredients
In a separate medium-sized bowl, whisk together the large eggs, milk, melted unsalted butter (make sure it’s cooled slightly so it doesn’t cook the eggs), and vanilla extract. Whisk until the mixture is well combined and slightly frothy. This step emulsifies the wet ingredients, creating a smooth and homogenous mixture. Ensuring the butter is not too hot is important because adding hot butter to eggs can partially cook them, which is not desirable for the batter consistency. The vanilla extract should be thoroughly incorporated to ensure its flavor permeates the entire batter.
Step 3: Combine Wet and Dry Ingredients
Gently pour the wet ingredients into the bowl of dry ingredients. Using a rubber spatula or a wooden spoon, fold the wet and dry ingredients together until just combined. It’s absolutely crucial not to overmix the batter at this stage. Overmixing develops gluten, which can result in tough, chewy waffles instead of light and fluffy ones. Mix just until the flour streaks disappear. A few lumps in the batter are perfectly fine and actually preferable to overmixing. The goal is to combine everything just enough so that there are no large pockets of dry flour remaining.
Step 4: Fold in the Chocolate Chips
Once the batter is just combined, gently fold in the chocolate chips. Distribute them evenly throughout the batter, again being careful not to overmix. Folding in the chocolate chips last ensures they remain intact and don’t get crushed or melted into the batter during mixing. You want distinct pockets of melted chocolate in your waffles, not just a chocolate-flavored batter.
Step 5: Preheat and Cook the Waffles
Preheat your bunny-shaped waffle maker (or regular waffle maker) according to the manufacturer’s instructions. Most waffle makers have an indicator light that will signal when it’s preheated and ready. Once preheated, lightly grease the waffle iron with cooking spray or a little melted butter. This prevents the waffles from sticking and ensures easy removal. Pour the batter onto the hot waffle iron, using about 1/2 cup of batter for each bunny waffle (adjust the amount depending on the size of your waffle maker and desired thickness). Close the lid and cook according to your waffle maker’s instructions, usually around 3-5 minutes, or until the waffles are golden brown and cooked through. The cooking time can vary depending on your waffle maker and the desired level of crispness.
Step 6: Serve and Enjoy!
Carefully remove the cooked waffles from the waffle maker. Bunny waffles might be a bit delicate due to their shape, so use a fork or tongs to gently lift them out. Serve immediately while they are warm and crispy. These Chocolate Chip Bunny Waffles are best enjoyed fresh and hot. You can serve them with your favorite toppings like maple syrup, powdered sugar, fresh fruit, whipped cream, or even a scoop of ice cream for a decadent treat. Get creative with your toppings and make breakfast fun and personalized!
Nutrition Facts
(Per Serving, based on approximately 6 waffles from the recipe. Nutritional values are approximate and can vary based on specific ingredients and serving sizes.)
- Serving Size: 1 Waffle
- Calories: Approximately 350 kcal
- Total Fat: 18g
Preparation Time
- Prep Time: 15 minutes (This includes measuring out all the ingredients, mixing the dry ingredients, and whisking together the wet ingredients. It’s a quick and straightforward process, especially if you have your ingredients readily available. This also accounts for melting and slightly cooling the butter.)
- Cook Time: 20 minutes (This is an estimate, as cooking time will depend on your waffle maker and how many waffles you are making at a time. Assuming each batch of waffles takes about 3-5 minutes to cook, and you make around 6 waffles, the total cooking time will be in this range. It also includes time for preheating the waffle maker.)
- Total Time: 35 minutes (From start to finish, including preparation and cooking, you can have delicious, freshly made Chocolate Chip Bunny Waffles on the table in about 35 minutes. This makes them a great option for a weekend breakfast or a special occasion without requiring a lot of time in the kitchen.)
How to Serve Chocolate Chip Bunny Waffles
These delightful bunny waffles are incredibly versatile and can be served in numerous ways to elevate your breakfast or brunch experience. Here are some serving suggestions to make them even more irresistible:
- Classic Syrup and Butter:
- Maple Syrup: The quintessential waffle topping. Warm maple syrup drizzled generously over hot waffles is a timeless combination that never disappoints.
- Butter: A pat of salted butter melting into the warm waffles adds richness and a savory counterpoint to the sweetness.
- Powdered Sugar: A light dusting of powdered sugar adds a touch of elegance and subtle sweetness.
- Fresh Fruit and Berries:
- Strawberries: Sliced fresh strawberries add a vibrant color, sweetness, and a slight tartness that complements the chocolate and waffle flavors.
- Blueberries: Bursting with antioxidants and flavor, blueberries are another excellent berry choice that pairs beautifully with waffles.
- Raspberries: Their delicate sweetness and slightly tangy flavor make raspberries a sophisticated topping.
- Bananas: Sliced bananas add a creamy texture and natural sweetness, making them a kid-friendly favorite.
- Mixed Berry Compote: For a more decadent option, make a quick berry compote by simmering mixed berries with a touch of sugar and lemon juice until thickened.
- Whipped Cream and Sweet Toppings:
- Homemade Whipped Cream: Lightly sweetened homemade whipped cream is a luxurious topping that adds a cloud-like texture and creamy sweetness.
- Store-Bought Whipped Cream: For convenience, a dollop of store-bought whipped cream works just as well.
- Chocolate Sauce: Drizzle warm chocolate sauce over the waffles for an extra dose of chocolate indulgence.
- Caramel Sauce: Caramel sauce adds a rich, buttery sweetness that complements the chocolate chips.
- Nutella or Other Nut Butters: Spread Nutella or your favorite nut butter for a creamy, nutty flavor and added protein.
- Sprinkles: For a fun and festive touch, especially for kids, add colorful sprinkles over the waffles.
- Savory and Brunch Pairings:
- Bacon or Sausage: Serve the sweet bunny waffles alongside crispy bacon or savory sausage for a balanced sweet and savory brunch.
- Scrambled Eggs or Omelets: Pair the waffles with scrambled eggs, omelets, or a frittata for a more substantial and complete brunch meal.
- Yogurt and Granola: Create a waffle parfait by layering waffle pieces with yogurt, granola, and fresh fruit for a lighter yet satisfying option.
- Dessert Waffles:
- Ice Cream Sundae Waffles: Turn bunny waffles into a fun dessert by topping them with scoops of your favorite ice cream, hot fudge, whipped cream, and cherries.
- Fruit and Custard: Layer waffle pieces with vanilla custard or pastry cream and fresh fruit for an elegant dessert waffle.
No matter how you choose to serve them, Chocolate Chip Bunny Waffles are sure to be a hit. Encourage everyone to customize their waffles with their favorite toppings and enjoy the fun and deliciousness!
Additional Tips for Perfect Chocolate Chip Bunny Waffles
To ensure your Chocolate Chip Bunny Waffles turn out perfectly every time, here are eight essential tips to keep in mind:
- Don’t Overmix the Batter: This is the golden rule of waffle (and pancake) making. Overmixing develops gluten, which results in tough and chewy waffles. Mix the wet and dry ingredients just until they are combined and the flour streaks disappear. A few lumps are perfectly acceptable and will disappear during cooking. Remember, a slightly lumpy batter is better than an overmixed one.
- Preheat Your Waffle Maker Thoroughly: Ensure your waffle maker is fully preheated before pouring in the batter. A hot waffle iron is crucial for creating crispy exteriors and fluffy interiors. Most waffle makers have an indicator light to signal when they are ready. Waiting until it’s properly heated will prevent sticking and ensure even cooking.
- Use Melted But Not Hot Butter: Melt the butter and let it cool slightly before adding it to the wet ingredients. Hot butter can partially cook the eggs in the batter, affecting the texture of the waffles. Melted and slightly cooled butter ensures it incorporates smoothly and contributes to the desired tender texture.
- Don’t Open the Waffle Maker Too Early: Resist the temptation to peek! Opening the waffle maker too early can cause the waffle to stick and tear apart. Wait until the steam has mostly subsided and the waffle maker indicator light signals that the waffle is done, or follow the manufacturer’s instructions for cooking time. Patience is key to perfectly formed waffles.
- Adjust Batter Consistency with Milk if Needed: If your batter seems too thick, you can add a tablespoon or two of milk to reach the desired pouring consistency. The batter should be pourable but not too thin. The right consistency ensures even spreading and cooking in the waffle maker, resulting in waffles that are neither too dense nor too flat.
- Add More Chocolate Chips (or Other Mix-ins): Feel free to customize your waffles by adding more chocolate chips if you are a true chocolate lover! You can also experiment with other mix-ins like chopped nuts, sprinkles, cocoa powder for a richer chocolate flavor, or even a hint of cinnamon for warmth. Get creative and personalize your waffles to your taste.
- Make Batter Ahead of Time (and Store it Correctly): You can prepare the waffle batter up to 24 hours in advance. Store it in an airtight container in the refrigerator. When ready to cook, give it a gentle stir. You might need to add a tablespoon or two of milk if the batter has thickened slightly overnight. This is a great time-saver for busy mornings.
- Keep Waffles Warm in the Oven: If you are making a large batch and want to keep the waffles warm while you cook the rest, preheat your oven to a low temperature (around 200°F or 95°C). Place the cooked waffles on a wire rack set over a baking sheet in the oven. This will keep them warm and crispy without making them soggy. Avoid stacking them directly on a plate, as this can trap steam and make them lose their crispness.
Frequently Asked Questions About Chocolate Chip Bunny Waffles
Q1: Can I use a regular waffle maker if I don’t have a bunny-shaped one?
A: Absolutely! While the bunny-shaped waffle maker adds a fun, festive touch, especially for Easter or spring, you can definitely use a regular waffle maker to make this recipe. The taste and texture will be exactly the same; you’ll just have round or square waffles instead of bunny-shaped ones. You can even use cookie cutters after cooking to cut out bunny shapes from regular waffles if you’re feeling creative!
Q2: Can I make these waffles ahead of time?
A: Yes, you can make these waffles ahead of time. Cooked waffles can be stored in the refrigerator for up to 3 days or frozen for up to 2 months. To reheat refrigerated waffles, toast them in a toaster, toaster oven, or oven at 350°F (175°C) for a few minutes until warm and crispy. For frozen waffles, you can reheat them directly from frozen using the same methods, just adding a few extra minutes to the reheating time.
Q3: Can I freeze these waffles?
A: Yes, these waffles freeze beautifully. Allow the cooked waffles to cool completely on a wire rack. Once cooled, place them in a single layer on a baking sheet and freeze for about 1-2 hours until solid. Then, transfer them to a freezer-safe bag or container, separating layers with parchment paper to prevent sticking. Freezing them individually first prevents them from sticking together in a clump.
Q4: Can I make these waffles vegan, dairy-free, or gluten-free?
A: Yes, with some substitutions, you can adapt this recipe to be vegan, dairy-free, or gluten-free.
* Vegan/Dairy-Free: Substitute the milk with plant-based milk like almond milk, soy milk, or oat milk. Replace the melted butter with melted vegan butter or coconut oil. Ensure your chocolate chips are dairy-free or vegan dark chocolate chips. You can use flax eggs or a commercial egg replacer to replace the eggs.
* Gluten-Free: Use a gluten-free all-purpose flour blend instead of regular all-purpose flour. Make sure the blend is designed for baking and contains xanthan gum or guar gum for structure. Double-check that your baking powder is also gluten-free, as some brands may contain wheat starch.
Q5: What if my waffles are sticking to the waffle maker?
A: Sticking waffles are usually caused by a few factors. Ensure your waffle maker is properly preheated and greased before pouring in the batter. Use cooking spray, melted butter, or oil to grease the waffle iron thoroughly before each batch. Also, make sure you are not opening the waffle maker too early; wait until the steam has subsided and the waffles are golden brown and cooked through. If you are still experiencing sticking, your waffle maker might need more thorough cleaning or may have worn out non-stick coating.
Q6: Can I double or halve this recipe?
A: Yes, you can easily double or halve this recipe to adjust the batch size to your needs. Simply multiply or divide all the ingredients by the desired factor (e.g., multiply by 2 to double, divide by 2 to halve). When doubling the recipe, you might need to cook in batches depending on the size of your waffle maker.
Q7: Can I add different flavors to these waffles?
A: Absolutely! This recipe is a great base for flavor variations. You can add:
* Spices: Cinnamon, nutmeg, or cardamom for a warm spice flavor.
* Citrus Zest: Lemon or orange zest for a bright, citrusy note.
* Extracts: Almond extract, maple extract, or peppermint extract for different flavor profiles.
* Cocoa Powder: For richer chocolate waffles, add 2-3 tablespoons of unsweetened cocoa powder to the dry ingredients.
Q8: How do I make bunny-shaped waffles if I don’t have a bunny waffle maker?
A: If you don’t have a bunny waffle maker, you can still create bunny shapes from regular waffles. Cook the waffles in a regular waffle maker (round or square). Once cooked and slightly cooled, use a bunny-shaped cookie cutter to cut out bunny shapes from the waffles. You may need to gently press and wiggle the cookie cutter to get clean shapes. This is a fun way to achieve the bunny theme even without specialized equipment, though there will be some waffle scraps left over. You can enjoy the scraps too!

Chocolate Chip Bunny Waffles Recipe
Ingredients
- All-Purpose Flour: 3 cups. The foundation of our waffles, all-purpose flour provides the necessary structure. It’s what gives the waffles their body and substance, ensuring they aren’t too flimsy and hold their shape well. Using the correct amount is crucial for achieving the right texture—fluffy yet slightly dense enough to hold toppings.
- Granulated Sugar: 1/4 cup. Sugar not only adds sweetness but also aids in browning and contributes to the waffle’s tender texture. It balances the flavors and creates a slightly caramelized exterior when cooked in the waffle maker. The amount is carefully measured to provide sweetness without overpowering the other flavors.
- Baking Powder: 4 teaspoons. This is the magic ingredient that makes our waffles light and airy. Baking powder is a leavening agent that releases carbon dioxide when mixed with liquid and heated, creating those delightful air pockets inside the waffles. It’s essential for achieving that signature fluffy waffle texture, preventing them from being dense or flat.
- Salt: 1/2 teaspoon. A pinch of salt might seem insignificant, but it plays a vital role in enhancing the flavors of all the other ingredients. It balances the sweetness of the sugar and brings out the richness of the butter and vanilla. Salt is crucial for a well-rounded flavor profile in baked goods, and waffles are no exception.
- Large Eggs: 3. Eggs serve multiple purposes in this recipe. They act as a binder, holding the ingredients together and providing structure. They also add richness, moisture, and a subtle flavor to the waffles. The yolks contribute to the tender texture and golden color, while the whites add to the lightness. Using large eggs ensures the right ratio of liquid and fat in the batter.
- Milk: 2 1/2 cups. Milk is the primary liquid component, providing moisture to the batter and helping to create a smooth consistency. It hydrates the flour and activates the baking powder. Milk also contributes to the soft interior of the waffles and helps in achieving a good batter consistency that pours and cooks evenly. You can use whole milk for richer waffles or lower-fat milk for a lighter version.
- Melted Unsalted Butter: 1/2 cup. Melted butter adds a rich, buttery flavor and tenderness to the waffles. The fat in butter contributes to a moist and flavorful crumb. Using unsalted butter allows you to control the salt content in the recipe. Melted butter also helps in achieving crispy edges on the waffles as it cooks in the waffle maker. Make sure the butter is melted and slightly cooled before adding to the batter to avoid cooking the eggs.
- Vanilla Extract: 2 teaspoons. Vanilla extract enhances the overall flavor profile of the waffles, adding a warm, aromatic note that complements the chocolate and buttery flavors. It elevates the taste from simple waffles to something truly special and inviting. Good quality vanilla extract makes a noticeable difference in the final taste.
- Chocolate Chips: 1 cup. The star of the show! Chocolate chips add bursts of sweet, chocolatey goodness to every bite. You can use semi-sweet, milk chocolate, or even dark chocolate chips depending on your preference. Mini chocolate chips distribute more evenly throughout the waffles, while regular-sized chips create pockets of melted chocolate. Feel free to experiment with different types and amounts of chocolate chips to customize your waffles.
- Bunny-Shaped Waffle Maker (Optional): While not strictly an ingredient, a bunny-shaped waffle maker is key to achieving the adorable bunny shape. If you don’t have one, a regular waffle maker will work just as well, and you can still enjoy delicious chocolate chip waffles. The bunny shape just adds a fun, festive touch, especially for kids and spring-themed breakfasts.
Instructions
Step 1: Prepare the Dry Ingredients
In a large mixing bowl, whisk together the all-purpose flour, granulated sugar, baking powder, and salt. Whisking is crucial here – it not only combines the ingredients evenly but also helps to aerate the flour, which contributes to lighter waffles. Make sure there are no clumps of baking powder or salt, as this will ensure even distribution throughout the batter and consistent leavening and flavor in every waffle. Set this bowl aside. Preparing the dry ingredients first allows you to quickly combine them with the wet ingredients later, minimizing overmixing.
Step 2: Combine the Wet Ingredients
In a separate medium-sized bowl, whisk together the large eggs, milk, melted unsalted butter (make sure it’s cooled slightly so it doesn’t cook the eggs), and vanilla extract. Whisk until the mixture is well combined and slightly frothy. This step emulsifies the wet ingredients, creating a smooth and homogenous mixture. Ensuring the butter is not too hot is important because adding hot butter to eggs can partially cook them, which is not desirable for the batter consistency. The vanilla extract should be thoroughly incorporated to ensure its flavor permeates the entire batter.
Step 3: Combine Wet and Dry Ingredients
Gently pour the wet ingredients into the bowl of dry ingredients. Using a rubber spatula or a wooden spoon, fold the wet and dry ingredients together until just combined. It’s absolutely crucial not to overmix the batter at this stage. Overmixing develops gluten, which can result in tough, chewy waffles instead of light and fluffy ones. Mix just until the flour streaks disappear. A few lumps in the batter are perfectly fine and actually preferable to overmixing. The goal is to combine everything just enough so that there are no large pockets of dry flour remaining.
Step 4: Fold in the Chocolate Chips
Once the batter is just combined, gently fold in the chocolate chips. Distribute them evenly throughout the batter, again being careful not to overmix. Folding in the chocolate chips last ensures they remain intact and don’t get crushed or melted into the batter during mixing. You want distinct pockets of melted chocolate in your waffles, not just a chocolate-flavored batter.
Step 5: Preheat and Cook the Waffles
Preheat your bunny-shaped waffle maker (or regular waffle maker) according to the manufacturer’s instructions. Most waffle makers have an indicator light that will signal when it’s preheated and ready. Once preheated, lightly grease the waffle iron with cooking spray or a little melted butter. This prevents the waffles from sticking and ensures easy removal. Pour the batter onto the hot waffle iron, using about 1/2 cup of batter for each bunny waffle (adjust the amount depending on the size of your waffle maker and desired thickness). Close the lid and cook according to your waffle maker’s instructions, usually around 3-5 minutes, or until the waffles are golden brown and cooked through. The cooking time can vary depending on your waffle maker and the desired level of crispness.
Step 6: Serve and Enjoy!
Carefully remove the cooked waffles from the waffle maker. Bunny waffles might be a bit delicate due to their shape, so use a fork or tongs to gently lift them out. Serve immediately while they are warm and crispy. These Chocolate Chip Bunny Waffles are best enjoyed fresh and hot. You can serve them with your favorite toppings like maple syrup, powdered sugar, fresh fruit, whipped cream, or even a scoop of ice cream for a decadent treat. Get creative with your toppings and make breakfast fun and personalized!
Nutrition
- Serving Size: one normal portion
- Calories: 350
- Fat: 18g


