

I’ll be the first to admit, the first time a friend suggested I make a dessert using avocados, I was more than a little skeptical. Avocados, in my mind, belonged mashed on toast, sliced in salads, or blended into a savory guacamole—not swirled with sweetener and served in a fancy cup. My family shared my hesitation; my husband raised an eyebrow, and the kids declared it “weird” before a single ingredient had even left the pantry. But my friend insisted, promising a creamy, decadent, and surprisingly healthy treat that would change my perception forever. With a sigh and a “what have I got to lose?” attitude, I blended my first batch. The result was nothing short of a revelation. The texture was impossibly smooth, like the most luxurious pot de crème, and the flavor was rich, subtly sweet, and completely devoid of any “vegetable” taste. That evening, the once-skeptical family scraped their dessert cups clean and immediately asked when I would be making it again. Now, these Chilled Avocado Dessert Cups have become a staple in our home—our go-to for a guilt-free weeknight indulgence, a quick and impressive dessert for guests, and a fantastic way to pack healthy fats into our diets without a single complaint. This recipe isn’t just a dessert; it’s a delicious magic trick that turns a humble fruit into a five-star treat.
Ingredients for Chilled Avocado Dessert Cups
This recipe relies on a few simple, high-quality ingredients to create its signature creamy texture and rich flavor. The magic lies in the ripeness of the avocados and the balance of sweetness and depth.
- 2 large, ripe Hass Avocados: These are the heart and soul of the dessert. Make sure they are perfectly ripe—yielding to gentle pressure but not mushy—to ensure the creamiest texture and avoid any bitterness.
- 1/2 cup Pure Maple Syrup: This natural sweetener provides a lovely, nuanced sweetness that complements the avocado. You can adjust the amount to your personal taste.
- 1/2 cup Unsweetened Cocoa Powder (or Cacao Powder): For a rich, chocolatey version, this is essential. Sifting it beforehand will prevent lumps and ensure a silky-smooth consistency.
- 1/4 cup Full-Fat Coconut Milk (from a can): This adds an extra layer of creaminess and richness. You can substitute with another plant-based milk like almond or oat milk, but the result may be slightly less thick.
- 1 teaspoon Pure Vanilla Extract: A non-negotiable for adding depth and a classic dessert aroma that rounds out the flavors beautifully.
- 1/4 teaspoon Fine Sea Salt: A tiny pinch of salt doesn’t make the dessert salty; it dramatically enhances the sweetness and the complexity of the chocolate flavor.
- Optional Squeeze of Lime or Lemon Juice: A small amount of acid can help prevent oxidation (browning) and brighten the overall flavor, though it’s not strictly necessary if you plan to serve it immediately.
Step-by-Step Instructions
Creating these dessert cups is incredibly simple and requires little more than a blender or food processor. The key is to blend until the mixture is completely smooth.
- Prepare the Avocados: Slice the avocados in half lengthwise and remove the pits. Scoop the green flesh out with a spoon and place it into the bowl of a high-speed blender or food processor. Discard the skins and pits.
- Add All Ingredients: To the blender or food processor with the avocado, add the maple syrup, unsweetened cocoa powder, coconut milk, vanilla extract, and fine sea salt. If you’re using it, add the squeeze of lime juice now.
- Blend Until Silky Smooth: Secure the lid and blend on high speed for 1-2 minutes. You may need to stop and scrape down the sides of the blender with a spatula a couple of times to ensure everything is fully incorporated. Continue blending until the mixture is completely smooth, creamy, and has no visible specks of avocado. The final texture should resemble a thick, luxurious pudding.
- Taste and Adjust: Once blended, taste the mixture. If you prefer it sweeter, add another tablespoon of maple syrup and blend for a few more seconds. If you want a deeper chocolate flavor, add an extra tablespoon of cocoa powder.
- Portion and Chill: Divide the avocado mixture evenly among four small dessert cups, ramekins, or glasses. You can spoon it in or, for a neater presentation, transfer the mixture to a piping bag and pipe it into the cups.
- Chill Thoroughly: Cover the dessert cups with plastic wrap, pressing it directly onto the surface of the pudding to prevent a skin from forming. Place them in the refrigerator to chill for at least 1-2 hours. This chilling step is crucial; it allows the flavors to meld and the dessert to firm up to the perfect consistency.
- Garnish and Serve: Once chilled, remove the dessert cups from the refrigerator. Garnish as desired (see “How to Serve” section for ideas) and serve immediately.
Nutrition Facts: A Guilt-Free Indulgence
This dessert offers a delicious way to enjoy a sweet treat without compromising on health. It’s packed with nutrients that you won’t find in typical store-bought puddings.
- Servings: 4
- Calories Per Serving: Approximately 350-400 kcal (This can vary based on the size of your avocados and any additional toppings.)
- Monounsaturated Fats: The majority of the fat content comes from the avocados, which are rich in heart-healthy monounsaturated fats. These fats can help reduce bad cholesterol levels and are beneficial for overall cardiovascular health.
- Dietary Fiber: Avocados and cocoa powder provide a significant amount of dietary fiber, which is crucial for digestive health, helps promote feelings of fullness, and can aid in stabilizing blood sugar levels.
- Potassium: A single avocado contains more potassium than a banana. This essential mineral helps regulate fluid balance, muscle contractions, and nerve signals.
- Antioxidants: Unsweetened cocoa powder is loaded with flavonoids, powerful antioxidants that help fight free radical damage in the body, reduce inflammation, and may improve blood flow.
- Naturally Sweetened: By using pure maple syrup instead of refined white sugar, you get a sweetener with a lower glycemic index and a bonus of some trace minerals like manganese and zinc.
Preparation Time: A Dessert in Minutes
One of the most appealing aspects of this recipe is how quickly it comes together, making it perfect for a last-minute dessert craving or an easy addition to a dinner party menu.
- Active Preparation: 10 minutes
- Chilling Time: 1-2 hours
The hands-on time is minimal. It takes just a few minutes to gather your ingredients, slice the avocados, and blend everything together. The majority of the time is dedicated to chilling, which is completely hands-off but absolutely essential for achieving the perfect pudding-like texture and allowing the flavors to fully develop.
How to Serve Your Chilled Avocado Dessert Cups
Presentation can elevate this simple dessert from a casual treat to an elegant masterpiece. Here are several ways to serve and garnish your Chilled Avocado Dessert Cups for maximum visual appeal and flavor complexity.
Garnish Options:
- Fresh Berries: A few fresh raspberries, sliced strawberries, or blueberries on top add a pop of color and a tartness that cuts through the richness of the dessert.
- Chocolate Shavings: Use a vegetable peeler to shave a bar of high-quality dark chocolate over the top for a classic, sophisticated look.
- Toasted Nuts or Seeds:
- Toasted chopped hazelnuts, pistachios, or almonds provide a wonderful crunchy contrast.
- For a nut-free option, sprinkle with toasted pumpkin seeds or sunflower seeds.
- Whipped Topping: A dollop of whipped coconut cream or regular whipped cream creates a beautiful visual and adds another layer of creamy texture.
- A Sprinkle of Spice: A light dusting of cinnamon, chili powder, or flaky sea salt can enhance the chocolate flavor in surprising and delicious ways.
- Fresh Mint: A single sprig of fresh mint adds a touch of green and a refreshing aroma.
Serving Styles:
- Individual Ramekins: Classic and clean, perfect for a sit-down dinner.
- Small Glass Jars: Using small mason jars or yogurt jars gives a rustic, charming feel. You can even layer the pudding with crushed cookies or granola for a parfait effect.
- Martini or Coupe Glasses: For a more elegant and formal occasion, serving the dessert in a fancy cocktail glass makes it feel exceptionally special.
- Family-Style Bowl: You can also chill the entire mixture in one larger bowl and allow guests to scoop their own portions, setting up a “topping bar” with various garnishes.
Beyond the Basics: Unlocking the Full Potential of Your Dessert
To truly master this recipe and understand why it works so well, it helps to dive a little deeper into the key components and techniques.
Why Use Avocado in a Dessert? The Secret to Creamy Perfection
The idea of avocado in a sweet context might seem strange to many in Western cultures, but it’s a common ingredient in desserts in countries like Brazil, Vietnam, and the Philippines. The reason is simple: avocado’s biological makeup makes it a perfect dessert base. Its high content of healthy fats gives it a naturally rich and buttery consistency when blended. This fat content emulsifies beautifully with the other ingredients, creating a stable, velvety-smooth texture that mimics traditional cream- or egg-yolk-based custards and mousses. Furthermore, a perfectly ripe avocado has a very mild, nutty flavor that is easily overshadowed by stronger ingredients like chocolate, vanilla, or citrus, making it a “secret” healthy ingredient that provides texture without dominating the taste.
Choosing the Perfect Avocado: The Foundation of Your Dessert
The success of this recipe hinges almost entirely on the quality of your avocados. A hard, underripe avocado will result in a lumpy, grassy-tasting dessert, while an overripe, mushy one can introduce a bitter or unpleasant flavor.
- Look for Hass Avocados: While other varieties will work, Hass avocados are generally preferred for their higher fat content and creamier texture.
- The Color Test: A ripe Hass avocado typically has a dark green, almost black, pebbly skin. Bright green avocados are usually underripe.
- The Pressure Test: This is the most reliable method. Hold the avocado in the palm of your hand and gently squeeze. It should yield to firm, gentle pressure. If it feels hard as a rock, it needs more time to ripen. If it feels mushy or leaves an indentation, it’s likely overripe and may have brown, stringy spots inside.
- The Stem Trick: Gently try to flick off the small brown stem cap at the top. If it comes off easily and you see a vibrant green color underneath, your avocado is likely perfect. If it’s hard to remove, it’s underripe. If you see brown or black underneath, it’s overripe.
Troubleshooting Common Pitfalls
Even with a simple recipe, things can sometimes go awry. Here’s how to fix common issues.
- Problem: My dessert tastes bitter.
- Cause: This is almost always due to using an overripe or underripe avocado. Overripe avocados can develop bitter-tasting compounds, while underripe ones have a raw, “green” flavor.
- Solution: Unfortunately, this is hard to fix after the fact. The best solution is prevention by using perfectly ripe avocados. A little extra sweetener might help mask minor bitterness, but it won’t eliminate it.
- Problem: My dessert isn’t smooth and has flecks of green.
- Cause: This usually means it wasn’t blended long enough or your blender isn’t powerful enough.
- Solution: Keep blending! Scrape down the sides and blend again on the highest setting until it’s completely smooth. If your blender struggles, a food processor often works better for this task.
- Problem: My dessert turned brown.
- Cause: Avocados oxidize, or turn brown, when exposed to air.
- Solution: While the cocoa powder in the chocolate version helps hide this, you can prevent it by adding a teaspoon of lime or lemon juice. Also, pressing plastic wrap directly onto the surface of the dessert before chilling eliminates air contact.
Elevate Your Cups: Flavor Variations to Try
The classic chocolate avocado dessert is just the beginning. The neutral base of avocado and sweetener is a blank canvas for a world of flavors.
Classic Chocolate Avocado Mousse
This is the recipe as written above. It’s the perfect starting point—rich, decadent, and universally loved. Its deep chocolate flavor is the perfect disguise for the healthy avocado within.
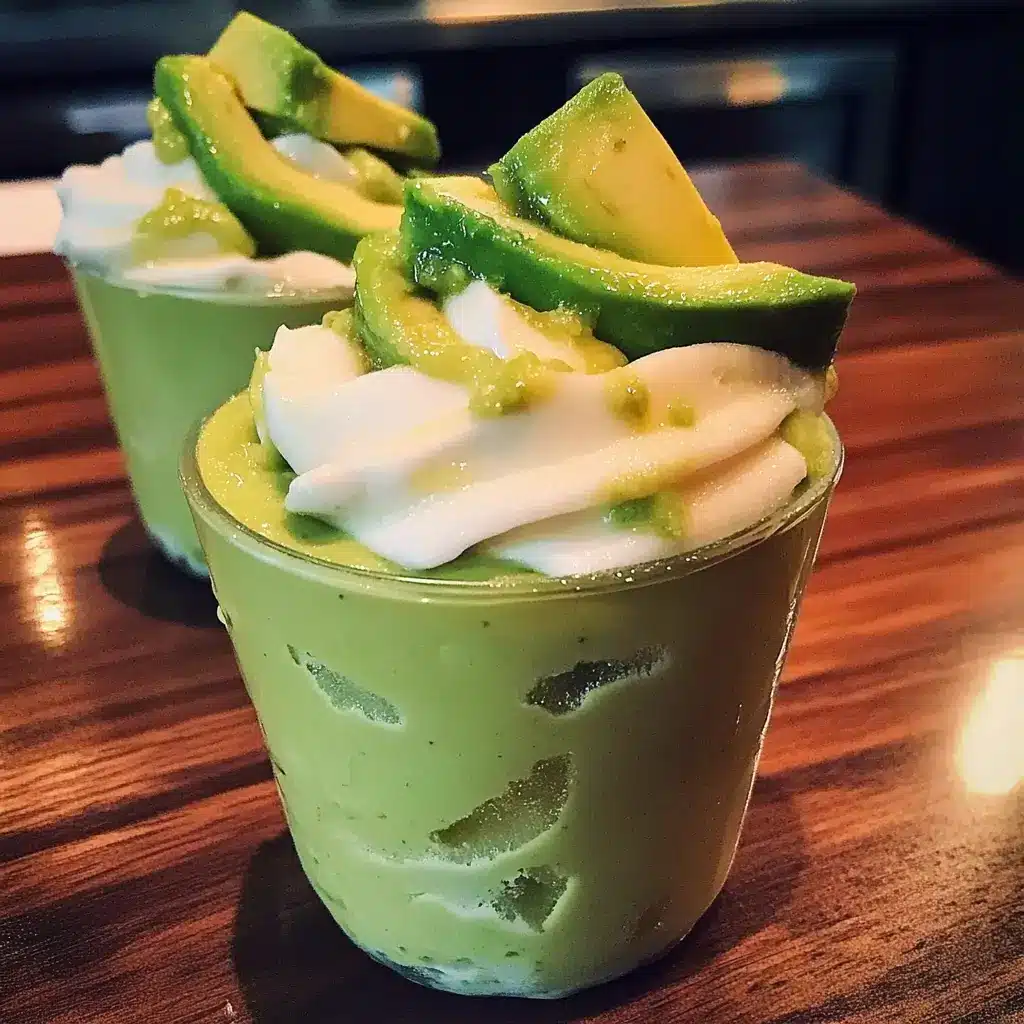
Zesty Lime & Coconut Dream
For a bright, tropical twist that’s reminiscent of a key lime pie, omit the cocoa powder and make these substitutions:
- Replace the cocoa powder with 1/4 cup of unsweetened shredded coconut.
- Add the zest and juice of 1-2 large limes.
- Use full-fat coconut milk for an extra creamy, tropical flavor.
- Garnish with toasted coconut flakes and a slice of lime.
Matcha Green Tea Zen Cups
For an earthy, sophisticated, and antioxidant-packed dessert, swap the cocoa powder for high-quality matcha.
- Replace the cocoa powder with 1 to 2 tablespoons of ceremonial-grade matcha powder (start with less and add more to taste, as it can be potent).
- Consider using a milder sweetener like agave nectar or even honey if you’re not strictly vegan.
- This version pairs beautifully with a garnish of fresh raspberries or black sesame seeds.
Berry Bliss Avocado Pudding
Create a vibrant, fruity pudding that’s perfect for summer.
- Omit the cocoa powder.
- Add 1 cup of fresh or frozen (and thawed) berries, such as raspberries or strawberries, directly into the blender with the other ingredients.
- You may need to slightly reduce the amount of other liquid (like coconut milk) to compensate for the moisture from the berries.
- Garnish with whole fresh berries and a mint sprig.
Additional Tips for Dessert Success
- Use a High-Speed Blender: For the absolute creamiest, most velvety texture, a high-speed blender (like a Vitamix or Blendtec) is your best friend. It will completely pulverize the avocado, leaving no trace behind. A food processor is the next best option.
- Sift Your Cocoa Powder: To avoid any lumps in your final product, always pass your cocoa powder through a fine-mesh sieve before adding it to the blender. This guarantees a silky-smooth result.
- Chill is Non-Negotiable: Don’t skip the chilling time. It’s not just about serving it cold. Chilling allows the fats in the avocado and coconut milk to solidify slightly, thickening the mixture from a smoothie-like consistency to a true pudding or mousse.
- Start with Chilled Ingredients: For a head start on the chilling process and to help the mixture thicken up faster, you can use avocados and a can of coconut milk that have been stored in the refrigerator.
- Taste and Adjust Sweetness: Everyone’s palate is different. The amount of sweetener in the recipe is a guideline. Always taste the mixture before you chill it and adjust the sweetness, chocolate, or vanilla to your exact preference.
- Don’t Fear the Salt: The small amount of salt in the recipe is a flavor enhancer, not a salting agent. It makes the chocolate taste more chocolaty and the sweet taste sweeter. Don’t leave it out!
- Scrape Down the Sides: During blending, ingredients can get stuck to the sides of the blender jar. Pause once or twice to scrape everything down with a spatula. This ensures that every last bit is perfectly blended and incorporated.
- Press Plastic Wrap on the Surface: To prevent a “skin” from forming on top of your dessert cups as they chill (and to prevent browning), press a piece of plastic wrap directly onto the surface of the pudding, ensuring there are no air pockets.
Frequently Asked Questions (FAQ)
1. Will my dessert taste like avocado?
No, not if you use perfectly ripe avocados. A ripe avocado has a very mild, buttery, and slightly nutty flavor that is completely masked by the richness of the cocoa powder and the sweetness of the maple syrup. If it tastes “green” or vegetal, your avocado was likely underripe.
2. Can I use a different sweetener?
Absolutely. While maple syrup is recommended for its flavor, you can easily substitute it with agave nectar or date syrup for a vegan option. Honey also works well if you are not strictly vegan. For a low-carb or keto version, you can use a powdered or liquid monk fruit or erythritol sweetener, but you may need to adjust the quantity to taste.
3. How long will these dessert cups last in the refrigerator?
They are best enjoyed within 2-3 days. Be sure to keep them covered tightly (with plastic wrap pressed to the surface) to maintain freshness and prevent them from absorbing any other fridge odors. The flavor is often even better on the second day!
4. Can I use frozen avocado?
Yes, you can use frozen avocado chunks, which is a great way to use up avocados before they go bad. Allow the frozen avocado to thaw for about 20-30 minutes at room temperature before blending to make it easier on your blender’s motor and ensure a smooth consistency.
5. Is this recipe kid-friendly?
It is exceptionally kid-friendly! Most children love the rich, chocolate pudding-like taste and texture and have no idea they are eating a dessert packed with healthy fats and fiber. It’s a fantastic “stealth health” recipe.
6. My dessert seems a little thin. How can I make it thicker?
The thickness can depend on the size and water content of your avocados. If it seems too thin after blending, you can add half of another small avocado or a tablespoon of melted coconut oil or chia seeds and blend again. However, remember that it will thicken up significantly as it chills in the refrigerator.
7. Can I freeze the avocado dessert?
Yes, you can freeze it. Poured into popsicle molds, it makes fantastic fudgesicles. You can also freeze it in an airtight container. When thawed, the texture might be slightly less silky than when fresh, but it will still be delicious. You can give it a quick re-blend or a vigorous stir to smooth it out again after thawing.
8. Why is my chocolate avocado dessert not as dark as the one in pictures?
The color depends entirely on the type of cocoa powder you use. Natural, unsweetened cocoa powder will give it a lighter, reddish-brown color. For a very dark, almost black color (like an Oreo cookie), use Dutch-processed or “black” cocoa powder, which has a deeper, less acidic flavor.

Chilled Avocado Dessert Cups
Ingredients
This recipe relies on a few simple, high-quality ingredients to create its signature creamy texture and rich flavor. The magic lies in the ripeness of the avocados and the balance of sweetness and depth.
- 2 large, ripe Hass Avocados: These are the heart and soul of the dessert. Make sure they are perfectly ripe—yielding to gentle pressure but not mushy—to ensure the creamiest texture and avoid any bitterness.
- 1/2 cup Pure Maple Syrup: This natural sweetener provides a lovely, nuanced sweetness that complements the avocado. You can adjust the amount to your personal taste.
- 1/2 cup Unsweetened Cocoa Powder (or Cacao Powder): For a rich, chocolatey version, this is essential. Sifting it beforehand will prevent lumps and ensure a silky-smooth consistency.
- 1/4 cup Full-Fat Coconut Milk (from a can): This adds an extra layer of creaminess and richness. You can substitute with another plant-based milk like almond or oat milk, but the result may be slightly less thick.
- 1 teaspoon Pure Vanilla Extract: A non-negotiable for adding depth and a classic dessert aroma that rounds out the flavors beautifully.
- 1/4 teaspoon Fine Sea Salt: A tiny pinch of salt doesn’t make the dessert salty; it dramatically enhances the sweetness and the complexity of the chocolate flavor.
- Optional Squeeze of Lime or Lemon Juice: A small amount of acid can help prevent oxidation (browning) and brighten the overall flavor, though it’s not strictly necessary if you plan to serve it immediately.
Instructions
Creating these dessert cups is incredibly simple and requires little more than a blender or food processor. The key is to blend until the mixture is completely smooth.
- Prepare the Avocados: Slice the avocados in half lengthwise and remove the pits. Scoop the green flesh out with a spoon and place it into the bowl of a high-speed blender or food processor. Discard the skins and pits.
- Add All Ingredients: To the blender or food processor with the avocado, add the maple syrup, unsweetened cocoa powder, coconut milk, vanilla extract, and fine sea salt. If you’re using it, add the squeeze of lime juice now.
- Blend Until Silky Smooth: Secure the lid and blend on high speed for 1-2 minutes. You may need to stop and scrape down the sides of the blender with a spatula a couple of times to ensure everything is fully incorporated. Continue blending until the mixture is completely smooth, creamy, and has no visible specks of avocado. The final texture should resemble a thick, luxurious pudding.
- Taste and Adjust: Once blended, taste the mixture. If you prefer it sweeter, add another tablespoon of maple syrup and blend for a few more seconds. If you want a deeper chocolate flavor, add an extra tablespoon of cocoa powder.
- Portion and Chill: Divide the avocado mixture evenly among four small dessert cups, ramekins, or glasses. You can spoon it in or, for a neater presentation, transfer the mixture to a piping bag and pipe it into the cups.
- Chill Thoroughly: Cover the dessert cups with plastic wrap, pressing it directly onto the surface of the pudding to prevent a skin from forming. Place them in the refrigerator to chill for at least 1-2 hours. This chilling step is crucial; it allows the flavors to meld and the dessert to firm up to the perfect consistency.
- Garnish and Serve: Once chilled, remove the dessert cups from the refrigerator. Garnish as desired (see “How to Serve” section for ideas) and serve immediately.
Nutrition
- Serving Size: one normal portion
- Calories: 400


