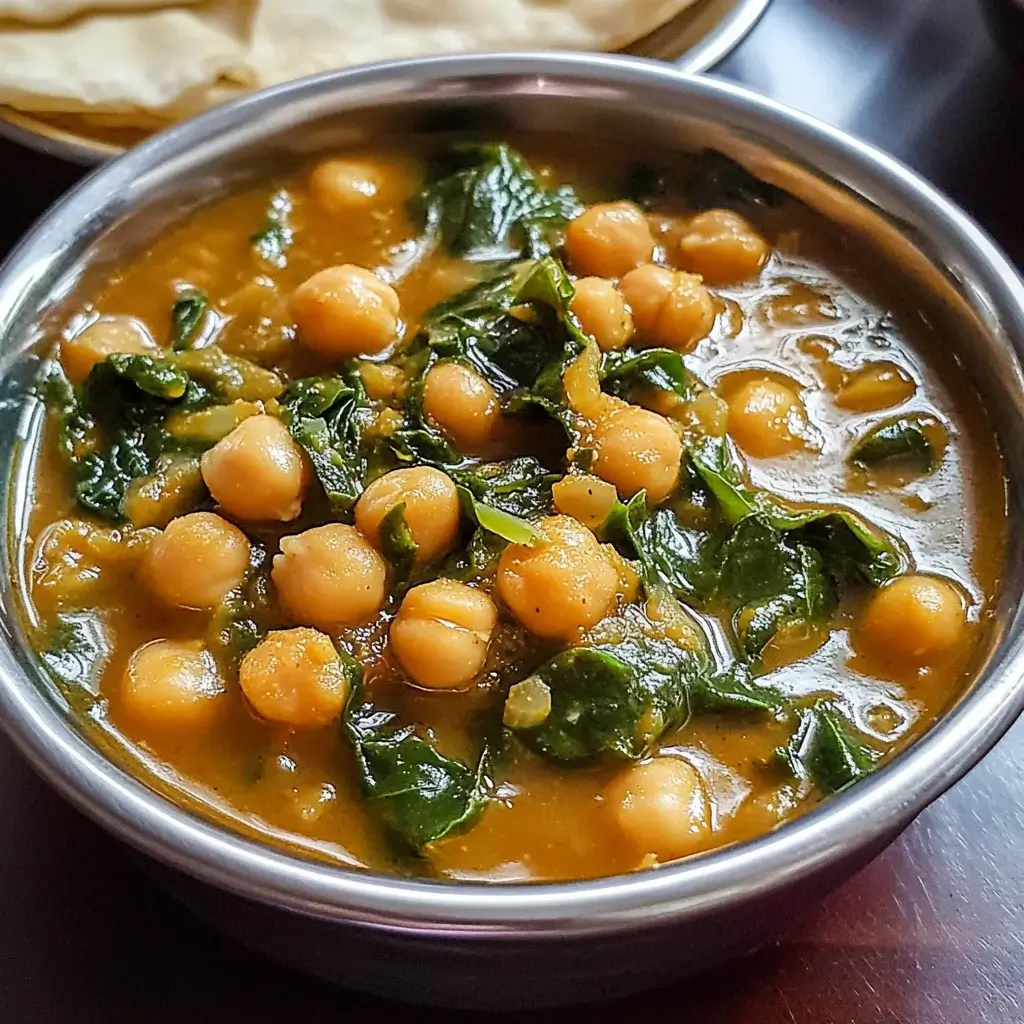

This Chickpea and Spinach Curry has become something of a legend in my kitchen. I first stumbled upon the idea while searching for a quick, healthy, and satisfying weeknight meal that wouldn’t break the bank or require hours of simmering. Skeptical but hopeful, I gathered the ingredients – mostly pantry staples – and gave it a whirl. The result? Absolutely transformative. The aroma alone, a fragrant cloud of toasted spices, ginger, and garlic mingling with creamy coconut milk, had my family migrating towards the kitchen before the curry was even finished simmering. The first spoonful was a revelation: tender chickpeas, wilted spinach enveloped in a rich, subtly spiced, velvety sauce. It was comforting yet vibrant, hearty yet light. Even my pickiest eater, who usually eyes anything green with suspicion, declared it “surprisingly amazing” and asked for seconds. Since that first success, it’s become a regular in our meal rotation. It’s my go-to dish for Meatless Mondays, a reliable crowd-pleaser when friends pop over unexpectedly, and a comforting bowl of goodness on chilly evenings. Its simplicity belies its depth of flavor, and its adaptability means I can tweak it based on what I have on hand. It’s proof that delicious, nourishing food doesn’t need to be complicated, and it consistently brings warmth and smiles to our dinner table.
Ingredients
Here’s what you’ll need to create this delicious and aromatic curry:
- 1 tablespoon Olive Oil or Coconut Oil: Used for sautéing the aromatics, forming the flavour base of the curry. Coconut oil adds a subtle complementary flavour.
- 1 large Yellow Onion: Finely chopped. Provides a sweet and savoury foundation when softened.
- 3-4 cloves Garlic: Minced. Adds pungent depth and aromatic complexity. Adjust amount based on your preference.
- 1 tablespoon Ginger: Freshly grated or minced. Lends a warm, zesty spice that brightens the dish.
- 1 teaspoon Ground Cumin: An essential earthy and warm spice, characteristic of many curries.
- 1 teaspoon Ground Coriander: Offers a slightly sweet, citrusy note that complements the cumin.
- 1 teaspoon Turmeric Powder: Provides vibrant yellow colour and a warm, slightly bitter, peppery flavour with earthy undertones.
- 1/2 teaspoon Smoked Paprika (Optional): Adds a subtle smoky depth; regular paprika can be used if preferred.
- 1/4 – 1/2 teaspoon Cayenne Pepper or Red Chilli Flakes (Optional): Adjust according to your heat preference. Start with less, you can always add more.
- 1 can (14.5 oz / 400g) Diced Tomatoes: Undrained. Adds acidity, moisture, and body to the sauce. Fire-roasted tomatoes can add extra flavour.
- 1 can (13.5 oz / 400ml) Full-Fat Coconut Milk: Creates the creamy, luscious texture of the curry sauce. Ensure it’s well-shaken. Light coconut milk can be used for a lighter version, but the sauce will be less rich.
- 2 cans (15 oz / 425g each) Chickpeas (Garbanzo Beans): Rinsed and drained. The star protein source, adding a nutty flavour and satisfying bite.
- 5 oz (about 140g) Fresh Spinach: Roughly chopped or left whole (baby spinach). Wilts down beautifully into the sauce, adding nutrients and colour. Frozen spinach can also be used (see tips).
- 1 tablespoon Lemon Juice: Freshly squeezed. Added at the end to brighten the flavours and cut through the richness.
- Salt: To taste. Essential for enhancing all the flavours.
- Fresh Cilantro (Coriander Leaves): Chopped, for garnish. Adds a burst of fresh, herbaceous flavour.
Instructions
Follow these steps carefully to achieve a perfectly balanced and flavourful Chickpea and Spinach Curry:
- Prepare the Aromatics: Begin by ensuring all your vegetables are prepped as described in the ingredients list (onion chopped, garlic minced, ginger grated). Having everything ready (“mise en place”) makes the cooking process smoother.
- Sauté the Onion: Heat the olive oil or coconut oil in a large pot, Dutch oven, or deep skillet over medium heat. Once the oil is shimmering slightly, add the finely chopped onion. Sauté for about 5-7 minutes, stirring occasionally, until the onion becomes soft, translucent, and slightly golden. This step builds the foundational layer of flavour.
- Add Garlic and Ginger: Add the minced garlic and grated ginger to the pot with the onions. Stir continuously for about 1-2 minutes until they become highly fragrant. Be careful not to burn the garlic, as it can turn bitter. The kitchen should start smelling wonderful at this point!
- Bloom the Spices: Add the ground cumin, ground coriander, turmeric powder, smoked paprika (if using), and cayenne pepper or red chilli flakes (if using) to the pot. Stir constantly for about 1 minute. Cooking the spices directly in the oil (a process called “blooming”) toasts them lightly, intensifying their aroma and flavour profile significantly compared to just adding them to liquid later.
- Incorporate Tomatoes: Pour in the can of undrained diced tomatoes. Stir well, scraping the bottom of the pot with your spoon to lift any flavourful bits (fond) that might have stuck. Bring the mixture to a gentle simmer and let it cook for about 3-4 minutes, allowing the tomatoes to break down slightly and meld with the spices. The mixture will start to thicken into a fragrant base sauce.
- Add Coconut Milk and Chickpeas: Pour in the full-fat coconut milk (make sure it’s well-shaken before opening the can) and add the rinsed and drained chickpeas. Stir everything together thoroughly to combine.
- Simmer the Curry: Bring the curry back to a gentle simmer over medium-low heat. Once simmering, reduce the heat to low, cover the pot loosely (leaving a small gap for steam to escape), and let it cook for at least 15-20 minutes. This simmering time is crucial; it allows the flavours to deepen and meld together beautifully, and the chickpeas absorb some of the sauce’s flavour. Stir occasionally to prevent sticking. The sauce should thicken slightly during this time.
- Wilt the Spinach: Remove the lid and add the fresh spinach to the pot. You might need to add it in batches if using a large amount. Stir gently; the heat from the curry will cause the spinach to wilt down considerably within 2-4 minutes. Continue stirring until the spinach is fully incorporated and tender. If using baby spinach, it will wilt almost instantly.
- Season and Finish: Turn off the heat. Stir in the freshly squeezed lemon juice. This acidity added at the end brightens all the complex flavours and provides a lovely contrast to the creamy coconut milk. Taste the curry and season generously with salt. Add more salt or cayenne pepper if needed, adjusting to your preference. Remember that curry flavours often become more pronounced as they sit.
- Serve: Ladle the hot Chickpea and Spinach Curry into bowls. Garnish generously with freshly chopped cilantro. Serve immediately with your favourite accompaniments (see “How to Serve” section below).
Nutrition Facts
- Servings: This recipe typically yields 4-6 servings.
- Calories per Serving: Approximately 350-450 kcal (estimated, varies based on specific ingredients like oil type and coconut milk fat content).
Key Nutritional Highlights (Approximate per serving):
- Plant-Based Protein: Around 10-15g per serving, primarily from the chickpeas, contributing to satiety and muscle maintenance. A fantastic source for vegetarian and vegan diets.
- Dietary Fiber: Rich in fiber (around 10-14g per serving), thanks to both chickpeas and spinach. Fiber aids digestion, helps regulate blood sugar, and promotes feelings of fullness.
- Iron: A good source of non-heme iron from spinach and chickpeas, crucial for oxygen transport in the blood. Consuming it with Vitamin C (from tomatoes and lemon juice) enhances absorption.
- Vitamin A & K: Spinach provides significant amounts of Vitamin A (important for vision and immune function) and Vitamin K (essential for blood clotting and bone health).
- Healthy Fats: Contains beneficial fats, particularly if using olive oil and full-fat coconut milk (which includes medium-chain triglycerides – MCTs), contributing to the curry’s satisfying richness.
(Disclaimer: Nutritional information is an estimate only and can vary depending on ingredients used and portion sizes.)
Preparation Time
- Prep Time: Approximately 15 minutes (includes chopping onion, mincing garlic, grating ginger, measuring spices, opening cans).
- Cook Time: Approximately 30-35 minutes (includes sautéing, simmering, and wilting spinach).
- Total Time: Approximately 45-50 minutes from start to finish, making it a feasible option for a weeknight dinner.
How to Serve
This Chickpea and Spinach Curry is incredibly versatile and pairs well with various accompaniments. Here are some serving suggestions to make it a complete and satisfying meal:
- Grains:
- Fluffy Basmati Rice: The classic choice. Its neutral flavour and fluffy texture are perfect for soaking up the rich curry sauce.
- Brown Rice: A healthier alternative, offering more fiber and a nuttier taste.
- Jasmine Rice: Slightly stickier and more fragrant than basmati, another excellent option.
- Quinoa: A protein-packed, gluten-free grain that adds a different texture and nutty flavour.
- Cauliflower Rice: A low-carb option that provides a light base for the curry.
- Breads:
- Naan Bread (Garlic or Plain): Warm, soft naan is ideal for scooping up every last bit of the delicious sauce. Garlic naan adds an extra layer of flavour.
- Roti or Chapati: Whole wheat flatbreads common in Indian cuisine, great for tearing and dipping.
- Pita Bread: Warm pita bread works well if naan or roti isn’t available.
- Garnishes & Toppings:
- Fresh Cilantro (Coriander): Essential for a burst of freshness (as mentioned in the recipe).
- Plain Yogurt or Coconut Yogurt: A dollop of cool yogurt (dairy or non-dairy) provides a creamy contrast to the spices and richness.
- Lemon or Lime Wedges: Extra wedges on the side allow individuals to add more brightness to their liking.
- Toasted Nuts or Seeds: A sprinkle of toasted cashews, almonds, or pumpkin seeds adds a delightful crunch.
- Sliced Red Onion or Pickled Onions: Offer a sharp, pungent counterpoint.
- A Pinch of Red Chilli Flakes: For those who like an extra kick of heat.
- Serving Style:
- Individual Bowls: Ladle the curry over rice or quinoa in individual bowls for easy serving.
- Family Style: Serve the curry in a large bowl alongside separate bowls of rice and various breads and garnishes, allowing everyone to build their own perfect plate.
- Drinks:
- Mango Lassi: A sweet and creamy yogurt-based drink that complements the curry beautifully.
- Indian Beer (like Kingfisher or Taj Mahal): A crisp lager cuts through the richness.
- Sparkling Water with Lemon/Lime: A refreshing non-alcoholic option.
Additional Tips
Enhance your Chickpea and Spinach Curry experience with these eight helpful tips:
- Adjust Spice Levels: This recipe is moderately spiced. To increase heat, add more cayenne pepper, red chilli flakes, or even a finely minced fresh chilli (like serrano or jalapeño) along with the garlic and ginger. For a milder curry, omit the cayenne/chilli flakes entirely and ensure your paprika isn’t hot.
- Use Different Greens: While spinach is classic (Chana Palak means Chickpea Spinach), feel free to substitute other leafy greens. Kale (sturdier leaves, add earlier and simmer longer), Swiss chard (chop stems and sauté with onion), or collard greens (remove tough stems, slice thinly, simmer longer) work well. Adjust cooking times accordingly.
- Bulk It Up with More Veggies: Make the curry even heartier and more nutritious by adding other vegetables. Cubed sweet potatoes, potatoes, carrots, bell peppers (any colour), cauliflower florets, or peas are great additions. Add root vegetables like potatoes/sweet potatoes earlier (around step 6, with the coconut milk and chickpeas) to ensure they cook through. Add quicker-cooking vegetables like bell peppers or peas towards the end with the spinach.
- Creamier vs. Lighter Sauce: For an extra rich and creamy curry, use full-fat coconut milk as recommended. You could even stir in a tablespoon of cashew butter or coconut cream at the end. For a lighter version, use light coconut milk or even substitute part of the coconut milk with vegetable broth (though this will significantly alter the creaminess and flavour profile).
- Using Frozen Spinach: If fresh spinach isn’t available, frozen spinach is a convenient alternative. Thaw about 10 oz (280g) of frozen spinach completely and squeeze out as much excess water as possible before adding it to the curry during the last 5-10 minutes of simmering (step 8). Squeezing out the water is crucial to prevent a watery sauce.
- Make Ahead & Storage: Curries often taste even better the next day as the flavours meld! Store leftover Chickpea and Spinach Curry in an airtight container in the refrigerator for up to 3-4 days. Reheat gently on the stovetop over low heat, adding a splash of water or vegetable broth if the sauce has thickened too much. You can also reheat it in the microwave.
- Toasting Spices Whole: For an even deeper flavour, start with whole cumin seeds and coriander seeds. Toast them briefly in the dry pot before adding the oil, until fragrant. Then, remove them, grind them (using a spice grinder or mortar and pestle), and add them back in at step 4. This adds an extra layer of aromatic complexity.
- Don’t Skip the Lemon Juice: The final squeeze of fresh lemon juice (or lime juice) is crucial. It cuts through the richness of the coconut milk and brightens up all the earthy spice flavours, making the curry taste vibrant and balanced rather than heavy. Taste before and after adding it – you’ll notice the difference!
FAQ (Frequently Asked Questions)
Here are answers to some common questions about making Chickpea and Spinach Curry:
- Q: Can I use dried chickpeas instead of canned?
- A: Yes, absolutely! You’ll need to plan ahead. Soak about 1 cup of dried chickpeas overnight (or use a quick-soak method). Then, cook them until tender according to package directions (usually boiling for 1-2 hours or using a pressure cooker for faster results). Use approximately 3 cups of cooked chickpeas to replace the two cans in the recipe. Using dried chickpeas often results in a better texture.
- Q: My curry isn’t creamy enough. How can I fix it?
- A: Ensure you used full-fat coconut milk, as light versions won’t provide the same richness. Make sure the coconut milk was well-shaken, as the cream can separate in the can. For extra creaminess, you can stir in a few tablespoons of coconut cream, cashew cream (soaked cashews blended with water), or even a spoonful of plain full-fat yogurt (dairy or non-dairy) at the very end, after turning off the heat. Simmering uncovered for a little longer can also help thicken the sauce slightly.
- Q: Is this Chickpea and Spinach Curry recipe vegan and gluten-free?
- A: Yes, as written, this recipe is naturally vegan (using plant-based ingredients like oil, coconut milk, chickpeas, and vegetables) and gluten-free (provided your spices and canned goods are certified gluten-free, which they usually are, but always check labels if you have celiac disease or severe intolerance). Serve with gluten-free grains like rice or quinoa and avoid gluten-containing breads like traditional naan.
- Q: Can I add meat or other proteins to this curry?
- A: While this is designed as a vegetarian/vegan dish, you certainly can adapt it. Cubed chicken breast or thighs can be browned after sautéing the onions, then simmered in the sauce until cooked through. Shrimp can be added during the last 5 minutes of cooking. Paneer (Indian cheese) is a popular vegetarian addition; lightly fry cubed paneer separately and add it towards the end with the spinach. Tofu (pressed and cubed/pan-fried) is another excellent plant-based option to add.
- Q: How long does this curry last in the refrigerator, and can it be frozen?
- A: Leftover curry stores well in an airtight container in the refrigerator for 3-4 days. The flavours often deepen overnight! Yes, this curry freezes quite well. Let it cool completely, then transfer it to freezer-safe containers or bags, leaving some headspace. Freeze for up to 2-3 months. Thaw overnight in the refrigerator and reheat gently on the stovetop or in the microwave. The texture of the spinach might change slightly upon thawing, but it will still be delicious.
- Q: What can I substitute for coconut milk if I don’t have it or don’t like it?
- A: Coconut milk provides the signature creaminess and flavour. Substituting it will change the dish significantly. However, you could try using cashew cream (blend soaked cashews with water until smooth), oat cream, soy cream, or even a dairy-based heavy cream for a non-vegan version. Another option, though less creamy, is to use vegetable broth thickened with a cornstarch slurry or blended with some silken tofu, but the flavour profile will be quite different.
- Q: The curry tastes a bit flat. What can I add?
- A: First, ensure you’ve seasoned adequately with salt – it’s crucial for bringing out all the flavours. Second, add the lemon juice as directed; acidity brightens everything up. If it still tastes flat, you might need more spices (cumin, coriander, turmeric) or a touch more heat (cayenne). A pinch of garam masala stirred in at the very end can also add warmth and complexity. Sometimes, simmering a bit longer helps the flavours meld more deeply.
- Q: Can I make this curry oil-free?
- A: Yes, you can make an oil-free version. Sauté the onions, garlic, and ginger in a splash of water or vegetable broth instead of oil, adding more liquid as needed to prevent sticking. You’ll also need to “bloom” the spices carefully in a bit of broth or add them directly with the tomatoes, understanding they might not be quite as intensely flavourful as when bloomed in oil. The final curry might taste slightly less rich but will still be flavourful.
Chickpea and Spinach Curry
Ingredients
Here’s what you’ll need to create this delicious and aromatic curry:
- 1 tablespoon Olive Oil or Coconut Oil: Used for sautéing the aromatics, forming the flavour base of the curry. Coconut oil adds a subtle complementary flavour.
- 1 large Yellow Onion: Finely chopped. Provides a sweet and savoury foundation when softened.
- 3–4 cloves Garlic: Minced. Adds pungent depth and aromatic complexity. Adjust amount based on your preference.
- 1 tablespoon Ginger: Freshly grated or minced. Lends a warm, zesty spice that brightens the dish.
- 1 teaspoon Ground Cumin: An essential earthy and warm spice, characteristic of many curries.
- 1 teaspoon Ground Coriander: Offers a slightly sweet, citrusy note that complements the cumin.
- 1 teaspoon Turmeric Powder: Provides vibrant yellow colour and a warm, slightly bitter, peppery flavour with earthy undertones.
- 1/2 teaspoon Smoked Paprika (Optional): Adds a subtle smoky depth; regular paprika can be used if preferred.
- 1/4 – 1/2 teaspoon Cayenne Pepper or Red Chilli Flakes (Optional): Adjust according to your heat preference. Start with less, you can always add more.
- 1 can (14.5 oz / 400g) Diced Tomatoes: Undrained. Adds acidity, moisture, and body to the sauce. Fire-roasted tomatoes can add extra flavour.
- 1 can (13.5 oz / 400ml) Full-Fat Coconut Milk: Creates the creamy, luscious texture of the curry sauce. Ensure it’s well-shaken. Light coconut milk can be used for a lighter version, but the sauce will be less rich.
- 2 cans (15 oz / 425g each) Chickpeas (Garbanzo Beans): Rinsed and drained. The star protein source, adding a nutty flavour and satisfying bite.
- 5 oz (about 140g) Fresh Spinach: Roughly chopped or left whole (baby spinach). Wilts down beautifully into the sauce, adding nutrients and colour. Frozen spinach can also be used (see tips).
- 1 tablespoon Lemon Juice: Freshly squeezed. Added at the end to brighten the flavours and cut through the richness.
- Salt: To taste. Essential for enhancing all the flavours.
- Fresh Cilantro (Coriander Leaves): Chopped, for garnish. Adds a burst of fresh, herbaceous flavour.
Instructions
Follow these steps carefully to achieve a perfectly balanced and flavourful Chickpea and Spinach Curry:
- Prepare the Aromatics: Begin by ensuring all your vegetables are prepped as described in the ingredients list (onion chopped, garlic minced, ginger grated). Having everything ready (“mise en place”) makes the cooking process smoother.
- Sauté the Onion: Heat the olive oil or coconut oil in a large pot, Dutch oven, or deep skillet over medium heat. Once the oil is shimmering slightly, add the finely chopped onion. Sauté for about 5-7 minutes, stirring occasionally, until the onion becomes soft, translucent, and slightly golden. This step builds the foundational layer of flavour.
- Add Garlic and Ginger: Add the minced garlic and grated ginger to the pot with the onions. Stir continuously for about 1-2 minutes until they become highly fragrant. Be careful not to burn the garlic, as it can turn bitter. The kitchen should start smelling wonderful at this point!
- Bloom the Spices: Add the ground cumin, ground coriander, turmeric powder, smoked paprika (if using), and cayenne pepper or red chilli flakes (if using) to the pot. Stir constantly for about 1 minute. Cooking the spices directly in the oil (a process called “blooming”) toasts them lightly, intensifying their aroma and flavour profile significantly compared to just adding them to liquid later.
- Incorporate Tomatoes: Pour in the can of undrained diced tomatoes. Stir well, scraping the bottom of the pot with your spoon to lift any flavourful bits (fond) that might have stuck. Bring the mixture to a gentle simmer and let it cook for about 3-4 minutes, allowing the tomatoes to break down slightly and meld with the spices. The mixture will start to thicken into a fragrant base sauce.
- Add Coconut Milk and Chickpeas: Pour in the full-fat coconut milk (make sure it’s well-shaken before opening the can) and add the rinsed and drained chickpeas. Stir everything together thoroughly to combine.
- Simmer the Curry: Bring the curry back to a gentle simmer over medium-low heat. Once simmering, reduce the heat to low, cover the pot loosely (leaving a small gap for steam to escape), and let it cook for at least 15-20 minutes. This simmering time is crucial; it allows the flavours to deepen and meld together beautifully, and the chickpeas absorb some of the sauce’s flavour. Stir occasionally to prevent sticking. The sauce should thicken slightly during this time.
- Wilt the Spinach: Remove the lid and add the fresh spinach to the pot. You might need to add it in batches if using a large amount. Stir gently; the heat from the curry will cause the spinach to wilt down considerably within 2-4 minutes. Continue stirring until the spinach is fully incorporated and tender. If using baby spinach, it will wilt almost instantly.
- Season and Finish: Turn off the heat. Stir in the freshly squeezed lemon juice. This acidity added at the end brightens all the complex flavours and provides a lovely contrast to the creamy coconut milk. Taste the curry and season generously with salt. Add more salt or cayenne pepper if needed, adjusting to your preference. Remember that curry flavours often become more pronounced as they sit.
- Serve: Ladle the hot Chickpea and Spinach Curry into bowls. Garnish generously with freshly chopped cilantro. Serve immediately with your favourite accompaniments (see “How to Serve” section below).
Nutrition
- Serving Size: one normal portion
- Calories: 450
- Fiber: 14g
- Protein: 15g