
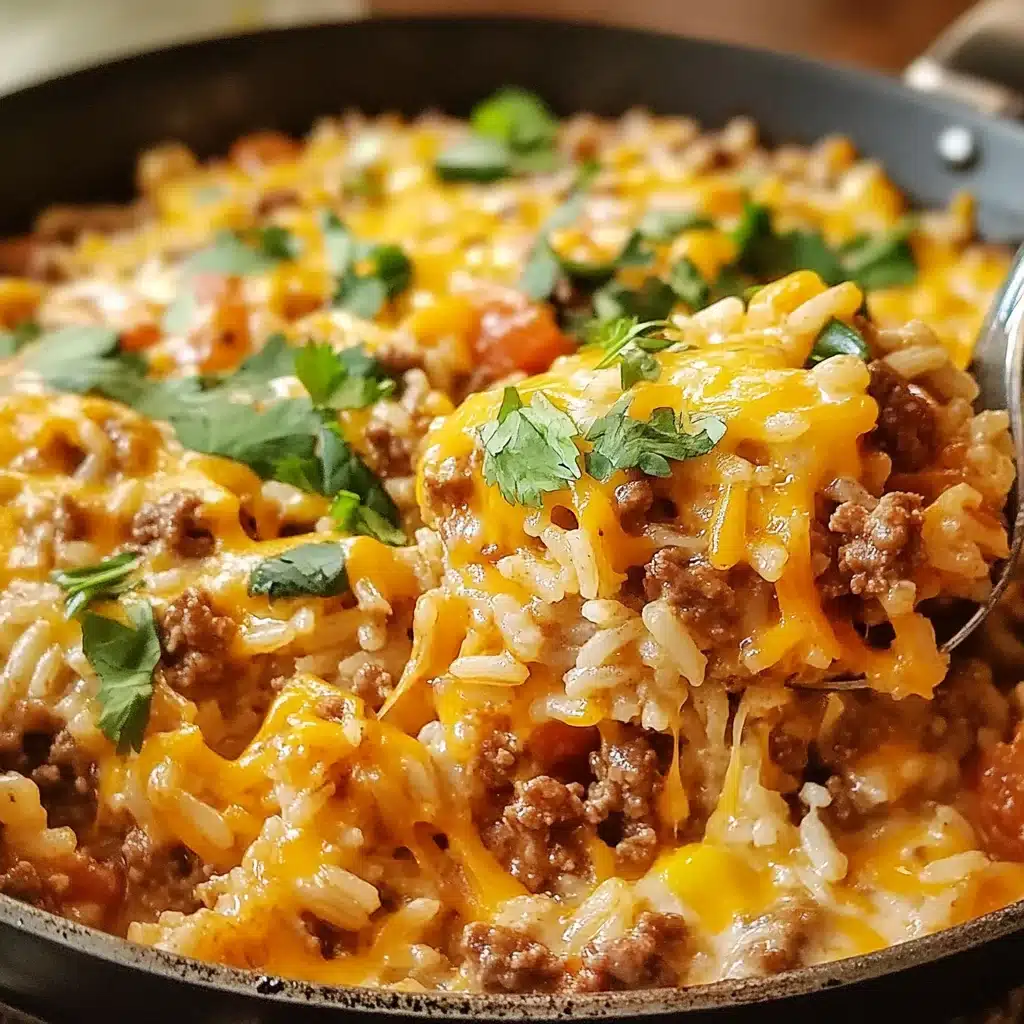

Let me tell you, this Cheesy Ground Beef Rice Skillet has become an absolute weeknight warrior in my household. I first stumbled upon the concept when I was desperately searching for a one-pan meal that would satisfy everyone – from my picky youngest to my always-hungry teenager, and of course, my husband and me. The promise of savory ground beef, fluffy rice, and a glorious blanket of melted cheese was too good to resist. The first time I made it, the aroma alone had everyone drifting into the kitchen, asking when dinner would be ready. When I finally set that bubbling, cheesy skillet on the table, it was met with oohs and aahs. The kids devoured it, even the one who usually turns his nose up at anything with visible vegetables (spoiler: you can sneak them in!). It was hearty, comforting, and packed with flavor. Clean-up was a breeze, which is always a massive win for any busy parent. Since that first success, this Cheesy Ground Beef Rice Skillet has been on regular rotation. We’ve tweaked it here and there, sometimes adding a bit more spice, other times throwing in whatever veggies we have on hand. But the core combination of beef, rice, and cheese remains the undisputed champion. It’s the kind of meal that feels like a warm hug, perfect for chilly evenings or when you just need a simple, satisfying dinner that you know will be a hit. It’s more than just a recipe; it’s become a reliable family favorite, a go-to for those evenings when time is short but the desire for a delicious, home-cooked meal is strong. The beautiful golden-brown cheese crust that forms on top, with those little crispy bits around the edges, is just divine. Trust me, once you try this, you’ll wonder how you ever managed weeknight dinners without it.
Ingredients
- 1 tablespoon Olive Oil: Extra virgin, for sautéing the aromatics and browning the beef.
- 1 pound Lean Ground Beef: (90/10 or 85/15 recommended) The star protein, providing a rich, savory base.
- 1 medium Yellow Onion: Finely chopped, adds a foundational sweet and savory flavor.
- 1 medium Bell Pepper: (any color, e.g., green, red, or yellow) Chopped, for a touch of sweetness and color.
- 2 cloves Garlic: Minced, for that aromatic punch that elevates any savory dish.
- 1 teaspoon Chili Powder: Adds a mild warmth and classic Tex-Mex flavor.
- 1 teaspoon Smoked Paprika: Lends a deep, smoky flavor and beautiful color.
- ½ teaspoon Cumin: Provides an earthy, warm spice note.
- ½ teaspoon Dried Oregano: For a hint of herbaceous, peppery flavor.
- Salt and Black Pepper: To taste, essential for seasoning every layer.
- 1 (14.5 ounce) can Diced Tomatoes: Undrained, they add moisture, acidity, and tomato flavor.
- 1 (8 ounce) can Tomato Sauce: Contributes to a richer tomato base and smooth consistency.
- 2 ½ cups Beef Broth: Low sodium preferred, used to cook the rice and add depth of flavor.
- 1 ½ cups Long-Grain White Rice: Uncooked, the starchy component that makes this dish hearty.
- 2 cups Shredded Cheddar Cheese: (or a blend like Colby Jack or Mexican blend) For that irresistible, gooey, cheesy topping.
- Fresh Parsley or Green Onions: Chopped, for garnish (optional, but adds freshness and color).
Instructions
- Brown the Beef: Heat the olive oil in a large, oven-safe skillet (at least 10-12 inches, preferably cast iron) over medium-high heat. Add the ground beef and cook, breaking it apart with a spoon, until it’s nicely browned, about 5-7 minutes. Drain off any excess grease.
- Sauté Aromatics: Add the chopped onion and bell pepper to the skillet with the beef. Cook, stirring occasionally, until they soften, about 4-5 minutes.
- Add Garlic and Spices: Stir in the minced garlic, chili powder, smoked paprika, cumin, and dried oregano. Cook for another minute until fragrant, stirring constantly to prevent the garlic from burning. Season generously with salt and black pepper.
- Incorporate Tomatoes and Broth: Pour in the undrained diced tomatoes, tomato sauce, and beef broth. Stir everything together, scraping up any browned bits from the bottom of the skillet – these add a lot of flavor!
- Add Rice: Bring the mixture to a gentle simmer. Stir in the uncooked long-grain white rice. Ensure the rice is mostly submerged in the liquid.
- Simmer and Cook: Reduce the heat to low, cover the skillet tightly with a lid, and let it simmer for 20-25 minutes, or until the rice is tender and most of the liquid has been absorbed. Avoid lifting the lid during this time to keep the steam in, which is crucial for cooking the rice properly.
- Check for Doneness: After 20 minutes, check a few grains of rice. If it’s still a bit firm or there’s too much liquid, cover and cook for another 5-10 minutes. If it seems too dry and the rice isn’t cooked, you can add a splash more broth or water.
- Melt the Cheese: Once the rice is cooked, remove the skillet from the heat. Sprinkle the shredded cheddar cheese evenly over the top of the beef and rice mixture.
- Broil (Optional but Recommended): For a bubbly, golden-brown cheese topping, place the skillet under a preheated broiler for 2-3 minutes. Keep a very close eye on it, as cheese can go from golden to burnt quickly! Alternatively, you can simply cover the skillet again for 5 minutes off the heat to allow the cheese to melt from the residual heat if you prefer not to use the broiler or if your skillet isn’t oven-safe.
- Rest and Serve: Let the skillet stand for about 5 minutes before serving. This allows the cheese to set slightly and the flavors to meld. Garnish with fresh chopped parsley or green onions, if desired.
Nutrition Facts
- Servings: 6 servings
- Calories per serving: Approximately 450-550 kcal (This can vary based on the leanness of the beef and specific brands of ingredients used).
- Protein: A good source, primarily from the ground beef, crucial for muscle repair and satiety.
- Carbohydrates: Mainly from the rice, providing energy.
- Fat: Content varies with beef leanness and cheese amount; includes saturated fats.
- Sodium: Can be notable depending on broth and canned tomato choices; opt for low-sodium versions to manage intake.
Preparation Time
- Prep Time: Approximately 15 minutes (chopping vegetables, measuring ingredients).
- Cook Time: Approximately 40-45 minutes (browning beef, simmering rice, melting cheese).
- Total Time: Roughly 60 minutes from start to finish, making it an excellent option for a satisfying weeknight dinner that doesn’t require hours in the kitchen.
How to Serve
This Cheesy Ground Beef Rice Skillet is a wonderfully versatile dish that can be served in a few delightful ways to suit different preferences and occasions:
- Straight from the Skillet:
- Place the hot skillet (on a trivet to protect your table!) directly in the center of the dining table for a rustic, family-style meal.
- Allow everyone to scoop their own portions. This highlights the one-pan nature of the dish and keeps it warm.
- Individual Portions:
- Spoon generous servings onto individual plates or into shallow bowls.
- This allows for more personalized garnishing.
- With a Dollop of Coolness:
- A spoonful of sour cream or plain Greek yogurt on top adds a lovely creamy, tangy contrast to the rich, cheesy beef and rice.
- Guacamole or sliced avocado also pairs wonderfully.
- Add Some Crunch:
- Serve with a side of tortilla chips for scooping. This adds a textural element and makes it even more fun to eat, especially for kids.
- Spice it Up:
- Offer hot sauce, pickled jalapeños, or red pepper flakes on the side for those who like an extra kick.
- Alongside a Fresh Salad:
- A simple green salad with a light vinaigrette can balance the richness of the skillet. Think mixed greens, cucumber, and cherry tomatoes.
- With Steamed or Roasted Vegetables:
- Serve with a side of steamed broccoli, green beans, or roasted asparagus for an extra dose of nutrients and color.
- Warm Bread:
- A slice of crusty bread or warm cornbread is perfect for soaking up any delicious sauce left on the plate.
- For Potlucks or Gatherings:
- This dish travels well (if you have a skillet with a secure lid or can transfer it to a casserole dish after cooking the rice and before adding cheese for baking). It’s a crowd-pleaser that’s easy to make in larger quantities.
Additional Tips
- Vary Your Veggies: Don’t be afraid to add other vegetables. Diced zucchini, corn (fresh or frozen), peas, or even finely chopped carrots can be sautéed with the onions and peppers to boost the nutritional value and add different flavors and textures.
- Cheese Choices: While cheddar is classic, experiment with other cheeses. Monterey Jack melts beautifully, Pepper Jack adds a spicy kick, a Mexican blend offers a good mix, or even a sprinkle of Parmesan along with the cheddar can add a salty, nutty note.
- Spice Level Customization: For a spicier dish, add a pinch of red pepper flakes with the other spices, or include a finely diced jalapeño (with or without seeds) when you sauté the onions and peppers. Conversely, if you’re sensitive to spice, reduce or omit the chili powder.
- Rice Varieties: While long-grain white rice is recommended for its texture in this dish, you could experiment with brown rice. If using brown rice, note that it will require a longer cooking time (around 40-45 minutes) and potentially more liquid. Basmati or Jasmine rice can also be used, though they might offer a slightly different texture and aroma.
- Make it Creamier: For an extra creamy texture, stir in a ¼ cup of heavy cream or a couple of ounces of softened cream cheese along with the shredded cheese before broiling or melting.
- Ground Meat Alternatives: If you’re not a fan of ground beef or want to switch things up, ground turkey, ground chicken, or even ground pork would work well in this recipe. Adjust seasoning as needed, as these meats can be milder.
- Proper Browning: Take the time to properly brown the ground beef. This develops a deep, savory flavor (thanks to the Maillard reaction) that forms the foundation of the dish. Don’t overcrowd the pan, and let it get some good color before breaking it up completely.
- Resting is Key: Allowing the skillet to rest for 5-10 minutes after it comes out of the oven (or after the cheese melts on the stovetop) is important. It allows the flavors to meld, the cheese to set slightly (making it less stringy when serving), and the rice to finish absorbing any remaining moisture, resulting in a better overall texture.
FAQ Section
Q1: Can I make this Cheesy Ground Beef Rice Skillet ahead of time?
A1: Yes, you can prepare parts of it ahead. You can cook the beef and vegetable mixture (up to step 3), cool it, and store it in an airtight container in the refrigerator for up to 2 days. When ready to serve, reheat the mixture in the skillet, then proceed with adding the broth, rice, and simmering as directed. You can also fully assemble the dish, let it cool, and then reheat, though the rice texture is best when freshly made.
Q2: How do I store and reheat leftovers?
A2: Store any leftovers in an airtight container in the refrigerator for up to 3-4 days. To reheat, you can microwave individual portions until heated through. For larger amounts, you can reheat gently in a skillet on the stovetop over low heat, adding a splash of broth or water if it seems dry, or in an oven-safe dish at 350°F (175°C) until warm. You might want to add a little fresh cheese on top when reheating for best results.
Q3: Can I freeze this Cheesy Ground Beef Rice Skillet?
A3: Yes, this dish freezes reasonably well. For best results, let it cool completely, then transfer to a freezer-safe container or a freezer-friendly casserole dish. You can freeze it with or without the cheese topping. If freezing without cheese, add it fresh when reheating. Thaw overnight in the refrigerator and then reheat as described above. Rice can sometimes change texture slightly upon freezing and thawing, but it should still be enjoyable. Freeze for up to 2-3 months.
Q4: What if I don’t have an oven-safe skillet?
A4: No problem! If your skillet isn’t oven-safe, you can still make this dish. Simply follow all the stovetop instructions. When it’s time to melt the cheese (step 9), instead of broiling, just sprinkle the cheese over the top, cover the skillet with its lid, and let it sit off the heat (or on very low heat) for 5-10 minutes until the cheese is fully melted and gooey from the residual heat. Alternatively, after the rice is cooked, you can transfer the mixture to an oven-safe casserole dish, top with cheese, and then broil or bake until the cheese is melted and bubbly.
Q5: Can I make this recipe gluten-free?
A5: This recipe is naturally quite close to being gluten-free. The main things to check are your beef broth (ensure it’s certified gluten-free, as some can contain gluten-based flavorings) and any specific spice blends you might use (individual spices like chili powder, cumin, paprika, and oregano are usually fine, but pre-made taco seasonings might not be). Rice, ground beef, fresh vegetables, and cheese are inherently gluten-free.
Q6: My rice didn’t cook properly, what went wrong?
A6: Several factors can affect rice cooking.
* Lid not tight enough: Steam escaping can prevent the rice from cooking evenly. Ensure a tight-fitting lid.
* Heat too high: If the heat is too high, the liquid can evaporate too quickly before the rice is cooked. Simmer on low.
* Too much peeking: Lifting the lid frequently releases steam. Try to avoid this.
* Type of rice: Different rice types have different liquid and time requirements. This recipe is optimized for long-grain white rice.
* Not enough liquid: If it seems dry and the rice is still hard, add ¼ cup more hot broth or water, cover, and continue to simmer.
Q7: Can I use a different type of rice, like brown rice or quinoa?
A7: Yes, but adjustments will be necessary.
* Brown Rice: Will require more liquid (likely an additional ½ to ¾ cup of broth) and a longer cooking time (around 40-45 minutes or more).
* Quinoa: Cooks faster than white rice (usually 15-20 minutes) and generally uses a 1:2 ratio of quinoa to liquid. You might need to adjust the simmering time and liquid amount accordingly.
Always check the package directions for the specific grain you choose and adjust.
Q8: How can I make this dish a bit healthier?
A8: There are several ways to make this dish healthier:
* Leaner Meat: Use extra lean ground beef (95/5) or ground turkey/chicken breast.
* More Veggies: Double the amount of bell peppers or add other vegetables like zucchini, spinach (stirred in at the end), mushrooms, or riced cauliflower.
* Brown Rice: Substitute brown rice for white rice for added fiber. (Remember to adjust liquid and cooking time).
* Reduced Cheese: Use a smaller amount of cheese or opt for a stronger flavored cheese so you can use less (like sharp cheddar or Parmesan).
* Low-Sodium Ingredients: Use low-sodium beef broth, low-sodium canned tomatoes, and be mindful of added salt.
* Drain Fat: Be thorough in draining any excess fat after browning the beef.

Cheesy Ground Beef Rice Skillet
Ingredients
- 1 tablespoon Olive Oil: Extra virgin, for sautéing the aromatics and browning the beef.
- 1 pound Lean Ground Beef: (90/10 or 85/15 recommended) The star protein, providing a rich, savory base.
- 1 medium Yellow Onion: Finely chopped, adds a foundational sweet and savory flavor.
- 1 medium Bell Pepper: (any color, e.g., green, red, or yellow) Chopped, for a touch of sweetness and color.
- 2 cloves Garlic: Minced, for that aromatic punch that elevates any savory dish.
- 1 teaspoon Chili Powder: Adds a mild warmth and classic Tex-Mex flavor.
- 1 teaspoon Smoked Paprika: Lends a deep, smoky flavor and beautiful color.
- ½ teaspoon Cumin: Provides an earthy, warm spice note.
- ½ teaspoon Dried Oregano: For a hint of herbaceous, peppery flavor.
- Salt and Black Pepper: To taste, essential for seasoning every layer.
- 1 (14.5 ounce) can Diced Tomatoes: Undrained, they add moisture, acidity, and tomato flavor.
- 1 (8 ounce) can Tomato Sauce: Contributes to a richer tomato base and smooth consistency.
- 2 ½ cups Beef Broth: Low sodium preferred, used to cook the rice and add depth of flavor.
- 1 ½ cups Long-Grain White Rice: Uncooked, the starchy component that makes this dish hearty.
- 2 cups Shredded Cheddar Cheese: (or a blend like Colby Jack or Mexican blend) For that irresistible, gooey, cheesy topping.
- Fresh Parsley or Green Onions: Chopped, for garnish (optional, but adds freshness and color).
Instructions
- Brown the Beef: Heat the olive oil in a large, oven-safe skillet (at least 10-12 inches, preferably cast iron) over medium-high heat. Add the ground beef and cook, breaking it apart with a spoon, until it’s nicely browned, about 5-7 minutes. Drain off any excess grease.
- Sauté Aromatics: Add the chopped onion and bell pepper to the skillet with the beef. Cook, stirring occasionally, until they soften, about 4-5 minutes.
- Add Garlic and Spices: Stir in the minced garlic, chili powder, smoked paprika, cumin, and dried oregano. Cook for another minute until fragrant, stirring constantly to prevent the garlic from burning. Season generously with salt and black pepper.
- Incorporate Tomatoes and Broth: Pour in the undrained diced tomatoes, tomato sauce, and beef broth. Stir everything together, scraping up any browned bits from the bottom of the skillet – these add a lot of flavor!
- Add Rice: Bring the mixture to a gentle simmer. Stir in the uncooked long-grain white rice. Ensure the rice is mostly submerged in the liquid.
- Simmer and Cook: Reduce the heat to low, cover the skillet tightly with a lid, and let it simmer for 20-25 minutes, or until the rice is tender and most of the liquid has been absorbed. Avoid lifting the lid during this time to keep the steam in, which is crucial for cooking the rice properly.
- Check for Doneness: After 20 minutes, check a few grains of rice. If it’s still a bit firm or there’s too much liquid, cover and cook for another 5-10 minutes. If it seems too dry and the rice isn’t cooked, you can add a splash more broth or water.
- Melt the Cheese: Once the rice is cooked, remove the skillet from the heat. Sprinkle the shredded cheddar cheese evenly over the top of the beef and rice mixture.
- Broil (Optional but Recommended): For a bubbly, golden-brown cheese topping, place the skillet under a preheated broiler for 2-3 minutes. Keep a very close eye on it, as cheese can go from golden to burnt quickly! Alternatively, you can simply cover the skillet again for 5 minutes off the heat to allow the cheese to melt from the residual heat if you prefer not to use the broiler or if your skillet isn’t oven-safe.
- Rest and Serve: Let the skillet stand for about 5 minutes before serving. This allows the cheese to set slightly and the flavors to meld. Garnish with fresh chopped parsley or green onions, if desired.
Nutrition
- Serving Size: one normal portion
- Calories: 550


