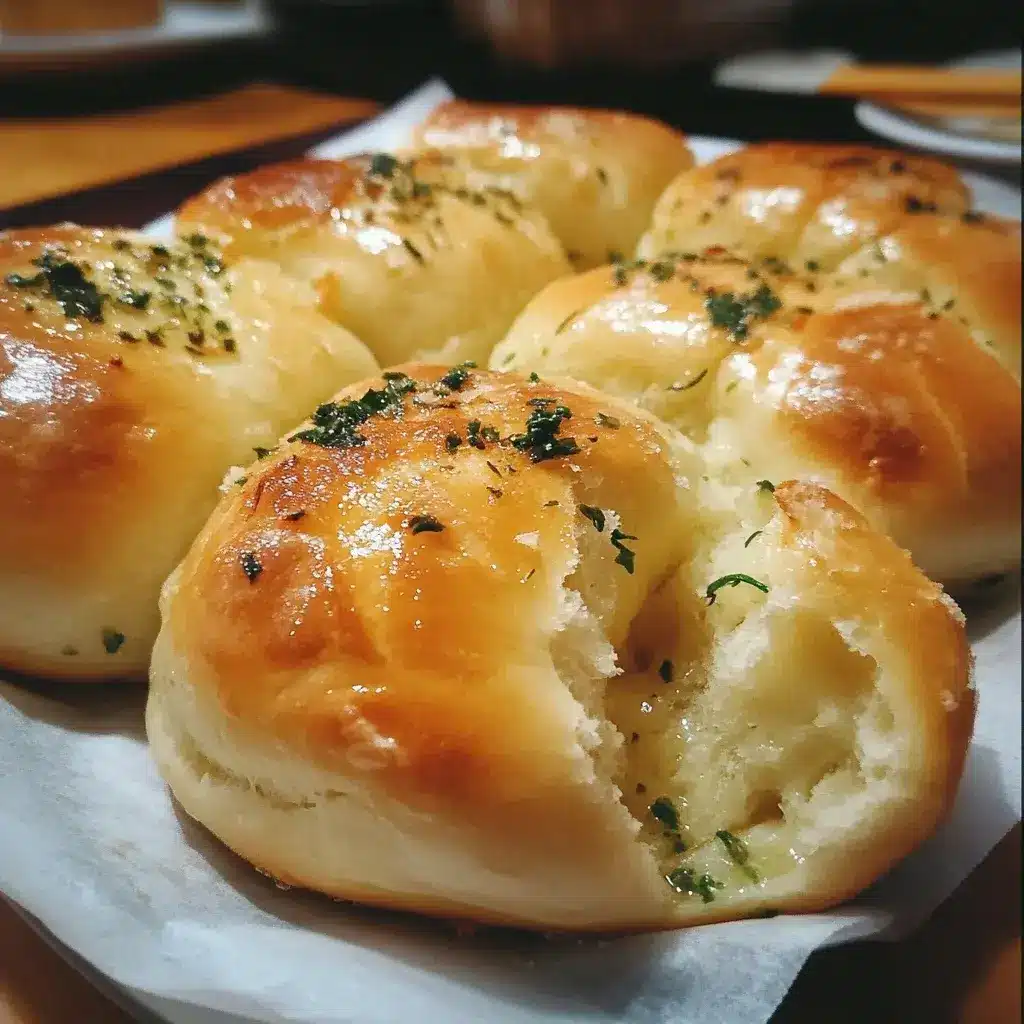

Oh, the sheer joy of pulling apart a warm, pillowy dinner roll, the aroma of garlic butter dancing in the air! In my kitchen, baking is more than just a task; it’s a way to bring warmth and happiness to our family table. And these Fluffy Garlic Dinner Rolls? They’ve become an absolute staple. From casual weeknight dinners to festive holiday feasts, these rolls vanish in minutes, leaving behind happy smiles and requests for ‘just one more’. The soft, cloud-like texture paired with the savory garlic butter is simply irresistible. Trust me, once you bake these, store-bought rolls will never quite measure up again. Get ready to experience the magic of homemade bread – it’s easier and far more rewarding than you might think!
Ingredients for Fluffy Garlic Dinner Rolls
To embark on your journey to fluffy, garlicky goodness, gather these simple yet essential ingredients. Each plays a vital role in creating the perfect dinner roll.
- Active Dry Yeast (2 ¼ teaspoons): The magic ingredient that brings our dough to life! Active dry yeast is responsible for the rise and airy texture of the rolls. Make sure it’s fresh for optimal results.
- Warm Water (1 cup, about 105-115°F): Warm water is crucial for activating the yeast. Too hot and it will kill the yeast; too cold and it won’t activate properly. Lukewarm is just right!
- Granulated Sugar (2 tablespoons): Sugar not only adds a touch of sweetness but also feeds the yeast, helping it to activate and rise the dough.
- Milk (½ cup, warmed): Warmed milk adds richness and tenderness to the rolls. It also contributes to a softer crust compared to using water alone. Whole milk is recommended for the best flavor and texture.
- Unsalted Butter (¼ cup, melted and cooled slightly): Melted butter adds flavor, richness, and helps to create a tender crumb. Cooling it slightly prevents it from overheating the yeast and milk mixture.
- Large Egg (1): An egg contributes to the structure, richness, and color of the rolls. It helps bind the ingredients together and adds a subtle richness.
- All-Purpose Flour (3 ½ – 4 cups): The foundation of our rolls! All-purpose flour provides the structure. The amount may vary slightly depending on humidity and flour brand, so start with 3 ½ cups and add more as needed.
- Salt (1 teaspoon): Salt is essential for flavor development and also controls the yeast activity, preventing the dough from rising too quickly.
- Garlic Butter Topping: The star of the show! This flavorful topping elevates the rolls to another level.
- Unsalted Butter (¼ cup, melted): Melted butter creates the base for our garlic topping and adds richness to the crust.
- Garlic (2-3 cloves, minced): Freshly minced garlic is best for the most intense garlic flavor. Adjust the amount to your preference.
- Fresh Parsley (1 tablespoon, chopped, optional): Fresh parsley adds a pop of color and a hint of freshness to the garlic butter topping. It’s optional but highly recommended for visual appeal and a subtle flavor boost.
Instructions for Baking Fluffy Garlic Dinner Rolls
Follow these step-by-step instructions to create your own batch of heavenly Fluffy Garlic Dinner Rolls. Don’t be intimidated by baking with yeast; this recipe is designed to be straightforward and rewarding.
Step 1: Activate the Yeast
In a large mixing bowl, or the bowl of your stand mixer, combine the warm water and granulated sugar. Sprinkle the active dry yeast over the top. Let it stand for 5-10 minutes until the yeast is foamy and bubbly. This step is crucial to ensure your yeast is active and ready to make your rolls rise beautifully. If the yeast doesn’t foam, it might be old or inactive, and you’ll need to start with fresh yeast.
Step 2: Combine Wet Ingredients
Once the yeast is foamy, add the warmed milk, melted and slightly cooled butter, and the egg to the yeast mixture. Whisk gently to combine all the wet ingredients. Ensure the butter is not too hot to avoid cooking the egg.
Step 3: Gradually Add Dry Ingredients
In a separate bowl, whisk together 3 ½ cups of all-purpose flour and salt. Gradually add the dry ingredients to the wet ingredients, mixing on low speed with a dough hook (if using a stand mixer) or with a wooden spoon (if mixing by hand). Continue to mix until the dough comes together and forms a shaggy mass.
Step 4: Knead the Dough
If using a stand mixer, knead the dough on low to medium speed for 6-8 minutes. If kneading by hand, turn the dough out onto a lightly floured surface and knead for 8-10 minutes. The dough should become smooth, elastic, and slightly tacky but not sticky. If the dough is too sticky, gradually add more flour, one tablespoon at a time, until it reaches the right consistency.
Step 5: First Rise (Bulk Fermentation)
Place the dough in a lightly greased bowl, turning to coat all sides. Cover the bowl with plastic wrap or a clean kitchen towel. Let the dough rise in a warm place for 1-1.5 hours, or until it has doubled in size. This first rise is essential for developing flavor and creating a light and airy texture. A warm place can be a slightly warmed oven (turned off!), a sunny spot, or simply a draft-free area in your kitchen.
Step 6: Shape the Rolls
Once the dough has doubled, gently punch it down to release the air. Turn the dough out onto a lightly floured surface. Divide the dough into 12 equal portions. You can use a kitchen scale for precise portions or simply eyeball it. Shape each portion into a smooth round roll by gently stretching the top surface of the dough and tucking it underneath to create a smooth ball.
Step 7: Second Rise (Proofing)
Grease a 9×13 inch baking pan. Place the shaped rolls evenly spaced in the prepared pan. Cover loosely with plastic wrap or a clean kitchen towel. Let the rolls rise again in a warm place for 30-45 minutes, or until they have nearly doubled in size and are puffy. This second rise, also known as proofing, is crucial for achieving that signature fluffy texture.
Step 8: Preheat Oven & Prepare Garlic Butter
While the rolls are proofing, preheat your oven to 375°F (190°C). Prepare the garlic butter topping by melting ¼ cup of unsalted butter in a small saucepan or microwave-safe bowl. Add the minced garlic and chopped parsley (if using) to the melted butter. Stir to combine and set aside.
Step 9: Bake the Rolls
Once the rolls are nicely puffed, brush the tops generously with the prepared garlic butter. Bake in the preheated oven for 18-22 minutes, or until the rolls are golden brown and cooked through. The internal temperature should reach around 200-210°F (93-99°C). If you notice the tops browning too quickly, you can loosely tent the pan with foil for the last few minutes of baking.
Step 10: Garlic Butter Bath (Optional but Recommended)
For extra flavor and shine, brush the baked rolls with the remaining garlic butter immediately after removing them from the oven. This “garlic butter bath” really elevates the flavor and keeps the rolls soft.
Step 11: Cool and Serve
Let the Fluffy Garlic Dinner Rolls cool in the pan for a few minutes before serving. They are best enjoyed warm and fresh from the oven, when they are at their absolute fluffiest and most flavorful. Pull apart and savor every garlicky, buttery, soft bite!
Nutrition Facts (per serving, 1 roll)
Please note that these are approximate values and can vary based on specific ingredients and portion sizes.
- Serving Size: 1 roll
- Calories: Approximately 200-250 kcal
- Fat: 8-10g
Preparation Time
From start to finish, making these Fluffy Garlic Dinner Rolls requires a bit of time, but the active hands-on time is relatively short. The majority of the time is spent waiting for the dough to rise, which is passive time.
- Prep time: 30 minutes (includes activating yeast, mixing dough, kneading, and shaping)
- Rise time (First Rise): 1-1.5 hours
- Rise time (Second Rise/Proofing): 30-45 minutes
- Bake time: 18-22 minutes
- Total time: Approximately 2.5 – 3 hours (mostly inactive time)
How to Serve Fluffy Garlic Dinner Rolls
These versatile rolls are the perfect accompaniment to a wide range of meals and occasions. Their soft texture and savory garlic flavor make them a crowd-pleaser every time.
- With Hearty Soups and Stews: Perfect for dipping into creamy tomato soup, hearty beef stew, or chicken noodle soup.
- Alongside Pasta Dishes: Serve with spaghetti and meatballs, lasagna, creamy fettuccine alfredo, or any pasta dish where you need something to soak up the delicious sauce.
- As a Side for Roasted Chicken or Meats: A classic pairing with roasted chicken, pot roast, grilled steak, or pork tenderloin.
- With Salads: Enjoy a warm roll alongside a fresh garden salad, Caesar salad, or콥샐러드 (cob salad).
- For Holiday Feasts: A must-have on Thanksgiving, Christmas, Easter, or any special occasion dinner table.
- As Mini Sandwiches: Slice them in half and fill with your favorite sandwich fillings like deli meats, cheese, or egg salad for a delightful lunch or snack.
- Simply with Butter: Sometimes, the best way to enjoy them is simply warm with a pat of butter – their flavor shines on its own!
- Garlic Bread Upgrade: For an even more intense garlic experience, slice the rolls in half lengthwise, spread with extra garlic butter, and broil briefly until golden and crispy for a supercharged garlic bread.
Additional Tips for Perfect Fluffy Garlic Dinner Rolls
Mastering the art of fluffy dinner rolls is all about understanding a few key techniques. Here are some essential tips to ensure your rolls are always soft, flavorful, and irresistible:
- Use Fresh Yeast: Always check the expiration date on your yeast. Inactive yeast won’t rise properly. If you are unsure about your yeast’s freshness, test it by mixing a small amount with warm water and sugar; it should become foamy within 5-10 minutes.
- Warm Liquids are Key: Warm water and milk are crucial for activating the yeast and creating a dough that rises properly. Use a thermometer to ensure the water temperature is between 105-115°F (40-46°C). Warm milk also helps to create a softer texture in the rolls.
- Don’t Over-Knead: While kneading is important to develop gluten, over-kneading can result in tough rolls. Knead until the dough is smooth and elastic but still slightly tacky.
- Proper Rising Environment: Yeast thrives in warm, humid environments. For optimal rising, find a warm spot in your kitchen, such as a slightly warmed oven (turned off!), a sunny windowsill, or a proofing box if you have one.
- Don’t Rush the Rise: Allow the dough to rise fully during both the first and second rise. Rushing the rise can result in dense, less fluffy rolls. Patience is key to achieving that light and airy texture.
- Use Room Temperature Ingredients (Except Liquids): While warm liquids are necessary, ensure other ingredients like eggs and butter are at room temperature for better incorporation into the dough.
- Generous Garlic Butter Topping: Don’t be shy with the garlic butter topping! Brushing generously before and after baking infuses the rolls with amazing garlic flavor and keeps them moist.
- Proper Baking Time and Temperature: Bake the rolls at the correct temperature and for the right duration to ensure they are cooked through but not dry. Ovens can vary, so keep an eye on the rolls and adjust baking time as needed. Look for a golden brown color and an internal temperature of 200-210°F (93-99°C).
Frequently Asked Questions (FAQ) about Fluffy Garlic Dinner Rolls
Have questions about making these delightful dinner rolls? Here are answers to some common queries to help you bake with confidence.
Q1: Can I use instant yeast instead of active dry yeast?
A: Yes, you can substitute instant yeast for active dry yeast. You can use the same amount. With instant yeast, you can skip the initial step of dissolving it in warm water; simply add it directly to the dry ingredients. The rising times should remain approximately the same.
Q2: Can I make the dough ahead of time?
A: Yes, you can prepare the dough ahead of time. After the first rise, punch down the dough, cover it tightly, and refrigerate for up to 24 hours. When ready to bake, let the dough come to room temperature for about 30-60 minutes before shaping and proceeding with the second rise and baking.
Q3: Can I freeze these garlic dinner rolls?
A: Absolutely! Baked rolls freeze beautifully. Let them cool completely after baking, then wrap them tightly in plastic wrap and place them in a freezer-safe bag. They can be frozen for up to 2-3 months. To reheat, thaw them at room temperature or warm them in a low oven (300°F/150°C) for 10-15 minutes until heated through.
Q4: What if I don’t have fresh garlic? Can I use garlic powder?
A: While fresh garlic provides the best flavor, you can use garlic powder in a pinch. For the garlic butter topping, use about 1-2 teaspoons of garlic powder instead of minced fresh garlic. However, fresh garlic is highly recommended for the most authentic garlic flavor.
Q5: My rolls are not rising, what could be the reason?
A: There are a few potential reasons why your rolls might not be rising:
Yeast is inactive: Ensure your yeast is fresh and properly activated.
Water temperature was incorrect: Water that is too hot or too cold can inhibit yeast activity. Use a thermometer to check the temperature.
Rising environment too cold: Yeast needs warmth to rise. Make sure your dough is in a warm place.
Too much salt: Too much salt can inhibit yeast activity. Ensure you are using the correct amount of salt.
Q6: Can I make these rolls without milk?
A: Yes, you can substitute water for milk. However, using milk will result in softer and richer rolls. If using water, warm it slightly before adding to the dough. You might also consider adding a tablespoon of melted butter or oil to compensate for the richness that milk provides.
Q7: Can I add cheese to these rolls?
A: Absolutely! For cheesy garlic rolls, you can sprinkle shredded cheese (like cheddar, mozzarella, or Parmesan) over the rolls before baking, or even incorporate cheese into the dough itself. Add about ½ to 1 cup of shredded cheese to the dough during the kneading process.
Q8: How do I prevent the bottom of the rolls from getting too brown?
A: If the bottoms of your rolls tend to brown too quickly, you can try a few things:
Lower oven rack: Move your oven rack to a lower position.
Double pan: Place another baking sheet underneath the pan of rolls to insulate the bottom.
Reduce oven temperature slightly: Lower the oven temperature by 25°F (15°C) and bake for a bit longer.
Enjoy the process of baking these Fluffy Garlic Dinner Rolls and the delightful aroma that fills your kitchen. They are a testament to the simple joys of homemade bread and are sure to become a cherished part of your family meals!
Print
Fluffy Garlic Dinner Rolls
Ingredients
To embark on your journey to fluffy, garlicky goodness, gather these simple yet essential ingredients. Each plays a vital role in creating the perfect dinner roll.
- Active Dry Yeast (2 ¼ teaspoons): The magic ingredient that brings our dough to life! Active dry yeast is responsible for the rise and airy texture of the rolls. Make sure it’s fresh for optimal results.
- Warm Water (1 cup, about 105-115°F): Warm water is crucial for activating the yeast. Too hot and it will kill the yeast; too cold and it won’t activate properly. Lukewarm is just right!
- Granulated Sugar (2 tablespoons): Sugar not only adds a touch of sweetness but also feeds the yeast, helping it to activate and rise the dough.
- Milk (½ cup, warmed): Warmed milk adds richness and tenderness to the rolls. It also contributes to a softer crust compared to using water alone. Whole milk is recommended for the best flavor and texture.
- Unsalted Butter (¼ cup, melted and cooled slightly): Melted butter adds flavor, richness, and helps to create a tender crumb. Cooling it slightly prevents it from overheating the yeast and milk mixture.
- Large Egg (1): An egg contributes to the structure, richness, and color of the rolls. It helps bind the ingredients together and adds a subtle richness.
- All-Purpose Flour (3 ½ – 4 cups): The foundation of our rolls! All-purpose flour provides the structure. The amount may vary slightly depending on humidity and flour brand, so start with 3 ½ cups and add more as needed.
- Salt (1 teaspoon): Salt is essential for flavor development and also controls the yeast activity, preventing the dough from rising too quickly.
- Garlic Butter Topping: The star of the show! This flavorful topping elevates the rolls to another level.
- Unsalted Butter (¼ cup, melted): Melted butter creates the base for our garlic topping and adds richness to the crust.
- Garlic (2-3 cloves, minced): Freshly minced garlic is best for the most intense garlic flavor. Adjust the amount to your preference.
- Fresh Parsley (1 tablespoon, chopped, optional): Fresh parsley adds a pop of color and a hint of freshness to the garlic butter topping. It’s optional but highly recommended for visual appeal and a subtle flavor boost.
Instructions
Follow these step-by-step instructions to create your own batch of heavenly Fluffy Garlic Dinner Rolls. Don’t be intimidated by baking with yeast; this recipe is designed to be straightforward and rewarding.
Step 1: Activate the Yeast
In a large mixing bowl, or the bowl of your stand mixer, combine the warm water and granulated sugar. Sprinkle the active dry yeast over the top. Let it stand for 5-10 minutes until the yeast is foamy and bubbly. This step is crucial to ensure your yeast is active and ready to make your rolls rise beautifully. If the yeast doesn’t foam, it might be old or inactive, and you’ll need to start with fresh yeast.
Step 2: Combine Wet Ingredients
Once the yeast is foamy, add the warmed milk, melted and slightly cooled butter, and the egg to the yeast mixture. Whisk gently to combine all the wet ingredients. Ensure the butter is not too hot to avoid cooking the egg.
Step 3: Gradually Add Dry Ingredients
In a separate bowl, whisk together 3 ½ cups of all-purpose flour and salt. Gradually add the dry ingredients to the wet ingredients, mixing on low speed with a dough hook (if using a stand mixer) or with a wooden spoon (if mixing by hand). Continue to mix until the dough comes together and forms a shaggy mass.
Step 4: Knead the Dough
If using a stand mixer, knead the dough on low to medium speed for 6-8 minutes. If kneading by hand, turn the dough out onto a lightly floured surface and knead for 8-10 minutes. The dough should become smooth, elastic, and slightly tacky but not sticky. If the dough is too sticky, gradually add more flour, one tablespoon at a time, until it reaches the right consistency.
Step 5: First Rise (Bulk Fermentation)
Place the dough in a lightly greased bowl, turning to coat all sides. Cover the bowl with plastic wrap or a clean kitchen towel. Let the dough rise in a warm place for 1-1.5 hours, or until it has doubled in size. This first rise is essential for developing flavor and creating a light and airy texture. A warm place can be a slightly warmed oven (turned off!), a sunny spot, or simply a draft-free area in your kitchen.
Step 6: Shape the Rolls
Once the dough has doubled, gently punch it down to release the air. Turn the dough out onto a lightly floured surface. Divide the dough into 12 equal portions. You can use a kitchen scale for precise portions or simply eyeball it. Shape each portion into a smooth round roll by gently stretching the top surface of the dough and tucking it underneath to create a smooth ball.
Step 7: Second Rise (Proofing)
Grease a 9×13 inch baking pan. Place the shaped rolls evenly spaced in the prepared pan. Cover loosely with plastic wrap or a clean kitchen towel. Let the rolls rise again in a warm place for 30-45 minutes, or until they have nearly doubled in size and are puffy. This second rise, also known as proofing, is crucial for achieving that signature fluffy texture.
Step 8: Preheat Oven & Prepare Garlic Butter
While the rolls are proofing, preheat your oven to 375°F (190°C). Prepare the garlic butter topping by melting ¼ cup of unsalted butter in a small saucepan or microwave-safe bowl. Add the minced garlic and chopped parsley (if using) to the melted butter. Stir to combine and set aside.
Step 9: Bake the Rolls
Once the rolls are nicely puffed, brush the tops generously with the prepared garlic butter. Bake in the preheated oven for 18-22 minutes, or until the rolls are golden brown and cooked through. The internal temperature should reach around 200-210°F (93-99°C). If you notice the tops browning too quickly, you can loosely tent the pan with foil for the last few minutes of baking.
Step 10: Garlic Butter Bath (Optional but Recommended)
For extra flavor and shine, brush the baked rolls with the remaining garlic butter immediately after removing them from the oven. This “garlic butter bath” really elevates the flavor and keeps the rolls soft.
Step 11: Cool and Serve
Let the Fluffy Garlic Dinner Rolls cool in the pan for a few minutes before serving. They are best enjoyed warm and fresh from the oven, when they are at their absolute fluffiest and most flavorful. Pull apart and savor every garlicky, buttery, soft bite!
Nutrition
- Serving Size: one normal portion
- Calories: 250
- Fat: 10g