


Easter is a time for joy, renewal, and of course, delightful treats! This year, our Easter celebration reached a new level of deliciousness thanks to these absolutely stunning Easter Egg Macarons. From the moment I pulled these pastel-hued beauties out of the oven, they were a hit. The delicate shells, speckled to mimic real eggs, cracked perfectly to reveal a chewy almond interior filled with a luscious lemon buttercream. My family, even the notoriously picky eaters, devoured them in minutes, proclaiming them the highlight of our Easter dessert spread. The blend of the crisp macaron shell with the tangy, creamy filling is simply irresistible. If you’re looking to impress your loved ones and add a touch of elegance and fun to your Easter festivities, look no further. This recipe is your key to creating edible masterpieces that are as beautiful as they are delicious. While macarons might seem daunting, this guide breaks down each step, making it approachable even for beginner bakers. Get ready to embark on a delightful baking adventure and create Easter memories that are both sweet and unforgettable!
Ingredients You’ll Need
To create these exquisite Easter Egg Macarons, you’ll need a few key ingredients, each playing a crucial role in achieving that perfect texture and flavor. Here’s a breakdown of what you’ll need:
- Almond Flour: (1 cup, finely ground and blanched) – The foundation of our macaron shells, providing that signature chewy texture and subtle nutty flavor. Ensure it’s finely ground for a smooth shell.
- Powdered Sugar: (1 ½ cups, also known as icing sugar) – Adds sweetness and structure to the macaron shells. Sifting it well is essential to remove lumps and ensure a smooth batter.
- Egg Whites: (3 large, aged) – The magic ingredient that creates the meringue and gives macarons their lightness and lift. Aging them helps to reduce moisture and create a more stable meringue.
- Granulated Sugar: (½ cup, caster sugar is ideal) – Used to create a stable meringue, adding sweetness and structure.
- Vanilla Extract: (1 teaspoon, pure vanilla extract) – Enhances the flavor of the macaron shells, adding a warm and aromatic note.
- Gel Food Coloring: (Assorted pastel colors) – To create the beautiful Easter egg hues. Gel food coloring is preferred over liquid as it adds color without thinning the batter.
- Lemon Buttercream Filling: (Ingredients listed below) – Provides a tangy and creamy contrast to the sweet macaron shells. You can substitute with other flavors if desired.
For the Lemon Buttercream Filling:
- Unsalted Butter: (1 cup, softened) – The base of our buttercream, providing richness and creaminess. Ensure it’s softened for smooth blending.
- Powdered Sugar: (3 cups, sifted) – Adds sweetness and structure to the buttercream. Sifting is important for a smooth, lump-free frosting.
- Lemon Juice: (3 tablespoons, freshly squeezed) – Provides the refreshing lemon flavor. Freshly squeezed juice is always best for vibrant flavor.
- Lemon Zest: (1 tablespoon, finely grated) – Adds an extra layer of lemon flavor and aroma. Use only the yellow zest, avoiding the bitter white pith.
- Heavy Cream or Milk: (2-3 tablespoons) – To adjust the consistency of the buttercream, making it smooth and spreadable.
Step-by-Step Instructions: Crafting Your Easter Egg Macarons
Creating macarons is a journey, and following these detailed instructions will guide you to success. Patience and precision are key!
1. Prepare Your Ingredients and Equipment:
- Aging Egg Whites: Separate your egg whites 24-48 hours in advance and store them in an airtight container in the refrigerator. This process reduces moisture content, leading to a more stable meringue. Bring them to room temperature about an hour before you begin baking.
- Measure and Sift Dry Ingredients: Accurately measure your almond flour and powdered sugar. Sift them together twice into a large bowl. This removes any lumps and aerates the mixture, resulting in smoother macaron shells. Set aside.
- Prepare Baking Sheets: Line baking sheets with parchment paper or silicone macaron mats. Macaron mats are particularly helpful for achieving uniformly sized macarons.
- Gather Piping Equipment: You’ll need piping bags and a round piping tip (usually size #8 or #10). Prepare these and have them ready.
- Preheat Oven: Preheat your oven to 300°F (150°C). Oven temperature is crucial for macarons, so use an oven thermometer to ensure accuracy.
2. Whip the Meringue:
- Start Whipping Egg Whites: In a clean, grease-free stand mixer bowl (or using a hand mixer), beat the room temperature aged egg whites on medium speed until soft peaks form. This means the whites will hold their shape but the tips will curl slightly.
- Gradually Add Sugar: Slowly add the granulated sugar, one tablespoon at a time, while continuing to whip on medium-high speed. Adding the sugar gradually ensures it dissolves properly and creates a stable meringue.
- Whip to Stiff Peaks: Continue whipping until stiff, glossy peaks form. The meringue should be firm enough to hold its shape and when you lift the whisk, the peaks should stand straight up without drooping. Over-whipping can lead to dry macarons, so watch carefully.
- Incorporate Vanilla Extract: Once stiff peaks are achieved, add the vanilla extract and whip for a few more seconds to incorporate.
3. Macaronage (The Art of Folding):
- Add Dry Ingredients to Meringue: Pour all the sifted almond flour and powdered sugar mixture into the bowl with the meringue.
- First Fold (Deflation): Using a rubber spatula, begin folding the dry ingredients into the meringue. Start by cutting straight down through the center of the mixture, then scooping up from the bottom and folding the batter over the top. Rotate the bowl and repeat. The initial folds will seem to deflate the meringue – this is normal and necessary.
- Continue Folding (Macaronage): Continue folding gently but firmly. The goal of macaronage is to achieve the right batter consistency. You are aiming for a batter that flows like lava – thick but slowly flowing.
- Test the Consistency: To test for the correct consistency, perform the “figure 8” test. Lift your spatula with some batter and let it drip back into the bowl. If the batter ribbons off the spatula in a thick stream and you can draw a figure 8 with the stream without it breaking, the macaronage is complete. If it’s too thick, continue folding a few more times. If it’s too runny, you’ve over-mixed and the batch might be compromised. It’s better to slightly under-mix than over-mix.
4. Coloring and Piping the Macarons:
- Divide the Batter (Optional): If you want to create macarons in different pastel colors, divide the batter into separate bowls.
- Add Gel Food Coloring: Add a few drops of gel food coloring to each bowl and gently fold it in until the color is evenly distributed. Remember, gel food coloring is concentrated, so start with a small amount and add more if needed. Aim for soft pastel shades for Easter eggs.
- Fill Piping Bag: Fit your piping bag with a round tip. Fill the piping bag with the colored macaron batter.
- Pipe Macaron Shells: Hold the piping bag vertically, about ½ inch above the baking sheet. Pipe even, round circles onto the prepared baking sheets. Aim for about 1.5 inches in diameter. Leave some space between each macaron as they will spread slightly.
- Speckle for Egg Effect (Optional): For an Easter egg effect, you can gently flick a small amount of brown or dark cocoa powder mixed with a tiny bit of water or vodka onto the piped macarons using a clean paintbrush or toothpick. This creates the speckled appearance of eggs.
5. Tapping and Resting (Croutage):
- Tap the Baking Sheets: Firmly tap the baking sheets against the countertop several times. This releases any trapped air bubbles in the batter and helps create smooth macaron shells.
- Rest the Macarons (Croutage): This is a crucial step! Let the piped macarons rest at room temperature for 30-60 minutes, or until a skin forms on the surface. You should be able to gently touch the surface of a macaron without the batter sticking to your finger. This skin is essential for developing the signature “feet” of macarons. The resting time will vary depending on humidity.
6. Baking the Macarons:
- Bake in Preheated Oven: Place the baking sheets in the preheated oven. Bake for 12-15 minutes, or until the “feet” have formed (the ruffled edge at the base of the macaron) and the shells are set.
- Check for Doneness: To check if they are done, gently nudge a macaron shell. It should not wobble. If it does, bake for another minute or two. Avoid over-baking, as this will make them dry.
- Cool Completely: Once baked, remove the baking sheets from the oven and let them cool completely on the baking sheets before attempting to remove them. Cooling completely is essential, as warm macarons are very delicate and can break easily.
7. Prepare the Lemon Buttercream Filling:
- Cream Butter: In a stand mixer (or with a hand mixer), beat the softened butter until light and fluffy.
- Gradually Add Powdered Sugar: Gradually add the sifted powdered sugar, one cup at a time, beating on low speed until combined. Then, increase the speed to medium and beat until light and creamy.
- Add Lemon Juice and Zest: Add the fresh lemon juice and lemon zest to the buttercream. Beat until well combined.
- Adjust Consistency: If the buttercream is too thick, add heavy cream or milk, one tablespoon at a time, until you reach a smooth and spreadable consistency.
8. Assemble the Macarons:
- Match Shells: Once the macaron shells are completely cool, gently peel them off the parchment paper or macaron mat. Match up pairs of similarly sized shells.
- Pipe or Spread Filling: Place the lemon buttercream into a piping bag fitted with a round tip or use a small spoon. Pipe or spread a generous amount of buttercream onto the flat side of one macaron shell.
- Sandwich Macarons: Gently top with the matching macaron shell, pressing down lightly to create a sandwich.
- Chill (Optional but Recommended): For best results, chill the assembled macarons in the refrigerator for at least 30 minutes, or preferably overnight. This allows the flavors to meld and the texture to mature.
9. Decorate (Optional):
- Dust with Edible Glitter: For extra sparkle, you can lightly dust the macarons with edible glitter.
- Drizzle with White Chocolate: Melt white chocolate and drizzle it decoratively over the macarons for an elegant touch.
- Add Sprinkles: Use pastel sprinkles around the edges of the filling for a festive Easter look.
Nutrition Facts (per serving, 1 macaron)
Please note that these are estimated values and can vary based on ingredient brands and specific measurements.
- Serving Size: 1 macaron
- Calories: Approximately 150-180 kcal
- Fat: 8-10g
Preparation Time: From Start to Sweet Finish
Making Easter Egg Macarons involves several stages, so plan your time accordingly. Here’s a breakdown:
- Prep Time (Aging Eggs, Measuring Ingredients): 30 minutes (plus 24-48 hours for aging egg whites)
- Making Macaron Batter & Piping: 45 minutes
- Resting Time (Croutage): 30-60 minutes
- Baking Time: 12-15 minutes per batch
- Cooling Time: 30 minutes – 1 hour
- Making Buttercream Filling: 20 minutes
- Assembly & Chilling: 30 minutes (plus chilling time)
Total Active Time: Approximately 2-2.5 hours (excluding egg aging and chilling)
Total Time (including resting and cooling): Approximately 4-5 hours (plus egg aging and chilling)
While it might seem lengthy, the hands-on time is manageable, and the result is well worth the effort!
How to Serve Your Easter Egg Macarons
These delightful macarons are perfect for showcasing their beauty and deliciousness. Here are some serving suggestions:
- Elegant Dessert Platter:
- Arrange the macarons on a tiered dessert platter, showcasing their pastel colors.
- Incorporate fresh spring flowers like tulips or daffodils around the platter for a festive touch.
- Add other Easter treats like mini chocolate eggs or pastel candies to create a visually appealing spread.
- Individual Place Settings:
- Place a single macaron at each guest’s place setting as a sweet welcome.
- Tie a ribbon around each macaron in a coordinating pastel color for a personalized touch.
- Use small macaron boxes or bags as favors for guests to take home.
- Easter Brunch or Tea Party:
- Serve macarons as part of an Easter brunch buffet or afternoon tea party.
- Pair them with other light and refreshing treats like fruit tarts, mini quiches, and tea sandwiches.
- Offer a selection of teas, coffee, or sparkling lemonade to complement the macarons.
- Gift Giving:
- Package macarons beautifully in decorative boxes or cellophane bags to give as Easter gifts.
- Add a handwritten tag with a personal message for a thoughtful touch.
- Macarons are a sophisticated and appreciated homemade gift.
- Kids’ Easter Egg Hunt:
- While delicate, you can incorporate macarons into an Easter egg hunt for older children or as a special prize at the end.
- Wrap them carefully to protect them from damage.
- Simple and Sweet Snack:
- Enjoy them simply with a cup of coffee or tea for a delightful afternoon treat.
- Macarons are perfect for satisfying a sweet craving in a refined and elegant way.
Additional Tips for Macaron Mastery
Macarons can be a bit temperamental, but with these helpful tips, you’ll be well on your way to becoming a macaron pro!
- Use Accurate Measurements: Macaron baking is a science. Use a kitchen scale to measure ingredients by weight whenever possible, especially for almond flour and powdered sugar. This ensures consistency and accuracy.
- Sift Dry Ingredients Thoroughly: Sifting almond flour and powdered sugar multiple times removes lumps and aerates the mixture. This results in smoother macaron shells and prevents grainy textures.
- Age Your Egg Whites: Aging egg whites is crucial for reducing moisture content and creating a more stable meringue. This leads to macarons with better structure and less cracking.
- Master the Macaronage: The macaronage (folding) step is the most critical. Under-mixing will result in lumpy, peaked macarons, while over-mixing will cause flat, runny shells. Practice makes perfect, and watching videos of macaronage techniques can be very helpful.
- Proper Resting Time (Croutage) is Key: Don’t skip the resting time! Allowing the piped macarons to rest until a skin forms is essential for the development of those signature “feet.” The skin prevents the shells from cracking during baking.
- Oven Temperature Accuracy: Oven temperature is paramount for macaron success. Use an oven thermometer to ensure your oven is accurately preheated to 300°F (150°C). Fluctuations in temperature can lead to cracked or undercooked macarons.
- Bake One Tray at a Time: Baking one tray of macarons at a time ensures even heat distribution and better results. Rotate the tray halfway through baking if your oven has hot spots.
- Cool Macarons Completely Before Removing: Macarons are very delicate when warm. Allow them to cool completely on the baking sheets before attempting to peel them off. Trying to remove them too soon can lead to breakage.
Frequently Asked Questions (FAQ) About Easter Egg Macarons
Got questions about making Easter Egg Macarons? We’ve got answers!
Q1: Why are my macaron shells cracking?
A: Cracked macaron shells are often caused by oven temperature being too high or not resting the piped macarons long enough to form a skin. Ensure your oven is accurately preheated to 300°F (150°C) and that you allow the macarons to rest until a skin forms before baking. Over-mixing the batter can also contribute to cracking.
Q2: Why don’t my macarons have feet?
A: Lack of feet can be due to several factors: under-mixing the batter (not enough macaronage), over-mixing the batter (too much macaronage), not resting the piped macarons long enough, or oven temperature being too low. Ensure you achieve the correct batter consistency, allow for proper resting time, and your oven is at the correct temperature.
Q3: Can I make macarons in advance?
A: Yes! Macarons actually taste better after they have matured in the refrigerator for 24-48 hours. The shells soften slightly, and the flavors meld together beautifully. Store assembled macarons in an airtight container in the refrigerator.
Q4: Can I freeze macarons?
A: Yes, you can freeze assembled macarons. Freeze them in an airtight container for up to a month. Thaw them in the refrigerator for a few hours before serving. Freezing is a great way to prepare ahead of time for Easter.
Q5: Can I use liquid food coloring instead of gel food coloring?
A: Gel food coloring is highly recommended for macarons. Liquid food coloring can add excess moisture to the batter, which can negatively affect the macaron shells’ texture and consistency. If you must use liquid food coloring, use it sparingly and reduce other liquid ingredients slightly if possible.
Q6: What if I don’t have almond flour? Can I substitute it?
A: Almond flour is essential for the texture and flavor of macarons. Substitutions are not recommended. Using other flours will likely result in a completely different outcome and not a true macaron.
Q7: My buttercream is too soft/runny. How can I fix it?
A: If your buttercream is too soft, you can try chilling it in the refrigerator for 15-20 minutes and then re-whip it. You can also add a bit more powdered sugar, a tablespoon at a time, until it reaches the desired consistency.
Q8: My macarons are sticking to the parchment paper/macaron mat. What did I do wrong?
A: If macarons are sticking, it’s usually a sign that they are not fully baked. Ensure you bake them for the full recommended time and check for doneness by gently nudging a shell – it should not wobble. Also, make sure they are completely cooled before attempting to remove them. Using a silicone macaron mat can sometimes help with easier release compared to parchment paper.
With these tips, instructions, and FAQs, you’re well-equipped to embark on your Easter Egg Macaron baking adventure! Enjoy the process, embrace the learning curve, and savor the sweet reward of these beautiful and delicious springtime treats! Happy baking and Happy Easter!
Print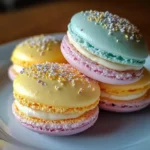
Easter Egg Macarons Recipe
Ingredients
To create these exquisite Easter Egg Macarons, you’ll need a few key ingredients, each playing a crucial role in achieving that perfect texture and flavor. Here’s a breakdown of what you’ll need:
- Almond Flour: (1 cup, finely ground and blanched) – The foundation of our macaron shells, providing that signature chewy texture and subtle nutty flavor. Ensure it’s finely ground for a smooth shell.
- Powdered Sugar: (1 ½ cups, also known as icing sugar) – Adds sweetness and structure to the macaron shells. Sifting it well is essential to remove lumps and ensure a smooth batter.
- Egg Whites: (3 large, aged) – The magic ingredient that creates the meringue and gives macarons their lightness and lift. Aging them helps to reduce moisture and create a more stable meringue.
- Granulated Sugar: (½ cup, caster sugar is ideal) – Used to create a stable meringue, adding sweetness and structure.
- Vanilla Extract: (1 teaspoon, pure vanilla extract) – Enhances the flavor of the macaron shells, adding a warm and aromatic note.
- Gel Food Coloring: (Assorted pastel colors) – To create the beautiful Easter egg hues. Gel food coloring is preferred over liquid as it adds color without thinning the batter.
- Lemon Buttercream Filling: (Ingredients listed below) – Provides a tangy and creamy contrast to the sweet macaron shells. You can substitute with other flavors if desired.
For the Lemon Buttercream Filling:
- Unsalted Butter: (1 cup, softened) – The base of our buttercream, providing richness and creaminess. Ensure it’s softened for smooth blending.
- Powdered Sugar: (3 cups, sifted) – Adds sweetness and structure to the buttercream. Sifting is important for a smooth, lump-free frosting.
- Lemon Juice: (3 tablespoons, freshly squeezed) – Provides the refreshing lemon flavor. Freshly squeezed juice is always best for vibrant flavor.
- Lemon Zest: (1 tablespoon, finely grated) – Adds an extra layer of lemon flavor and aroma. Use only the yellow zest, avoiding the bitter white pith.
- Heavy Cream or Milk: (2-3 tablespoons) – To adjust the consistency of the buttercream, making it smooth and spreadable.
Instructions
Creating macarons is a journey, and following these detailed instructions will guide you to success. Patience and precision are key!
1. Prepare Your Ingredients and Equipment:
- Aging Egg Whites: Separate your egg whites 24-48 hours in advance and store them in an airtight container in the refrigerator. This process reduces moisture content, leading to a more stable meringue. Bring them to room temperature about an hour before you begin baking.
- Measure and Sift Dry Ingredients: Accurately measure your almond flour and powdered sugar. Sift them together twice into a large bowl. This removes any lumps and aerates the mixture, resulting in smoother macaron shells. Set aside.
- Prepare Baking Sheets: Line baking sheets with parchment paper or silicone macaron mats. Macaron mats are particularly helpful for achieving uniformly sized macarons.
- Gather Piping Equipment: You’ll need piping bags and a round piping tip (usually size #8 or #10). Prepare these and have them ready.
- Preheat Oven: Preheat your oven to 300°F (150°C). Oven temperature is crucial for macarons, so use an oven thermometer to ensure accuracy.
2. Whip the Meringue:
- Start Whipping Egg Whites: In a clean, grease-free stand mixer bowl (or using a hand mixer), beat the room temperature aged egg whites on medium speed until soft peaks form. This means the whites will hold their shape but the tips will curl slightly.
- Gradually Add Sugar: Slowly add the granulated sugar, one tablespoon at a time, while continuing to whip on medium-high speed. Adding the sugar gradually ensures it dissolves properly and creates a stable meringue.
- Whip to Stiff Peaks: Continue whipping until stiff, glossy peaks form. The meringue should be firm enough to hold its shape and when you lift the whisk, the peaks should stand straight up without drooping. Over-whipping can lead to dry macarons, so watch carefully.
- Incorporate Vanilla Extract: Once stiff peaks are achieved, add the vanilla extract and whip for a few more seconds to incorporate.
3. Macaronage (The Art of Folding):
- Add Dry Ingredients to Meringue: Pour all the sifted almond flour and powdered sugar mixture into the bowl with the meringue.
- First Fold (Deflation): Using a rubber spatula, begin folding the dry ingredients into the meringue. Start by cutting straight down through the center of the mixture, then scooping up from the bottom and folding the batter over the top. Rotate the bowl and repeat. The initial folds will seem to deflate the meringue – this is normal and necessary.
- Continue Folding (Macaronage): Continue folding gently but firmly. The goal of macaronage is to achieve the right batter consistency. You are aiming for a batter that flows like lava – thick but slowly flowing.
- Test the Consistency: To test for the correct consistency, perform the “figure 8” test. Lift your spatula with some batter and let it drip back into the bowl. If the batter ribbons off the spatula in a thick stream and you can draw a figure 8 with the stream without it breaking, the macaronage is complete. If it’s too thick, continue folding a few more times. If it’s too runny, you’ve over-mixed and the batch might be compromised. It’s better to slightly under-mix than over-mix.
4. Coloring and Piping the Macarons:
- Divide the Batter (Optional): If you want to create macarons in different pastel colors, divide the batter into separate bowls.
- Add Gel Food Coloring: Add a few drops of gel food coloring to each bowl and gently fold it in until the color is evenly distributed. Remember, gel food coloring is concentrated, so start with a small amount and add more if needed. Aim for soft pastel shades for Easter eggs.
- Fill Piping Bag: Fit your piping bag with a round tip. Fill the piping bag with the colored macaron batter.
- Pipe Macaron Shells: Hold the piping bag vertically, about ½ inch above the baking sheet. Pipe even, round circles onto the prepared baking sheets. Aim for about 1.5 inches in diameter. Leave some space between each macaron as they will spread slightly.
- Speckle for Egg Effect (Optional): For an Easter egg effect, you can gently flick a small amount of brown or dark cocoa powder mixed with a tiny bit of water or vodka onto the piped macarons using a clean paintbrush or toothpick. This creates the speckled appearance of eggs.
5. Tapping and Resting (Croutage):
- Tap the Baking Sheets: Firmly tap the baking sheets against the countertop several times. This releases any trapped air bubbles in the batter and helps create smooth macaron shells.
- Rest the Macarons (Croutage): This is a crucial step! Let the piped macarons rest at room temperature for 30-60 minutes, or until a skin forms on the surface. You should be able to gently touch the surface of a macaron without the batter sticking to your finger. This skin is essential for developing the signature “feet” of macarons. The resting time will vary depending on humidity.
6. Baking the Macarons:
- Bake in Preheated Oven: Place the baking sheets in the preheated oven. Bake for 12-15 minutes, or until the “feet” have formed (the ruffled edge at the base of the macaron) and the shells are set.
- Check for Doneness: To check if they are done, gently nudge a macaron shell. It should not wobble. If it does, bake for another minute or two. Avoid over-baking, as this will make them dry.
- Cool Completely: Once baked, remove the baking sheets from the oven and let them cool completely on the baking sheets before attempting to remove them. Cooling completely is essential, as warm macarons are very delicate and can break easily.
7. Prepare the Lemon Buttercream Filling:
- Cream Butter: In a stand mixer (or with a hand mixer), beat the softened butter until light and fluffy.
- Gradually Add Powdered Sugar: Gradually add the sifted powdered sugar, one cup at a time, beating on low speed until combined. Then, increase the speed to medium and beat until light and creamy.
- Add Lemon Juice and Zest: Add the fresh lemon juice and lemon zest to the buttercream. Beat until well combined.
- Adjust Consistency: If the buttercream is too thick, add heavy cream or milk, one tablespoon at a time, until you reach a smooth and spreadable consistency.
8. Assemble the Macarons:
- Match Shells: Once the macaron shells are completely cool, gently peel them off the parchment paper or macaron mat. Match up pairs of similarly sized shells.
- Pipe or Spread Filling: Place the lemon buttercream into a piping bag fitted with a round tip or use a small spoon. Pipe or spread a generous amount of buttercream onto the flat side of one macaron shell.
- Sandwich Macarons: Gently top with the matching macaron shell, pressing down lightly to create a sandwich.
- Chill (Optional but Recommended): For best results, chill the assembled macarons in the refrigerator for at least 30 minutes, or preferably overnight. This allows the flavors to meld and the texture to mature.
9. Decorate (Optional):
- Dust with Edible Glitter: For extra sparkle, you can lightly dust the macarons with edible glitter.
- Drizzle with White Chocolate: Melt white chocolate and drizzle it decoratively over the macarons for an elegant touch.
- Add Sprinkles: Use pastel sprinkles around the edges of the filling for a festive Easter look.
Nutrition
- Serving Size: one normal portion
- Calories: 180
- Fat: 10g


