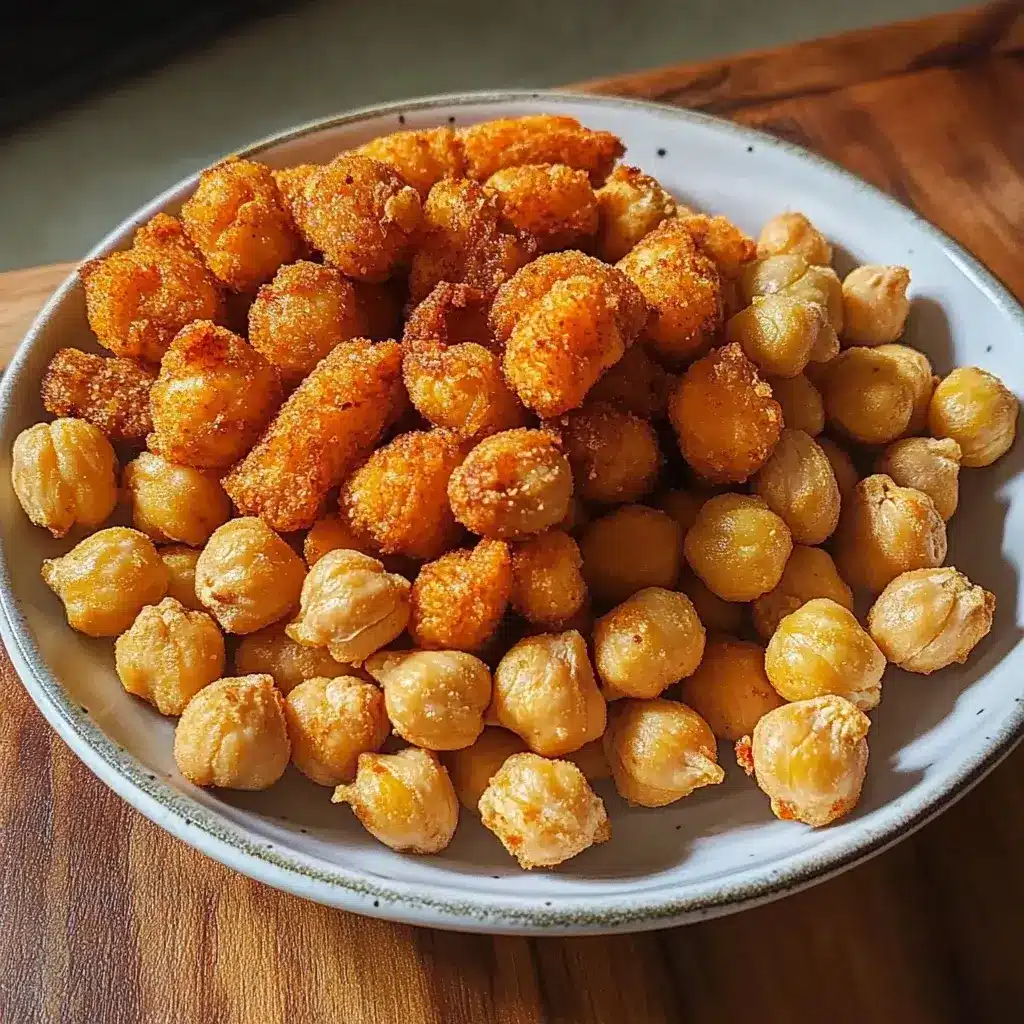

My family are self-proclaimed snack connoisseurs, always on the hunt for that perfect bite to satisfy their cravings between meals. We’ve tried everything from gourmet popcorn to elaborate dips, but nothing quite prepared us for the sheer delight of these crispy chickpea snacks. Honestly, from the moment I pulled these golden nuggets of goodness out of the oven, the aroma alone had everyone gathered in the kitchen, practically salivating. The first bite? Pure crunch, followed by a burst of savory, slightly smoky flavor that was utterly addictive. Even my pickiest eater, who usually shies away from anything remotely “healthy,” devoured a whole bowlful. This recipe has become a staple in our house, not just because it’s incredibly easy to make, but because it’s legitimately delicious and guilt-free. Whether you’re looking for a healthy afternoon snack, a crunchy topping for your salad, or a crowd-pleasing appetizer, these crispy chickpea snacks are guaranteed to become your new go-to. Prepare to be amazed at how something so simple can be so incredibly satisfying!
Ingredients
- Canned Chickpeas: (1 can, about 15 ounces) – The base of our crispy snack, providing protein and fiber. Make sure to drain and rinse them thoroughly for optimal crispiness.
- Olive Oil: (2 tablespoons) – Essential for roasting, adding flavor and helping the chickpeas crisp up beautifully. Extra virgin olive oil is recommended for the best taste.
- Smoked Paprika: (1 teaspoon) – Lends a wonderful smoky depth and vibrant color to the chickpeas.
- Garlic Powder: (1 teaspoon) – Adds a savory and aromatic touch that complements the paprika perfectly.
- Onion Powder: (½ teaspoon) – Enhances the overall savory flavor profile and adds a subtle sweetness.
- Cumin: (½ teaspoon) – Contributes a warm, earthy note that rounds out the spice blend.
- Salt: (½ teaspoon, or to taste) – Crucial for bringing out the flavors and enhancing the crispiness. Sea salt or kosher salt works best.
- Black Pepper: (¼ teaspoon, or to taste) – Adds a touch of spice and complexity to the flavor.
Instructions
- Preheat Your Oven and Prepare Baking Sheet: Start by preheating your oven to 400°F (200°C). While the oven is heating up, prepare a large baking sheet by lining it with parchment paper. Parchment paper isn’t strictly necessary, but it makes cleanup a breeze and prevents the chickpeas from sticking to the pan, especially if your baking sheet is older or prone to sticking. Using a large baking sheet is important because you want to spread the chickpeas in a single layer, which is crucial for even roasting and maximum crispiness. Avoid overcrowding them, as this will steam them instead of roasting, resulting in less crispy snacks.
- Rinse and Drain the Chickpeas Thoroughly: Open the can of chickpeas and pour them into a colander. Rinse them thoroughly under cold running water. This step is important for a couple of reasons. First, it removes the starchy liquid (aquafaba) that chickpeas are packed in, which can hinder crisping. Second, rinsing helps to reduce the sodium content, if that’s a concern. After rinsing, let the chickpeas drain in the colander for a few minutes to remove excess water.
- Dry the Chickpeas – The Key to Crispiness! This is arguably the most crucial step for achieving truly crispy chickpeas. Excess moisture is the enemy of crispiness. Transfer the drained chickpeas to a clean kitchen towel or a few layers of paper towels. Gently pat them very dry. You can even roll them around in the towel to absorb as much moisture as possible. For extra insurance, some people recommend letting the chickpeas air dry for about 15-20 minutes after patting them dry. The drier the chickpeas are before roasting, the crispier they will become. Don’t skip or rush this step! Think of it as the secret weapon for achieving that perfect crunch.
- Toss with Olive Oil and Spices: In a medium-sized bowl, place the thoroughly dried chickpeas. Drizzle them with olive oil. Two tablespoons is usually sufficient to coat them evenly without making them greasy. Next, add all the spices: smoked paprika, garlic powder, onion powder, cumin, salt, and black pepper. Use your hands or a spoon to toss everything together until the chickpeas are evenly coated with the oil and spices. Make sure every chickpea is glistening with the oil and spice mixture for maximum flavor and crispiness. At this stage, you can also experiment with other spices if you like – chili powder for heat, oregano for a Mediterranean twist, or curry powder for an Indian-inspired flavor.
- Roast the Chickpeas to Perfection: Spread the spiced chickpeas in a single layer on the prepared baking sheet. Ensure they are not overcrowded and have some space around them. Place the baking sheet in the preheated oven and roast for 30-40 minutes, or until the chickpeas are golden brown and crispy. The roasting time can vary slightly depending on your oven and the size of the chickpeas. It’s important to check them periodically, especially after the 25-minute mark.
- Shake and Continue Roasting (Optional but Recommended): About halfway through the roasting time, around 15-20 minutes in, take the baking sheet out of the oven and give it a good shake or stir the chickpeas with a spatula. This helps to ensure even roasting and prevents any chickpeas from sticking to the pan or each other. Return the baking sheet to the oven and continue roasting for the remaining time.
- Listen for the Crunch and Cool: As the chickpeas roast, you’ll start to hear them crackling and popping – this is a good sign that they are becoming crispy. Keep roasting until they are deeply golden brown and feel firm to the touch. Once they are done, remove the baking sheet from the oven and let the crispy chickpea snacks cool on the baking sheet for a few minutes. They will crisp up even further as they cool. Resist the urge to eat them straight from the oven, as they will be very hot! Allowing them to cool slightly enhances their crispiness and makes them easier to handle.
- Enjoy Your Crispy Chickpea Snacks! Once cooled, transfer your crispy chickpea snacks to a bowl and enjoy immediately for the best crunch. They are delicious on their own as a snack, but also incredibly versatile. You can use them as a topping for salads, soups, grain bowls, or even as a crunchy element in tacos or wraps. Store any leftovers in an airtight container at room temperature. While they are best consumed fresh, they can still be enjoyed the next day, although they might lose some of their initial crispiness.
Nutrition Facts
Serving Size: Approximately ¼ cup (about 1/4 of the recipe)
- Calories: Approximately 150-180 kcal
- Protein: 6-7 grams
- Fat: 8-10 grams
- Iron: 8-10% of Daily Value
Note: Nutritional values are estimates and can vary based on specific ingredients and serving sizes.
Preparation Time
Prep Time: 15 minutes (includes rinsing, drying, and seasoning)
Cook Time: 30-40 minutes (roasting in the oven)
Total Time: Approximately 45-55 minutes
This recipe is incredibly quick and easy to prepare, with most of the time being hands-off while the chickpeas roast in the oven. The active prep time is minimal, making it a perfect snack to whip up even on busy weeknights. You can easily multitask while the chickpeas are roasting, making it a very efficient and satisfying snack option.
How to Serve
These crispy chickpea snacks are incredibly versatile and can be enjoyed in countless ways. Here are some delicious serving suggestions:
- Straight-Up Snack: The most obvious and perhaps most satisfying way to enjoy them is simply as a snack, right out of the bowl. Their crunchy texture and savory flavor make them a perfect alternative to chips or popcorn.
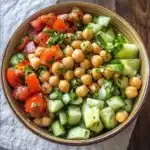
- Salad Topping: Sprinkle them over your favorite salads for an extra boost of protein, fiber, and satisfying crunch. They work wonderfully on green salads, grain salads, and even creamy salads like potato or pasta salad.
- Soup Garnish: Add a handful of crispy chickpeas to your soup just before serving for a delightful textural contrast. They complement both creamy and broth-based soups beautifully.
- Grain Bowl Component: Incorporate them into your grain bowls for added protein and crunch. They pair well with quinoa, rice, farro, or any other grain base, along with roasted vegetables and your favorite sauce.
- Taco or Wrap Filling: For a vegetarian twist, add crispy chickpeas to your tacos or wraps. They provide a satisfyingly meaty texture and delicious flavor that complements various fillings and toppings.
- Appetizer Platter: Include them on a snack or appetizer platter alongside dips, vegetables, crackers, and cheese for a crowd-pleasing and healthy option.
- Trail Mix Addition: Mix them into your homemade trail mix for a savory and crunchy element that balances out the sweetness of dried fruits and nuts.
- Kids’ Lunchbox Snack: Pack them in your kids’ lunchboxes as a healthy and fun snack alternative to processed chips or crackers.
Additional Tips for Perfect Crispy Chickpea Snacks
- Don’t Skip the Drying Step: We can’t stress this enough! Thoroughly drying the chickpeas is the single most important factor in achieving ultimate crispiness. Take your time and ensure they are as dry as possible before tossing them with oil and spices.
- Single Layer is Key: Always spread the chickpeas in a single layer on the baking sheet. Overcrowding will lead to steaming instead of roasting, and you’ll end up with soft, not crispy, chickpeas. Use a large baking sheet or two if needed.
- Use Enough Oil, But Not Too Much: Olive oil is essential for crisping and flavor, but you don’t want to drown the chickpeas in oil. Two tablespoons for a can of chickpeas is usually just right. Too much oil can make them greasy and less crispy.
- Spice it Up (or Down): Feel free to customize the spice blend to your liking. Experiment with different spices like chili powder, curry powder, Italian seasoning, or even nutritional yeast for a cheesy flavor. Adjust the amount of salt and pepper to your taste.
- Roast at the Right Temperature: 400°F (200°C) is generally the sweet spot for roasting chickpeas. Higher temperatures might burn them before they get crispy inside, while lower temperatures will take longer and might not achieve the desired crispiness.
- Listen to Your Chickpeas: Pay attention to the sound as they roast. You’ll hear them crackling and popping as they become crispy. This is a good indicator that they are getting close to being done.
- Don’t Over-Roast: While you want them crispy, you don’t want to burn them. Keep an eye on them towards the end of the roasting time and remove them from the oven when they are golden brown and feel firm. Over-roasted chickpeas can become too hard and bitter.
- Cooling is Crucial for Crispiness: Let the chickpeas cool on the baking sheet for a few minutes after roasting. They will continue to crisp up as they cool. Eating them straight from the oven, while tempting, will result in a less crispy experience.
FAQ – Frequently Asked Questions About Crispy Chickpea Snacks
Q1: Can I use dried chickpeas instead of canned chickpeas?
A: Yes, you can! You’ll need to soak dried chickpeas overnight and then cook them until tender before proceeding with the recipe. Make sure they are thoroughly drained and dried after cooking, just like canned chickpeas, for optimal crispiness. Using canned chickpeas is a shortcut for convenience, but dried chickpeas work just as well.
Q2: How do I make these chickpea snacks spicier?
A: To add heat, you can incorporate spices like chili powder, cayenne pepper, red pepper flakes, or even a dash of hot sauce to the spice blend. Start with a small amount and adjust to your preferred level of spiciness. You can also add a pinch of chipotle powder for a smoky heat.
Q3: Can I make these crispy chickpeas in an air fryer?
A: Absolutely! Air frying is a fantastic way to make crispy chickpeas even quicker. Preheat your air fryer to 400°F (200°C). Prepare the chickpeas as directed, then air fry them in a single layer for about 12-15 minutes, shaking the basket halfway through, until they are golden brown and crispy. Air frying often results in even crispier chickpeas in less time.
Q4: How long do crispy chickpea snacks stay crispy?
A: Crispy chickpea snacks are best enjoyed immediately after roasting for maximum crispiness. However, if stored in an airtight container at room temperature, they can stay reasonably crispy for up to a day or two. They might lose some of their initial crunch over time, but they will still be delicious. Avoid storing them in the refrigerator, as moisture will make them soft.
Q5: Can I make a large batch of these and store them for later?
A: You can make a larger batch, but keep in mind that they are best when freshly made for optimal crispiness. If you make a large batch, store them in an airtight container at room temperature. To revive some of the crispiness, you can briefly reheat them in a low oven or air fryer for a few minutes before serving.
Q6: Can I use different oils besides olive oil?
A: Yes, you can use other oils like avocado oil, coconut oil (for a slightly different flavor profile), or vegetable oil. Olive oil is recommended for its flavor and health benefits, but feel free to experiment with other oils based on your preference and what you have on hand.
Q7: My chickpeas aren’t getting crispy, what am I doing wrong?
A: The most common reasons for chickpeas not getting crispy are: not drying them thoroughly enough, overcrowding the baking sheet, or not roasting them for long enough. Make sure you are patting them very dry, spreading them in a single layer, and roasting them until they are golden brown and firm to the touch. Oven temperatures can vary, so you might need to roast them for a bit longer.
Q8: Are crispy chickpea snacks healthy?
A: Yes, crispy chickpea snacks are a healthy snack option! They are a good source of plant-based protein, fiber, and essential minerals. They are also naturally gluten-free and vegan. Compared to processed snacks like chips or crackers, they are a much healthier and more nutritious choice. By roasting instead of frying and using healthy spices, you’re creating a snack that’s both delicious and good for you.

Crispy Chickpea Snacks Recipe
Ingredients
- Canned Chickpeas: (1 can, about 15 ounces) – The base of our crispy snack, providing protein and fiber. Make sure to drain and rinse them thoroughly for optimal crispiness.
- Olive Oil: (2 tablespoons) – Essential for roasting, adding flavor and helping the chickpeas crisp up beautifully. Extra virgin olive oil is recommended for the best taste.
- Smoked Paprika: (1 teaspoon) – Lends a wonderful smoky depth and vibrant color to the chickpeas.
- Garlic Powder: (1 teaspoon) – Adds a savory and aromatic touch that complements the paprika perfectly.
- Onion Powder: (½ teaspoon) – Enhances the overall savory flavor profile and adds a subtle sweetness.
- Cumin: (½ teaspoon) – Contributes a warm, earthy note that rounds out the spice blend.
- Salt: (½ teaspoon, or to taste) – Crucial for bringing out the flavors and enhancing the crispiness. Sea salt or kosher salt works best.
- Black Pepper: (¼ teaspoon, or to taste) – Adds a touch of spice and complexity to the flavor.
Instructions
- Preheat Your Oven and Prepare Baking Sheet: Start by preheating your oven to 400°F (200°C). While the oven is heating up, prepare a large baking sheet by lining it with parchment paper. Parchment paper isn’t strictly necessary, but it makes cleanup a breeze and prevents the chickpeas from sticking to the pan, especially if your baking sheet is older or prone to sticking. Using a large baking sheet is important because you want to spread the chickpeas in a single layer, which is crucial for even roasting and maximum crispiness. Avoid overcrowding them, as this will steam them instead of roasting, resulting in less crispy snacks.
- Rinse and Drain the Chickpeas Thoroughly: Open the can of chickpeas and pour them into a colander. Rinse them thoroughly under cold running water. This step is important for a couple of reasons. First, it removes the starchy liquid (aquafaba) that chickpeas are packed in, which can hinder crisping. Second, rinsing helps to reduce the sodium content, if that’s a concern. After rinsing, let the chickpeas drain in the colander for a few minutes to remove excess water.
- Dry the Chickpeas – The Key to Crispiness! This is arguably the most crucial step for achieving truly crispy chickpeas. Excess moisture is the enemy of crispiness. Transfer the drained chickpeas to a clean kitchen towel or a few layers of paper towels. Gently pat them very dry. You can even roll them around in the towel to absorb as much moisture as possible. For extra insurance, some people recommend letting the chickpeas air dry for about 15-20 minutes after patting them dry. The drier the chickpeas are before roasting, the crispier they will become. Don’t skip or rush this step! Think of it as the secret weapon for achieving that perfect crunch.
- Toss with Olive Oil and Spices: In a medium-sized bowl, place the thoroughly dried chickpeas. Drizzle them with olive oil. Two tablespoons is usually sufficient to coat them evenly without making them greasy. Next, add all the spices: smoked paprika, garlic powder, onion powder, cumin, salt, and black pepper. Use your hands or a spoon to toss everything together until the chickpeas are evenly coated with the oil and spices. Make sure every chickpea is glistening with the oil and spice mixture for maximum flavor and crispiness. At this stage, you can also experiment with other spices if you like – chili powder for heat, oregano for a Mediterranean twist, or curry powder for an Indian-inspired flavor.
- Roast the Chickpeas to Perfection: Spread the spiced chickpeas in a single layer on the prepared baking sheet. Ensure they are not overcrowded and have some space around them. Place the baking sheet in the preheated oven and roast for 30-40 minutes, or until the chickpeas are golden brown and crispy. The roasting time can vary slightly depending on your oven and the size of the chickpeas. It’s important to check them periodically, especially after the 25-minute mark.
- Shake and Continue Roasting (Optional but Recommended): About halfway through the roasting time, around 15-20 minutes in, take the baking sheet out of the oven and give it a good shake or stir the chickpeas with a spatula. This helps to ensure even roasting and prevents any chickpeas from sticking to the pan or each other. Return the baking sheet to the oven and continue roasting for the remaining time.
- Listen for the Crunch and Cool: As the chickpeas roast, you’ll start to hear them crackling and popping – this is a good sign that they are becoming crispy. Keep roasting until they are deeply golden brown and feel firm to the touch. Once they are done, remove the baking sheet from the oven and let the crispy chickpea snacks cool on the baking sheet for a few minutes. They will crisp up even further as they cool. Resist the urge to eat them straight from the oven, as they will be very hot! Allowing them to cool slightly enhances their crispiness and makes them easier to handle.
- Enjoy Your Crispy Chickpea Snacks! Once cooled, transfer your crispy chickpea snacks to a bowl and enjoy immediately for the best crunch. They are delicious on their own as a snack, but also incredibly versatile. You can use them as a topping for salads, soups, grain bowls, or even as a crunchy element in tacos or wraps. Store any leftovers in an airtight container at room temperature. While they are best consumed fresh, they can still be enjoyed the next day, although they might lose some of their initial crispiness.
Nutrition
- Serving Size: one normal portion
- Calories: 180
- Fat: 10 grams
- Protein: 7 grams