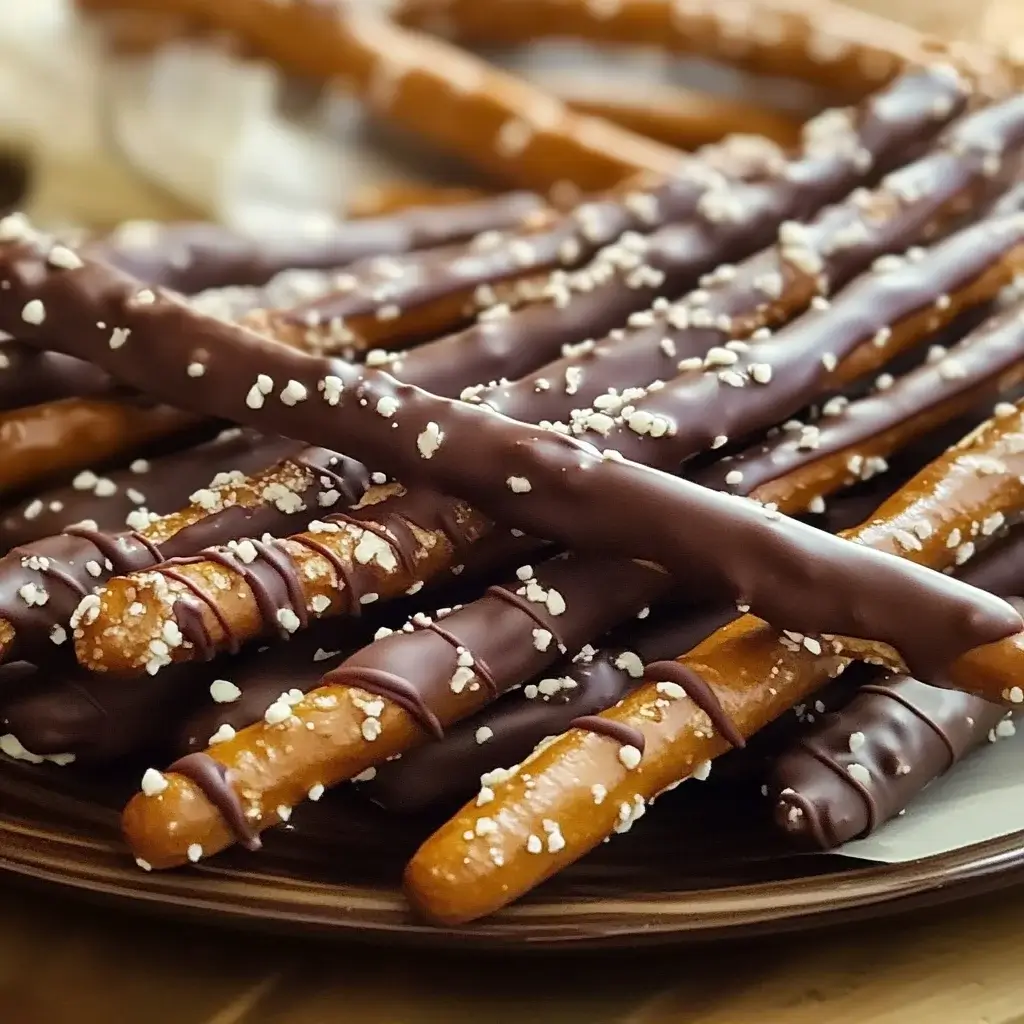

In our household, there’s a constant battle between sweet cravings and salty desires. It’s a culinary tug-of-war that often ends in a stalemate, with everyone reaching for both ends of the snack spectrum. That’s why discovering chocolate-covered pretzel sticks felt like striking gold. Imagine the satisfying snap of a crunchy pretzel rod, immediately followed by the smooth, melt-in-your-mouth sweetness of rich chocolate. It’s the perfect harmony of flavors and textures, a truly addictive treat that caters to everyone’s whims. When I first made these for a family movie night, they disappeared in minutes. The kids were practically fighting over the last few, and even the adults couldn’t resist sneaking handful after handful. They are incredibly simple to make, endlessly customizable, and always a crowd-pleaser. Whether you need a quick dessert, a fun party snack, or just a little something to brighten your day, these chocolate-covered pretzel sticks are guaranteed to be a hit. Trust me, once you try them, you’ll be hooked too!
Ingredients: Simple Components, Delicious Results
- Pretzel Sticks: The foundation of our treat! Choose sturdy pretzel sticks, rods, or even pretzel twists for a different shape. The saltiness of the pretzel is crucial for balancing the sweetness of the chocolate.
- Chocolate Chips: This is where the magic happens. You can use semi-sweet, milk chocolate, dark chocolate, or even white chocolate chips depending on your preference. For a richer flavor, consider using chocolate melting wafers or high-quality baking chocolate.
- Vegetable Shortening or Coconut Oil (Optional): Adding a small amount of shortening or coconut oil to your melting chocolate helps to thin it out, making it smoother and easier to dip the pretzels. It also creates a glossy finish on the chocolate.
- Sprinkles, Nuts, or Toppings (Optional): Get creative! Sprinkles add a festive touch, chopped nuts provide extra crunch and flavor, and other toppings like sea salt flakes, shredded coconut, or mini chocolate chips offer endless customization possibilities.
Step-by-Step Instructions: Crafting Your Chocolate Pretzel Masterpieces
- Prepare Your Workspace: Before you begin, line a baking sheet with parchment paper or wax paper. This will prevent the chocolate-covered pretzels from sticking and make cleanup a breeze. Ensure you have enough space to lay out the pretzels in a single layer to cool and set. Having everything ready beforehand will make the dipping process smoother and more efficient.
- Melt the Chocolate: There are a few ways to melt chocolate, but the most common methods are using a microwave or a double boiler.
- Microwave Method: Place your chocolate chips in a microwave-safe bowl. Microwave in 30-second intervals, stirring well after each interval. It’s crucial to stir between intervals to distribute the heat evenly and prevent the chocolate from burning. Continue microwaving and stirring until the chocolate is almost completely melted, with just a few small pieces remaining. The residual heat will melt the remaining chocolate as you stir it smooth. Be very careful not to overheat the chocolate, as it can become grainy or seize. If you are using shortening or coconut oil, add it in during the last 30-second interval and stir it in until fully incorporated.
- Double Boiler Method: Fill a saucepan with about an inch or two of water and bring it to a simmer. Place a heatproof bowl (glass or stainless steel) over the saucepan, ensuring the bottom of the bowl does not touch the water. Add your chocolate chips to the bowl. The steam from the simmering water will gently melt the chocolate. Stir occasionally until the chocolate is smooth and melted. If you are using shortening or coconut oil, stir it in once the chocolate is mostly melted. This method provides more gentle and even heating, reducing the risk of burning the chocolate.
- Dip the Pretzel Sticks: Once your chocolate is melted and smooth, it’s time to dip the pretzels. Hold a pretzel stick by one end and dip it into the melted chocolate, coating about two-thirds to three-quarters of the pretzel. You can use a spoon or spatula to help coat the pretzel evenly and remove any excess chocolate. Gently tap the pretzel against the edge of the bowl to allow excess chocolate to drip back into the bowl. This step is important to prevent a thick, gloppy coating of chocolate.
- Decorate (Optional): If you are using sprinkles, chopped nuts, or other toppings, now is the time to add them. Immediately after dipping the pretzel in chocolate and while the chocolate is still wet, sprinkle your chosen toppings over the chocolate-coated portion. The wet chocolate will act as a glue, securing the toppings. Be generous with your toppings for a visually appealing and flavorful treat.
- Set the Chocolate: Carefully place the chocolate-covered pretzel stick onto the prepared baking sheet. Ensure they are not touching each other to prevent them from sticking together as the chocolate sets. Repeat steps 3 and 4 with the remaining pretzel sticks and chocolate.
- Chill (Optional but Recommended): For faster setting and a firmer chocolate coating, place the baking sheet with the chocolate-covered pretzels in the refrigerator or freezer. Refrigeration will typically take about 20-30 minutes, while freezing will take around 10-15 minutes. Chilling helps the chocolate harden quickly, making them easier to handle and preventing the chocolate from melting at room temperature, especially if you are in a warmer climate. If you are in a rush, freezing is a great option, but be mindful not to leave them in the freezer for too long, as the pretzels can become brittle and the chocolate can develop condensation.
- Enjoy! Once the chocolate is completely set and firm, your chocolate-covered pretzel sticks are ready to be enjoyed! They are best enjoyed soon after they are made, but they can also be stored in an airtight container at room temperature or in the refrigerator for longer storage.
Nutrition Facts: A Treat to Indulge in Moderation
(Nutrition facts are estimated and can vary based on specific ingredients and serving size. These are approximate values per serving, assuming 1 serving is 2 chocolate-covered pretzel sticks made with semi-sweet chocolate.)
- Serving Size: 2 pretzel sticks
- Calories: Approximately 150-200 kcal
- Total Fat: 8-12g
Please note: These values are estimates. For precise nutritional information, use a nutrition calculator and input the specific brands and quantities of ingredients you use. Chocolate-covered pretzel sticks are a treat and should be enjoyed in moderation as part of a balanced diet.
Preparation Time: Quick and Easy Sweet Indulgence
- Prep Time: 15 minutes (includes gathering ingredients, preparing workspace, and melting chocolate)
- Cook Time/Set Time: 20-30 minutes (primarily for chocolate setting, refrigeration time)
- Total Time: Approximately 35-45 minutes
This recipe is incredibly quick and easy, making it perfect for last-minute dessert cravings or when you need a fun snack in a hurry. The majority of the time is spent waiting for the chocolate to set, which is largely hands-off time. The active preparation time is minimal, making it a great recipe even for beginner bakers or busy individuals. You can even involve kids in the dipping and decorating process for a fun family activity!
How to Serve Chocolate-Covered Pretzel Sticks: Elevate Your Snacking Experience
Chocolate-covered pretzel sticks are incredibly versatile and can be served in a variety of ways to elevate your snacking experience. Here are some ideas:
- Simple Snack: Enjoy them straight out of the fridge or at room temperature as a simple and satisfying snack. They are perfect for an afternoon pick-me-up or a sweet treat after dinner.
- Party Platter: Arrange them attractively on a platter for parties, gatherings, or holiday celebrations. They are visually appealing and always a crowd-pleaser. You can even create themed platters by using different colored sprinkles or chocolates to match the occasion.
- Dessert Board Addition: Incorporate them into a dessert board or charcuterie board alongside other sweet treats like cookies, brownies, fruit, and cheeses. The salty pretzels offer a nice contrast to the other sweet elements.
- Gift Giving: Package them in cellophane bags tied with ribbons for a thoughtful homemade gift. They are perfect for holiday gifts, teacher appreciation presents, or party favors.
- Dessert Dipping Station: Set up a fun dessert dipping station with melted chocolate, pretzel sticks, and various toppings. Let your guests dip and decorate their own pretzel sticks for an interactive and engaging dessert experience.
- Ice Cream Sundae Topping: Break them into smaller pieces and use them as a crunchy topping for ice cream sundaes or yogurt parfaits. They add a delightful texture and flavor contrast.
- Coffee or Tea Companion: Serve them alongside a cup of coffee, tea, or hot chocolate for a perfect sweet and salty pairing. The pretzel sticks are great for dipping into your warm beverage.
- Kids’ Lunchboxes: Include a couple of chocolate-covered pretzel sticks in your kids’ lunchboxes as a special treat. They are a fun and portable snack that kids will love.
Pro Tips for Perfect Chocolate-Covered Pretzel Sticks: Elevate Your Recipe Game
To ensure your chocolate-covered pretzel sticks are a resounding success every time, here are some pro tips to elevate your recipe game:
- Choose the Right Chocolate: Opt for good quality chocolate chips or melting wafers. The quality of the chocolate significantly impacts the flavor and texture of the final product. For a smoother finish, melting wafers are often easier to work with and require less added oil.
- Don’t Overheat the Chocolate: Whether you are using the microwave or a double boiler, be patient and melt the chocolate gently. Overheating can cause the chocolate to seize or become grainy. Microwave in short intervals and stir frequently. With a double boiler, ensure the water is simmering gently, not boiling vigorously.
- Use Shortening or Coconut Oil Sparingly: While a little bit of shortening or coconut oil can help thin the chocolate and create a glossy finish, using too much can make the chocolate too thin and less flavorful. Start with a small amount and add more gradually if needed.
- Ensure Pretzels are Dry: Make sure your pretzel sticks are completely dry before dipping them in chocolate. Excess moisture can prevent the chocolate from adhering properly and can lead to a less smooth coating.
- Work Quickly: Once you start dipping, work relatively quickly, especially if you are adding toppings. The chocolate sets fairly quickly, and you want to add your toppings before it hardens too much.
- Control the Chocolate Coating Thickness: To avoid overly thick chocolate, gently tap the pretzel against the edge of the bowl after dipping to remove excess chocolate. This will result in a more delicate and enjoyable treat.
- Experiment with Flavors: Don’t be afraid to experiment with different types of chocolate and flavorings. Try using white chocolate, dark chocolate, or even flavored melting wafers like peppermint or caramel. You can also add extracts like vanilla, peppermint, or almond extract to your melted chocolate for extra flavor.
- Proper Storage is Key: Store your chocolate-covered pretzel sticks in an airtight container at room temperature or in the refrigerator. If storing at room temperature, keep them in a cool, dry place away from direct sunlight. Refrigeration will help them last longer, especially in warmer climates, but may cause the chocolate to bloom slightly (develop a white film), which is harmless and doesn’t affect the taste.
Frequently Asked Questions About Chocolate-Covered Pretzel Sticks: Your Queries Answered
Q1: Can I use different types of pretzels for this recipe?
A1: Absolutely! While pretzel sticks are classic, you can definitely use pretzel rods, mini pretzels, pretzel snaps, or even pretzel twists. The dipping technique remains the same, just adjust your workspace accordingly to accommodate different shapes and sizes.
Q2: What if my chocolate becomes too thick or seizes?
A2: If your chocolate becomes too thick, you can add a tiny bit more shortening or coconut oil, a teaspoon at a time, and stir until smooth. If your chocolate seizes (becomes grainy and hard), unfortunately, it’s difficult to fully recover. However, you can sometimes salvage it by adding a tablespoon of boiling water and stirring vigorously. This may change the texture slightly, but it can sometimes bring it back together enough to use. Prevention is key – melt chocolate gently and avoid overheating.
Q3: Can I use white chocolate or dark chocolate instead of milk chocolate?
A3: Yes, you can use any type of chocolate you prefer! White chocolate, dark chocolate, semi-sweet chocolate, and even flavored melting wafers all work wonderfully. Each type will offer a different flavor profile, so experiment to find your favorite combination with the salty pretzels.
Q4: How long do chocolate-covered pretzel sticks last?
A4: Stored properly in an airtight container at room temperature, chocolate-covered pretzel sticks can last for about 1-2 weeks. In the refrigerator, they can last even longer, up to 2-3 weeks. However, they are typically best enjoyed within the first week for optimal freshness and flavor.
Q5: Can I freeze chocolate-covered pretzel sticks?
A5: Yes, you can freeze them! Place them in a single layer on a baking sheet lined with parchment paper and freeze until solid. Once frozen, transfer them to an airtight container or freezer bag. They can be frozen for up to 2-3 months. Thaw them in the refrigerator or at room temperature before serving.
Q6: What are some fun topping ideas besides sprinkles?
A6: The topping possibilities are endless! Consider chopped nuts (peanuts, almonds, pecans, walnuts), shredded coconut, mini chocolate chips, sea salt flakes, toffee bits, dried cranberries, crushed candy canes (for holidays), or even a drizzle of caramel or peanut butter after the chocolate has set.
Q7: Can I make these ahead of time for a party?
A7: Absolutely! Chocolate-covered pretzel sticks are perfect for making ahead of time. Prepare them 1-2 days in advance and store them in an airtight container at room temperature or in the refrigerator. This makes party preparation much easier and less stressful.
Q8: Are chocolate-covered pretzel sticks suitable for kids to help make?
A8: Yes, this is a fantastic recipe to make with kids! Kids can help with dipping the pretzels, adding sprinkles and toppings, and arranging them on the baking sheet. Just supervise them closely, especially during the chocolate melting process, to ensure safety and a fun, collaborative baking experience.