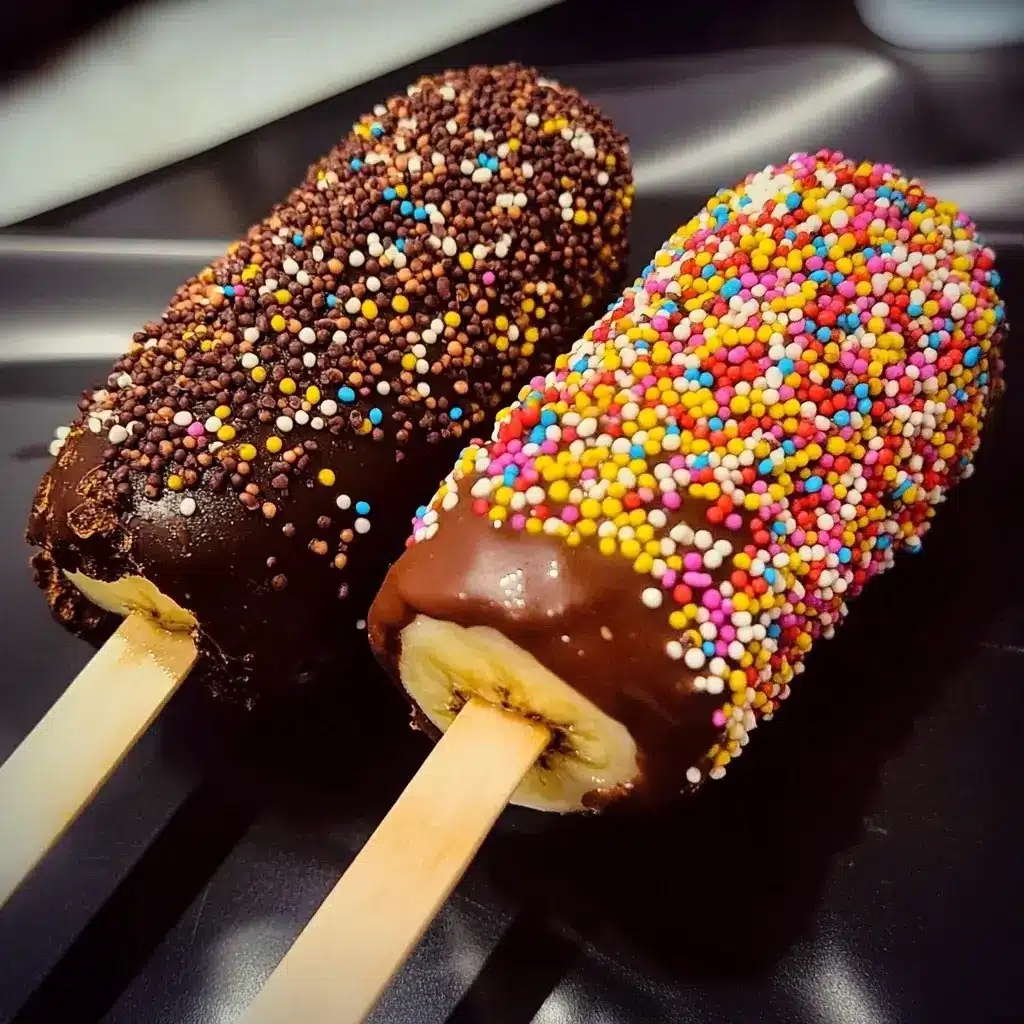

In our house, dessert time is always met with enthusiastic cheers, but sometimes, the usual cakes and cookies just don’t cut it, especially when the weather is warm and we crave something lighter and more refreshing. That’s when Choco Banana Pops with Sprinkles came into our lives, and they quickly became a family favorite. These aren’t just any frozen treats; they are little bundles of joy on a stick! My kids absolutely adore helping me make them – it’s a fantastic activity that’s both fun and yields a delicious reward. From the moment they start dipping the frozen bananas into melted chocolate and showering them with vibrant sprinkles, their eyes light up with pure excitement. And honestly, who can resist that first bite? The crisp, crackly chocolate shell gives way to a creamy, sweet banana center, all enhanced by the playful crunch of sprinkles. Whether it’s a summer afternoon snack, a party treat, or just a fun way to get a little fruit into their diet disguised as dessert, Choco Banana Pops are always a hit. They are incredibly easy to make, surprisingly healthy-ish, and endlessly customizable, making them a winner in my book and, more importantly, in the eyes (and mouths!) of my family. Get ready to create some smiles with these delightful frozen delights!
Ingredients
- Ripe Bananas: Choose bananas that are ripe but still firm, providing the perfect sweetness and texture for freezing.
- Chocolate Chips (Dark, Milk, or White): Select your favorite type or a combination for dipping, adding a rich and decadent chocolate coating.
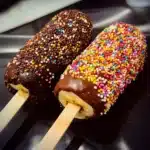
- Sprinkles: Rainbow sprinkles, chocolate sprinkles, or any decorative sprinkles of your choice to add color, fun, and a delightful crunch.
- Coconut Oil (Optional): A small amount of coconut oil helps to thin the chocolate and create a smoother, glossier coating.
- Popsicle Sticks or Skewers: To insert into the bananas, making them easy to handle and enjoy as pops.
Instructions
- Prepare the Bananas: Peel the bananas and cut each one in half crosswise. This creates perfectly sized portions for pops.
- Insert Sticks: Gently insert a popsicle stick or skewer into the cut end of each banana half, pushing it in about halfway through the banana to create a handle.
- Freeze the Bananas: Place the banana pops on a baking sheet lined with parchment paper or silicone mat. Make sure they are not touching each other. Freeze for at least 2-3 hours, or preferably overnight, until they are solid and frozen hard. This step is crucial for the chocolate to adhere properly.
- Melt the Chocolate: While the bananas are freezing, prepare the chocolate coating. In a microwave-safe bowl, combine the chocolate chips and coconut oil (if using). Microwave in 30-second intervals, stirring well after each interval, until the chocolate is completely melted and smooth. Be careful not to overheat the chocolate, as it can seize. Alternatively, you can melt the chocolate in a double boiler on the stovetop.
- Prepare the Sprinkles: Pour your chosen sprinkles into a shallow dish or plate for easy dipping.
- Dip the Frozen Bananas: Once the bananas are thoroughly frozen and the chocolate is melted, take the bananas out of the freezer. Working quickly, dip each frozen banana pop into the melted chocolate, ensuring it is fully coated. If the chocolate starts to thicken, you can microwave it for a few seconds to re-melt it.
- Add Sprinkles: Immediately after dipping the banana in chocolate, roll or sprinkle it generously with your chosen sprinkles while the chocolate is still wet. The sprinkles will adhere best to the melted chocolate.
- Set the Chocolate: Place the chocolate-covered and sprinkled banana pops back on the parchment-lined baking sheet. Freeze for another 15-20 minutes, or until the chocolate is completely set and hardened. This final freeze ensures the pops are firm and ready to enjoy.
- Enjoy! Once the chocolate is set, your Choco Banana Pops with Sprinkles are ready to be served and enjoyed. Store any leftover pops in an airtight container in the freezer for up to a month.
Nutrition Facts
(Per Serving – 1 Choco Banana Pop)
- Servings: 12 (based on 6 bananas, cut in half)
- Calories: Approximately 180-250 kcal (depending on the type and amount of chocolate and sprinkles used)
- Fat: 8-15g
Note: Nutritional values are estimates and can vary based on specific ingredients used. Using dark chocolate with higher cocoa percentage and less sugar, and being mindful of the amount of sprinkles, can help reduce sugar and fat content.
Preparation Time
Prep Time: 20 minutes (This includes peeling bananas, inserting sticks, and melting chocolate.)
Freezing Time: Minimum 2-3 hours (or overnight) for initial freezing, plus 15-20 minutes for final setting after dipping.
Total Time: Approximately 2 hours 35 minutes to 3 hours 20 minutes (mostly inactive freezing time).
These Choco Banana Pops are wonderfully easy to prepare, with most of the time spent waiting for the bananas to freeze. This makes them perfect for making ahead of time for parties or whenever you need a quick and delightful frozen treat.
How to Serve
Choco Banana Pops with Sprinkles are incredibly versatile and can be served in various fun and appealing ways:
- For Kids’ Parties:
- Display them standing upright in a decorated styrofoam block or a jar filled with rice or beans.
- Serve them individually wrapped in small cellophane bags tied with colorful ribbons for a party favor.
- Set up a “Choco Banana Pop Bar” where kids can dip their own frozen bananas in melted chocolate and choose from a variety of sprinkles and toppings.
- As a Refreshing Dessert:
- Serve them as a light and refreshing dessert after a meal, especially during warmer months.
- Pair them with a scoop of vanilla ice cream or a dollop of whipped cream for an extra indulgent treat.
- Arrange them artfully on a dessert platter alongside fresh fruit like berries and sliced kiwi for a visually appealing and balanced dessert.
- For a Fun Snack:
- Enjoy them straight from the freezer as a satisfying and healthier alternative to traditional ice cream or sugary snacks.
- Pack them in lunchboxes for a special treat (ensure they stay frozen by using insulated lunch bags and ice packs).
- Enjoy them as a post-workout snack for a quick energy boost from the banana’s natural sugars.
- For Celebrations and Holidays:
- Customize the sprinkles and chocolate colors to match the theme of the celebration (e.g., red, white, and blue for 4th of July, pastel colors for Easter, Halloween-themed sprinkles).
- Present them on festive platters or cake stands to elevate their presentation for special occasions.
- Use them as a fun and interactive dessert for holiday gatherings, allowing guests to decorate their own banana pops.
Additional Tips for Perfect Choco Banana Pops
Creating the perfect Choco Banana Pops is an art that requires attention to detail and a bit of know-how. Below, we expand on essential tips to help you achieve deliciously coated banana pops that are both visually appealing and satisfying to eat.
Choose the Right Bananas
Selecting the ideal bananas is a critical first step in making Choco Banana Pops. Aim for bananas that are at the perfect ripeness: a bright yellow hue with just a few brown speckles. This stage of ripeness ensures a natural sweetness and maintains a firm yet creamy texture that holds up well during freezing.
Why This Matters: Overripe bananas, while sweet and flavorful, can become too soft and mushy, making them difficult to handle and prone to breaking or falling apart when skewered or dipped in chocolate. On the other hand, slightly underripe bananas tend to be too firm and not as sweet, which can result in a less enjoyable taste experience.
For best results, consider using medium-sized bananas; they provide a good balance between size and sweetness, and are easier to dip in chocolate without overwhelming the palate.
Ensure Bananas are Thoroughly Frozen
Before dipping your bananas in chocolate, it’s crucial to freeze them until they are completely solid. This step is essential for two reasons: it prevents the chocolate from melting off and allows for a clean, crisp coating.
How to Freeze Properly:
- Cut and Skewer: Slice the bananas in half or into thirds, depending on your preferred pop size. Insert wooden popsicle sticks or skewers into the cut ends.
- Single Layer Freezing: Place the banana pops on a parchment-lined baking sheet in a single layer, ensuring they are not touching each other. This prevents them from sticking together during the freezing process.
- Freezing Duration: Freeze the bananas for at least 2-3 hours, or until they are rock solid. This ensures that when you dip them in hot chocolate, the cold banana will help the chocolate set quickly, resulting in a smooth coating.
Control Chocolate Temperature
The temperature of your melted chocolate is critical to achieving the perfect dip. Ideally, the chocolate should be warm but not boiling hot.
Tips for Temperature Control:
- Melt the chocolate in a microwave-safe bowl in short bursts of 20-30 seconds, stirring in between to monitor its temperature and consistency.
- If the chocolate becomes too hot, it can melt the banana too quickly, leading to a thin, runny coating. Conversely, if it cools down too much, it will thicken and become difficult to work with.
- Use a candy thermometer if you have one, aiming for a temperature around 90-95°F (32-35°C) for optimal dipping.
Thin the Chocolate (Optional but Recommended)
For an even more delightful coating, consider thinning your chocolate by adding a teaspoon of coconut oil or vegetable oil.
Benefits of Thinning:
- Thinning the chocolate not only helps achieve a smoother and more even coating but also enhances the chocolate’s glossy appearance.
- It allows for better adherence to the frozen bananas, creating a shell that is less likely to crack or fall off once frozen.
- The added oil can also contribute to the chocolate’s fluidity, making it easier to dip.
Work Quickly
After removing the bananas from the freezer, time is of the essence. Working quickly during the dipping process is essential to ensure the bananas do not soften too much.
Practical Tips:
- Prepare your dipping station in advance by having everything ready to go, including melted chocolate, toppings, and a tray for the coated pops.
- If you find that the bananas are starting to soften, place them back in the freezer for a few minutes before continuing.
Variety of Toppings
One of the joys of making Choco Banana Pops is the ability to customize them with a variety of toppings.
Creative Topping Ideas:
- Chopped Nuts: Almonds, walnuts, or peanuts add a delightful crunch.
- Shredded Coconut: Use sweetened or unsweetened coconut for a tropical twist.
- Mini Chocolate Chips: For an extra chocolatey experience, sprinkle mini chips over the chocolate coating.
- Crushed Cookies: Oreos or graham crackers can enhance texture and flavor.
- Sea Salt Flakes: A sprinkle of sea salt can elevate the flavor profile, balancing sweetness with a savory touch.
- Drizzles: Consider drizzling melted caramel, peanut butter, or even white chocolate over the finished pops for added flair.
Set up a topping station with small bowls of different toppings to make the process fun and interactive for family and friends.
Double Dip for a Thicker Coating
For those who believe more is more, double dipping your banana pops can create a thicker, richer chocolate shell.
How to Double Dip:
- After the first chocolate dip, let the pops freeze for about 10-15 minutes until the chocolate is set.
- Dip them again into the warm chocolate, allowing for a thicker layer to form.
- Return them to the freezer once more to set before adding toppings.
This technique not only enhances the visual appeal with a more substantial chocolate shell but also adds to the overall indulgence of the treat.
Storage is Key
Once you’ve made your delicious Choco Banana Pops, proper storage is essential to maintain their quality.
Storage Tips:
- Place the pops in an airtight container or freezer-safe bags, ensuring they are spaced out to avoid sticking. If stacking is necessary, use parchment paper between layers.
- For best flavor and texture, consume them within 2-3 weeks. While they can be stored for up to a month, the quality may begin to decline as freezer burn can affect the bananas’ texture.
- Consider labeling your storage containers with the date made, so you can keep track of freshness.
By following these expanded tips, you can create Choco Banana Pops that are not only visually stunning but also bursting with flavor and texture, making them a delightful treat for any occasion. Enjoy your delicious creations!
FAQ – Frequently Asked Questions about Choco Banana Pops
Q1: Can I use different types of chocolate?
A: Absolutely! You can use dark chocolate, milk chocolate, white chocolate, or even flavored melting wafers. Each type of chocolate will offer a different flavor profile. Experiment and find your favorite combination! For a richer flavor, use dark chocolate with a higher cocoa percentage.
Q2: How long do Choco Banana Pops last in the freezer?
A: When stored properly in an airtight container or freezer bags, Choco Banana Pops can last in the freezer for up to a month. However, for the best taste and texture, it’s recommended to consume them within 2-3 weeks.
Q3: Can I make these ahead of time for a party?
A: Yes, Choco Banana Pops are perfect for making ahead of time! In fact, it’s recommended to make them in advance as they need time to freeze. Prepare them a day or two before your event and store them in the freezer until you are ready to serve.
Q4: What are some good sprinkle alternatives?
A: Beyond traditional sprinkles, you can use a variety of toppings! Consider chopped nuts (almonds, peanuts, pecans), shredded coconut, mini chocolate chips, crushed Oreos or graham crackers, mini candies, sea salt flakes, or even a drizzle of caramel or peanut butter after the chocolate has set.
Q5: Can I use bananas that are slightly overripe?
A: While slightly overripe bananas can be used, it’s best to use bananas that are ripe but still firm. Overripe bananas tend to be too soft and mushy, making them difficult to handle and freeze. They may also become too sweet and lose their shape when dipped.
Q6: How do I prevent the chocolate from cracking when frozen?
A: Adding a small amount of coconut oil or vegetable oil to the melted chocolate helps to keep it smooth and prevents it from becoming too brittle and cracking when frozen. Also, ensure the bananas are thoroughly frozen before dipping and avoid temperature shocks by not placing them directly from a very warm room into a very cold freezer.
Q7: My chocolate is too thick, what should I do?
A: If your melted chocolate is too thick, you can thin it out by adding a little more coconut oil or vegetable oil, a teaspoon at a time, and stirring until it reaches a smoother consistency. You can also microwave it for a few seconds to re-melt it, but be careful not to overheat it.
Q8: Can I make these vegan?
A: Yes, you can easily make vegan Choco Banana Pops! Simply use vegan chocolate chips (many dark chocolate chips are naturally vegan) and ensure your sprinkles are also vegan-friendly. Most rainbow sprinkles are vegan, but always check the ingredient list to be sure. The rest of the ingredients are naturally vegan, making this a delicious and inclusive treat for everyone!
Choco Banana Pops with Sprinkles
Ingredients
- Ripe Bananas: Choose bananas that are ripe but still firm, providing the perfect sweetness and texture for freezing.
- Chocolate Chips (Dark, Milk, or White): Select your favorite type or a combination for dipping, adding a rich and decadent chocolate coating.
- Sprinkles: Rainbow sprinkles, chocolate sprinkles, or any decorative sprinkles of your choice to add color, fun, and a delightful crunch.
- Coconut Oil (Optional): A small amount of coconut oil helps to thin the chocolate and create a smoother, glossier coating.
- Popsicle Sticks or Skewers: To insert into the bananas, making them easy to handle and enjoy as pops.
Instructions
- Prepare the Bananas: Peel the bananas and cut each one in half crosswise. This creates perfectly sized portions for pops.
- Insert Sticks: Gently insert a popsicle stick or skewer into the cut end of each banana half, pushing it in about halfway through the banana to create a handle.
- Freeze the Bananas: Place the banana pops on a baking sheet lined with parchment paper or silicone mat. Make sure they are not touching each other. Freeze for at least 2-3 hours, or preferably overnight, until they are solid and frozen hard. This step is crucial for the chocolate to adhere properly.
- Melt the Chocolate: While the bananas are freezing, prepare the chocolate coating. In a microwave-safe bowl, combine the chocolate chips and coconut oil (if using). Microwave in 30-second intervals, stirring well after each interval, until the chocolate is completely melted and smooth. Be careful not to overheat the chocolate, as it can seize. Alternatively, you can melt the chocolate in a double boiler on the stovetop.
- Prepare the Sprinkles: Pour your chosen sprinkles into a shallow dish or plate for easy dipping.
- Dip the Frozen Bananas: Once the bananas are thoroughly frozen and the chocolate is melted, take the bananas out of the freezer. Working quickly, dip each frozen banana pop into the melted chocolate, ensuring it is fully coated. If the chocolate starts to thicken, you can microwave it for a few seconds to re-melt it.
- Add Sprinkles: Immediately after dipping the banana in chocolate, roll or sprinkle it generously with your chosen sprinkles while the chocolate is still wet. The sprinkles will adhere best to the melted chocolate.
- Set the Chocolate: Place the chocolate-covered and sprinkled banana pops back on the parchment-lined baking sheet. Freeze for another 15-20 minutes, or until the chocolate is completely set and hardened. This final freeze ensures the pops are firm and ready to enjoy.
- Enjoy! Once the chocolate is set, your Choco Banana Pops with Sprinkles are ready to be served and enjoyed. Store any leftover pops in an airtight container in the freezer for up to a month.
Nutrition
- Serving Size: one normal portion
- Calories: 250
- Fat: 15g