

It’s funny how sometimes the simplest things can bring the most joy. I remember the first time I made these caramelized apple slices; it was a chilly autumn evening, and the aroma of cinnamon and sweet apples filled our kitchen, instantly making it feel warm and cozy. My family, who can sometimes be a tough crowd when it comes to desserts, devoured them in minutes. My youngest even declared them “better than pie!”, a high compliment indeed. What I love most about this recipe, besides its incredible taste, is its sheer versatility. Whether you’re looking for a quick and easy dessert, a delightful topping for your morning pancakes, or a comforting side dish to complement a savory meal, these caramelized apple slices are a guaranteed crowd-pleaser. They are so simple to make, yet the depth of flavor achieved through the caramelization process is truly remarkable. Honestly, if you’re searching for a recipe that is both impressively delicious and effortlessly easy, look no further. This caramelized apple slices recipe is about to become your new go-to for satisfying those sweet cravings.
Ingredients for Irresistible Caramelized Apple Slices
This recipe relies on simple, pantry-staple ingredients, but the magic truly happens in the method. Here’s what you’ll need to create these delightful caramelized apple slices:
- Apples: (About 3-4 medium-sized apples) The star of the show! Choose apples that hold their shape well during cooking. Varieties like Honeycrisp, Fuji, Gala, Braeburn, or Pink Lady are excellent choices. Their slight tartness balances beautifully with the sweetness of the caramel. Avoid apples that tend to get mushy when cooked, such as McIntosh or Red Delicious.
- Butter: (4 tablespoons, unsalted or salted) Butter is crucial for flavor and richness. Unsalted butter allows you to control the saltiness of the dish, while salted butter can add a subtle savory note that enhances the sweetness. Either will work beautifully.
- Brown Sugar: (1/4 cup, packed, light or dark brown sugar) Brown sugar is the key to that beautiful caramel flavor. Light brown sugar will provide a milder caramel taste, while dark brown sugar will offer a richer, molasses-like depth. Both are fantastic, so use what you have on hand or prefer.
- Ground Cinnamon: (1 teaspoon) Cinnamon is the quintessential spice partner for apples, adding warmth and aromatic complexity to the dish. It complements the caramel flavor perfectly and enhances the overall comforting feel.
- Vanilla Extract: (1/2 teaspoon, pure vanilla extract) While optional, a touch of vanilla extract elevates the flavor profile, adding a subtle sweetness and aromatic depth that rounds out the other ingredients. Use pure vanilla extract for the best flavor.
- Water or Apple Juice: (2 tablespoons) A little liquid helps to deglaze the pan and create a luscious sauce. Water works perfectly well, but apple juice will amplify the apple flavor and add an extra layer of sweetness.
- Pinch of Salt: (Optional, but recommended) A tiny pinch of salt is a secret weapon in sweet recipes. It balances the sweetness, enhances the other flavors, and prevents the dish from being overly sugary.
Step-by-Step Instructions for Perfect Caramelized Apple Slices
Creating these caramelized apple slices is surprisingly straightforward. Follow these detailed instructions for guaranteed success:
Step 1: Prepare the Apples
- Wash and Core: Begin by thoroughly washing your chosen apples under cool water. This removes any dirt or residue from the skin. Next, core the apples. You can use an apple corer, or simply cut around the core with a sharp knife.
- Slice the Apples: Slice the apples into even slices, about ¼ to ½ inch thick. Uniform slices are essential for even cooking, ensuring that all the slices caramelize at the same rate and are tender at the same time. You can slice them into wedges or rounds, depending on your preference and how you plan to serve them. Slicing them into wedges is often easier and quicker.
- Prevent Browning (Optional): Apples can oxidize and turn brown quickly once cut. If you’re not cooking them immediately, you can prevent browning by tossing the apple slices with a tablespoon of lemon juice or dipping them in a bowl of water with a squeeze of lemon juice. This step is more for aesthetic purposes and won’t affect the flavor if you skip it and cook the apples promptly.
Step 2: Melt the Butter in a Skillet
- Choose the Right Skillet: Use a large skillet, preferably a non-stick or cast iron skillet. A skillet with a wide surface area allows the apple slices to cook in a single layer without overcrowding, which is crucial for proper caramelization.
- Melt the Butter: Place the skillet over medium heat. Add the butter and let it melt completely. Allow the butter to melt and shimmer slightly, but don’t let it brown or burn. The melted butter creates a flavorful base for caramelizing the apples and prevents them from sticking to the pan.
Step 3: Add the Apple Slices and Cook
- Arrange Apple Slices in a Single Layer: Once the butter is melted, carefully add the apple slices to the skillet in a single layer. Avoid overcrowding the pan, as this will steam the apples instead of caramelizing them. If necessary, cook the apples in batches to ensure they have enough space to brown properly.
- Cook the Apples: Cook the apple slices for about 5-7 minutes on each side, or until they are tender and lightly browned. Resist the urge to stir them too frequently at first. Let them sit undisturbed for a few minutes on each side to develop a nice golden-brown color. Gently flip the slices with a spatula to ensure they cook evenly on both sides. You’ll notice the edges starting to soften and become slightly translucent as they cook.
Step 4: Add Brown Sugar and Cinnamon
- Sprinkle Brown Sugar and Cinnamon: Once the apple slices are tender and lightly browned, sprinkle the brown sugar and ground cinnamon evenly over the apples. The heat from the skillet will melt the brown sugar, creating a luscious caramel sauce.
- Cook Until Caramelized: Continue to cook for another 2-3 minutes, stirring gently to coat the apple slices with the melted brown sugar and cinnamon. The brown sugar will melt and caramelize, creating a rich, syrupy sauce that coats the apples beautifully. Be careful not to overcook at this stage, as the sugar can burn quickly. Keep the heat at medium and watch closely.
Step 5: Add Vanilla Extract and Water (or Apple Juice)
- Stir in Vanilla Extract: Remove the skillet from the heat and stir in the vanilla extract. The residual heat will release the aromatic compounds in the vanilla, enhancing the overall flavor of the dish.
- Deglaze with Water or Apple Juice: Pour in the water or apple juice. This will deglaze the pan, lifting up any flavorful browned bits from the bottom and creating a delicious sauce. Stir gently to combine everything and ensure the apple slices are coated in the sauce.
- Simmer (Optional, for Thicker Sauce): If you prefer a thicker sauce, return the skillet to low heat and let it simmer for a minute or two, allowing the sauce to reduce slightly and thicken. Watch it closely to prevent it from becoming too thick or burning.
Step 6: Serve and Enjoy!
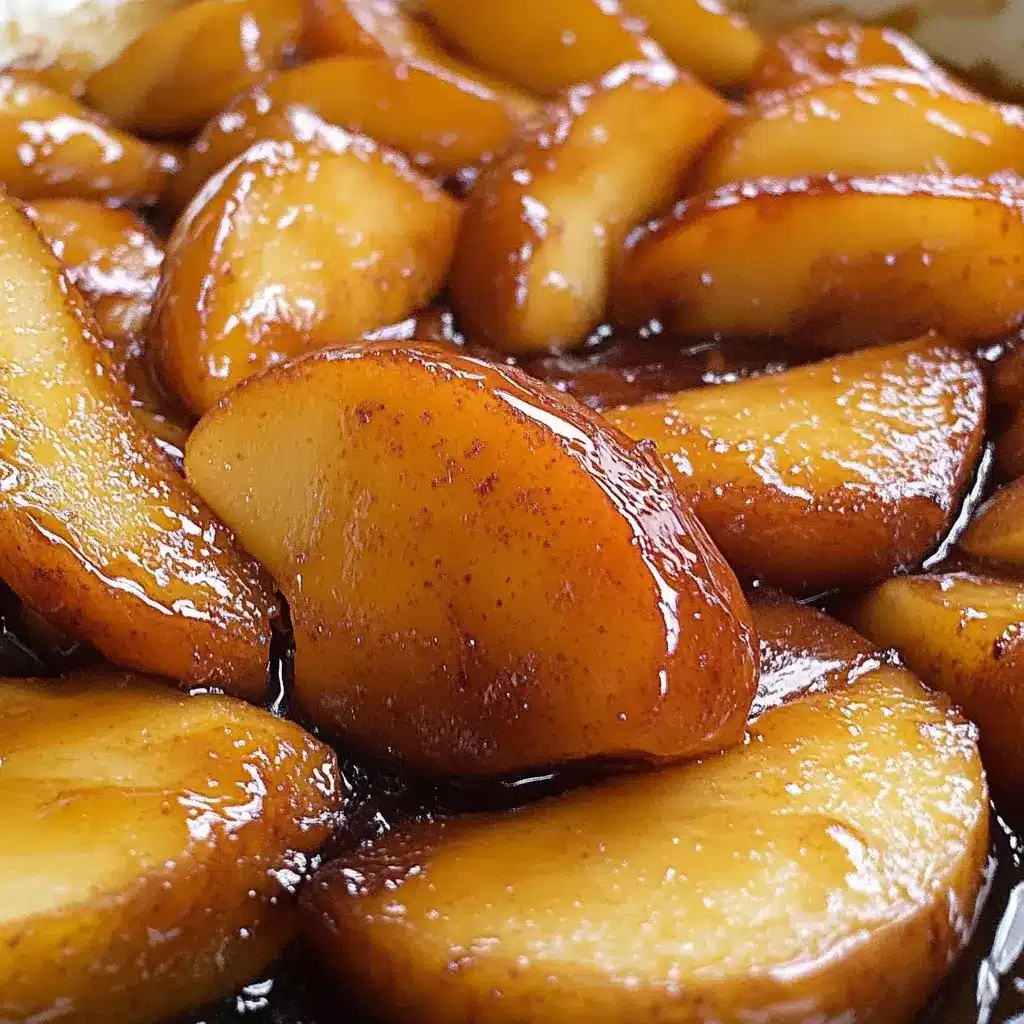
- Serve Warm: Caramelized apple slices are best served warm, either immediately after cooking or slightly cooled. The warm apples and caramel sauce are incredibly comforting and delicious.
- Garnish (Optional): For an extra touch, you can garnish the caramelized apple slices with a sprinkle of extra cinnamon, a dusting of powdered sugar, chopped nuts (like pecans or walnuts), or a drizzle of caramel sauce.
Nutrition Facts for Caramelized Apple Slices
(Approximate values per serving, assuming 4 servings from the recipe, and using medium-sized apples)
- Serving Size: Approximately 1/4 of the recipe (about 3-4 slices)
- Calories: Approximately 200-250 kcal
- Fat: 8-10g
Note: These are estimated values and can vary depending on the specific ingredients used, the size of the apples, and the portion sizes. This recipe is a sweet treat and should be enjoyed in moderation as part of a balanced diet.
Preparation Time for Caramelized Apple Slices
This recipe is a winner when you are short on time but craving something delicious and comforting.
- Prep Time: 10 minutes (washing, coring, and slicing apples)
- Cook Time: 15 minutes (caramelizing the apples and making the sauce)
- Total Time: Approximately 25 minutes
From start to finish, you can have warm, fragrant caramelized apple slices ready in under half an hour. This makes it a perfect dessert for weeknights, quick gatherings, or whenever you need a sweet fix without spending hours in the kitchen. The minimal hands-on time also makes it a joy to prepare.
How to Serve Caramelized Apple Slices: Versatile Serving Suggestions
The beauty of caramelized apple slices lies in their versatility. They can be served in countless ways, transforming from a simple dessert to an elegant topping or a flavorful side dish. Here are some delightful serving suggestions:
- As a Dessert Topping:
- Vanilla Ice Cream: The classic pairing! Warm caramelized apples over cold vanilla ice cream create a delightful contrast in temperature and texture.
- Yogurt or Greek Yogurt: Add a spoonful of caramelized apples to your morning yogurt or as a healthy dessert topping.
- Pancakes or Waffles: Elevate your breakfast or brunch by topping pancakes or waffles with these sweet apple slices.
- Cheesecake: Caramelized apples make a stunning and flavorful topping for cheesecake, especially a classic New York style or a creamy ricotta cheesecake.
- Pound Cake or Angel Food Cake: Serve alongside slices of pound cake or angel food cake for a simple yet elegant dessert.
- Oatmeal or Porridge: Stir into warm oatmeal or porridge for a cozy and flavorful breakfast or snack.
- As a Standalone Dessert:
- Whipped Cream or Crème Fraîche: Serve warm with a dollop of freshly whipped cream or crème fraîche for a simple and satisfying dessert.
- With a Sprinkle of Crumble Topping: For a more decadent dessert, top the caramelized apples with a buttery crumble topping and bake briefly until warmed through.
- Alongside a Scoop of Cinnamon Ice Cream: Enhance the cinnamon notes by pairing with cinnamon ice cream for a double dose of spice and sweetness.
- As a Savory Side Dish:
- With Roasted Pork or Chicken: The sweetness of caramelized apples complements the savory flavors of roasted pork or chicken beautifully.
- With Grilled Cheese Sandwiches: Add a surprising twist to grilled cheese by serving caramelized apples on the side for a sweet and savory combination.
- On a Cheese Board: Include caramelized apple slices on a cheese board to pair with sharp cheddar, brie, or goat cheese for a delightful sweet and savory appetizer.
- With Pork Chops: Serve alongside pan-seared or grilled pork chops for a delicious and balanced meal.
- Incorporated into Baked Goods:
- Apple Pie Filling: Use caramelized apple slices as a base for apple pie filling for an extra layer of flavor and richness.
- Apple Crisp or Crumble: Add caramelized apples to apple crisp or crumble recipes to enhance the apple flavor and create a more complex dessert.
- Apple Turnovers or Pastries: Fill puff pastry or pie dough with caramelized apples to make delicious apple turnovers or pastries.
- Apple Bread or Muffins: Fold caramelized apple slices into batter for apple bread or muffins for added moisture and flavor.
Additional Tips for Perfect Caramelized Apple Slices: Elevate Your Recipe
While this recipe is wonderfully simple, these additional tips will help you achieve caramelized apple slice perfection every time:
- Choose the Right Apple Variety: Opt for apples that are firm and hold their shape well during cooking. Varieties like Honeycrisp, Fuji, Gala, Braeburn, and Pink Lady are ideal. Avoid softer apples like McIntosh or Red Delicious, which can become mushy.
- Slice Apples Evenly for Uniform Cooking: Ensure all apple slices are roughly the same thickness (about ¼ to ½ inch). This is crucial for even cooking and caramelization. Uneven slices will cook at different rates, leading to some slices being undercooked while others are overcooked.
- Don’t Overcrowd the Skillet: Cook the apple slices in batches if necessary to avoid overcrowding the pan. Overcrowding will steam the apples instead of caramelizing them, resulting in a less desirable texture and flavor. Give the apples space to brown and caramelize properly.
- Use Good Quality Butter for Flavor: The butter contributes significantly to the flavor of the caramelized apples. Using good quality butter, whether salted or unsalted, will enhance the richness and overall taste of the dish.
- Adjust Sweetness to Your Preference: The amount of brown sugar can be adjusted to your liking. If you prefer a less sweet dish, reduce the brown sugar slightly. For a sweeter treat, you can add a bit more. Taste and adjust as you go.
- Add a Pinch of Salt for Flavor Balance: A pinch of salt, even in sweet recipes, is essential for balancing the sweetness and enhancing the other flavors. It prevents the dish from tasting one-dimensional and overly sugary.
- Watch the Heat to Prevent Burning: Keep the heat at medium, especially when adding the brown sugar. Brown sugar can burn quickly if the heat is too high, resulting in a bitter taste. Monitor the skillet closely and adjust the heat as needed to prevent burning.
- Experiment with Spices for Different Flavor Profiles: While cinnamon is classic, don’t be afraid to experiment with other warm spices. A pinch of nutmeg, cloves, cardamom, or even ginger can add a unique and delicious twist to your caramelized apple slices.
Frequently Asked Questions (FAQ) about Caramelized Apple Slices
Here are some common questions and answers to help you master this recipe:
Q1: What are the best apples to use for caramelized apple slices?
A: The best apples for caramelizing are firm varieties that hold their shape during cooking. Honeycrisp, Fuji, Gala, Braeburn, and Pink Lady are excellent choices. These apples have a good balance of sweetness and tartness and won’t turn mushy. Avoid softer apples like McIntosh or Red Delicious.
Q2: Can I use different types of sugar besides brown sugar?
A: Yes, you can experiment with other sugars. Granulated sugar will caramelize, but it won’t provide the same depth of flavor as brown sugar. Maple syrup or honey can also be used for a different flavor profile, but you may need to adjust the liquid content and cooking time accordingly. Brown sugar is generally recommended for the classic caramelized flavor.
Q3: Can I make caramelized apple slices ahead of time?
A: Yes, you can prepare caramelized apple slices ahead of time. Let them cool completely and store them in an airtight container in the refrigerator for up to 3 days. Reheat them gently in a skillet over low heat or in the microwave before serving. They may soften slightly upon reheating, but they will still be delicious.
Q4: How do I prevent the apples from getting mushy when caramelized?
A: To prevent mushy apples, use firm apple varieties, slice them evenly, and avoid overcrowding the pan. Don’t overcook them; cook until they are tender-crisp and lightly browned, but not overly soft. Cooking them in a single layer and not stirring too frequently initially also helps maintain their texture.
Q5: Can I add nuts to this recipe?
A: Absolutely! Nuts add a wonderful crunch and flavor to caramelized apple slices. You can add chopped pecans, walnuts, or almonds. Add them towards the end of the cooking process, after the brown sugar and cinnamon, and toast them lightly in the skillet until fragrant. You can also sprinkle toasted nuts over the finished dish as a garnish.
Q6: Can I make this recipe vegan?
A: Yes, this recipe can easily be made vegan. Simply substitute the butter with a plant-based butter alternative. Choose a vegan butter that is designed for cooking and has a good flavor profile. Olive oil or coconut oil can also be used, but they will impart a slightly different flavor.
Q7: What can I do with leftover caramelized apple slices?
A: Leftover caramelized apple slices can be repurposed in many delicious ways! Use them as a filling for crepes or omelets, stir them into oatmeal or yogurt, add them to smoothie bowls, or use them as a topping for pancakes, waffles, or ice cream. They can also be incorporated into baked goods like muffins, bread, or crumbles.
Q8: How long do caramelized apple slices last?
A: Properly stored in an airtight container in the refrigerator, caramelized apple slices will last for up to 3 days. For the best quality and texture, it’s recommended to consume them within this timeframe. Reheat them gently before serving. Freezing is not recommended as it can significantly alter the texture of the apples, making them mushy.
Print
Caramelized Apple Slices Recipe
Ingredients
This recipe relies on simple, pantry-staple ingredients, but the magic truly happens in the method. Here’s what you’ll need to create these delightful caramelized apple slices:
- Apples: (About 3-4 medium-sized apples) The star of the show! Choose apples that hold their shape well during cooking. Varieties like Honeycrisp, Fuji, Gala, Braeburn, or Pink Lady are excellent choices. Their slight tartness balances beautifully with the sweetness of the caramel. Avoid apples that tend to get mushy when cooked, such as McIntosh or Red Delicious.
- Butter: (4 tablespoons, unsalted or salted) Butter is crucial for flavor and richness. Unsalted butter allows you to control the saltiness of the dish, while salted butter can add a subtle savory note that enhances the sweetness. Either will work beautifully.
- Brown Sugar: (1/4 cup, packed, light or dark brown sugar) Brown sugar is the key to that beautiful caramel flavor. Light brown sugar will provide a milder caramel taste, while dark brown sugar will offer a richer, molasses-like depth. Both are fantastic, so use what you have on hand or prefer.
- Ground Cinnamon: (1 teaspoon) Cinnamon is the quintessential spice partner for apples, adding warmth and aromatic complexity to the dish. It complements the caramel flavor perfectly and enhances the overall comforting feel.
- Vanilla Extract: (1/2 teaspoon, pure vanilla extract) While optional, a touch of vanilla extract elevates the flavor profile, adding a subtle sweetness and aromatic depth that rounds out the other ingredients. Use pure vanilla extract for the best flavor.
- Water or Apple Juice: (2 tablespoons) A little liquid helps to deglaze the pan and create a luscious sauce. Water works perfectly well, but apple juice will amplify the apple flavor and add an extra layer of sweetness.
- Pinch of Salt: (Optional, but recommended) A tiny pinch of salt is a secret weapon in sweet recipes. It balances the sweetness, enhances the other flavors, and prevents the dish from being overly sugary.
Instructions
Creating these caramelized apple slices is surprisingly straightforward. Follow these detailed instructions for guaranteed success:
Step 1: Prepare the Apples
- Wash and Core: Begin by thoroughly washing your chosen apples under cool water. This removes any dirt or residue from the skin. Next, core the apples. You can use an apple corer, or simply cut around the core with a sharp knife.
- Slice the Apples: Slice the apples into even slices, about ¼ to ½ inch thick. Uniform slices are essential for even cooking, ensuring that all the slices caramelize at the same rate and are tender at the same time. You can slice them into wedges or rounds, depending on your preference and how you plan to serve them. Slicing them into wedges is often easier and quicker.
- Prevent Browning (Optional): Apples can oxidize and turn brown quickly once cut. If you’re not cooking them immediately, you can prevent browning by tossing the apple slices with a tablespoon of lemon juice or dipping them in a bowl of water with a squeeze of lemon juice. This step is more for aesthetic purposes and won’t affect the flavor if you skip it and cook the apples promptly.
Step 2: Melt the Butter in a Skillet
- Choose the Right Skillet: Use a large skillet, preferably a non-stick or cast iron skillet. A skillet with a wide surface area allows the apple slices to cook in a single layer without overcrowding, which is crucial for proper caramelization.
- Melt the Butter: Place the skillet over medium heat. Add the butter and let it melt completely. Allow the butter to melt and shimmer slightly, but don’t let it brown or burn. The melted butter creates a flavorful base for caramelizing the apples and prevents them from sticking to the pan.
Step 3: Add the Apple Slices and Cook
- Arrange Apple Slices in a Single Layer: Once the butter is melted, carefully add the apple slices to the skillet in a single layer. Avoid overcrowding the pan, as this will steam the apples instead of caramelizing them. If necessary, cook the apples in batches to ensure they have enough space to brown properly.
- Cook the Apples: Cook the apple slices for about 5-7 minutes on each side, or until they are tender and lightly browned. Resist the urge to stir them too frequently at first. Let them sit undisturbed for a few minutes on each side to develop a nice golden-brown color. Gently flip the slices with a spatula to ensure they cook evenly on both sides. You’ll notice the edges starting to soften and become slightly translucent as they cook.
Step 4: Add Brown Sugar and Cinnamon
- Sprinkle Brown Sugar and Cinnamon: Once the apple slices are tender and lightly browned, sprinkle the brown sugar and ground cinnamon evenly over the apples. The heat from the skillet will melt the brown sugar, creating a luscious caramel sauce.
- Cook Until Caramelized: Continue to cook for another 2-3 minutes, stirring gently to coat the apple slices with the melted brown sugar and cinnamon. The brown sugar will melt and caramelize, creating a rich, syrupy sauce that coats the apples beautifully. Be careful not to overcook at this stage, as the sugar can burn quickly. Keep the heat at medium and watch closely.
Step 5: Add Vanilla Extract and Water (or Apple Juice)
- Stir in Vanilla Extract: Remove the skillet from the heat and stir in the vanilla extract. The residual heat will release the aromatic compounds in the vanilla, enhancing the overall flavor of the dish.
- Deglaze with Water or Apple Juice: Pour in the water or apple juice. This will deglaze the pan, lifting up any flavorful browned bits from the bottom and creating a delicious sauce. Stir gently to combine everything and ensure the apple slices are coated in the sauce.
- Simmer (Optional, for Thicker Sauce): If you prefer a thicker sauce, return the skillet to low heat and let it simmer for a minute or two, allowing the sauce to reduce slightly and thicken. Watch it closely to prevent it from becoming too thick or burning.
Step 6: Serve and Enjoy!
- Serve Warm: Caramelized apple slices are best served warm, either immediately after cooking or slightly cooled. The warm apples and caramel sauce are incredibly comforting and delicious.
- Garnish (Optional): For an extra touch, you can garnish the caramelized apple slices with a sprinkle of extra cinnamon, a dusting of powdered sugar, chopped nuts (like pecans or walnuts), or a drizzle of caramel sauce.
Nutrition
- Serving Size: one normal portion
- Calories: 250
- Fat: 10g


