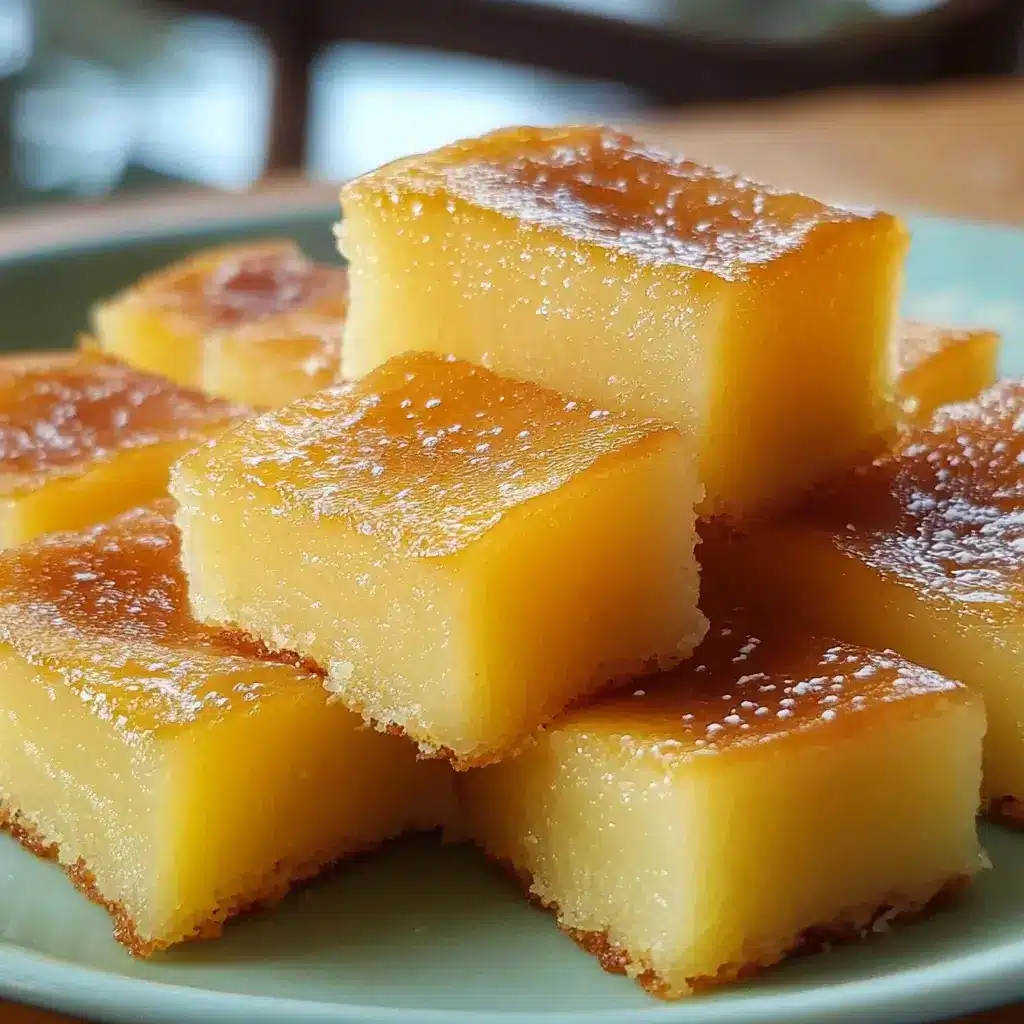

The aroma alone was enough to transport me back to the warm, comforting kitchens of my childhood. Baking has always been a love language in my family, and when I stumbled upon this recipe for Buttery & Chewy Mochi Cake Delight, I knew I had to try it. The promise of a cake that was both buttery and delightfully chewy was simply irresistible. From the first mix of ingredients to the final golden-brown bake, the process was a joy. And the taste? Oh, the taste! My family, usually a tough crowd to please, devoured it in minutes, praising the unique texture and rich, comforting flavor. It’s safe to say this mochi cake has become a new family favorite, and I’m thrilled to share this delightful recipe with you, so you too can experience the magic of this truly special treat.
Ingredients
- Sweet Rice Flour (Mochiko Flour): 3 cups (360g). The star ingredient, providing the signature chewy texture of mochi cake. Ensure you use sweet rice flour, also known as glutinous rice flour or Mochiko, and not regular rice flour.
- Granulated Sugar: 2 cups (400g). Adds sweetness and helps with browning. Adjust to your preference if you prefer a less sweet cake.
- Baking Powder: 2 teaspoons. A leavening agent that helps the cake rise and become light and airy while retaining its chewiness.
- Salt: ½ teaspoon. Enhances the sweetness and balances the flavors of the cake.
- Eggs: 4 large. Provide structure, richness, and moisture to the cake. Use large eggs at room temperature for best results.
- Whole Milk: 1 ½ cups (360ml). Adds moisture and richness, contributing to the cake’s tender crumb. You can substitute with other milk alternatives like almond milk or oat milk, but whole milk provides the best flavor and texture.
- Melted Unsalted Butter: 1 cup (225g). The key to the “buttery” in Buttery & Chewy Mochi Cake. It adds a rich, decadent flavor and tenderizes the cake. Ensure the butter is unsalted to control the overall salt level. Melt and cool slightly before adding to the batter.
- Vanilla Extract: 2 teaspoons. Enhances the overall flavor profile, adding a warm and comforting note. Use pure vanilla extract for the best taste.
Instructions
- Preheat and Prepare: Begin by preheating your oven to 350°F (175°C). While the oven is heating, prepare your baking pan. For this recipe, a 9×13 inch baking pan works perfectly. Grease the pan thoroughly with butter or cooking spray. For extra insurance against sticking, you can line the bottom of the pan with parchment paper, leaving an overhang on the sides to easily lift the baked cake out later. This step is crucial for ensuring the cake releases cleanly and beautifully after baking.
- Combine Dry Ingredients: In a large mixing bowl, whisk together the dry ingredients. This includes the sweet rice flour (Mochiko flour), granulated sugar, baking powder, and salt. Whisk these ingredients together thoroughly for at least a minute. This step is important to evenly distribute the baking powder and salt throughout the flour mixture, which ensures consistent leavening and flavor in the final cake. Breaking up any clumps of flour or sugar at this stage will also contribute to a smoother batter.
- Whisk Wet Ingredients: In a separate mixing bowl, whisk together the wet ingredients. This includes the eggs, whole milk, melted unsalted butter, and vanilla extract. Whisk these ingredients until they are well combined and the mixture is homogenous. Ensure the melted butter has cooled slightly before adding to the eggs to prevent cooking them. Room temperature eggs will incorporate more easily into the mixture, creating a smoother batter. The vanilla extract should be evenly dispersed to flavor the entire cake.
- Combine Wet and Dry Ingredients: Gradually pour the wet ingredients into the bowl of dry ingredients. Using a spatula or a whisk, gently fold the wet ingredients into the dry ingredients until just combined. Be careful not to overmix the batter. Overmixing can develop the gluten in the sweet rice flour (even though it’s gluten-free, overmixing can still toughen the texture slightly), resulting in a less tender cake. Mix until you no longer see streaks of dry flour, but don’t worry if the batter is slightly lumpy at this stage – a few lumps are perfectly acceptable. The batter will be quite liquid, which is normal for mochi cake.
- Pour Batter into Prepared Pan: Pour the prepared batter into the greased and (optionally) parchment-lined baking pan. Spread the batter evenly across the pan using a spatula to ensure a uniform thickness, which will promote even baking. Gently tap the pan on the countertop a few times to release any trapped air bubbles within the batter. This step helps create a smoother surface on the baked cake.
- Bake in Preheated Oven: Place the pan in the preheated oven and bake for 50-60 minutes, or until a toothpick inserted into the center of the cake comes out clean. The baking time may vary slightly depending on your oven, so it’s important to check for doneness. The top of the cake should be golden brown and slightly springy to the touch. If the top is browning too quickly, you can loosely tent the pan with aluminum foil for the last 15-20 minutes of baking to prevent it from over-browning while ensuring the inside is fully cooked.
- Cool Completely: Once the cake is baked, remove it from the oven and place it on a wire rack to cool completely in the pan. Allow the cake to cool fully before cutting and serving. This is crucial for the texture of mochi cake. As it cools, the cake will set and become chewier. Cutting into it while it’s still warm can result in a slightly gummy texture. Cooling allows the cake to firm up and develop its signature chewy texture. For the best texture, you can even chill the cake in the refrigerator for a couple of hours after it has cooled to room temperature. This will enhance the chewiness even further.
- Cut and Serve: Once the mochi cake is completely cooled, it’s ready to cut and serve. If you lined the pan with parchment paper, lift the cake out of the pan using the parchment paper overhang. Cut the cake into squares or rectangles using a sharp knife. For clean cuts, you can wipe the knife clean between slices, especially if the cake is slightly sticky. Mochi cake is delicious served at room temperature or slightly chilled.
Nutrition Facts
- Serving Size: 1 square (based on 12 servings from a 9×13 inch pan)
- Calories per Serving: Approximately 350-400 kcal
- Total Fat: 15-20g
(Note: Nutritional values are estimates and can vary based on specific ingredients and portion sizes.)
Preparation Time
- Prep Time: 15 minutes
- Cook Time: 50-60 minutes
- Total Time: 1 hour 5-1 hour 15 minutes (excluding cooling time)
How to Serve
- Classic Squares: Cut the cooled mochi cake into classic squares or rectangles for easy serving and a traditional presentation. Perfect for potlucks, gatherings, or a simple dessert at home.
- Dust with Powdered Sugar: A simple yet elegant way to enhance the visual appeal and add a touch of sweetness. Dust the top of the cooled cake with powdered sugar just before serving.
- Topped with Fresh Fruit: Pair the rich, buttery flavor of the mochi cake with the brightness of fresh fruit. Berries like strawberries, blueberries, and raspberries are excellent choices. Sliced mangoes or peaches also complement the cake beautifully.
- Whipped Cream or Ice Cream: Serve a square of mochi cake alongside a dollop of freshly whipped cream or a scoop of vanilla ice cream. The cool creaminess contrasts wonderfully with the chewy texture and buttery flavor of the cake.
- With a Drizzle of Honey or Maple Syrup: For added sweetness and flavor depth, drizzle a bit of honey or maple syrup over the cake slices just before serving. This adds a lovely glaze and enhances the natural sweetness of the mochi cake.
- Alongside Coffee or Tea: Mochi cake makes a delightful accompaniment to a cup of hot coffee or tea. The rich flavors of the cake pair perfectly with the warmth and slight bitterness of these beverages, making it a perfect afternoon treat or after-dinner dessert.
Additional Tips
- Use Fresh Baking Powder: Baking powder is a crucial leavening agent in this recipe. Ensure your baking powder is fresh (check the expiration date). Old baking powder may lose its potency, resulting in a cake that doesn’t rise properly and is denser than desired. For optimal results, replace your baking powder every 6-12 months.
- Measure Ingredients Accurately: Baking is a science, and accurate measurements are essential, especially for recipes like mochi cake where texture is key. Use measuring cups and spoons for dry and liquid ingredients, and level off dry ingredients with a straight edge. For best accuracy, especially with flour, consider using a kitchen scale to weigh ingredients in grams, as cup measurements can vary.
- Don’t Overmix the Batter: As mentioned in the instructions, avoid overmixing the batter once you combine the wet and dry ingredients. Overmixing can develop the gluten (even in gluten-free flour like sweet rice flour, it can still affect texture) and result in a tougher cake. Mix just until the ingredients are combined and no streaks of dry flour remain. A few lumps are okay.
- Adjust Sugar to Your Preference: While this recipe calls for 2 cups of sugar, you can adjust the sweetness to your liking. If you prefer a less sweet cake, you can reduce the sugar to 1 ¾ cups or even 1 ½ cups. Keep in mind that sugar also contributes to the texture and browning of the cake, so reducing it significantly may slightly alter the final outcome.
- Experiment with Flavor Extracts: Vanilla extract is classic, but feel free to experiment with other flavor extracts to customize your mochi cake. Almond extract, coconut extract, or even a hint of citrus extract like lemon or orange zest can add a unique twist to the flavor profile. Add extracts in small amounts, starting with ½ teaspoon and tasting as you go, as they can be potent.
- Store Properly for Best Texture: Mochi cake is best enjoyed fresh, but leftovers can be stored in an airtight container at room temperature for 2-3 days. To maintain the chewy texture, avoid storing it in the refrigerator, as refrigeration can sometimes dry out the cake slightly. If you do refrigerate it, let it come to room temperature before serving to regain some of its chewiness. You can also gently reheat slices in the microwave for a few seconds to soften them slightly.
FAQ Section
Q1: Can I use regular rice flour instead of sweet rice flour (Mochiko flour)?
A: No, you cannot substitute regular rice flour for sweet rice flour in this recipe. Sweet rice flour, also known as glutinous rice flour or Mochiko flour, is essential for achieving the signature chewy texture of mochi cake. Regular rice flour will result in a completely different texture – it will be more crumbly and less chewy. Make sure to specifically look for sweet rice flour or Mochiko flour, which is widely available in Asian grocery stores and many supermarkets.
Q2: Is mochi cake gluten-free?
A: Yes, mochi cake is naturally gluten-free as it is made with sweet rice flour, which is gluten-free. This recipe is perfect for those who are following a gluten-free diet or have gluten sensitivities. However, it’s always important to check the labels of all your ingredients, especially baking powder, to ensure they are certified gluten-free if you are strictly avoiding gluten due to allergies or celiac disease.
Q3: Can I make mochi cake ahead of time?
A: Yes, mochi cake can be made ahead of time. In fact, many people find that the texture of mochi cake is even better the day after it is baked, as the chewiness develops further as it cools and rests. You can bake the mochi cake a day in advance and store it in an airtight container at room temperature. It will remain moist and delicious for several days.
Q4: My mochi cake is not chewy, what did I do wrong?
A: There are a few reasons why your mochi cake might not be as chewy as expected. Firstly, ensure you used sweet rice flour (Mochiko flour) and not regular rice flour. Secondly, avoid overmixing the batter. Overmixing can sometimes toughen the texture slightly. Thirdly, make sure you baked the cake for the correct duration and allowed it to cool completely. Cooling is crucial for the chewiness to develop. If you underbake it, it might be too soft, and if you overbake it, it might be drier. Also, ensure your baking powder is fresh, as old baking powder might affect the texture.
Q5: Can I add toppings or mix-ins to this mochi cake recipe?
A: Absolutely! Mochi cake is quite versatile, and you can definitely add toppings or mix-ins to customize it to your taste. Popular additions include sesame seeds (black or white) sprinkled on top before baking for a nutty flavor and visual appeal. You can also add chocolate chips, shredded coconut, chopped nuts (like macadamia nuts or walnuts), or even fruit pieces like blueberries or chopped mangoes to the batter before baking. Get creative and experiment with your favorite flavors!
Q6: Can I halve this recipe?
A: Yes, you can easily halve this recipe if you want to make a smaller batch. Simply halve all the ingredient quantities. If you halve the recipe, it’s best to bake it in a smaller pan, such as an 8×8 inch square pan or a 9-inch round pan, and you may need to slightly reduce the baking time. Keep an eye on it and check for doneness with a toothpick. Halving the recipe is a great option if you are baking for a smaller group or just want to try the recipe without making a large cake.
Print
Buttery & Chewy Mochi Cake Delight
Ingredients
- Sweet Rice Flour (Mochiko Flour): 3 cups (360g). The star ingredient, providing the signature chewy texture of mochi cake. Ensure you use sweet rice flour, also known as glutinous rice flour or Mochiko, and not regular rice flour.
- Granulated Sugar: 2 cups (400g). Adds sweetness and helps with browning. Adjust to your preference if you prefer a less sweet cake.
- Baking Powder: 2 teaspoons. A leavening agent that helps the cake rise and become light and airy while retaining its chewiness.
- Salt: ½ teaspoon. Enhances the sweetness and balances the flavors of the cake.
- Eggs: 4 large. Provide structure, richness, and moisture to the cake. Use large eggs at room temperature for best results.
- Whole Milk: 1 ½ cups (360ml). Adds moisture and richness, contributing to the cake’s tender crumb. You can substitute with other milk alternatives like almond milk or oat milk, but whole milk provides the best flavor and texture.
- Melted Unsalted Butter: 1 cup (225g). The key to the “buttery” in Buttery & Chewy Mochi Cake. It adds a rich, decadent flavor and tenderizes the cake. Ensure the butter is unsalted to control the overall salt level. Melt and cool slightly before adding to the batter.
- Vanilla Extract: 2 teaspoons. Enhances the overall flavor profile, adding a warm and comforting note. Use pure vanilla extract for the best taste.
Instructions
- Preheat and Prepare: Begin by preheating your oven to 350°F (175°C). While the oven is heating, prepare your baking pan. For this recipe, a 9×13 inch baking pan works perfectly. Grease the pan thoroughly with butter or cooking spray. For extra insurance against sticking, you can line the bottom of the pan with parchment paper, leaving an overhang on the sides to easily lift the baked cake out later. This step is crucial for ensuring the cake releases cleanly and beautifully after baking.
- Combine Dry Ingredients: In a large mixing bowl, whisk together the dry ingredients. This includes the sweet rice flour (Mochiko flour), granulated sugar, baking powder, and salt. Whisk these ingredients together thoroughly for at least a minute. This step is important to evenly distribute the baking powder and salt throughout the flour mixture, which ensures consistent leavening and flavor in the final cake. Breaking up any clumps of flour or sugar at this stage will also contribute to a smoother batter.
- Whisk Wet Ingredients: In a separate mixing bowl, whisk together the wet ingredients. This includes the eggs, whole milk, melted unsalted butter, and vanilla extract. Whisk these ingredients until they are well combined and the mixture is homogenous. Ensure the melted butter has cooled slightly before adding to the eggs to prevent cooking them. Room temperature eggs will incorporate more easily into the mixture, creating a smoother batter. The vanilla extract should be evenly dispersed to flavor the entire cake.
- Combine Wet and Dry Ingredients: Gradually pour the wet ingredients into the bowl of dry ingredients. Using a spatula or a whisk, gently fold the wet ingredients into the dry ingredients until just combined. Be careful not to overmix the batter. Overmixing can develop the gluten in the sweet rice flour (even though it’s gluten-free, overmixing can still toughen the texture slightly), resulting in a less tender cake. Mix until you no longer see streaks of dry flour, but don’t worry if the batter is slightly lumpy at this stage – a few lumps are perfectly acceptable. The batter will be quite liquid, which is normal for mochi cake.
- Pour Batter into Prepared Pan: Pour the prepared batter into the greased and (optionally) parchment-lined baking pan. Spread the batter evenly across the pan using a spatula to ensure a uniform thickness, which will promote even baking. Gently tap the pan on the countertop a few times to release any trapped air bubbles within the batter. This step helps create a smoother surface on the baked cake.
- Bake in Preheated Oven: Place the pan in the preheated oven and bake for 50-60 minutes, or until a toothpick inserted into the center of the cake comes out clean. The baking time may vary slightly depending on your oven, so it’s important to check for doneness. The top of the cake should be golden brown and slightly springy to the touch. If the top is browning too quickly, you can loosely tent the pan with aluminum foil for the last 15-20 minutes of baking to prevent it from over-browning while ensuring the inside is fully cooked.
- Cool Completely: Once the cake is baked, remove it from the oven and place it on a wire rack to cool completely in the pan. Allow the cake to cool fully before cutting and serving. This is crucial for the texture of mochi cake. As it cools, the cake will set and become chewier. Cutting into it while it’s still warm can result in a slightly gummy texture. Cooling allows the cake to firm up and develop its signature chewy texture. For the best texture, you can even chill the cake in the refrigerator for a couple of hours after it has cooled to room temperature. This will enhance the chewiness even further.
- Cut and Serve: Once the mochi cake is completely cooled, it’s ready to cut and serve. If you lined the pan with parchment paper, lift the cake out of the pan using the parchment paper overhang. Cut the cake into squares or rectangles using a sharp knife. For clean cuts, you can wipe the knife clean between slices, especially if the cake is slightly sticky. Mochi cake is delicious served at room temperature or slightly chilled.
Nutrition
- Serving Size: one normal portion
- Calories: 400
- Fat: 20g