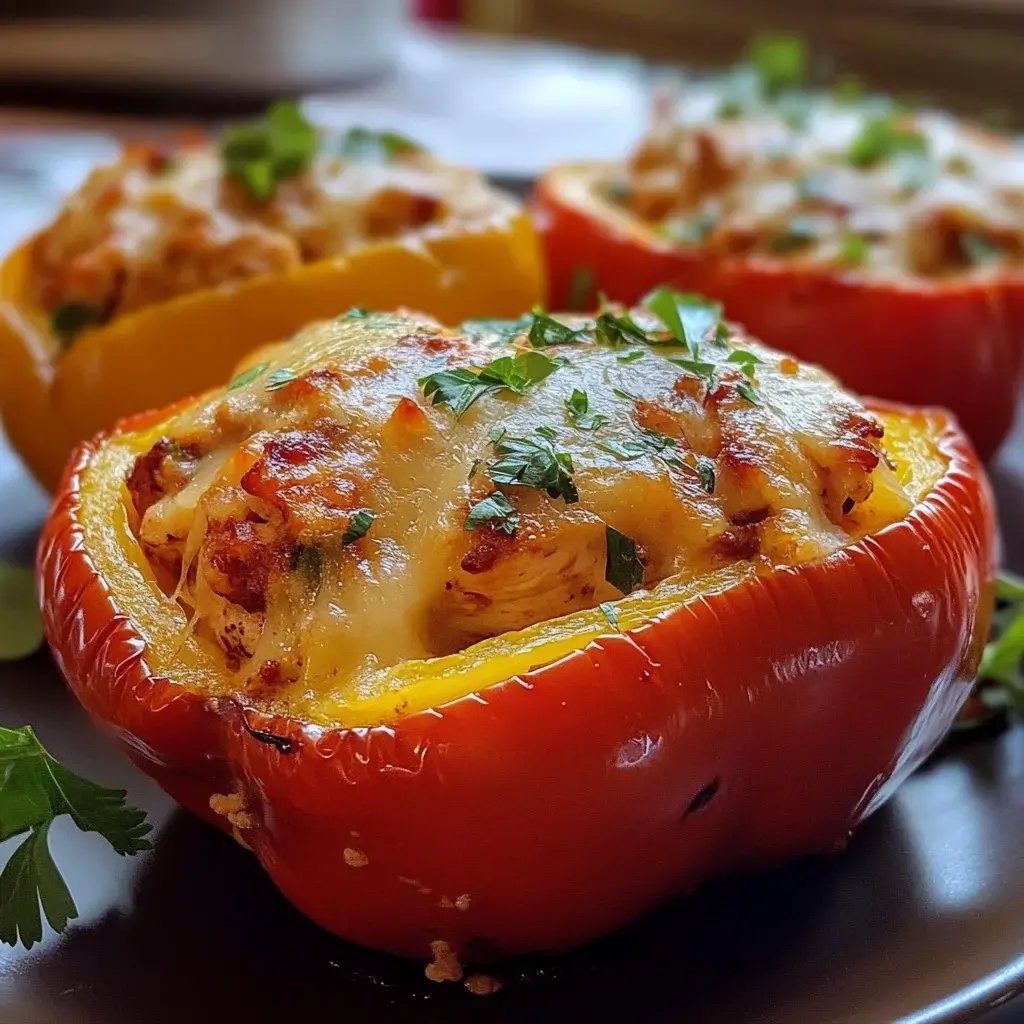

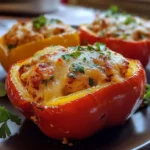
Honestly, finding a weeknight dinner that ticks all the boxes – healthy, satisfying, relatively easy, and genuinely loved by the whole family – can feel like searching for a culinary unicorn. For the longest time, I was stuck in a rotation of the same few meals. Then, I stumbled upon the concept of stuffed peppers, but many seemed too fussy or used ingredients my picky eaters would turn their noses up at. That’s when I decided to create my own version: Baked Chicken Stuffed Peppers. The first time I made these, I was cautiously optimistic. I used colourful bell peppers (because we eat with our eyes first, right?), lean chicken, fluffy rice, and just the right amount of cheese to make it feel indulgent. The aroma filling the kitchen as they baked was incredible – savory chicken, sweet peppers, fragrant herbs. The real test, though, was the dinner table. My husband, usually reserved with praise, declared them “restaurant-worthy.” My kids, who often view vegetables with suspicion, actually ate the peppers along with the delicious filling, asking for seconds! Since then, these Baked Chicken Stuffed Peppers have become a star player in our meal rotation. They are versatile enough to adapt based on what’s in the fridge, feel special enough for guests, yet are practical enough for a Tuesday night. They reheat beautifully for lunches, making them a gift that keeps on giving. This recipe isn’t just about feeding my family; it’s about creating moments of shared enjoyment around a dish that’s both wholesome and incredibly flavorful. It’s proof that healthy eating doesn’t have to be boring, and family dinners can be stress-free and delicious.
Ingredients
Here’s what you’ll need to create these delicious Baked Chicken Stuffed Peppers:
- 4 Medium-Large Bell Peppers: (Any color – red, yellow, orange, or green work well). These form the edible bowls for our filling, offering sweetness (especially red/yellow/orange) and vibrant color. Choose peppers that can stand upright relatively easily.
- 1 tablespoon Olive Oil: (Extra Virgin recommended). Used for sautéing the aromatics and chicken, adding a touch of fruity flavour.
- 1 pound Boneless, Skinless Chicken Breasts or Thighs: (Cut into small ½-inch cubes). The star protein. Breasts are leaner, while thighs offer slightly more flavour and moisture. Cubing ensures quick cooking and easy integration into the filling.
- 1 Medium Onion: (Finely chopped, about 1 cup). Provides a foundational aromatic sweetness and depth to the filling.
- 2 Cloves Garlic: (Minced). Adds that essential pungent kick and fragrance that complements the chicken and vegetables.
- 1 teaspoon Dried Oregano: A classic Mediterranean herb that pairs beautifully with chicken and peppers.
- 1 teaspoon Dried Basil: Adds a touch of sweet, peppery flavour.
- ½ teaspoon Smoked Paprika: Lends a subtle smokiness and beautiful color to the filling.
- Salt: (To taste, start with ½ teaspoon). Enhances all the other flavours. Adjust based on your preference and the saltiness of your broth/canned tomatoes.
- Black Pepper: (Freshly ground, to taste, start with ¼ teaspoon). Adds a touch of spice and rounds out the seasoning.
- 1 (14.5 ounce) can Diced Tomatoes: (Undrained). Adds moisture, acidity, and tomato flavour to bind the filling together. Fire-roasted tomatoes add extra depth.
- ½ cup Chicken Broth: (Low-sodium recommended). Provides additional moisture for cooking the rice and prevents the filling from becoming dry. Vegetable broth can also be used.
- 1 ½ cups Cooked Rice: (White, brown, or even quinoa). Acts as a binder and adds satisfying bulk to the filling. Using pre-cooked rice significantly speeds up the process.
- 1 cup Shredded Cheese: (Monterey Jack, Cheddar, Mozzarella, or a blend). Divided – half for mixing into the filling, half for topping. Provides creaminess, flavour, and that irresistible golden-brown crust.
- 2 tablespoons Fresh Parsley: (Chopped, optional garnish). Adds a touch of freshness and color at the end.
Instructions
Follow these steps for perfectly baked, flavourful chicken stuffed peppers:
- Preheat Oven & Prep Peppers: Preheat your oven to 375°F (190°C). Wash the bell peppers thoroughly. Slice them in half lengthwise, from stem to base. Remove the seeds and membranes carefully, creating a hollowed-out boat shape. If you prefer them to stand upright, you can slice a very thin layer off the rounded bottom (be careful not to cut through!) or cut the tops off and hollow them out like little pots (this method often requires slightly longer baking). Arrange the pepper halves, cut-side up, in a 9×13 inch baking dish or another oven-safe dish large enough to hold them snugly. Add about ½ inch of water to the bottom of the dish – this helps steam the peppers and prevents them from drying out or scorching on the bottom during baking.
- Cook the Chicken: Heat the olive oil in a large skillet or Dutch oven over medium-high heat. Once shimmering, add the cubed chicken. Season generously with about half of the salt and pepper. Cook, stirring occasionally, until the chicken is lightly browned and cooked through (no longer pink inside), about 5-7 minutes. Use a slotted spoon to remove the chicken from the skillet and set it aside on a plate. Leave the flavorful drippings in the skillet.
- Sauté Aromatics: Reduce the heat to medium. Add the chopped onion to the same skillet. Cook, stirring frequently, until the onion softens and becomes translucent, about 4-5 minutes. Add the minced garlic, dried oregano, dried basil, and smoked paprika. Cook for another minute, stirring constantly, until the spices are fragrant. This step, known as “blooming” the spices, intensifies their flavour.
- Combine Filling Base: Pour the undrained diced tomatoes and chicken broth into the skillet with the onions and spices. Stir well, scraping up any browned bits (fond) from the bottom of the skillet – these add lots of flavour! Bring the mixture to a simmer.
- Add Rice and Chicken: Reduce the heat to low. Stir the cooked rice and the previously cooked chicken back into the skillet. Mix everything together thoroughly until well combined. Taste the filling and adjust seasoning if necessary, adding the remaining salt and pepper, or more herbs if desired.
- Incorporate Cheese: Remove the skillet from the heat. Stir in ½ cup of the shredded cheese until it’s melted and integrated into the filling. This makes the filling creamier and richer.
- Stuff the Peppers: Carefully spoon the chicken and rice mixture evenly into each prepared bell pepper half. Mound the filling slightly, but don’t pack it down too tightly, as this can make the filling dense. Ensure each pepper is generously filled.
- Prepare for Baking: Pour out any excess water you initially added to the baking dish, leaving maybe just a tablespoon or two. Carefully place the stuffed peppers back into the dish. Sprinkle the remaining ½ cup of shredded cheese evenly over the top of each stuffed pepper.
- Bake: Cover the baking dish loosely with aluminum foil. This helps the peppers soften and cook through without the topping burning too quickly. Bake in the preheated oven for 30 minutes.
- Brown the Topping: After 30 minutes, carefully remove the foil. Continue baking for another 15-20 minutes, or until the peppers are tender (easily pierced with a fork) and the cheese topping is melted, bubbly, and lightly golden brown. If you like a crispier topping, you can switch the oven to the broil setting for the last 1-2 minutes, watching very carefully to prevent burning.
- Rest and Serve: Remove the baking dish from the oven. Let the stuffed peppers rest for 5-10 minutes before serving. This allows the filling to set slightly and the peppers to cool down just enough to handle. Garnish with fresh chopped parsley, if desired, before serving warm.
Nutrition Facts
Nutritional information is an estimate and can vary based on specific ingredients used.
- Servings: 4 (assuming each person eats two pepper halves)
- Calories per Serving: Approximately 450-550 kcal (depending on cheese type, chicken cut, and additions)
- Protein: High in protein (approx. 35-45g per serving), primarily from the chicken, essential for muscle maintenance and satiety.
- Vitamin C: Excellent source of Vitamin C (especially if using red or yellow peppers), a powerful antioxidant important for immune function.
- Fiber: Good source of dietary fiber (approx. 6-8g per serving) from the peppers, rice (especially if using brown rice), and vegetables, aiding digestion and promoting fullness.
- Sodium: Moderate sodium content, controllable by using low-sodium broth, no-salt-added tomatoes, and adjusting added salt.
- Fat: Contains moderate fat (approx. 15-25g per serving), mainly from the olive oil, chicken (especially thighs), and cheese. Choose leaner chicken and reduced-fat cheese to lower fat content if desired.
Preparation Time
- Prep Time: Approximately 25-30 minutes (includes chopping vegetables, cubing chicken, measuring ingredients, and preparing the peppers). This can be reduced if using pre-chopped vegetables or leftover cooked chicken/rice.
- Cook Time: Approximately 45-55 minutes (includes sautéing time and baking time).
- Total Time: Approximately 1 hour 10 minutes to 1 hour 25 minutes.
How to Serve
These Baked Chicken Stuffed Peppers are quite a complete meal on their own, but here are some ideas to round them out or present them beautifully:
- Garnishes:
- A sprinkle of fresh chopped parsley or cilantro for freshness and color.
- A dollop of sour cream, plain Greek yogurt, or crème fraîche for a cool, creamy contrast.
- A dash of hot sauce or red pepper flakes for those who like extra heat.
- A crumble of feta cheese or cotija cheese over the top after baking for a salty tang.
- A few sliced green onions.
- Side Dishes:
- Simple Green Salad: A light salad with a vinaigrette dressing complements the richness of the peppers. Think mixed greens, cucumber, and cherry tomatoes.
- Crusty Bread: Perfect for soaking up any delicious juices from the peppers or the pan. Garlic bread is also a fantastic option.
- Steamed Vegetables: Lightly steamed broccoli, green beans, or asparagus add extra greens to the plate without competing with the main dish.
- Cornbread: A slightly sweet cornbread pairs wonderfully with the savory filling.
- Light Soup: A cup of simple tomato soup or a light vegetable broth can be a nice starter.
- Presentation:
- Serve directly from the baking dish for a rustic, family-style feel.
- Plate individually, perhaps placing two pepper halves side-by-side or slightly overlapping.
- Ensure the cheesy topping is nicely golden and bubbly for visual appeal.
Additional Tips
Enhance your Baked Chicken Stuffed Pepper experience with these handy tips:
- Pepper Perfection: For softer peppers, you can pre-bake or blanch them before stuffing. To pre-bake, place the halved peppers cut-side down in the baking dish with water and bake at 375°F (190°C) for 15-20 minutes while you prepare the filling. To blanch, drop the pepper halves into boiling water for 3-4 minutes, then immediately transfer to ice water to stop the cooking before stuffing. This ensures they are tender even if you prefer a shorter overall bake time for the filling.
- Rice Variations: Don’t have cooked white rice? Use cooked brown rice for extra fiber and a nuttier flavour. Quinoa is a great gluten-free, high-protein alternative. Cauliflower rice works well for a low-carb version (add it raw or lightly sautéed with the onions). You can even use orzo pasta! Remember to use cooked grains unless the recipe specifically instructs cooking it within the filling (which this one doesn’t, to save time).
- Chicken Shortcuts: Save time by using leftover cooked chicken (like rotisserie chicken or previously grilled/baked chicken). Simply shred or dice it and add it to the filling mixture after sautéing the aromatics (Step 5). Ground chicken can also be substituted; brown it with the onions until cooked through.
- Cheese Choices: Experiment with different cheeses! Pepper Jack adds a spicy kick. Provolone offers a sharper flavour. A blend of mozzarella and Parmesan gives great melt and flavour. For a dairy-free option, use your favourite dairy-free shreds.
- Spice It Up (or Down): Adjust the heat level to your preference. Add a pinch of red pepper flakes, cayenne pepper, or a finely chopped jalapeño (sautéed with the onions) for more heat. For a milder version, omit the smoked paprika or ensure your diced tomatoes aren’t fire-roasted. You can also explore different spice profiles – try adding cumin and chili powder for a Tex-Mex twist, or Italian seasoning blend instead of individual herbs.
- Make-Ahead Magic: This recipe is great for meal prep. You can prepare the entire filling a day or two in advance and store it covered in the refrigerator. You can also stuff the peppers completely, cover tightly, and refrigerate for up to 24 hours before baking (you might need to add 5-10 minutes to the initial covered baking time if baking straight from the fridge).
- Prevent Soggy Bottoms: Ensure you drain most of the water from the baking dish before adding the stuffed peppers for the main bake (Step 8). While a little water helps steam initially, too much can make the pepper bottoms soggy. Also, ensure your filling isn’t overly wet – if your diced tomatoes seem very watery, you can drain them slightly.
- Checking for Doneness: The key indicators are tender peppers and a hot, bubbly filling. Pierce the thickest part of a pepper wall with a fork or knife – it should go in easily with little resistance. The cheese topping should be melted and golden. If using a meat thermometer, the internal temperature of the filling should reach 165°F (74°C).
FAQ
Here are answers to some frequently asked questions about Baked Chicken Stuffed Peppers:
- Can I use different meat instead of chicken?
Absolutely! Ground beef, ground turkey, ground sausage (Italian sausage is particularly delicious), or even leftover pulled pork would work wonderfully. Simply brown the ground meat with the onions, draining any excess fat before proceeding with the recipe. Adjust seasonings as needed to complement the chosen meat. - How can I make this recipe vegetarian?
Easily! Omit the chicken and substitute it with plant-based protein or more vegetables. Good options include:- Beans/Lentils: Add a can of rinsed black beans, kidney beans, or cooked lentils to the filling along with the rice.
- Vegetables: Increase the amount of onion and add other chopped vegetables like mushrooms, zucchini, corn, or spinach (sauté them with the onions).
- Plant-Based Ground: Use a plant-based ground “meat” substitute, browning it as you would ground meat.
- Remember to substitute vegetable broth for the chicken broth.
- Can I make a low-carb version?
Yes! The main carbohydrate source is the rice. Replace the cooked rice with an equal amount of cauliflower rice (you can add it raw to the filling mixture or lightly sauté it first). Ensure your diced tomatoes and broth don’t have added sugars. The peppers themselves contain carbs, but are generally considered suitable for many low-carb diets in moderation. - Can I freeze Baked Chicken Stuffed Peppers?
Yes, they freeze quite well. For best results:- Cool Completely: Let the baked stuffed peppers cool completely to room temperature.
- Wrap Individually: Wrap each pepper half tightly in plastic wrap, then in aluminum foil, or place them in airtight freezer-safe containers or bags. Separating them prevents sticking.
- Freeze: Freeze for up to 2-3 months.
- Reheating: Thaw overnight in the refrigerator for best results. Reheat in a baking dish covered with foil in a 350°F (175°C) oven for 20-30 minutes, or until heated through. You can also microwave them, but the oven yields better texture. The pepper texture might be slightly softer after freezing and reheating.
- How do I reheat leftovers?
Leftovers can be stored in an airtight container in the refrigerator for 3-4 days. Reheat individual portions in the microwave on medium power until heated through (start with 1-2 minutes, checking frequently). For best texture (especially the cheesy topping), reheat them in an oven or toaster oven at 350°F (175°C) for 10-15 minutes, or until hot and bubbly. You might want to cover loosely with foil initially to prevent drying out. - Why are my peppers still hard/too crunchy after baking?
This usually means they needed a longer baking time or more moisture. Several factors can contribute:- Pepper Size/Thickness: Larger or thicker-walled peppers naturally take longer to soften.
- Oven Temperature: Ensure your oven is accurately calibrated.
- Baking Time: They may simply need more time. Continue baking (covered if the top is browning too much) until tender.
- Pre-Cooking: Consider pre-baking or blanching the peppers before stuffing (see Tip #1) if you consistently find them too firm.
- Can I use leftover cooked rice and chicken?
Yes, absolutely! This recipe is perfect for using leftovers. Using pre-cooked rice saves a significant step. Using leftover cooked chicken (like rotisserie or baked chicken) is also a great time-saver. Just chop or shred the chicken and add it along with the cooked rice at Step 5. Ensure the chicken is heated through during the baking process. - What kind of bell peppers are best?
You can use any color!- Green Bell Peppers: Have a slightly more vegetal, less sweet flavour. They hold their shape well.
- Red Bell Peppers: Are the sweetest as they are fully ripe. They become very tender when cooked.
- Yellow & Orange Bell Peppers: Offer a sweetness level between green and red.
- Using a variety of colors makes the final dish visually stunning. Choose peppers that are firm, glossy, and relatively uniform in size so they cook evenly. Look for ones with flatter bottoms if you plan to cut them crosswise (like little pots) instead of lengthwise.
Baked Chicken Stuffed Peppers
Ingredients
Here’s what you’ll need to create these delicious Baked Chicken Stuffed Peppers:
- 4 Medium-Large Bell Peppers: (Any color – red, yellow, orange, or green work well). These form the edible bowls for our filling, offering sweetness (especially red/yellow/orange) and vibrant color. Choose peppers that can stand upright relatively easily.
- 1 tablespoon Olive Oil: (Extra Virgin recommended). Used for sautéing the aromatics and chicken, adding a touch of fruity flavour.
- 1 pound Boneless, Skinless Chicken Breasts or Thighs: (Cut into small ½-inch cubes). The star protein. Breasts are leaner, while thighs offer slightly more flavour and moisture. Cubing ensures quick cooking and easy integration into the filling.
- 1 Medium Onion: (Finely chopped, about 1 cup). Provides a foundational aromatic sweetness and depth to the filling.
- 2 Cloves Garlic: (Minced). Adds that essential pungent kick and fragrance that complements the chicken and vegetables.
- 1 teaspoon Dried Oregano: A classic Mediterranean herb that pairs beautifully with chicken and peppers.
- 1 teaspoon Dried Basil: Adds a touch of sweet, peppery flavour.
- ½ teaspoon Smoked Paprika: Lends a subtle smokiness and beautiful color to the filling.
- Salt: (To taste, start with ½ teaspoon). Enhances all the other flavours. Adjust based on your preference and the saltiness of your broth/canned tomatoes.
- Black Pepper: (Freshly ground, to taste, start with ¼ teaspoon). Adds a touch of spice and rounds out the seasoning.
- 1 (14.5 ounce) can Diced Tomatoes: (Undrained). Adds moisture, acidity, and tomato flavour to bind the filling together. Fire-roasted tomatoes add extra depth.
- ½ cup Chicken Broth: (Low-sodium recommended). Provides additional moisture for cooking the rice and prevents the filling from becoming dry. Vegetable broth can also be used.
- 1 ½ cups Cooked Rice: (White, brown, or even quinoa). Acts as a binder and adds satisfying bulk to the filling. Using pre-cooked rice significantly speeds up the process.
- 1 cup Shredded Cheese: (Monterey Jack, Cheddar, Mozzarella, or a blend). Divided – half for mixing into the filling, half for topping. Provides creaminess, flavour, and that irresistible golden-brown crust.
- 2 tablespoons Fresh Parsley: (Chopped, optional garnish). Adds a touch of freshness and color at the end.
Instructions
Follow these steps for perfectly baked, flavourful chicken stuffed peppers:
- Preheat Oven & Prep Peppers: Preheat your oven to 375°F (190°C). Wash the bell peppers thoroughly. Slice them in half lengthwise, from stem to base. Remove the seeds and membranes carefully, creating a hollowed-out boat shape. If you prefer them to stand upright, you can slice a very thin layer off the rounded bottom (be careful not to cut through!) or cut the tops off and hollow them out like little pots (this method often requires slightly longer baking). Arrange the pepper halves, cut-side up, in a 9×13 inch baking dish or another oven-safe dish large enough to hold them snugly. Add about ½ inch of water to the bottom of the dish – this helps steam the peppers and prevents them from drying out or scorching on the bottom during baking.
- Cook the Chicken: Heat the olive oil in a large skillet or Dutch oven over medium-high heat. Once shimmering, add the cubed chicken. Season generously with about half of the salt and pepper. Cook, stirring occasionally, until the chicken is lightly browned and cooked through (no longer pink inside), about 5-7 minutes. Use a slotted spoon to remove the chicken from the skillet and set it aside on a plate. Leave the flavorful drippings in the skillet.
- Sauté Aromatics: Reduce the heat to medium. Add the chopped onion to the same skillet. Cook, stirring frequently, until the onion softens and becomes translucent, about 4-5 minutes. Add the minced garlic, dried oregano, dried basil, and smoked paprika. Cook for another minute, stirring constantly, until the spices are fragrant. This step, known as “blooming” the spices, intensifies their flavour.
- Combine Filling Base: Pour the undrained diced tomatoes and chicken broth into the skillet with the onions and spices. Stir well, scraping up any browned bits (fond) from the bottom of the skillet – these add lots of flavour! Bring the mixture to a simmer.
- Add Rice and Chicken: Reduce the heat to low. Stir the cooked rice and the previously cooked chicken back into the skillet. Mix everything together thoroughly until well combined. Taste the filling and adjust seasoning if necessary, adding the remaining salt and pepper, or more herbs if desired.
- Incorporate Cheese: Remove the skillet from the heat. Stir in ½ cup of the shredded cheese until it’s melted and integrated into the filling. This makes the filling creamier and richer.
- Stuff the Peppers: Carefully spoon the chicken and rice mixture evenly into each prepared bell pepper half. Mound the filling slightly, but don’t pack it down too tightly, as this can make the filling dense. Ensure each pepper is generously filled.
- Prepare for Baking: Pour out any excess water you initially added to the baking dish, leaving maybe just a tablespoon or two. Carefully place the stuffed peppers back into the dish. Sprinkle the remaining ½ cup of shredded cheese evenly over the top of each stuffed pepper.
- Bake: Cover the baking dish loosely with aluminum foil. This helps the peppers soften and cook through without the topping burning too quickly. Bake in the preheated oven for 30 minutes.
- Brown the Topping: After 30 minutes, carefully remove the foil. Continue baking for another 15-20 minutes, or until the peppers are tender (easily pierced with a fork) and the cheese topping is melted, bubbly, and lightly golden brown. If you like a crispier topping, you can switch the oven to the broil setting for the last 1-2 minutes, watching very carefully to prevent burning.
- Rest and Serve: Remove the baking dish from the oven. Let the stuffed peppers rest for 5-10 minutes before serving. This allows the filling to set slightly and the peppers to cool down just enough to handle. Garnish with fresh chopped parsley, if desired, before serving warm.
Nutrition
- Serving Size: one normal portion
- Calories: 550
- Fat: 25g
- Fiber: 8g
- Protein: 45g